Table of Contents
Advertisement
Available languages
Available languages
Quick Links
LED EMERGENCY LIGHTS
TECHNICAL DATA
Model
Model
VT-522-S
VT-522-S
WATTS
WATTS
2W
2W
NO. OF LED
NO. OF LED
16 SMD LEDs
16 SMD LEDs
LUMENS
LUMENS
140LM
140LM
BATTERY TYPE
BATTERY TYPE
Ni-Cd 3.6V, 900mAh
Ni-Cd 3.6V, 900mAh
EMERGENCY OPERATION TIME
EMERGENCY OPERATION TIME
>3 Hours (Maintained)
>3 Hours (Maintained)
BATTERY DISCHARGE CURRENT
BATTERY DISCHARGE CURRENT
200-280mA
200-280mA
BATTERY CHARGING CURRENT
BATTERY CHARGING CURRENT
100-140mA
100-140mA
RECHARGING
RECHARGING
12 HOURS
12 HOURS
VIEWING DISTANCE
VIEWING DISTANCE
24 METERS FROM BOTH SIDE
24 METERS FROM BOTH SIDE
DIMENSION
DIMENSION
335x200x46mm
335x200x46mm
INPUT POWER
INPUT POWER
AC:220-240V
AC:220-240V
STICKER
STICKER
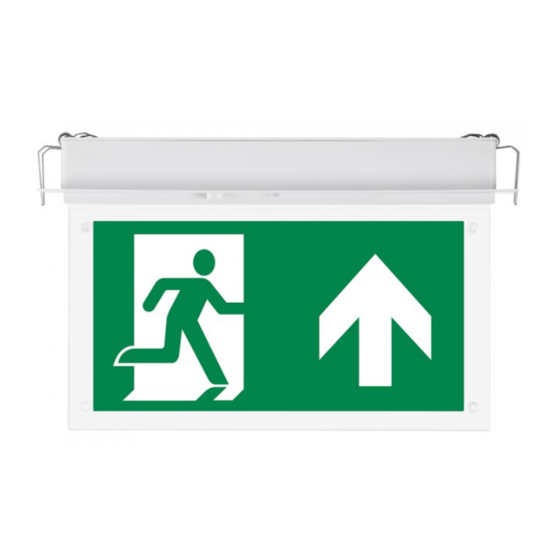
3 WAY LEGENDS AVAILABLE
3 WAY LEGENDS AVAILABLE
INDICATOR
INDICATOR
GREEN LIGHT TEST BUTTON
GREEN LIGHT TEST BUTTON
LAMP TYPE
LAMP TYPE
EXIT LAMP
EXIT LAMP
INTRODUCTION & WARRANTY
Thank you for selecting and buying V-TAC product. V-TAC will serve you the best. Please read these instruc-
tions carefully before starting the installing and keep this manual handy for future reference. If you have any
another query, please contact our dealer or local vendor from whom you have purchased the product. They
are trained and ready to serve you at the best. The warranty is valid for 3 years from the date of purchase.
The warranty does not apply to damage caused by incorrect installation or abnormal wear and tear. The
company gives no warranty against damage to any surface due to incorrect removal and installation of the
product. This product is warranted for manufacturing defects only.
3
*
WARRANTY
ENGLISH
WARNING:
• This product must be disconnected from the circuit if subjected to any high voltage or insulation resistance
testing. Irreparable damage will occur if this instruction is not followed
• Recommended routine test procedure in accordance with BS5266
• Daily check – check that the status GREEN LED indicator is illuminated
• Monthly functional test – simulate a mains supply failure for approx. 30 secs by operation of key switch or
switching off a circuit breaker. Ensure normal supply is restored after test and the indicator status LED is
illuminated
• Twice yearly conduct a one hour duration test - simulate a mains supply failure for one hour continuous test
by operation of key switch or switching off circuit breaker. Ensure normal supply is restored after test and the
indicator status LED is illuminated
• Annual full three hour duration test - conduct a three hour continuous duration test. Simulate a mains supply
failure for three hour continuous test by operation of key switch or switching off circuit breaker. Ensure normal
supply is restored after test and the indicator status LED is illuminated
• Please make sure to turn off the power before starting the installation.
• The light source of this luminaire is not replaceable; when the light source reaches its end of life the whole
luminaire shall be replaced.
• Replace any cracked protective shield.
• Installation should only be done by a certified electrician.
• For Indoor Use only
SAFETY
• Installation of this luminiare should only be carried out by a qualified electrician or competent person to the
current IEE Wiring Regulations (BS7671)
• Please isolate main prior to installation/maintenance.
• Check the total load on the circuit cable, fuse or circuit breaker.
• This product is Class II double insulated
This marking indicates that this
product should not be disposed
of with other household wastes.
Caution, risk of electric shock.
INSTALLATION:
• Provide power to the required point of installation
• Cut a suitable aperture in the ceiling as per the cut-out details( 310mmx48mm) ensuring that it does not
infringe with electical cables, water/gas pipes or ceiling joists.
• Remove 2 screws on top of the fitting (see Fig 1)
• Connect the battery to the inverter via the plug and socket provided.
ENGLISH
Fig 1
EMERGENCY TERMINATIONS MAINTAINED/NON-MAINTAINED
①
②
NON-MAINTAINED
WIRING DIAGRAM
L
N
Live
Neutral
(brown)
(blue)
• When all connections have been made reassemble the fitting completely.
• Restore the supply and check that the Green LED indicator illuminates to confirm the batteries are charging.
There are three possible reasons when the green LED indicator does not light up:
1) there is no power supply AC220-240V,
2) the batteries are not properly connected to the PCB,
3) the batteries are not being charged.
• Allow a short period for partly charging the batteries and then isolate the mains supply to the fitting in order
to check the correct operation of the fitting in emergency mode. After 36 hours on continuous charge (and only
at a safe time) a mains failure should be simulated to ensure that the fitting illuminates for its rated emergency
duration.
The luminaire will have a 1-hour backup after 14 hours charging and will be fully charged after 24 hours (first
charge 36 hours)
MAINTENANCE
Once the luminaire no longer meets the rated emergency operation the batteries must be replaced after a
maximum of 4 years in service.
Repairs should only be carried out by a qualified person. Please recycle disposal of replaced components where
facilities exist. Special care should be taken if it's required to open the fitting as the fitting may still be "live"
even though the mains supply has been isolated. In these circumstances immediately disconnect the battery
supply.
Servicing and cleaning should only be carried out after the fitting has been made electrically safe. Cleaning of
luminaires should be carried out at regular intervals not only to ensure good optical performance but also
ensure that dirt does not accumulate to such an extent as to impair the electrical or thermal safety of the
fitting.
IN CASE OF ANY QUERY/ISSUE WITH THE PRODUCT, PLEASE REACH OUT TO US AT: SUPPORT@V-TAC.EU
FOR MORE PRODUCTS RANGE, INQUIRY PLEASE CONTACT OUR DISTRIBUTOR OR NEAREST
DEALERS. V-TAC EUROPE LTD. BULGARIA, PLOVDIV 4000, BUL.L.KARAVELOW 9B
ENGLISH
1. Remove 2-PIN connector for
Non-Maintained Operation
2. Connect battery lead
MAINTAINED
Advertisement
Table of Contents

Subscribe to Our Youtube Channel
Related Manuals for V-TAC VT-522-S


Summary of Contents for V-TAC VT-522-S
- Page 1 • Provide power to the required point of installation Thank you for selecting and buying V-TAC product. V-TAC will serve you the best. Please read these instruc- Once the luminaire no longer meets the rated emergency operation the batteries must be replaced after a •...
- Page 2 EINFÜHRUNG UND GEBRAUCHSANWEISUNG • Versorgen Sie den erforderlichen Installationspunkt mit Strom Wir danken Ihnen, dass Sie ein V-TAC ausgesucht und gekauft haben. V-TAC wird Ihnen die besten Dienste • Schneiden Sie eine geeignete Öffnung in die Decke gemäß den Ausschnittdetails(310mmx48mm), um sicher- WARTUNG erweisen.
- Page 3 ВЪВЕДЕНИЕ И ГАРАНЦИЯ • Осигурете захранване до желаната точка на монтаж. Благодарим ви, че избрахте и закупихте продукт на Ви-Тек (V-TAC). Ви-Тек (V-TAC) ще ви послужи по • Изрежете подходящ отвор на тавана според детайлите( 310mmx48mm), като се уверите, че той не...
-
Page 4: Istruzioni Di Installazione
36 ore). INSTALLAZIONE: INTRODUZIONE E GARANZIA Grazie per aver scelto e acquistato il prodotto della V-TAC. La V-TAC Le servirà nel miglior modo possibile. Si • Fornire alimentazione al punto di installazione desiderato. MANUTENZIONE prega di leggere attentamente queste istruzioni prima di iniziare l’installazione e di conservare questo man- •... - Page 5 • Biztosítsa az áramellátást a szükséges telepítési ponton KARBANTARTÁS Köszönjük, hogy választotta és megvásárolta a V-TAC terméket. V-TAC nyújtja Önnek a legjobb szolgáltatást. • Vágjon egy megfelelő nyílást a mennyezetbe(310mmx48mm) kivágási részleteinek megfelelően, hogy az Miután a lámpatest már nem felel meg a névleges vészhelyzeti üzemnek, az akkumulátorokat legfeljebb 4 év Kérjük, a szerelés előtt figyelmesen olvassa el ezeket az utasításokat és óvja ezt a kézikönyvet későbbi...
-
Page 6: Instrucciones De Instalación
• Proporcione alimentación al punto de montaje deseado. Le agradecemos que ha elegido y adquirido la V-TAC. V-TAC le servirá del mejor modo posible. Pedimos que • Corte una abertura adecuada en el techo según los detalles(310mmx48mm), asegurándose de que no infrinja MANTENIMIENTO antes de comenzar la instalación lea atentamente las presentes instrucciones y las guarde en un lugar adec-... -
Page 7: Instructions D'installation
INTRODUCTION & GARANTIE • Fournir l'alimentation électrique au point d'installation requis Merci d’avoir choisi et acheté un produit à V-TAC. V-TAC vous offrira le meilleur. Veuillez lire attentivement ces ENTRETIEN • Découpez une ouverture appropriée dans le plafond conformément aux détails de la découpe(310mmx48mm) instructions avant de commencer l’installation et conservez ce manuel à... - Page 8 • Osigurajte napajanje do željene točke gdje će te ršiti montažu. Hvala vam, što ste odabrali i kupili tvrtke Vi-Tek (V-TAC). Vi-Tek (V-TAC) će vam poslužiti na najbolji mogući • Izrežite odgovarajući otvor na stropu prema detaljima izrezivanja(310mmx48mm), osiguravajući da ne krši Ako rasvjetno tijelo više ne može pružiti nominalno razdoblje rada u nuždi, baterije se moraju zamijeniti nakon...
-
Page 9: Instruções De Instalação
• Forneça alimentação ao ponto de montagem desejado. Agradecemos que escolheu e adquiriu o produto da V-TAC. A V-TAC irá servir-lhe da melhor maneira possível. • Corte uma abertura adequada no teto conforme os detalhes do recorte(310mmx48mm) garantindo que não MANUTENÇÃO... - Page 10 • Zapewnij zasilanie w wybranym punkcie przymocowania urządzenia. KONSERWACJA Dziękujemy za wybór i zakup produktu V-TAC. V-TAC będzie Ci służył najlepiej. Prosze przeczytać tę instrukcje • Wytnij w suficie odpowiedni otwór zgodnie z wycięciem(310mmx48mm), upewniając się, że nie narusza on uważnie przed przystąpieniem do zainstalowania i zachować...
- Page 11 ΕΙΣΑΓΩΓΗ - ΕΓΓΥΗΣΗ • Παρέχετε τροφοδοσία στο επιθυμητό σημείο εγκατάστασης. Σας ευχαριστούμε για το ότι επιλέξατε και αγοράσατε το προϊόν της Βι-ΤΑΚ(V-TAC). Η Βι-ΤΑΚ (V-TAC) θα σας • Κόψτε ένα κατάλληλο άνοιγμα στην οροφή σύμφωνα με τις λεπτομέρειες αποκοπής(310mmx48mm), εξυπηρετήσει με τον καλύτερο δυνατό τρόπο. Παρακαλούμε να διαβάσετε προσεκτικά τις οδηγίες μας προτού...
-
Page 12: Instrucţiuni De Instalare
(prima încărcare trebuie să dureze 36 de ore). INSTALARE: INTRODUCERE, GARANŢIA Vă mulţumim că aţi ales şi v-aţi cumpărat acest produs de V-TAC. V-TAC vă va fi de un mare folos, utilizându-l • Asiguraţi alimentarea până la punctul de instare dorit. DESERVIRE TEHNICĂ... -
Page 13: Pokyny Pro Instalaci
ÚDRŽBA • Zajistěte napájení požadovaného místa instalace Děkujeme, že jste si vybrali a koupili výrobek firmy V-TEK (V-TAC). V-TEK (V-TAC) vám nabízí ty nejlepší Pokud svítidlo již nemůže poskytovat jmenovitou dobu nouzového provozu, baterie musí být vyměněny po • Ve stropě vyřízněte vhodný otvor podle podrobností výřezu(310mmx48mm), aby nedošlo k jeho narušení...
Need help?
Do you have a question about the VT-522-S and is the answer not in the manual?
Questions and answers