
Subscribe to Our Youtube Channel
Related Manuals for Fanelite FANDC52


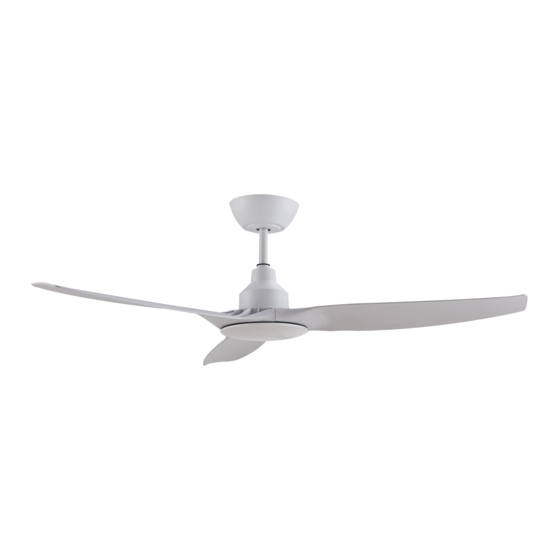
Summary of Contents for Fanelite FANDC52
- Page 1 FRANÇAIS ENGLISH www.fanelite.com MODE D’EMPLOI NOTICE DE MONTAGE, D’INSTALLATION ET D’UTILISATION USER MANUAL INSTALLING AND OPERATING MANUAL POUR MODÈLE FOR MODEL FANDC52...
-
Page 2: Table Of Contents
SOMMAIRE FRANÇAIS 1. Votre nouvel appareil 2. Consignes de sécurité 3. Garantie 4. Notes 5. Hauteur sous les pales 6. Contrôle au déballage 7. Fixation du support plafond 8. Assemblage 9. Suspension 10. Installation du récepteur dans le support plafond 11. -
Page 3: Consignes De Sécurité
2. CONSIGNES DE SÉCURITÉ Veuillez lire attentivement les consignes de sécurité avant d’utiliser votre appareil. Pour réduire les risques d’incendie, de choc électrique, de blessures corporelles et de dommages matériels, lisez et respectez scrupuleusement les consignes suivantes : - Cet appareil peut être utilisé par des enfants âgés d’au moins 8 ans et par des per- sonnes ayant des capacités physiques, sensorielles ou mentales réduites ou dénuées d’expérience ou de connaissance, s’ils (si elles) sont correctement surveillé(e)s ou si des instructions relatives à... - Page 4 - De par sa construction cet appareil n’est pas prévu pour une utilisation à l’extérieur, usage intérieur uniquement. - Retirez tous les éléments de l’emballage et retirez les rubans adhésifs empêchant le fonctionnement de l’appareil avant utilisation. - Assemblez entièrement l’appareil avant de l’utiliser. Il ne doit en aucun cas être ali- menté...
- Page 5 - Si vous prévoyez de ne pas utiliser votre appareil pendant un certain temps, étei- gnez-le et débranchez son alimentation électrique. - Utilisez uniquement les pièces de rechange FANELITE. - Cet appareil est conforme aux normes européennes de sécurité en vigueur.
-
Page 6: Garantie
à la réglementation en vigueur et aux instructions figurant dans cette notice d’utilisation et de montage. FANELITE se réserve le droit de ne pas appliquer la garantie en cas de négligence du client, d’installations défectueuses, mal adaptées ou non conformes aux normes en vigueur. -
Page 7: Hauteur Sous Les Pales
Une boite de raccordement est requise. Ne jamais utiliser de boite de raccordement en plastique. Les brasseurs d’air FANELITE peuvent peser avec leurs accessoires jusqu’à 25 kg. Assurez-vous quoique vous fassiez que le support plafond est solidement fixé et que votre installation puisse supporter un poids d’au moins 68 kg. -
Page 8: Fixation Du Support Plafond
7. FIXATION DU SUPPORT PLAFOND ATTENTION : La fixation devra être faite de façon sûre dans la structure même du plafond par une personne qualifiée. En fonction de la structure de votre plafond, utilisez des vis et des chevilles ap- propriés. -
Page 9: Assemblage
8. ASSEMBLAGE Pour fixer les pales, placez le bloc moteur de façon à ce qu’il soit stable. Souvent, la mousse en polystyrène utilisée pour l’emballage du moteur peut faire un excellent support sur votre plan de travail. Le moteur / tube / coupelles / cache inférieur sont pré-assemblés. Positionnez chaque pale sur le bloc moteur (les pales se clipsent) et utilisez les vis fournies afin de les fixer. -
Page 10: Installation Du Récepteur Dans Le Support Plafond
10. INSTALLATION DU RÉCEPTEUR DANS LE SUPPORT PLAFOND Une fois votre brasseur installé dans le support plafond, glissez le récepteur dans le support plafond (au dessus de la boule de suspension). Récepteur 11. CONNEXIONS ÉLECTRIQUES ATTENTION : Avant d’effectuer les connexions électriques, lisez scrupuleusement les consignes de sécurité... -
Page 11: Installation De La Coupelle Supérieure
Support plafond Récepteur ARRIVÉES PLAFOND Brasseur d’air 12. INSTALLATION DE LA COUPELLE SUPÉRIEURE Une fois les connexions électriques effectuées, montez la coupelle contre le support plafond, placez-la cor- rectement sur le support plafond et tournez la jusqu’à ce qu’elle se bloque. Faites attention de ne pas abîmer / coincer les fils électriques. -
Page 12: Installation Des Piles Dans La Télécommande
13. INSTALLATION DES PILES DANS LA TÉLÉCOMMANDE NOTE : Si vous prévoyez de ne pas utiliser votre télécommande et brasseur pendant un long moment, nous vous conseillons de retirer les piles de la télécommande afin de la préserver. La télécommande fonctionne avec 2 piles 1,5V AAA. Afin d’insérer les piles ou changer les piles lorsqu’elles sont vides : Faites glisser vers le bas le couvercle du compartiment des piles (à... - Page 13 2/ UTILISATION Marche / Arrêt Appuyez sur ce bouton pour allumer ou éteindre votre brasseur. Votre brasseur démarre par défaut en vitesse 3. Sélection des vitesses Appuyez sur ce bouton pour augmenter la vitesse (5 vitesses, la vitesse 1 étant la plus faible, la vitesse 5 la plus élevée).
-
Page 14: Nettoyage Et Entretien
4/ SYNCHRONISATION DE LA TÉLÉCOMMANDE SUR PLUSIEURS BRASSEURS Lorsque plusieurs brasseurs d’air FANDC52 sont installés, il est possible de tous les contrôler à l’aide d’une seule télécommande. Répétez la procédure SYNCHRONISATION TÉLÉCOMMANDE / RÉCEPTEUR ci-dessus avec tous les autres brasseurs d’air que vous souhaitez synchroniser sur cette même télécommande. -
Page 15: Spécifications Techniques
Une fois la bonne position trouvée, collez le poids au niveau de la pince (au dessus de la pale) et retirez la pince. Pour plus d’informations, visitez notre site internet www.fanelite.com ou contactez-nous. Voir section INFORMATIONS COMPLÉMENTAIRES. -
Page 16: Informations Complémentaires
Veuillez-vous adresser à votre municipalité pour connaître la déchetterie compétente. 19. INFORMATIONS COMPLÉMENTAIRES Cette notice est également disponible en ligne sur notre site internet : www.fanelite.com Vous souhaitez nous contacter par e-mail : contact@fanelite.com Vous souhaitez nous contacter par téléphone : (+590) 590 29 44 64 Vous pouvez aussi nous contacter à... - Page 17 SUMMARY ENGLISH 1. Your new appliance 2. Important safety instructions 3. Guarantee 4. Notes 5. Height under blades 6. Unpacking check 7. Fix the ceiling hanger bracket 8. Assembly 9. Hang the ceiling fan 10. Install the receiver in the ceiling hanger bracket 11.
-
Page 18: Important Safety Instructions
2. IMPORTANT SAFETY INSTRUCTIONS Please read the safety instructions carefully before using your appliance. To reduce the risk of fire, electric shock, personal injury and damage, read and strictly follow the instructions below : - This appliance can be used by children at least 8 years old and by people with re- duced physical, sensory or mental capacities or lacking in experience or knowledge, if they are properly supervised or if they have been given instructions on how to use the appliance safely and if the risks involved have been understood. - Page 19 eration of the appliance before use. - Assemble the appliance completely before using it. Under no circumstances it should be connected to power supply before it is fully assembled and ready for use. - Electrical connections must be made in accordance with current regulations and by a qualified electrician.
- Page 20 - If you plan to not use your appliance for a long time, turn it off and disconnect its power supply. - Use only FANELITE spare parts. - This appliance complies with current European safety standards. Your appliance works with a batteries operated remote control.
-
Page 21: Guarantee
FANELITE reserves the right to apply or not the guarantee in case of negligence of the customer, defective installations, poorly adapted or not in conformity with the regulations in force. -
Page 22: Height Under Blades
A connection box is required. Never use a plastic box. FANELITE ceiling fans can weigh up to 25 kg with accessories. Make sure that your ceiling fan hanger brack- et is firmly attached and that your installation can support a weight of at least 68 kg. -
Page 23: Fix The Ceiling Hanger Bracket
7. FIX THE CEILING HANGER BRACKET WARNING : The fixing must be done securely in the structure of the ceiling by a qualified person. Depending on the structure of your ceiling, use suitable screws and washers. Do not fix the ceiling support in a structure thinner than 50 mm or in hollow elements, in order to avoid any risk of falling. -
Page 24: Assembly
8. ASSEMBLY To fix the blades, place the motor block so that it is stable. Often, the polystyrene foam used for motor pack- aging can make excellent support on your worktop. The motor / tube / canopy / bottom cover are pre-assembled. Position each blade on the motor block (the blades snap into place) and use the screws provided to secure them. -
Page 25: Install The Receiver In The Ceiling Hanger Bracket
10. INSTALL THE RECEIVER IN THE CEILING HANGER BRACKET Once your ceiling fan is installed in the hanger bracket, slide the receiver into the hanger bracket (above the hanger ball). Receiver 11. ELECTRICAL CONNECTIONS WARNING : Before proceeding to the electrical connections, carefully read the safety instructions in this manual. -
Page 26: Install The Canopy
Hanger bracket Receiver AC CEILING WIRES Ceiling fan 12. INSTALL THE CANOPY Once the electrical connections have been made, mount the canopy against the hanger bracket, place it correctly on the hanger bracket and turn it until it locks in place. Be careful to not damage / pinch the electrical wires. -
Page 27: Install The Batteries In The Remote Control
13. INSTALL THE BATTERIES IN THE REMOTE CONTROL NOTE : If you intend to not use your remote control or ceiling fan for a long time, we advise you to remove the batteries from the remote control to preserve it. The remote control works with 2 batteries 1,5V AAA. - Page 28 2/ USE OF THE REMOTE CONTROL Power On / Off Press this button to turn on or off your ceiling fan. Your ceiling fan starts by default at speed 3. Speed setting Press this button to increase the speed (5 speeds, speed 1 is the lowest, speed 5 is the highest). The number of bars visible on the screen correspond to the selected speed.
-
Page 29: Cleaning And Maintenance
4/ PAIR THE REMOTE CONTROL ON SEVERAL CEILING FANS When several FANDC52 ceiling fans are installed, it’s possible to control all of them with only one single remote control. Repeat the above procedure PAIRING PROCEDURE REMOTE CONTROL / RECEIVER with all the other ceiling fans that you want to synchronize on the same remote control. -
Page 30: Technical Specifications
Once the correct position is found, glue the weight at the level of the pliers (onto the blade) then remove the pliers. For more information, visit our website www.fanelite.com or contact us. See ADDITIONAL INFORMA- TION section. 17. TECHNICAL SPECIFICATIONS... -
Page 31: Additional Information
Please inquire at the community administration for the authorized disposal location. 19. ADDITIONAL INFORMATION This manual is also available online on our website : www.fanelite.com You want to contact us by email : contact@fanelite.com You want to contact us by phone : (+590) 590 29 44 64 You can also contact us by using the contact form of our websites. - Page 32 @fanelitebrand www.fanelite.com...
Need help?
Do you have a question about the FANDC52 and is the answer not in the manual?
Questions and answers
how can I change the rotation
To change the rotation on the Fanelite FANDC52 ceiling fan, use the remote control and press the "F / R" button. This will switch the blade direction between:
- Summer mode (F forward): counterclockwise rotation to cool the room.
- Winter mode (R reverse): clockwise rotation to push warm air down.
This answer is automatically generated