Table of Contents
Advertisement
Available languages
Available languages
Quick Links
MODE D'EMPLOI - NOTICE DE MONTAGE,
D'INSTALLATION ET D'UTILISATION
REFERENCE : FS-40RC / FS-40RC (3)
USER MANUAL – INSTALLING AND OPERATING
MANUAL
FANELITE vous remercie d'avoir choisi ce produit. Ce produit très innovant et très
design a été conçu pour vous assurer un maximum de confort et de sécurité. Veuillez
lire attentivement cette notice avant d'utiliser votre appareil et conservez là
soigneusement pour référence ultérieure. Pour une utilisation correcte et en toute
sécurité, veillez à bien lire les consignes de sécurité.
FANELITE thanks you for choosing this product. This very innovative and very design
product has been designed to ensure maximum comfort and safety. Please read this manual
carefully before using your appliance and keep it there for future reference. For correct and
safe use, be sure to read the safety instructions.
1
Advertisement
Table of Contents

Related Manuals for Fanelite FS-40RC


Summary of Contents for Fanelite FS-40RC
- Page 1 USER MANUAL – INSTALLING AND OPERATING MANUAL FANELITE vous remercie d’avoir choisi ce produit. Ce produit très innovant et très design a été conçu pour vous assurer un maximum de confort et de sécurité. Veuillez lire attentivement cette notice avant d’utiliser votre appareil et conservez là...
- Page 2 TABLE DES MATIERES 1. CONSIGNES DE SECURITE 2. GARANTIE 3. DESCRIPTION 4. ASSEMBLAGE / MONTAGE 5. UTILISATION 6. REMPLACEMENT DE LA PILE 7. NETTOYAGE ET ENTRETIEN 8. SPECIFICATIONS TECHNIQUES 9. PROTECTION DE L’ENVIRONNEMENT 10. INFORMATION COMPLEMENTAIRE 1. CONSIGNES DE SECURITE Veuillez lire attentivement cette notice avant la première utilisation de l’appareil.
- Page 3 relatives à l'utilisation de l'appareil en toute sécurité leur ont été données et si les risques encourus ont été appréhendés. Les enfants ne doivent pas jouer avec l’appareil. Le nettoyage et l'entretien par l'usager ne doivent pas être effectués par des enfants sans surveillance.
- Page 4 Si vous prévoyez de ne pas utiliser votre appareil pendant un certain temps, éteignez-le et débranchez sa prise du secteur. Transportez l’appareil dans son emballage d’origine. Utilisez uniquement les pièces de rechange FANELITE. AVERTISSEMENT Votre appareil fonctionne avec une télécommande à piles.
- Page 5 FANELITE se réserve le droit de ne pas appliquer la garantie en cas de négligence du client, d’installations défectueuses, mal adaptées ou non conformes aux normes en vigueur.
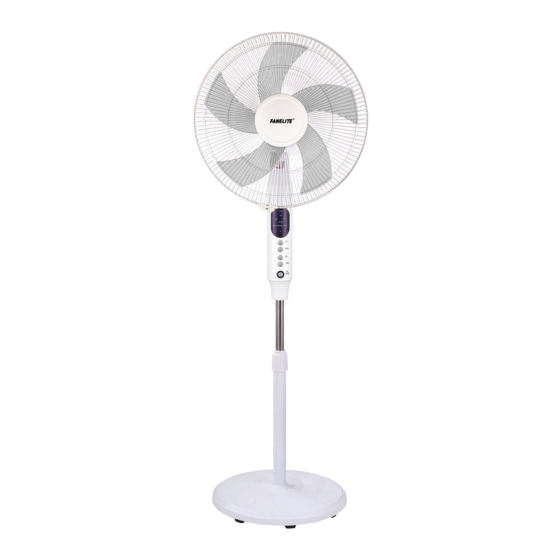
- Page 6 1. Cache 2. Grille avant 3. Hélice 4. Bague de blocage grille arrière 5. Moteur 6. Base 7. Prise électrique 8. Cordon d’alimentation 9. Grille arrière 10. Cercle de blocage des grilles 11. Écrou de blocage hélice 4. ASSEMBLAGE / MONTAGE ATTENTION : Avant d’assembler votre ventilateur, lisez scrupuleusement les consignes de sécurité...
- Page 7 7. Placez la grille avant correctement sur la grille arrière en prenant soin de mettre le logo Fanelite à l’horizontal. Assemblez les grilles à l’aide du cercle de blocage des grilles, une fois le cercle correctement installé serrez la vis et l’écrou. Prenez soin de serrer la vis correctement pour une sécurité...
- Page 8 l’appareil va réduire sa vitesse et reproduire l’effet du vent naturel de différentes façons selon la vitesse sélectionnée. Le mode nuit est idéal en cas de sensibilité aux rhumes. Arrêt (OFF) Appuyez sur le bouton OFF pour éteindre le ventilateur. Angle d’inclinaison Pour régler l’angle de la tête du ventilateur de haut en bas, il suffit juste de faire monter ou descendre la tête du ventilateur manuellement dans la...
- Page 9 Veuillez-vous adresser à votre municipalité pour connaître la déchetterie compétente. 10. INFORMATION COMPLEMENTAIRE Cette notice est disponible en ligne sur notre site internet www.fanelite.com Importé et distribué par LOGIFAN SARL 45 Zac de Hope Estate, 97150 Saint-Martin FWI Imprimé en Chine...
-
Page 10: Table Of Contents
TABLE OF CONTENTS 1. IMPORTANT SAFETY INSTRUCTIONS 2. GUARANTEE 3. DESCRIPTION 4. ASSEMBLY 5. OPERATING INSTRUCTIONS 6. REPLACING THE BATTERY 7. CLEANING AND MAINTENANCE 8. TECHNICAL SPECIFICATIONS 9. ENVIRONMENT PROTECTION 10. ADDITIONAL INFORMATION 1. IMPORTANT SAFETY INSTRUCTIONS Please read these instructions carefully before using the appliance for the first time. WARNING To reduce the risk of fire, electric shock, personal injury and damage, read and strictly follow the instructions below :... - Page 11 This appliance is not intended for use by persons (including children) with reduced physical, sensory or mental capabilities or lack of experience and knowledge, unless they have been given supervision or instruction concerning use of the appliance by a person responsible for their safety.
- Page 12 If not used, turn off the appliance and disconnect it from the AC power. Carry the appliance in its original packaging. Use only FANELITE spare parts. WARNING Your appliance works with a battery operated remote control. The batteries must be installed respecting the polarity.
-
Page 13: Guarantee
FANELITE reserves the right to apply or not the guarantee in case of negligence of the customer, defective installations, poorly adapted or not in conformity with the regulations in force. -
Page 14: Assembly
7. Place the front grill on the rear grill (put the Fanelite logo horizontally) and assemble the grills using the grills locking circle by tightening the nut and the screw. Take care to tighten the screw properly for optimum safety. - Page 15 Insert a battery AAA into the remote control (see section REPLACING THE BATTERY for more information). Plug in the power cord. Using the control panel or remote control : Power ON and speed setting Press the ON/SPEED button to turn on the fan. Press again to adjust the speed. The corresponding indicator light on on the fan.
-
Page 16: Replacing The Battery
Do not disassemble the fan to clean it. Do not use water or detergent to clean the appliance. Use a soft, dry cloth. 8. TECHNICAL SPECIFICATIONS Reference : FS-40RC / FS-40RC (3) Power source : 220-240 V~ 50/60 Hz Protection class : II... -
Page 17: Environment Protection
Please inquire at the community administration for the authorized disposal location. 10. ADDITIONAL INFORMATION This manual is available online on our website www.fanelite.com Imported and distributed by LOGIFAN SARL 45 Zac de Hope Estate, 97150 Saint-Martin FWI Printed in China... - Page 18 www.fanelite.com...
Need help?
Do you have a question about the FS-40RC and is the answer not in the manual?
Questions and answers