Table of Contents

Related Manuals for Toshiba RAV-HM401CTP-E


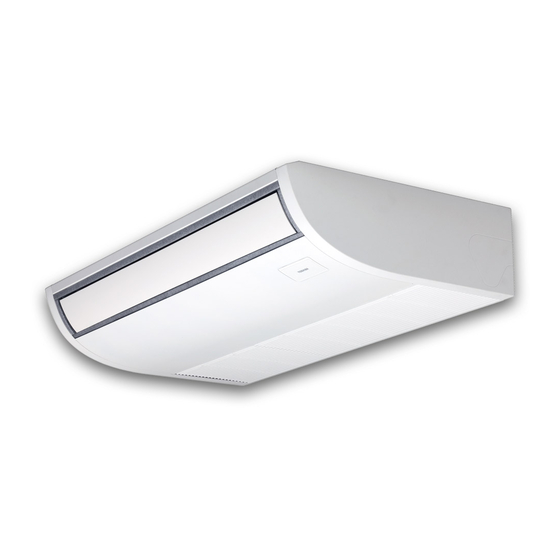
Summary of Contents for Toshiba RAV-HM401CTP-E
- Page 1 AIR CONDITIONER (SPLIT TYPE) Installation Manual Indoor Unit For commercial use Model name: Ceiling Type RAV-HM401CTP-E RAV-HM561CTP-E RAV-HM801CTP-E RAV-HM901CTP-E RAV-HM1101CTP-E RAV-HM1401CTP-E RAV-HM1601CTP-E English...
-
Page 2: Table Of Contents
Be sure to check the refrigerant type for outdoor unit to be combined, and then install it. 5 Drain piping ........................12 Product information of ecodesign requirements. (Regulation (EU) 2016/2281) 6 Refrigerant piping ......................13 http://ecodesign.toshiba-airconditioning.eu/en 7 Electrical connection ....................15 8 Applicable controls ..................... 17 9 Test run ......................... 20 10 Maintenance ......................... - Page 3 Shoes with additional protective toe cap heavy objects made by Toshiba Carrier Corporation. He or she has been trained to install, maintain, relocate and remove the air conditioners made by Toshiba Carrier Corporation or, alternatively, he or she has Repair of outdoor unit...
-
Page 4: Precautions For Safety
– 3 – ■ Warning indications on the air conditioner unit Precautions for safety The manufacturer shall not assume any liability for the damage Warning indication Description caused by not observing the description of this manual. WARNING WARNING WARNING ELECTRICAL SHOCK HAZARD ELECTRICAL SHOCK HAZARD Disconnect all remote General... - Page 5 • Wear protective gloves and safety work clothing during • To transport the air conditioner, do not take hold of the bands installation, servicing and removal. around the packing carton. You may injure yourself if the bands • Do not touch the aluminium fin of the unit. You may injure should break.
- Page 6 – 5 – • If refrigerant gas has leaked during the installation work, ventilate • To connect the electrical wires, repair the electrical parts or the room immediately. If the leaked refrigerant gas comes in undertake other electrical jobs, wear gloves to provide protection contact with fire, noxious gas may generate.
- Page 7 • If there is any kind of trouble (such as an error display has Relocation appeared, smell of burning, abnormal sounds, the air conditioner • Only a qualified installer (*1) or qualified service person (*1) is fails to cool or heat or water is leaking) has occurred in the air allowed to relocate the air conditioner.
-
Page 8: Accessory Parts
– 7 – Accessory parts CAUTION This Air Conditioner has adopted a refrigerant HFC (R32) Part name Q’ty Shape Usage which does not destroy the ozone layer. (Hand over to customers) • As the R32 refrigerant is easily affected by impurities such Installation Manual This manual (For other languages that do not appear in this Installation... -
Page 9: Adoption Of R32 Refrigerant 3 Selection Of Installation Place
■ Installation space (Unit: mm) Selection of installation place Reserve sufficient space required for installation or service work. Avoid installing in the following places. Select a location for the indoor unit where the cool or warm air will circulate evenly. Avoid installation in the following kinds of locations. -
Page 10: Installation
– 9 – ■ Installation of hanging bolt Installation of hanging bolt Installation Use M10 hanging bolts (4 pcs, locally procured). • Consider the piping / wiring after the unit is hung to Matching to the existing structure, set pitch according determine the location of the indoor unit installation to size in the “External dimensions”. - Page 11 ■ ■ Before installation Draw-out direction of pipe / <In case of taking pipe from upper side> CAUTION wire Taking pipe from upper side is applied only to the Removal of air intake grille refrigerant pipe. 1) Remove the screws of air intake grille fixing When taking out the drain pipe from the upper side, Decide installation place of the unit and draw-out knob on a side of each filter.
- Page 12 – 11 – ■ Installation of indoor unit ◆ Attaching the hanging bracket ◆ Holding down of main unit Attach the indoor unit onto the hanging first bracket and fasten it tight with the bolts and <Hanging the indoor unit directly from the screws.
-
Page 13: Drain Piping
■ Connection of drain hose Drain piping • Insert the attached drain hose into the drain pipe connecting port on the drain pan up to the end. • Fit the attached hose band to the end of the pipe connecting port, and then tighten it securely. CAUTION REQUIREMENT Following the Installation Manual, perform the drain piping work so that water is properly drained. -
Page 14: Product Information Of Ecodesign Requirements. (Regulation (Eu) 2016/2281) Http://Ecodesign.toshiba-Airconditioning.eu/En 6 Refrigerant Piping
– 13 – ■ Heat insulating process Refrigerant piping ■ Pipe size • Using the attached drain hose heat insulator, lap the connecting section and the drain hose without clearance, and then tighten with two handing band so that heat insulator does not open. •... - Page 15 Flaring diameter size: A (Unit: mm) Open the valve fully Outer dia. of Tightening torque (N•m) connecting pipe (mm) Open the valve of the outdoor unit fully. A 4 mm- 14 to 18 (1.4 to 1.8 kgf•m) hexagonal wrench is required for opening the valve. Outer dia.
-
Page 16: Electrical Connection
– 15 – ■ Communication type Electrical connection TU2C-Link can be used with these models. If the indoor unit and the connected remote controller / remote sensor are all TU2C-Link models, TU2C-Link WARNING communication will be performed automatically. (If the TCC-Link model is included, TCC-Link communication will be performed.) •... - Page 17 ■ Wiring between indoor unit and outdoor unit ◆ Wire connection • Figure below shows the wiring connections between the indoor and outdoor units and between the indoor units REQUIREMENT and remote controller. The wires indicated by the broken lines or dot-and-dash lines are provided at the locally. •...
-
Page 18: Applicable Controls
– 17 – <Multi-indoor-unit connection> Applicable controls ■ Applicable controls setup • For using the wired remote controller RBC-AMS55E*, Power supply wiring for refer to the Owner’s Manual attached to the wired (settings at the site) multiple indoor units remote controller. Indoor/Outdoor Remote controller model name: REQUIREMENT... - Page 19 ■ ■ ■ Installing indoor unit on high Filter sign setting Remote controller sensor Each time [ ] [ ] setting button is pushed, indoor unit numbers in the group control ceiling change cyclically. Select the indoor unit to According to the installation condition, the filter sign The temperature sensor of the indoor unit senses room change settings for.
- Page 20 – 19 – ■ ■ 8°C operation Group control Group control for system of multiple units One group can control up to 16 (TU2C-Link) or 8 (TCC-Link) indoor units with one remote controller. Pre-heating operation can be set for cold regions Simultaneous twin system (Refer to the Wiring specifications) where room temperature drops to below zero.
-
Page 21: Test Run
■ Manual address setting Test run Push and hold OFF timer button and [ ] setting button simultaneously for 10 seconds Push and hold menu button and [ ] setting button simultaneously for 10 seconds or more. or more. [TEST] is displayed on the display ■... - Page 22 – 21 – ■ Monitoring function Wireless remote controller Indoor unit data Code No. Data name This function can be used to call the service monitor Cooling test run Heating test run Room temperature (remote controller) NOTE mode from the remote controller during a test run to Indoor unit intake air temperature (TA) Set the temperature Set the temperature...
-
Page 23: Maintenance
▼Periodic Maintenance Maintenance • For environmental conservation, it is strongly recommended that the indoor and outdoor units of the air conditioner in use be cleaned and maintained regularly to ensure efficient operation of the air conditioner. When the air conditioner is operated for a long time, periodic maintenance (once a year) is recommended. Furthermore, <Daily maintenance>... -
Page 24: Troubleshooting
– 23 – ■ Check codes and parts to be checked Troubleshooting Wired Wireless remote remote controller Sensor ■ Confirmation and check controller block display of display receiving unit Judging Main defective parts Parts to be checked / error description conditioner If a problem occurs with the air device... - Page 25 Wired Wireless remote Wired Wireless remote remote controller Sensor remote controller Sensor controller block display of controller block display of display receiving unit display receiving unit Judging Judging Main defective parts Parts to be checked / error description conditioner Main defective parts Parts to be checked / error description conditioner device...
-
Page 26: Specifications
The existing R22 and R410A piping can be reused for Cooling Heating • There is the possibility that copper green rust has inverter R32 product installations. RAV-HM401CTP-E been generated. 6. When the existing air conditioner is removed after RAV-HM561CTP-E WARNING refrigerant has been recovered. - Page 27 Existing pipes: Cannot be used. Are there scratches or dents on the existing pipes? Use new pipes. Is it possible to operate the existing air conditioner? After the existing air conditioner is operated in cooling mode for approx. 30 minutes or longer,* recover the refrigerant.
- Page 28 – 27 – Declaration of Conformity Declaration of Conformity Manufacturer: Toshiba Carrier (Thailand) Co., Ltd. Manufacturer: Toshiba Carrier (Thailand) Co., Ltd. 144/9 Moo 5, Bangkadi Industrial Park, Tivanon road, Tambol Bangkadi, 144/9 Moo 5, Bangkadi Industrial Park, Tivanon road, Tambol Bangkadi,...
- Page 29 144 / 9 Moo 5, Bangkadi Industrial Park, Tivanon Road, Tambol Bangkadi, Amphur Muang, Pathumthani 12000, Thailand 1115652796...
Need help?
Do you have a question about the RAV-HM401CTP-E and is the answer not in the manual?
Questions and answers