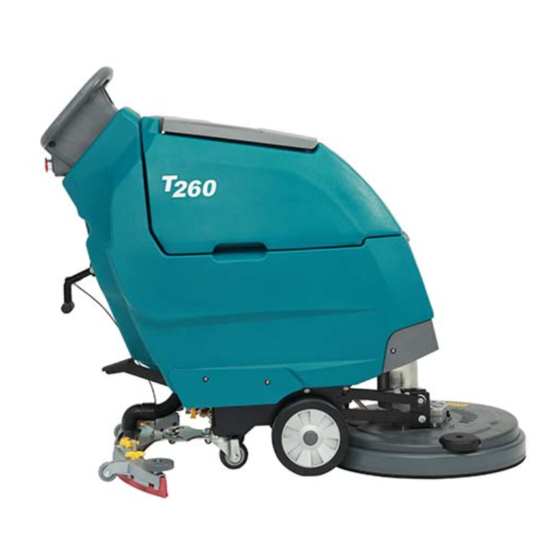
Tennant T260 Operator's Manual
Battery floor scrubber
Hide thumbs
Also See for T260:
- Quick start manual (105 pages) ,
- Operator's manual (93 pages) ,
- Service manual (35 pages)

Related Manuals for Tennant T260


Summary of Contents for Tennant T260
- Page 1 BATTERY FLOOR SCRUBBER OPERATOR’S MANUAL (EN) Model Part No.: - SCRUBBER [ 50CM PAD ASSIST, To view, print or download the parts manual, visit: /manuals Rev. 00 ( -202 )
- Page 2 This manual provides necessary Machine Operation and maintenance instructions. Before operating or using this machine, please read and understand this manual. Each new model also comes with a complete illustration manual of spare parts, which is used to replace parts. To ensure timely delivery, please follow the "Parts Ordering Approach"...
-
Page 3: Table Of Contents
CONTENTS Safety Precautions........4 Weekly Maintenance .......27 Security Label...........7 Maintenance Every Six Months..28 Machine Components......8 Squeegee Blade Replacement...29 Console Symbol........9 Move the Machine......30 Machine Installation ......10 Store the Machine......30 Unpack the Machine.........10 Troubleshooting.........31 Install the Battery ........11 Power Charger Fault Code....32 How the Machine Works.......12 Brush and Scouring Pad Information .12 General Machine Size/Capacity..34... -
Page 4: Safety Precautions
Safety Precautions The following symbols are used throughout this manual as indicated in the descriptions: Warning: To warn of hazards or unsafe practices that could result in severe personal injury or death. FOR SAFETY: To identify actions that must be followed for safe operation of equipment.The following information signals potentially dangerous conditions to the operator or equipment. - Page 5 Safety Precautions 2. Before starting machine: - Check whether the machine has a liquid leakage. - Make sure all safety devices are in place and operate properly. 3. When using machine: - Operate only following this manual. - Go slow on inclines and slippery surfaces. - Slow down when turning.
- Page 6 - Do not power up the spray or hose down the machines near electrical components. - Disconnect battery connections before working on machine. - Battery must be installed by trained operator. - All servicing must be operated by trained technician. - Do not make any change on original design for machine.
-
Page 7: Security Label
Security Label Security label The security label will be marked on the machine according to the indicated position. If the label is missing, damaged or illegible, please replace the label. - Page 8 1. Recovery tank cover 2. Clear water inlet 3. Brush plate motor 4. Brush plate 5. Waterproof skirt 6. Big casters 7. Squeegee assembly 8.Charger interface 9 . S q u e e g e e l i f t i n g handle S q u e e g e e l i f t pedal...
-
Page 9: Machine Components
Machine Components 14.Suction pipe 15.Clean water filter screen Electricity meter Work Timing Brush plate switch... -
Page 10: Machine Installation
Power cord negative (black) Brush plate reset switch Power cord positive (red) Water suction reset switch Control circuit reset switch Machine Installation Unpack the Machine 1. Check carefully whether there is any damage on the machine packing box. If there is any damage, please report it to the carrier immediately. 2. -
Page 11: Install The Battery
Install the Battery Install the battery For safety: when repairing the machine, please wear protective gloves and eye protection equipment when handling the battery and battery wiring. Two 12 V, 135AH/C20 maintenance-free batteries. The maximum volume of the battery: 332 mm X 176 mm X 214 mm. take out the key. -
Page 12: How The Machine Works
How the Machine Works Cleaning Method: plate. When the machine is moving forward, the generated sucked into the recovery tank through the squeegee assembly and the motor. Brush and Scouring Pad Information To ensure the best results, please use the appropriate type of brush when cleaning. The brushes and scouring pads recommended for GM45B are as follows: Brush plate: 470mm 17.5"... -
Page 13: Machine Installation
Machine Installation Machine Installation Connect the Squeegee Assembly 3. Install the squeegee assembly on the squeegee mounting bracket (as the slot before tightening the knob. 4. Connect the suction pipe to the squeegee assembly. As shown in the... -
Page 14: Installing The Brush/Scouring Pad
For safety: Before installing the brush plate or pad holder, please park the machine 2.Step down the pedal of the brush plate motor and move it to the right (as shown 3. Place the brush plate in the center of the brush plate cover, hold the brush plate upward with both hands in balance, and put one pin on the brush plate into the brush buckle installation hole through the observation port, and shake it from side to side, so that the other two pins also enter the hole of the brush buckle. -
Page 15: Pour The Solution Into The Solution Tank
Machine Installation Pour the Solution Into the Solution Tank The front of the machine is equipped with a bucket water injection hole, and the solution is injected into the solution tank (as shown in the picture below). For scrubbing method: use warm water (maximum 60°C). Pour the recommended detergent into the solution tank for mixing. -
Page 16: Machine Operation
Machine Operation For safety: do not operate the machine before reading and understanding the operation manual. Check Before Operation -Clean up the solid garbage on the ground. -Check the battery capacity scale of the battery meter (refer to "Battery Meter" on Page 18). - Page 17 Machine Operation 3. Put down the lifting handle of the squeegee to make the squeegee assembly to the ground (as shown in the picture below), and the water suction motor works. 4. Manually adjust the valve, adjust the amount of water output. After adjusting it to the appropriate position, push the machine to start cleaning (as shown in the picture below).
-
Page 18: During The Operation Of The Machine
During Machine Operation materials or reactive metals. For safety: When using the machine, please walk slowly and wear non- slip shoes when encountering slopes and slippery surfaces. 1.Each cleaning path overlaps by 5 cm. 2.Keep the machine moving so as not to damage the ground. 3.Clean the cleaning area beforehand to avoid. -
Page 19: Overload Reset Switch
Machine Operation Overload Reset Switch The machine is equipped with a resettable overload reset switch to avoid damage below). When the overload reset switch triggers a power trip, please determine the cause of the power trip and let the motor cool down, and then manually press the overload reset switch button. -
Page 20: Water Tank Drainage
Water tank drainage The recovery tank should be drained and cleaned after each use. For safety: Before leaving or repairing the machine, park the machine on Discharge Recovery Tank 2. Hold the drain pipe with the mouth upwards, remove the pipe cap and Note: When using buckets to hold discharged from the recovery tank, do not use the same bucket to pour solution into the solution tank. -
Page 21: Drain Solution Tank
Machine Operation Drain Solution Tank To drain the remaining water in the solution tank, open the drain cover of the solution tank (as shown below). Battery Charging The following charging instructions apply to the charger that comes with this machine. Note: In order to extend the life of the battery, please be sure to charge the battery in time after the machine is used to prevent damage to the battery due to long-term loss of power. -
Page 22: Use Battery Charger
For operating instructions of the battery charger, please refer to the battery charger manual provided with the charger. 1.Move the machine to a well-ventilated place. 3.Insert the charger plug into the charging port of the machine and make sure that 4. -
Page 23: Led Lights Indicate Working Status
Charging the Battery 4.When installing the battery in the whole vehicle, adjust the plug between the batteries to make the battery in an upright position and tighten the battery to prevent the battery from shaking and collision. 5.Electric door locks, fuse holders, etc. must be isolated from the battery during periods that are prone to sparks. -
Page 24: Machine Maintenance
Machine Maintenance To keep the machine in the best working condition, it is necessary to strictly follow the daily and weekly maintenance procedures. switch. Daily maintenance (after each use) 1. Drain and clean the recovery tank (as shown below). 2. Clean the collection basket (as shown below). 3. - Page 25 Machine Maintenance 4. Clean the squeegee blade (as shown below). Place the squeegee in a raised position to prevent damage to the blade. 5. Check the wear condition of the edge of the squeegee blade (as shown in the picture below). If it is worn out, please switch the two ends of the blade. (Refer to "Squeegee blade replacement"...
- Page 26 7. In order to prolong the life of the battery, please charge the battery in time after the machine is used to prevent damage to the battery due to power loss (as shown below). www.tennantco.com.cn...
-
Page 27: Weekly Maintenance
Machine Maintenance Weekly Maintenance screen. 2. Clean the top of the battery to prevent electrode corrosion, and check whether the battery wiring is loose (as shown below). Maintenance every six months: check the circuit system of the machine. -
Page 28: Maintenance Every Six Months
Maintenance Table The table below indicates who is responsible for each procedure O=Operator T = Specially Trained Personnel Interval Responsible Description Procedure Period Person Brush Plate/Pad Holder Check the Height of the Brush Scouring Pad Plate/Pad Holder Check for Damage and Wear Daily Recovery Tank or Debris... -
Page 29: Squeegee Blade Replacement
Machine Maintenance Squeegee Blade Replacement Each squeegee blade has four sides. When the blade is worn, you only need to exchange the two ends of the blade and use the other intact surface. If all four edges are worn, replace the blade. 1. -
Page 30: Move The Machine
the Machine When using a truck or trailer to move the machine, be sure to follow the following strapping procedures: 1.Raise the squeegee and brush head. 2.Use the recommended loading dock to load the machine. 3.Place the front of the machine close to the front of the truck or trailer. After the machine is stable, lower the brush head and squeegee. -
Page 31: Troubleshooting
Machine Maintenance Troubleshooting Problem Solution Turn on the switch or replace the The switch is not open or damaged switch The brush plate motor button is Turn on the switch or replace the not open or damaged switch The machine cannot Motor switch handle malfunction Replace the micro switch be operated... -
Page 32: Power Charger Fault Code
Troubleshooting —— Continued The recovery tank is full or Drain the recovery tank or the suction pipe is broken replace the suction pipe pipe cover is Replace the drain pipe not sealed cover the recovery tank is blocked screen Remove foreign objects Foreign matter in the and re-cover the seal of the... - Page 33 Machine Maintenance Battery Charger Fault Code Code Malfunction Solution Battery voltage is lower Use 24V, 15-25Ah to charge than 22V LED2 is green and for half an hour and then use the smart charger for daily The battery is inverted, charging.
-
Page 34: General Machine Size/Capacity
General Machine Size/Capacity Project Size/Capacity Length Height Width/Frame Scrubbing Width Suction Width Brush Diameter Solution Tank Capacity Recovery Tank Capacity Without Standard Battery Components Type Quantity Voltage Rated Reference Current Weight Battery (Standard) Type KW hp Brush Plate Motor Electric Motor Water Suction Motor Type... -
Page 35: Type
Type... - Page 36 Product Warranty Card(Main Card) (The product warranty card is the main evidence for warranty service, Keep Properly Warranty: Within the warranty period, if any fault condition happens by normal use under the instruction of operation manual, it will be repaired for free. Please take the warranty card and purchasing invoice for free repair.
- Page 37 1.Product information: Product Model and Name: _______________________________________ Serial No: ____________________________________________________ 2. User Information: ____________________________________________ Final User Company: ___________________ Tel: _________________ Address: ________________________ Fax: ____________________ E-mail: ________________________ Post Code:___________________ 3. Sales Company Information: ___________________________________ Address: _____________________________________________________ Contact: ___________________________ Tel: __________________ Post Code: __________________ Sales Date: _____________________ In order to achieve the company's service commitment and improve customer services, the company will establish a customer information file in the computer...
- Page 38 www.tennantco.com.cn...
Need help?
Do you have a question about the T260 and is the answer not in the manual?
Questions and answers