
Related Manuals for gorilla sports 100822


Summary of Contents for gorilla sports 100822
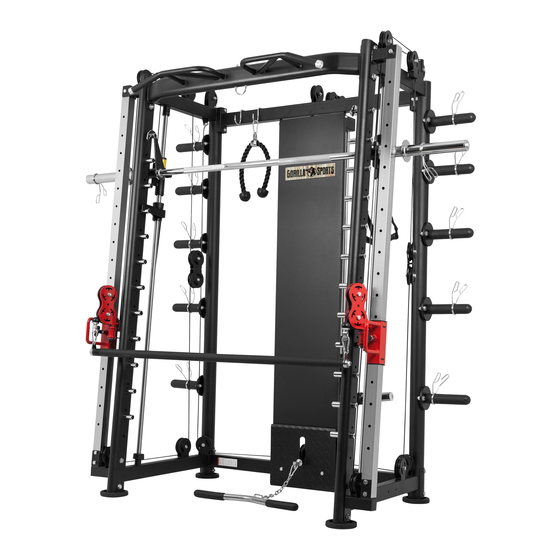
- Page 1 M M u u l l t t i i f f u u n n c c t t i i o o n n S S m m i i t t h h M M a a c c h h i i n n e e 100822 100822...
-
Page 2: Table Of Contents
TABLE OF CONTENT Page 2 ............................. Table of content Page 3 - 4 ..........................Safety Instructions Page 5 ..........................Technical data overview Page 6-10 ..............................Parts list Page 11-43 ............................ Assembling steps Page 44 ....................... Cleaning/Maintenance/Disposal Page 45 ..............................Warranty Page 46-47 .......................... - Page 3 IMPORTANT INFORMATION AND SAFETY INSTRUCTIONS General information Please ensure that all persons using the device have read and understood the assembly and operating instructions. The assembly and operating instructions must be regarded as part of the product and kept in a safe place so that they can be referred to at any time if necessary. Ensure that the safety and main- tenanceinstructions are followed exactly.
- Page 4 IMPORTANT INFORMATION AND SAFETY INSTRUCTIONS Training clothes and shoes suitable for fitness training with the device must be worn. The clothing must be such that it cannot get caught in the device during training due to its shape (e.g. length). The training shoes should be chosen to match the training equipment, basically give the foot a firm grip and have a non-slip sole.
-
Page 5: Technical Data Overview
TECHNICAL DATA OVERVIEW Maximum load 200 kg Maximum load 200 kg Maximum load 300 kg Maximum load 250 kg Maximum load 100 kg Maximum load 180 kg... -
Page 6: Parts List
PARTS LIST PART PHOTOS... - Page 7 PARTS LIST PART PHOTOS...
- Page 8 PARTS LIST 1PCS 1PCS 2PCS 2PCS 1PCS...
- Page 9 PARTS LIST 100822(1/2) (55) Washer 8.5* 16*1.5t 4pcs (54) Nylon Lock Nut M10 56pcs (57) Hexagon Head Bolt M8*15 4PCS (56) Washer 10.5* 20*1.5t 130pcs (58) Hexagon Head Bolt M10*20 27 PCS (60) Hexagon Head Bolt M10*45 23 PCS...
- Page 10 PARTS LIST 100822(2/2) (59)Hexagon Head Bolt M10*25 4PCS (69)Hexagon Head Bolt M10*30 3PCS (68)Hexagon Head Bolt M10*50 4PCS (62)Hexagon Head Bolt M10*75 14PCS (64)Hexagon Head Bolt M10*100 4PCS (61)Hexagon Head Bolt M10*55 2PCS Spanner 14#/17# 2PCS...
- Page 11 ASSEMBLING STEPS Assembly Instruction Important: When assembling the equipment, use only those components and fasteners that are included t least two or three adults are required to assemble this machine. with the equipment. Please note. a ASSEMBLY STEPS STEP 1 Please note, this machine needs 3 persons to assemble.
- Page 12 ASSEMBLING STEPS STEP 2 PART LIST № NAME № NAME Top side Chin up tube Locknut M10 Roof side Pulley/ bracket set-L Washer φ10 Roof side Pulley/ bracket set-R Hex. Bolt M10*75...
- Page 13 ASSEMBLING STEPS STEP 3 PART LIST № NAME № NAME Back bottom feet tube Washer φ10 Hex. Bolt M10*20...
- Page 14 ASSEMBLING STEPS STEP 4 PART LIST № NAME № NAME Weight plate Guide rod Washer φ10 Hex. Bolt M10*20...
- Page 15 ASSEMBLING STEPS STEP 5 PART LIST № NAME № NAME Rubber Pad Weight plate slide carriage set...
- Page 16 ASSEMBLING STEPS STEP 6 PART LIST № NAME № NAME Back roof connection tube Hex. Bolt M10*90 Washer φ10 Hex. Bolt M10*20...
- Page 17 ASSEMBLING STEPS STEP 7 Noted the direction Noted the direction Noted the direction direction Noted the direction direction Noted the direction Noted the direction Noted the direction direction direction Please note, this step needs 2 person proceed simultaneously. Follow up above photo for each part postion and well assemble.
- Page 18 ASSEMBLING STEPS STEP 8 Use No.67 Allen Wrench 4# to tighteen the screw PART LIST № NAME № NAME...
- Page 19 ASSEMBLING STEPS STEP 9 PART LIST № NAME № NAME Back Pulley fixed bracket Locknut M10*50 Locknut Washer φ10...
- Page 20 ASSEMBLING STEPS STEP 10 Assemble No. 27 Assisted Weight plate with No. 50 Cable wire set as photo above. And tighteen it. Total is 2 sets. PART LIST № NAME № NAME Assisted Weight plate Cable wire #50...
- Page 21 ASSEMBLING STEPS Noted: Cable must go through the pulley STEP 11 PART LIST № NAME № NAME Pulley Hex. Bolt M10*25 L shape bracket Hex. Bolt M10*50 Locknut Washer φ10...
- Page 22 ASSEMBLING STEPS STEP 12 PART LIST № NAME № NAME Pulley Hex. Bolt M10*45 Locknut Washer φ10...
- Page 23 ASSEMBLING STEPS STEP 13 PART LIST № NAME № NAME Bottom side Pulley/ bracket set Hex. Bolt M10*75 Locknut Washer φ10...
- Page 24 ASSEMBLING STEPS STEP 14 32 56 56 54 PART LIST № NAME № NAME Pulley Hex.Bolt M10*45 Locknut Washer φ10...
- Page 25 ASSEMBLING STEPS STEP 15 60 56 32 56 54 60 56 32 56 54 60 56 32 56 54 PART LIST № NAME № NAME Pulley Hex. Bolt M10*45 Locknut Washer φ10...
- Page 26 ASSEMBLING STEPS STEP 16 PART LIST № NAME № NAME Square Guide Tube Washer φ10 Pulley Slider set Right Hex. Bolt M10*75 Locknut...
- Page 27 ASSEMBLING STEPS STEP 17 PART LIST № NAME № NAME Square Guide Tube Washer φ10 Pulley Slider set Left Hex. Bolt M10*75 Locknut...
- Page 28 ASSEMBLING STEPS STEP 18 PART LIST № NAME № NAME Logo plating cover Washer φ8 Hex. socket head bolt M8*15...
- Page 29 ASSEMBLING STEPS STEP 19 PART LIST № NAME № NAME Low row mounting plate Washer φ10 Hex. Bolt M10*20...
- Page 30 ASSEMBLING STEPS STEP 20 Low cable wire view PART LIST № NAME № NAME Low Cable wire set #52...
- Page 31 ASSEMBLING STEPS STEP 21 PART LIST № NAME № NAME Movable dual pulley bracket Low Cable wire set #52 Pulley Locknut U shape bracket for Cable Washer φ10 Ball stopper (for cable) Hex. Bolt M10*45 Domed metal cap Hex. Bolt M10*30...
- Page 32 ASSEMBLING STEPS STEP 22 Cable Wire view PART LIST № NAME № NAME Pulley bracket Cable wire set #49...
- Page 33 ASSEMBLING STEPS STEP 23 60 56 32 56 54 60 56 32 56 54 PART LIST № NAME № NAME Pulley bracket Washer φ10 Pulley Hex. Bolt M10*45 Metal carabiner Metal chain set Cable wire set #49 Locunut M10...
- Page 34 ASSEMBLING STEPS STEP 24 Right side Cable wire view PART LIST № NAME № NAME Movable dual pulley bracket Cable wire set #51...
- Page 35 ASSEMBLING STEPS STEP 25 PART LIST № NAME № NAME Movable dual pulley bracket Washer φ10 Pulley Hex. Bolt M10*25 Cable wire set #51 Hex. Bolt M10*45 Locknut M10...
- Page 36 ASSEMBLING STEPS STEP 26 Left side cable wire view...
- Page 37 ASSEMBLING STEPS STEP 27 PART LIST № NAME № NAME Movable dual pulley bracket Washer φ10 Pulley Hex. Bolt M10*25 Cable wire #51 Hex. Bolt M10*45 Locknut M10...
- Page 38 ASSEMBLING STEPS STEP 28 Cable wire Route view Cable wire #53, one side go through A, and then B,C,D,E,F,G,I,J,K,L,M, to N. Go out from N and then tips assemble with #37 #45 and #46 PART LIST № NAME № NAME U shape bracket for Cable Cable wire #53 Ball stopper (for cable)
- Page 39 ASSEMBLING STEPS STEP 29 60 56 32 56 54 60 56 32 56 54 PART LIST № NAME № NAME Pulley Hex. Nut M10*45 Locknut M10 Washer φ10...
- Page 40 ASSEMBLING STEPS STEP 30 PART LIST № NAME № NAME Side plate sleeve Hex. Bolt M10*20 Spring clamp Washer φ10...
- Page 41 ASSEMBLING STEPS STEP 31 PART LIST № NAME № NAME J hooks bar Fixed Pin Safety bar Jaw Lock...
- Page 42 ASSEMBLING STEPS STEP 32 PART LIST № NAME № NAME Metal carabiner Handle grip with band Metal chain set Low row handlebar...
- Page 43 ASSEMBLING STEPS STEP 33 PART LIST № NAME № NAME Wire hanger Fixed Pin Biceps Rope Dip bar - L Long bar Dip bar - R...
-
Page 44: Cleaning/Maintenance/Disposal
CLEANING/ MAINTENANCE/DISPOSAL Cleaning Please use only a slightly damp cloth for cleaning. Attention! Never use gasoline, thinner or other aggressive cleaning products to clean the surface, as this may cause damage. The device is only suitable for private home and for indoor use. Keep the device clean and moisture away from the device. -
Page 45: Warranty
Claims for compensation for damage that may occur outside the device (unless liability is mandatory regulated by law) are excluded. Manufacturer: Gorilla Sports GmbH Nordring 80 64521 Groß-Gerau Here you can find an overview of our international partners:... -
Page 46: Training Information
TRAINING INFORMATION Training preparations Before you start training, not only must the training equipment be in perfect condition, but you or your body should also be ready for training. Therefore, if you have not done any strength/endurance training for a long time, you should always consult your family doctor before starting your training and carry out a fitness check-up. - Page 47 TRAINING INFORMATION Hydration Sufficient fluid intake is essential before and during training. During a training session of 60 minutes, it is quite possible to lose up to 0.5 liters of fluid. To compensate for this fluid loss, apple spritzer in amix- ing ratio of one-third apple juice and two-thirds mineral water is ideal, as it contains and replacesall the electrolytes and minerals that the body loses through sweat.
-
Page 48: Warm-Up/Stretching
WARM-UP/STRETCHING Thighs Support yourself with your right hand against a wall or your exercise equipment. Lift the left foot backward and hold it with the left hand. The knee points straight down. Now pull your thigh back until you feel a slight stretchin the muscle. -
Page 49: Notes
NOTES... - Page 50 NORDRING 80, 64521 GROß-GERAU WWW.GORILLASPORTS.EU...
Need help?
Do you have a question about the 100822 and is the answer not in the manual?
Questions and answers