Table of Contents
Advertisement
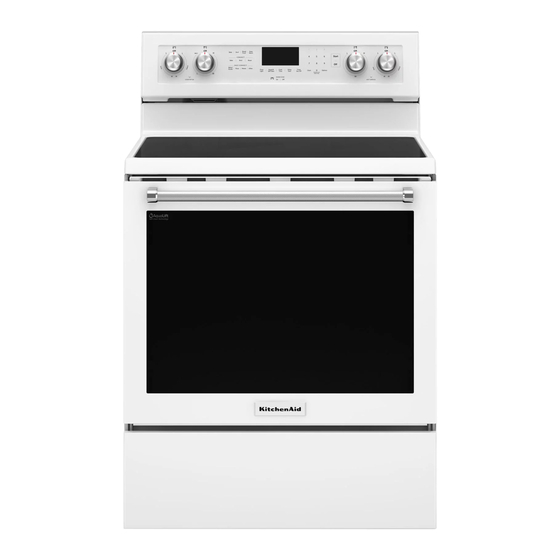
FREESTANDING ELECTRIC RANGE
Table of Contents
RANGE SAFETY.............................................................. 2
Range Safety ............................................................. 2
RANGE MAINTENANCE AND CARE................................... 4
General Cleaning........................................................ 4
Clean Cycle ............................................................... 5
INSTALLATION INSTRUCTIONS ........................................ 6
REQUIREMENTS ............................................................. 6
Tools and Parts .......................................................... 6
Location Requirements ................................................ 6
Electrical Requirements - U.S.A. Only ............................. 7
INSTALLATION ............................................................... 8
Unpack Range ........................................................... 8
Install Anti-Tip Bracket ................................................. 9
Level Range .............................................................. 9
Adjust Leveling Legs ................................................. 10
Electrical Connection - U.S.A. Only ............................... 11
Verify Anti-Tip Bracket Is Installed and Engaged .............. 15
some models) .......................................................... 16
Storage Drawer (on some models) ............................... 16
Oven Door............................................................... 17
Complete Installation ................................................. 17
Moving the Range ..................................................... 18
IMPORTANT:
Save for local electrical inspector's use.
W11432245A
©2020 All rights reserved.
Used under license in Canada.
OWNER'S MANUAL
Advertisement
Table of Contents

Related Manuals for KitchenAid KFEG500EWH


Summary of Contents for KitchenAid KFEG500EWH
-
Page 1: Table Of Contents
FREESTANDING ELECTRIC RANGE OWNER’S MANUAL Table of Contents RANGE SAFETY.............. 2 Range Safety ............. 2 RANGE MAINTENANCE AND CARE........4 General Cleaning............4 Clean Cycle ............... 5 INSTALLATION INSTRUCTIONS ........6 REQUIREMENTS ............. 6 Tools and Parts ............6 Location Requirements ..........6 Electrical Requirements - U.S.A. -
Page 2: Range Safety
RANGE SAFETY Your safety and the safety of others are very important. We have provided many important safety messages in this manual and on your appliance. Always read and obey all safety messages. This is the safety alert symbol. This symbol alerts you to potential hazards that can kill or hurt you and others. All safety messages will follow the safety alert symbol and either the word “DANGER”... - Page 3 IMPORTANT SAFETY INSTRUCTIONS ■ Do Not Leave Children Alone - Children should not be left ■ Do Not Soak Removable Heating Elements – Heating alone or unattended in area where appliance is in use. elements should never be immersed in water. They should never be allowed to sit or stand on any part ■...
-
Page 4: Range Maintenance And Care
RANGE MAINTENANCE AND 2. Apply a few dime-sized drops of Cooktop Cleaner to the affected areas. CARE General Cleaning IMPORTANT: Before cleaning, make sure all controls are off and the oven and cooktop are cool. Always follow label instructions on cleaning products. -
Page 5: Clean Cycle
STORAGE DRAWER OR WARMING DRAWER (on some 2. Pour distilled or filtered water onto the bottom of the empty models) oven, and close the oven door. Check that storage drawer or warming drawer is cool and empty before cleaning. Cleaning Method: ■... -
Page 6: Installation Instructions
Parts needed ■ Nonabrasive scrub sponges or eraser style cleaning pads (without cleaners) can be effective for cleaning the oven If using a power supply cord kit: cavity walls, oven door and oven bottom for difficult soils. ■ A UL listed power supply cord kit marked for use with ranges. For best results, moisten the pads and sponges before The cord should be rated at 250 V minimum, 40 A or 50 A that use. -
Page 7: Electrical Requirements - U.s.a. Only
Cabinet Dimensions WARNING: Improper connection of the equipment-grounding conductor can result in a risk of electric shock. Check with a Cabinet opening dimensions shown are for 25" (64.0 cm) qualified electrician or service technician if you are in doubt as to countertop depth, 24"... -
Page 8: Installation
If connecting to a 3-wire system: 3. Do not remove the shipping base at this time. Local codes may permit the use of a UL listed, 3-wire, 250 V, 40 or 50 A range power supply cord (pigtail). This cord contains 3 copper conductors with ring terminals or open-end spade terminals with upturned ends, terminating in a NEMA Type 10-50P plug on the supply end. -
Page 9: Install Anti-Tip Bracket
Install Anti-Tip Bracket 4. Drill two 1/8" (3 mm) holes that correspond to the bracket holes of the determined mounting method. See the following illustrations. WARNING Floor Mounting Tip Over Hazard Rear Position Front Position Diagonal (2 options) A child or adult can tip the range and be killed. Install anti-tip bracket to floor or wall per installation Wall Mounting instructions. -
Page 10: Adjust Leveling Legs
Adjust Leveling Legs ® ® For Ranges without AquaLift Technology or Steam Clean: 1. If range height adjustment is necessary, use a wrench or pliers to loosen the four leveling legs. 1. Place a standard flat rack in oven. This may be done with the range on its back or with the range 2. -
Page 11: Electrical Connection - U.s.a. Only
Electrical Connection - U.S.A. Only Power Supply Cord Direct Wire WARNING WARNING Electrical Shock Hazard Electrical Shock Hazard Disconnect power before servicing. Disconnect power before servicing. Use a new 40 amp power supply cord. Use 8 gauge copper or 6 gauge aluminum wire. Plug into a grounded outlet. - Page 12 ■ Tighten strain relief screw against the power supply cord. And you will be If your home has: Go to Section: connecting to: 3-wire receptacle A UL Listed, 250 V 3-wire connection: (NEMA type 10-50R minimum, 40 A, Power supply cord range power supply cord 3-wire direct...
- Page 13 5. Use 3/8" (9.5 mm) nut driver to connect the neutral (white) 2. Use 3/8" (9.5 mm) nut driver to connect the neutral (white) wire to the center terminal block post with one of the 10-32 wire to the center terminal block post with one of the 10-32 hex nuts.
- Page 14 4-Wire Connection: Direct Wire 4. Attach terminal lugs to line 1 (black), neutral (white), and line 2 (red) wires. Loosen (do not remove) the setscrew on the front Use this method for: of the terminal lug and insert exposed wire end through ■...
-
Page 15: Verify Anti-Tip Bracket Is Installed And Engaged
3-Wire Connection: Direct Wire Use this method only if local codes permit connecting ground conductor to neutral supply wire. 1. Pull the wires through the conduit on cord/conduit plate on bottom of range. Allow enough slack to easily attach the wiring to the terminal block. -
Page 16: Warming Drawer Or Premium Storage Drawer (On Some Models)
3. If the rear of the range lifts more than 1/2" (1.3 cm) off the floor To Replace: without resistance, stop tilting the range and lower it gently 1. Align the forward drawer notches with the notches in the back to the floor. The range foot is not engaged in the anti-tip drawer glides on both sides. -
Page 17: Oven Door
3. Slowly push the drawer into the range. 2. Open the oven door. You should hear a “click” as the door is set into place. 3. Move the hinge levers back to the locked position. Check that the door is free to open and close. If it is not, repeat the removal and installation procedures. -
Page 18: Moving The Range
Moving the Range For direct-wired ranges: WARNING WARNING Electrical Shock Hazard Tip Over Hazard Disconnect power before servicing. A child or adult can tip the range and be killed. Replace all parts and panels before operating. Install anti-tip bracket to floor or wall per installation instructions.
Need help?
Do you have a question about the KFEG500EWH and is the answer not in the manual?
Questions and answers