Table of Contents
Advertisement
Quick Links
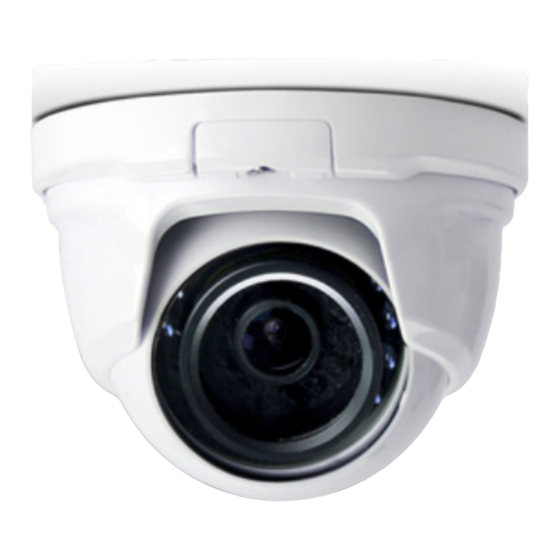
IR Dome Camera User Manual
The product image shown above may differ from the actual product.
Please use this camera with a DVR which supports HD video recording.
Please read the instructions thoroughly before using the product.
C
A
U
T
I
O
N
:
C
A
U
T
I
O
N
:
To reduce the risk of electric shock, do not expose this apparatus to rain or moisture.
Only operate this apparatus from the type of power source indicated on the label.
The company shall not be liable for any damages arising out of any improper use, even if we have been advised of the possibility of
such damages.
The lightning flash with arrowhead symbol, within an equilateral triangle, is intended to alert the user to the presence
of uninsulated "dangerous voltage" within the product's enclosure that may be of sufficient magnitude to constitute a
risk of electric shock to persons.
This exclamation point within an equilateral triangle is intended to alert the user to the presence of important
operating and maintenance (servicing) instructions in the literature accompanying the appliance.
ROHS Announcement
All lead-free products offered by the company comply with the requirements of the European law on the Restriction
of Hazardous Substances (RoHS) directive, which means our manufacture processes and products are strictly
"lead-free" and without the hazardous substances cited in the directive.
The crossed-out wheeled bin mark symbolizes that within the European Union the product must be collected
separately at the product end-of-life. This applies to your product and any peripherals marked with this symbol. Do
not dispose of these products as unsorted municipal waste.
CE Mark
This apparatus is manufactured to comply with the radio interference.
The company does not warrant that this manual will be uninterrupted or error-free. We reserve the right to revise or
remove any content in this manual at any time.
C
A
U
T
I
O
N
C
A
U
T
I
O
N
R
R
I
I
S
S
K
K
O
O
F
F
E
E
L
L
E
E
C
C
T
T
R
R
I
I
C
C
S
S
H
H
O
O
C
C
K
K
735Z
t1104t_V1.1
Advertisement
Table of Contents

Subscribe to Our Youtube Channel
Summary of Contents for Avtech AVT1104TP
- Page 1 735Z IR Dome Camera User Manual The product image shown above may differ from the actual product. Please use this camera with a DVR which supports HD video recording. Please read the instructions thoroughly before using the product. To reduce the risk of electric shock, do not expose this apparatus to rain or moisture. Only operate this apparatus from the type of power source indicated on the label.
- Page 2 FEATURES 1. 1/2.7” CMOS Sensor 2. 1080P video output 3. External alarm I/O device connection 4. Low light sensitivity of 0.1 Lux / F1.8, 0 Lux (IR LED ON) 5. IP66 for weather-proof application 6. Day and night 24-hour surveillance with IR effective distance up to 18 meters 7.
- Page 3 INSTALLATION Step1: Disassemble the camera case into three parts as illustrated in Figure 1. Figure 1 Step2: Locate the base on the place you would like to install the camera; make sure the cable can be arranged properly in the base. (Refer to Figure 2) Step3: Drill 4 holes and screw the base to the wall (or ceiling).
- Page 4 CONNECTION 1. DC12V Input Terminal Connect the power terminal of the camera to a DC 12V regulated power supply. Note: Please use the correct power adaptor, DC12V (regulated), to operate this unit. The power tolerance of this unit is DC12V ± 10%. Over maximum DC 12V power input will damage this unit. 2.
- Page 5 CAMERA PARAMETERS This camera series has its own configuration menu, and either of the two methods below is available to access the menu based on the camera model you have. Note: The methods below are available only when the camera is used with our brand’s HD CCTV DVR.
- Page 6 MENU DESCRIPTION DAY / NIGHT MODE Use the external light sensor we added in the camera to detect the surrounding light condition and switch to color or B/W mode. If you’re not satisfying with the mode switch time, you can go to D TO N / N TO D to manually adjust the sensitivity.
- Page 7 MENU DESCRIPTION 1/25 Manually choose the shutter speed you need for exposure. (automatic 1/30 exposure) 1/50 1/60 1/100 1/120 1/250 1/500 1/1000 1/3000 1/10000 Enable this function to fix the flicker situation. FLICKER OFF / 50HZ / 60HZ Adjust the image to compensate for an area that is overpowered by 0 ~ 16 brightness because of excessive light.
- Page 8 MENU DESCRIPTION EFFECT COLOR GAIN 0 ~ 255 Set the level of color saturation. The more the value, the more saturated the color will be, but the more noise the image will get. COLOR HUE 0 ~ 71 Set the level of hue. SHARPNESS 0 ~ 255 Set the level of sharpness to enhance the clarity of image detail by...


Need help?
Do you have a question about the AVT1104TP and is the answer not in the manual?
Questions and answers