Table of Contents
Advertisement
Quick Links
TRANSLATION OF THE ORIGINAL INSTRUCTIONS
We advise you to read this manual carefully, which contains all the instructions for
maintaining the appliance's aesthetic and functional qualities.
For further information on the product: www.smeg.com
Contents
42
42
46
47
48
49
49
50
52
52
53
53
61
63
64
67
70
71
71
71
71
71
72
73
73
74
74
75
75
77
41
Advertisement
Table of Contents

Related Manuals for Smeg SIM3844D


Summary of Contents for Smeg SIM3844D
-
Page 1: Table Of Contents
5.5 Section cut from the countertop 5.6 Mounting TRANSLATION OF THE ORIGINAL INSTRUCTIONS We advise you to read this manual carefully, which contains all the instructions for maintaining the appliance’s aesthetic and functional qualities. For further information on the product: www.smeg.com... -
Page 2: Instructions
Instructions 1 Instructions • Cleaning and maintenance must not be carried out by 1.1 General safety instructions unsupervised children. • Be aware of how rapidly the Risk of personal injury cooking zones heat up. Do not let • During use the appliance and its pans heat up when dry, as there is accessible parts become very hot. - Page 3 Instructions • Do not use or store flammable Risk of damaging the appliance materials near the appliance or • Do not use abrasive or corrosive directly underneath the hob. detergents (e.g. scouring • DO NOT USE AEROSOLS IN powders, stain removers and THE VICINITY OF THIS metallic sponges) on glass parts.
- Page 4 Instructions • All pans must have smooth, flat Installation bottoms. • THIS APPLIANCE MUST NOT BE • If any liquid does boil over or spill, INSTALLED IN BOATS OR remove the excess from the hob. CARAVANS. • Take care not to spill acid •...
- Page 5 Instructions For this appliance • Supervise children carefully as they cannot readily see the • If cracks or fissures form, or if the residual heat indication. After use glass ceramic cooking surface the cooking zones remain hot for breaks, turn off the appliance a certain period of time even if immediately.
-
Page 6: Appliance Purpose
Instructions • In conformity with the provisions 1.3 Manufacturer’s liability regarding electromagnetic • The manufacturer declines all compatibility, the electromagnetic liability for damage to persons or induction cooking hob comes property caused by: under group 2 and class B (EN •... -
Page 7: Disposal
Instructions 1.6 Disposal • Deliver the appliance to the appropriate recycling centre for This appliance conforms to the electrical and electronic WEEE European directive equipment waste, or return it to (2012/19/EU) and must be the retailer when purchasing an disposed of separately from other equivalent product, on a one for waste at the end of its service life. -
Page 8: How To Read The User Manual
Instructions 1.7 How to read the user manual This user manual uses the following reading conventions: Instructions General information on this user manual, on safety and final disposal. Description Description of the appliance and its accessories. Information on the use of the appliance and its accessories, cooking advice. -
Page 9: Description
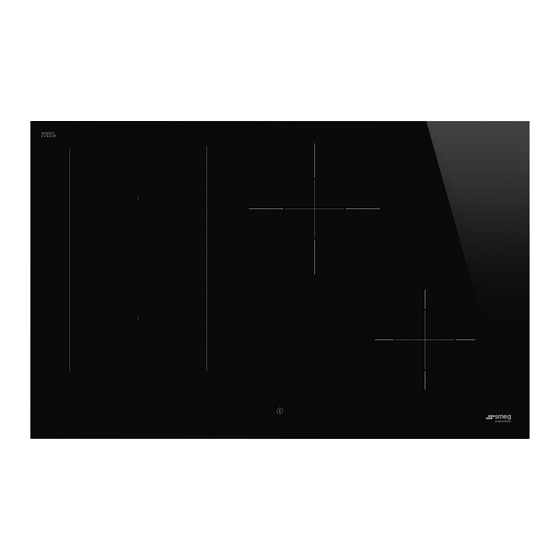
Description 2 Description 2.1 General description 60 cm 80 cm (A) 80 cm (B) 90 cm 1 = Rear central cooking zone = Left cooking zones 2 = Front right cooking zone = Centre cooking zones = Right cooking zones... -
Page 10: Control Panel
Description 2.2 Control panel 1 Special functions buttons 4 Scroll bar 2 Timer display 5 ON/OFF button 3 Cooking zone display 6 Auto-Vent 2.0 function button Maximum power consumption table 60 cm, 80 cm (A) and 90 cm models: Dimensions Level 9 Booster Double Booster... - Page 11 Description Advantages of induction cooking Power control The hob is fitted with a power control The appliance is equipped with an module that optimises/limits consumption. If induction generator for each the overall set power level exceeds the cooking zone. Each generator maximum limit permitted, the electronic located under the glass ceramic circuit board will automatically manage the...
-
Page 12: Use
3 Use High temperature Danger of fire or explosion 3.1 Instructions High temperature • Do not use or leave flammable materials near the appliance or directly Danger of burns underneath the hob. • Do not cook in closed tins or containers, •... -
Page 13: Preliminary Operations
3.2 Preliminary operations List of symbols In order to remove any moisture that could On/Off button: turns the hob on or off. have accumulated during the manufacturing process and for the electronic circuits and Auto-Vent 2.0 function button: control keypad to work properly: activates communication between the 1. - Page 14 Minimum pan diameter Cookware suitable for use in induction cooking Make sure that the minimum diameter of the pans are those indicated in the following Cookware used on the induction cooking table, for both configurations. surface must be made of metal, with magnetic properties and a sufficiently large Ø...
- Page 15 Maximum cooking dura- If the symbol appears on the display, it Set power level tion in hours means the pan is not suitable. 1 ½ 1 ½ 1 ½ Use only cookware with a 1 ½ perfectly flat bottom which is suitable for induction hot plates.
- Page 16 • When preparing dishes with long Power levels cooking times, you can save time and The power in the cooking zone can be energy by using a pressure cooker, adjusted to various levels. The table shows which also helps to retain vitamins the levels suitable for various types of contained in the food.
- Page 17 Switching on the cooking zone 2. Move your finger to the left or right on the automatically scroll bar to select the power level, from or activate the Booster The hob is fitted with a pan detection system that automatically function (see “Booster Function”).
- Page 18 After switching on the hob and having Quick selection selected a cooking zone: This function allows you to quickly 1. Place a finger on the left-hand side of the set the cooking zones to the scroll bar. required power. After switching on the hob and having selected a cooking zone: 1.
- Page 19 The Booster function can be activated Multizone function quickly. This function can be used to • After switching on the hob, place your operate two finger at the far right of the scroll bar of cooking zones (front and the cooking zone you wish to use. rear) when using pans like fish kettles or rectangular pans.
- Page 20 The same parameters are set on both cooking zones. The Multizone function can only be activated between cooking zones that are vertically connected (zones indicated by “SX”, “CNT” and “DX” - see “General description”). This function automatically divides the power equally between both Example of incorrect pan position of the hot plates in use.
-
Page 21: Special Functions
Cooking guidelines Residual heat The table below shows the power values Improper use which can be set, together with the Danger of burns corresponding type of food. Settings may vary depending on the amount of food and • Supervise children carefully as they consumer taste. - Page 22 To deactivate the Pause function: To deactivate the control lock: 1. Hold down the button . The pause 1. press the button again for at least symbol, which has just been pressed, one second. starts to flash. • When power comes back on 2.
-
Page 23: Auto-Vent 2.0 Function
This function has an automatic and a Warming Function manual mode: This function allows you to keep • Automatic mode (default), adjusts the cooked food warm or to keep hood extractor fan speed according to water on the boil. the total power of the appliance (see “User menu”... -
Page 24: Additional Functions
3.6 Additional functions Rapid heating Child lock This function is not available for power level 9 or the Booster and This is useful to prevent functions being Double booster functions. activated by mistake (e.g. by children). To activate the child lock, the appliance The rapid heating function heats one must be on, but with the zones deactivated: cooking zone at maximum power for a... - Page 25 2. Use the + and - buttons to select the 2. Use the + and - buttons to modify or reset required time. the timer. 3. After 10 seconds, the timer will start the new countdown or will be deactivated. Timed cooking This function is used to program the •...
- Page 26 5. Press any button to deactivate the Recall Function buzzer. This is used to restore some functions that have already been A maximum of 9 hours and 59 started after the appliance has minutes can be set. been switched off unintentionally. If the appliance is switched off This function can be activated on unintentionally, carry out the following...
-
Page 27: User Menu
3.7 User menu Press all the buttons of the cooking zones in sequence in a clockwise direction starting The user menu allows you to modify the from the front left. Every effective touch will operating characteristics of the appliance. be confirmed by a beep. 9 of the options can be modified. - Page 28 6. Press the symbol to go back to selecting the options. A scroll bar The sound associated with the appears in which each segment is button and the sounds associated with error messages cannot be associated with a menu option. deactivated.
- Page 29 Option U6 allows you to activate or Refer to the following table to choose the deactivate the automatic pan detection most suitable value according to the power function. (see “Switching on the cooking limitation of the appliance: zone automatically”). Hardness level Power limitation •...
-
Page 30: Error Codes
3.8 Error codes If the appliance malfunctions or operates incorrectly, the associated error code appears on the cooking zones display. The error codes always begin with “E..” or “Er..”, followed by a number. The following error codes can be corrected without having to contact the Technical Support Service. -
Page 31: Cleaning And Maintenance
Cleaning and maintenance 4 Cleaning and maintenance 4.3 Ordinary weekly cleaning Clean and maintain the hob once a week 4.1 Instructions using an ordinary glass cleaning product. Always follow the manufacturer’s Improper use instructions. The silicon in these products Risk of damage to surfaces creates a protective, water-repellent membrane which also resists dirt. -
Page 32: What To Do If
Cleaning and maintenance Changes in colour do not affect the The cooking results are unsatisfactory: operation and stability of the glass. These • Make sure that the cooking temperature are not alterations to the material of the hob is not too high or too low. but just residues which have not been The hob smokes: removed and have then carbonised. -
Page 33: Installation
Installation 5 Installation 60 cm and 80 cm (A) models: • 220-240 V / 380-415 V 2N~ 5.1 Electrical connection Power voltage Danger of electrocution • Have the electrical connection performed by authorised technical 6 x 1.5 mm² six-core cable. personnel. -
Page 34: Instructions For The Installer
Installation 5.2 Instructions for the installer • 220-240 V 1N~ • Do not bend or trap the power cable. • The appliance must be installed according to the installation diagrams. • If the appliance does not work correctly after having carried out all the checks, contact your local Authorised Service 5 x 2,5 mm²... -
Page 35: Safety Instructions
Installation 4. Press the left of the scroll bar to decrease The minimum clearance between exhaust hoods and the cooking surface must be at the power and the right to increase it. least the distance indicated in the exhaust The Eco-Logic Advance function increases hood installation instructions. - Page 36 Installation Flush built-in model Semi-flush mounting For this kind of hobs additional milling is needed in the recessed hole if you wish to install the hob flush with the work surface. 800 (A) 730 - 750 480 - 490 800 (B) min.
-
Page 37: Mounting
Installation In the event the hob needs to be removed, cut the silicone using a cutter before attempting to remove it (C). 5.6 Mounting opens on bottom and on rear Over built-in oven unit On top of an empty kitchen unit or drawers If installed on top of an oven, the latter must be equipped with a... - Page 38 Installation opens on rear Failure to install the double-layer wooden base exposes the user to possible accidental contact with Spring clips sharp or hot parts. To ensure the hob is fixed and centred as accurately as possible, the clips provided Ventilation must be positioned as described below: The illustrations below show two examples...
Need help?
Do you have a question about the SIM3844D and is the answer not in the manual?
Questions and answers