Table of Contents
Advertisement
Quick Links
Advertisement
Table of Contents

Subscribe to Our Youtube Channel
Related Manuals for Shuttle HOT-679V


Summary of Contents for Shuttle HOT-679V
- Page 1 HOT-679V Pentium II processor ™ Based AGP MAIN BOARD User's Manual...
- Page 2 FCC Notice: This equipment has been tested and found to comply with the limits for a Class B digital device, pursuant to Part 15 of FCC Rules. These limits are designed to provide reasonable protection against harmful interference in a residential installation. This equipment generates, uses and can radiate radio frequency energy.
-
Page 3: Table Of Contents
TABLE OF CONTENTS ......................4 REFACE ..................5 HAPTER NTRODUCTION Introduction ..........................5 Accessories of HOT-679V ......................7 ..............8 HAPTER ARDWARE ONFIGURATION The Pentium II & Celeron Processor ................... 8 What does the URM (Universal Retention Mechanism) consist of ..........9 Install the Universal Retention Mechanism ................. -
Page 4: Preface
3D applications. The A.G.P. is independent of the PCI bus and is designed to exclusively use with graphical-display devices. The HOT-679V supports 3.3 V A.G.P. devices with data transfer rates up to 133 MHz, allowing data throughput of 500 MB/sec. -
Page 5: Chapter 1 Introduction
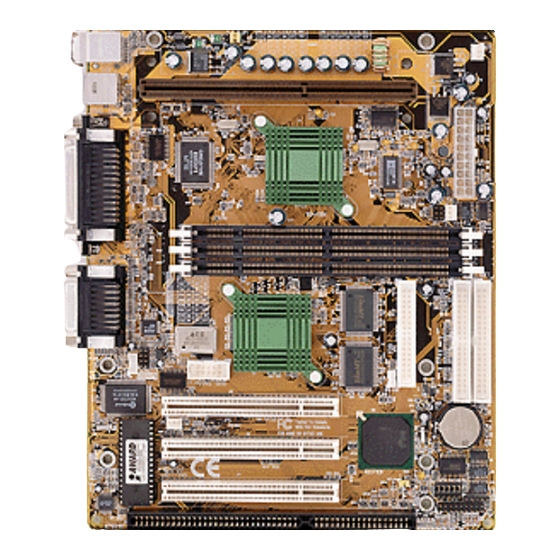
INTRODUCTION The HOT-679V Mainboard is carefully designed for the demanding PC user who wants high perfor- mance and many intelligent features in a compact package: Chipset: Features VIA Apollo Pro with I/O subsystems. CPU Support: Intel Pentium II processor 233/66 ~ 400/66 MHz and 350/100 ~ 500/100 MHz. - Page 6 MicroATX form factor 244mm x 199mm. Advanced Features: CPU Plug & Play -- HOT-679V featuring CPU Plug & Play function, the user needn't to adjust onboard system clock and CPU multiplier. When the system first power-on, BIOS will set CPU clock speed to 233 MHz or 350 MHz (depend on CPU external frequency) automatically.
-
Page 7: Accessories Of Hot-679V
ACCESSORIES OF HOT-679V - 7 -... -
Page 8: Chapter 2 Hardware Configuration
HARDWARE CONFIGURATION The Pentium™ II Processor The Pentium™ II and Celeron™ processor is the next member of the P6 processor family. It combines the architectural advances in the Pentium Pro processor with the instruction set extensions of MMX technology. It is fully compatible with the huge base of Intel architec- ture-based PC software. -
Page 9: What Does The Urm (Universal Retention Mechanism) Consist Of
(that is, no DIMMs, cables, or cards are installed). Install the Retention Mechanism : 1. Finds out the Universal Retention Mechanism (URM) Mounting Holes of Slot1 on HOT-679V main board. (Refer to Figure 2-6) Figure 2-6 2. Install two Universal Retention... - Page 10 Install the Heat Sink Support: (optional) If your Heat Sink comes with the Heat Sink suport then install it according to the instruction comes with your Heat Sink. Figure 2-8 and Figure 2-9 shows some Heat Sink examples. Figure 2-9 Figure 2-8 - 10 -...
-
Page 11: Install Pentium Ii Processor
Install Pentium II Processor Push the latches on the processor toward the center of the processor until they click into place. Hold the processor so that the fan shroud is facing toward the Heat Sink Support Base bar on the mainboard. Slide the processor into the Universal Retention Mechanism. Ensure that the alignment notch in the processor fits over the plug in Slot 1. -
Page 12: Celeron Processor S.e.p.p Only Rm Assembly Procedure
Celeron™ Processor S.E.P.P. Only Retention Mechanism Assembly Procedures These procedures have been included to help assemble the S.E.P.P. (Single Edge Processor Package) only Retention Mechanism. Please follow them exactly: Required Components Figure 2-13 SEPP (Figure 2-12) Primary Side Heatsink (Figure 2-13) Heatsink Retention Clip (Figure 2-14) Figure 2-12 Figure 2-14... -
Page 13: Install Celeron Processor
Install Celeron™ Processor Hold the processor unit so that the Heat sink faces toward the DIMM sockets on the mainboard. Insert the processor into the Universal Retention Mechanism. Press the processor down firmly with even pressure on both sides of the top until it is seated. (Refer to Figure 2-19 and Figure 2-20) Figure 2-19 Figure 2-20... -
Page 14: Install S.e.c.c.2 Processor
Install S.E.C.C.2™ Processor Hold the processor unit so that the Heat sink faces toward the DIMM sockets on the mainboard. Insert the processor into the Universal Retention Mechanism. Press the processor down firmly with even pressure on both sides of the top until it is seated. (Refer to Figure 2-21 and Figure 2-22) Figure 2-21 Figure 2-22... -
Page 15: Jumpers
To connect the pins, simply place a plastic jumper cap over the two pins. CPU Clock Speed Selection - JP2 and JP9 HOT-679V featuring CPU Plug & Play function, the user needn't to adjust onboard system When the system power-on first time, BIOS will set CPU clock clock and CPU multiplier. - Page 16 CPU Clock Configuration Table (Table 2-1) shows the Pentium II / Celeron 233MHz ~ 400MHz and Pentium II 350MHz ~ 500MHz quick setting on the mainboard. Table 2-2 shows the adjustable CPU Host Clock on jumper JP2. Table 2-3 shows the adjustable CPU Clock Ratio on jumper group JP9. CPU Configuration Table Pentium II System...
- Page 17 HOT-679V mainboard provides a Jumper group JP9 to set CPU Speed configure by BIOS or by hardware jumper. By inserting jumper pack on Row B-C group, the user can Soft-Configure the CPU Host Clock and CPU Clock Ratio from BIOS.
-
Page 18: Flash Eeprom Vpp
Figure 2-26 Keyboard & PS/2 Mouse Power-On Setting - JP1 HOT-679V mainboard provides an optional power-on function by stroke any key (or hot- key) on keyboard or double click on PS/2 mouse. Note: Power-on by serial mouse is not supported JP1 is the jumper used to set the functions of keyboard &... -
Page 19: On Board Audio Controller Setting - Jp6
On Board Audio Controller Setting - JP6 HOT-679V mainboard provides on-board PnP 64 voices wavetable sound chip which based on Creative ES1371 AC97 PnP 3D integrated audio controller chip. Jumper JP6 is used to enabled or disabled it. On-board Audio Controller... - Page 20 Back Panel Connectors Figure 2-29 VGA Connectors Attach 15-pin VGA cable to this connector. COM1 Connectors Attach COM1 device cable to this connector. PS/2 Keyboard & PS/2 Mouse Connector Two 6-pin female PS/2 keyboard & Mouse Connectors is located at the rear of the main board. PS/2 Mouse on top of connector and PS/2 Keyboard on the bottom of connector.
- Page 21 CPU, Chassis & AGP cooling Fan connectors - JP3, JP5 & J1 The main board provides three onboard 12V cooling fan power connectors. Depending on the fan maker, the wiring and plug may be different. The red wire should be connected to +12V and black wire should be connected to ground (GND).
-
Page 22: Chapter 3 Memory Configuration
MEMORY CONFIGURATION The HOT-679V mainboard provides three 168-pin DIMM sockets that make it possible to install from 8MB up to 256MB of SDRAM. The DIMM socket support 8MB, 16MB, 32MB, 64MB, 128MB and 256MB 3.3V single- or double- side SDRAM DIMM. -
Page 23: Chapter 4 Flash Utility
FLASH UTILITY This chapter briefly discusses Award Flash utility in order to guide you through updating your old BIOS. The file name we use to program here is test.bin, and the file name to save old BIOS is 679V.OLD. Please note that those file names are not absolute. They are only examples to let you have a more clear understanding of the updating process. - Page 24 If “Yes” To save the old BIOS: 1. Please respond “Y”, and then press the ENTER key. 2. Move the cursor to “File Name to Save: “ 3. Type file name “TEST.BIN”, and then press the ENTER key. (Your old BIOS will be saved in the file name you create.
-
Page 25: Etup
BIOS SETUP The BIOS ROM has a built-in Setup program that allows users to modify the basic system configuration. This type of information is stored in battery-backed RAM so that it retains the Setup information when the power is turned off. Entering Setup Power on the computer and press <Del>... -
Page 26: The Main Menu
The Main Menu Standard CMOS setup This setup page includes all items in a standard compatible BIOS. BIOS features setup This setup page includes all items of Award special enhanced features. Chipset features setup This setup page includes all items of chipset features. Power Management Setup This setup page includes all items of Power Management features. - Page 27 Supervisor Password Change, set, or disable supervisor password. It allows you to limit access to the system and Setup, or just to Setup. User Password Change, set, or disable user password. It allows you to limit access to the system and Setup, or just to Setup.
-
Page 28: Standard Cmos Setup
Standard CMOS Setup Date The date format is <day>, <month> <date> <year>. Press <F3> to show the calendar. Time The time format is <hour> <minute> <second>. The time is calculated base on the 24-hour military-time clock. For example. 5 p.m. is 17:00:00. Hard Disks Type This item identify the types of hard disk drives that has been installed in the computer. - Page 29 Video This item selects the type of adapter used for the primary system monitor that must matches your video display card and monitor. Although secondary monitors are sup- ported, you do not have to select the type in Setup. Error halt This item determines if the system will stop, when an error is detected during power up.
-
Page 30: Bios Features Setup
BIOS Features Setup Virus Warning When this item is enabled, the Award BIOS will monitor the boot sector and partition table of the hard disk drive for any attempt at modification. If an attempt it made, the BIOS will halt the system and the following error message will appear. Afterwards, if necessary, you will be able to run an anti-virus program to locate and remove the problem before any damage is done. - Page 31 Boot Sequence This item determines which drive computer searches first for the disk operating system. Default setting is A, C, SCSI. BIOS also support system boot from CD-ROM drive or SCSI hard disk drive. Swap Floppy Drive When this item enables, the BIOS will swap floppy drive assignments so that Drive A: will function as Drive B: and Drive B: as Drive A:.
- Page 32 Security Option This item allows you to limit access to the System and Setup, or just to Setup. When System is selected, the System will not boot and access to Setup will be denied if the correct password is not entered at the prompt. When Setup is selected, the System will boot, but access to Setup will be denied if the correct password is not entered at the prompt.
-
Page 33: Chipset Features Setup
Chipset Features Setup Bank x/x DRAM Timing This value in this field is set by the system board manufacturer, depending on whether the board has paged DRAMS or EDO DRAMS. The choice: 70ns, 60ns. SDRAM Cycle Length This field allows you to set the SDRAM latency timer. The Choice: 2, 3. - Page 34 System BIOS Cacheable Selecting Enabled allows caching of the system BIOS ROM at F0000h - FFFFFh, result- ing in better system performance. However, if any program writes to this memory area, a system error may result. Video RAM Cacheable When enabled. The Video RAM cache will cause access to video RAM addressed at C0000H to C7FFFH to be cached, if the cache controller is also enabled.
- Page 35 CPU Warning Temperature (optional) Since the mainboard support CPU temperature monitoring and overhear alert. This item allows the user to set the threshold of CPU warning temperature. When CPU temperature over the threshold, system will slow down clock to prevent CPU damage. Current System Temperature (optional) Since the mainboard support System and CPU temperature monitoring and overheat alert.
-
Page 36: Power Management Setup
Power Management Setup Power Management This item determines the options of the power management function. Max Saving puts the system into power saving mode after a brief period of system inactivity; Min Saving is the same as Max Saving except the time of the system inactivity period is longer; Dis- abled disables the power saving feature;... - Page 37 Soft-Off by PWRBTN When Enabled, turning the system off with the on/off button places the system in a very low-power-usage state, with only enough circuitry receiving power to detect power button activity or Resume by Ring activity. CPU Fan In Suspend When Off, the CPU fan turns off during Suspend mode.
- Page 38 Modem Ring Resume When set to Enagled, any event occurring Modem Ring/activity of LAN will awaken a system which has been powered down. RTC Alarm Resume When set to Enabled RTC Alarm Resume, you could set the date (of month) and timer (hh:mm:ss), any event occurring at RTC will awaken system which has been powered down.
-
Page 39: Pci Configuration Setup
PCI Configuration Setup PnP OS Installed When this item is set to Yes, it will allow the PnP OS (Windows 95) control the system resources except PCI devices and PnP boot devices. Default setting is No. Resources Controlled By The Award Plug and Play BIOS has the capability to automatically configure all of the boot and Plug and Play compatible devices. - Page 40 PCI Dynamic Bursting When Enabled, data transfers on the PCI bus, where possible, make use of the high- performance PCI burst protocol, in which greater amounts of data are transferred at a single command. The choice : Enabled, Disabled. PCI Master 0 WS Write When Enabled, writes to the PCI bus are command with zero wait states.
-
Page 41: Integrated Peripherals
Integrated Peripherals OnChip IDE Channel0 This item is used to defined on chip Primary PCI IDE controller is Enable or Disable setting. OnChip IDE Channel1 This item is used to defined on chip secondary PCI IDE controller is Enable or Disable setting. - Page 42 Primary Master / Slave UDMA On this mainboard, VIA Chipset improves IDE transfer rate using Bus Master UltraDMA/ 33 IDE which can handle data transfer up to 33MB/sec. The options are Disabled, Enabled and Auto, Auto is the default settings for on board Primary Master / Slave UltraDMA33.
- Page 43 Onboard Serial Port 1 This item is used to define onboard serial port 1 to 3F8/IRQ4, 2F8/IRQ3, 3E8/IRQ4, 2E8/ IRQ3, Auto or Disabled. Onboard Serial Port 2 This item is used to define onboard serial port 2 to 3F8/IRQ4, 2F8/IRQ3, 3E8/IRQ4, 2E8/ IRQ3, Auto or Disabled.
-
Page 44: Password Setting
Password Setting This section describes the two access modes that can be set using the options found on the Supervisor Password and User Password. Supervisor Password and User Password The options on the Password screen menu make it possible to restrict access to the Setup program by enabling you to set passwords for two different access modes: Supervisor mode and User mode. -
Page 45: Chapter 6 O Nboard Audio Controller
ON BOARD AUDIO CONTROLLER Introduction ™ CREATIVE ES1371 Sound Blaster AudioPCI The On-board audio controller is the new Creative AC97 digital controller which pro- vides the next generation of audio performance to the PC market. The ES1371 is avail- able in a 5.0 V PCI bus compatible device that enables the Creative/ENSONIQ Wavetable synthesis PCI solution. -
Page 46: General Specifications
General Specifications Wavetable Synthesis Creative synthesis engine Digital effects engine for reverb and chorus 64-voice polyphony and multi-timbral capability 16 MIDI channels, 128 GM and GS compatible instruments and 10 drum kits MT-32 compatible instrument set 2MB, 4MB and 8MB sample sets included 3D Audio Technology Support for Microsoft DirectSound Localized 3D Sound technology expands the spaciousness of sounds in the tradi... -
Page 47: Connecting Audio Devices To 679V
Connecting Audio Devices to 679V Line Out LINE-OUT is a stereo output through which the combined signal of all internal and external audio sources on the board is output. It can be connected to 1/8-inch TRS stereo headphones or to amplified speakers. Line Input LINE-IN is a stereo line-level input that accepts a 1/8-inch TRS stereo plug. - Page 48 CD Audio-In Connection - SJ1, SJ2 & SJ3 SJ1, SJ2 and SJ3 are used to connect CD Audio output from CD-ROM drive. CD_In SJ1 pin assignment 1 : Left channel 2 : Gound 3 : Gound 4 : Right channel SJ2 pin assignment AUX In 1 : LAUX...
-
Page 49: Auto-Installing Applications And Drivers
(for Windows 95/98 and Windows NT4.0) 1. Insert the installation CD into the CD-ROM drive. 2. If AutoRun is enabled on your system, the "Shuttle Mainboard Software Setup" will appear on your screen. Otherwise, double-click the My Computer icon on your Windows Desktop, then Right-click on your CD-ROM drive icon and click on AutoRun.EXE program. - Page 50 Uninstalling Software in Windows 95/98 and Windows NT4.0 1. Click the Start menu, point to Settings and click Control Panel. 2. Double-click the Add/Remove Programs icon. 3. On the Install/Unistall tabbed page, select Sound Blaster AudioPCI 64V. 4. Click the Add/Remove button, and then click the Yes button when prompted to remove the software.
Need help?
Do you have a question about the HOT-679V and is the answer not in the manual?
Questions and answers