
Related Manuals for Schweigen NAUM-9


Summary of Contents for Schweigen NAUM-9
- Page 1 RANGEHOOD & INSTALLATION GUIDE NAUM-9 Revision V1.1 www.schweigen.com.au NAUM-9.indd 1 24/02/2017 3:12 PM...
-
Page 2: Table Of Contents
Back Draft Fins __________________________________________________________________ 15 Installation Advice ________________________________________________________________ 16 Roof Cowls/Roof Seal Kit ___________________________________________________________ 18 8. Maintenance Condensation Information __________________________________________________________ 19 Troubleshooting _______________________________________________________________________________ 20 9. Specifications NAUM-9 ______________________________________________________________________________________ 21 10. Technical Support ___________________________________________________________________________ 22 Page 2 NAUM-9.indd 2 24/02/2017 3:12 PM... -
Page 3: Welcome
This will ensure your personal safety and the lasting value of your professional rangehood. We trust that you will enjoy your new Schweigen rangehood. Please always retain your proof of purchase to aid in any warranty queries. This unit comes with a 2 Year Warranty. -
Page 4: Your Safety
15. Turn the rangehood motor off about 10-15 minutes after you finish cooking. 16. It is forbidden to use the rangehood as an aspirator. 17. Never cook foodstuff directly over the flame or have the gas burners on under the rangehood without using cookware. Page 4 NAUM-9.indd 4 24/02/2017 3:12 PM... -
Page 5: Before Installation
2. Your Safety Before Installation We recommend this appliance be installed or repaired by a qualified Schweigen Home Appliances technician. Please see our website www.schweigen.com.au for recommended installers. It is dangerous to modify any part of this appliance. Modification of any kind, will immediately void the warranty. -
Page 6: Product Use
Ensure the supply cord is not exposed to heat, chemicals or sharp objects. If the supply cord is damaged, it must be replaced by the manufacturer, service agent or a similarly qualified person in order to avoid a hazard. Page 6 NAUM-9.indd 6 24/02/2017 3:12 PM... -
Page 7: Tips And Suggestions
2. For recommended height, please refer to Mounting Laws and Regulations. OPTIMAL ADEQUATE INADEQUATE Rangehood bigger than the Rangehood equal to the cooking Rangehood smaller than the cooking area. area. cooking area. Page 7 NAUM-9.indd 7 24/02/2017 3:12 PM... -
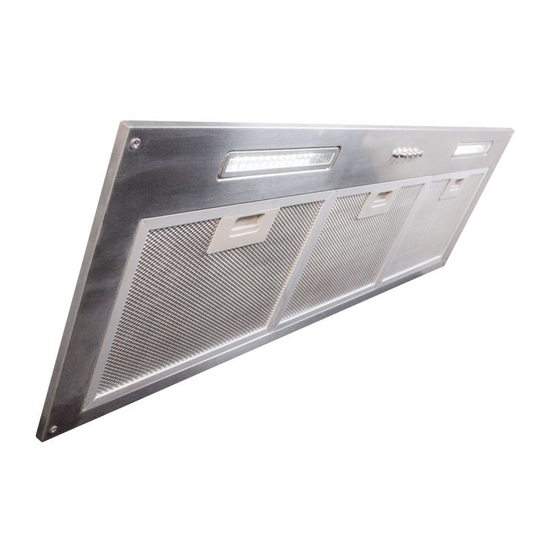
Page 8: Description
This undermount is equipped with a 3 speed mechanical control. Speed control usage suggestions: • Low speed for simmering. • Medium speed for light cooking. • High speed for heavy frying or heavy cooking. Page 8 NAUM-9.indd 8 24/02/2017 3:12 PM... -
Page 9: Operation
5. Operation Push Button Control Panel Turn off the rangehood Low speed setting Medium speed setting High speed setting Turn on/off the lamp Page 9 NAUM-9.indd 9 24/02/2017 3:12 PM... -
Page 10: Cleaning And Maintenance
Dishwasher - Put the filter in the dishwasher and select a short program at low temperature. NOTE: The colour of the metal mesh filters may change after several washes. This is normal and it is not necessary to change the filters. Page 10 NAUM-9.indd 10 24/02/2017 3:12 PM... -
Page 11: Cleaning The Interior
• The manufacturer will not be held responsible for functional or aesthetic damage caused by cleaning with products which are not suitable or using inadequate cleaning methods. Page 11 NAUM-9.indd 11 24/02/2017 3:12 PM... -
Page 12: Installation
650mm 750mm 800mm Induction 700mm 750mm* 800mm Schweigen’s recommended height will help avoid condensation, peculiar to cooking with an Induction Cooktop. Refer to additional notes on page19. • The location of the installation must have permanent openings for ventilation. •... -
Page 13: Mounting Points
Always switch off and disconnect power before installing the rangehood. Failure to do so may cause serious injury. NOTE: Please make sure that all plastic protection on the rangehood and filters are removed before use. Page 13 NAUM-9.indd 13 24/02/2017 3:12 PM... -
Page 14: Installation Example
Connect the 6 pin connector (on the face plate) to the rangehood before securing the face plate to the cabinet using provided screws. Insert the light globes and filter into place last. Face Plate Page 14 NAUM-9.indd 14 24/02/2017 3:12 PM... -
Page 15: Ducting
NOTE: Please make sure when ducting is installed, that it does not impede the Back Draft Fins from operation. Back Draft Fins Back Draft Base Page 15 NAUM-9.indd 15 24/02/2017 3:12 PM... -
Page 16: Installation Advice
When the carbon filter is attached, the suction power may be lower. • Please replace the carbon filter every 4 to 6 months; depending on cooking frequency & method, you may need to replace the filter more or less frequently. Page 16 NAUM-9.indd 16 24/02/2017 3:12 PM... - Page 17 7. Installation Figure 1 Figure 2 Figure 3 Figure 4 Figure 5 Page 17 NAUM-9.indd 17 24/02/2017 3:12 PM...
-
Page 18: Roof Cowls/Roof Seal Kit
*NOTE: Motor system does not include the roof seal kit/roof cowls, cable tie, duct tape or the support straps. For best result, please install ducting in a straight line and duct length no longer than 4 metres. Page 18 NAUM-9.indd 18 24/02/2017 3:12 PM... -
Page 19: Maintenance
• Distance from cooktop to the rangehood • Speed of food & liquid heating • Angle of ducting – Schweigen ‘S’ bend preferred • Filter size - larger canopy preferred • Quality of pots or cookware you are using – high quality recommended How to reduce the possibility of condensation forming: •... -
Page 20: Troubleshooting
Do not take any action that will damage the product. Rangehood does not work Light does not work Rangehood air suction is weak Rangehood does not direct air out (through chimney) Loud noise from the rangehood Page 20 NAUM-9.indd 20 24/02/2017 3:12 PM... -
Page 21: Specifications
8. Specifications Technical Specifications Model NAUM-9 Feeding Voltage 240V 50Hz Lamp Power — LED Strip (W) 2 x 2.5W (supplied) Front 165mm 150mm 71mm Page 21 NAUM-9.indd 21 24/02/2017 3:12 PM... -
Page 22: Technical Support
It is not the responsibility of Schweigen Home Appliances to rectify any incorrect installations. A service call out fee will be charged for any Schweigen technician that attends a call, whereby it’s established that the fault is due to an incorrect installation or non-manufacturing fault. Should the appliance be installed in such a way that the service agent is unable to gain access to the appliance, the person/s who own the premises or the appliance where the appliance resides —... - Page 23 Notes Page 23 NAUM-9.indd 23 24/02/2017 3:12 PM...
- Page 24 Australia 8/3-4 Anzed Court, Mulgrave VIC 3170. Phone 1300 881 693 Email sales@schweigen.com.au Web www.schweigen.com.au New Zealand 5 Tolich Place, Henderson, Auckland 0610. Phone 0800 200 510 Email info.parex@emerson.com Web www.parex.co.nz Distributed by Axis Group International Pty Ltd ACN 124 141 322 NAUM-9.indd 24...
Need help?
Do you have a question about the NAUM-9 and is the answer not in the manual?
Questions and answers