Table of Contents
Advertisement
Available languages
Available languages
Quick Links
BVSTDCP12B_R_G_19SEM1 (LA).indd 1
BVSTDCP12B_R_G_19SEM1 (LA).indd 1
MODELOS
MODELS
Manual de Instrucciones
CAFETERA PARA 12 TAZAS
LEA TODAS LAS INSTRUCCIONES ANTES DE USAR ESTE ARTEFACTO
Instruction Manual
12 CUP COFFEEMAKER
READ ALL INSTRUCTIONS BEFORE USING THIS APPLIANCE
BVSTDCP12B/R/G
11/15/19 10:21
11/15/19 10:21
Advertisement
Table of Contents

Related Manuals for Oster BVSTDCP12B


Summary of Contents for Oster BVSTDCP12B
- Page 1 MODELOS BVSTDCP12B/R/G MODELS Manual de Instrucciones CAFETERA PARA 12 TAZAS LEA TODAS LAS INSTRUCCIONES ANTES DE USAR ESTE ARTEFACTO Instruction Manual 12 CUP COFFEEMAKER READ ALL INSTRUCTIONS BEFORE USING THIS APPLIANCE BVSTDCP12B_R_G_19SEM1 (LA).indd 1 BVSTDCP12B_R_G_19SEM1 (LA).indd 1 11/15/19 10:21 11/15/19 10:21...
-
Page 2: Medidas De Seguridad Importantes
MEDIDAS DE SEGURIDAD IMPORTANTES Cuando se utilizan aparatos eléctricos, siempre se deben seguir las precauciones básicas de seguridad para disminuir el riesgo de incendio, descarga eléctrica o lesiones personales, incluidas las siguientes: 1. Lea todas las instrucciones antes de utilizar este producto. 2. - Page 3 Para aparatos con paneles de servicio: 20. ADVERTENCIA: PARA REDUCIR EL RIESGO DE INCENDIO O DESCARGA ELÉCTRICA, NO QUITE ESTA TAPA. NO TIENE PIEZAS EN EL INTERIOR QUE DEBAN SER REPARADAS POR EL USUARIO. CUALQUIER REPARACIÓN SOLO DEBE SER REALIZADA POR PERSONAL DE SERVICIO AUTORIZADO. CONSERVE ESTAS INSTRUCCIONES SOLO PARA USO DOMÉSTICO AVISOS SOBRE EL PRODUCTO...
-
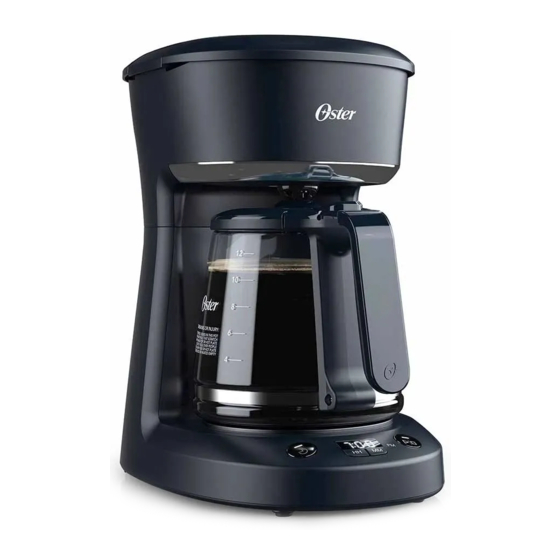
Page 4: Co No Zca Su C Af Etera
CO NO ZCA SU C AF ETERA 1. Cesta de preparación 2. Depósito de agua 3. Botón Preparar más tarde 4. Botón Preparar ahora 5. Pantalla del reloj 6. Botones de Hora / Minuto 7. Jarra 8. Cabezal de regadera A. - Page 5 G UÍ A DE I N I CI O DESEMBALE LA CAFETERA 1. Desembale la cafetera y retire de la unidad las bolsas de plástico, los cartones y cualquier cinta. ADVERTENCIA: MANTENGA LAS BOLSAS DE PLÁSTICO LEJOS DE LOS NIÑOS. LIMPIE LA CAFETERA ANTES DE USARLA Solo siga estos pasos sencillos: 1.
- Page 6 CÓMO HACER SU PRIMERA JARRA DE CAFÉ TABLA DE MEDICIÓN DE CAFÉ SUGERIDA: Para obtener los mejores resultados, prepare cuatro o más tazas de café. Agua para la Café molido preparación 12 tazas = 60 onzas 12 cucharadas 10 tazas = 50 onzas 10 cucharadas 8 tazas = 40 onzas 8 cucharadas...
- Page 7 PREPARAR MÁS TARDE IMPORTANTE: DEBE CONFIGURAR EL RELOJ ANTES DE USAR ESTA FUNCIÓN. 1. Presione Preparar mas tarde. La pantalla muestra “12:00”. Para configurar el tiempo de preparación deseado, presione los botones de Hora y Minuto. Presione Preparar más tarde para ajustar el reloj a la hora seleccionada. 2.
- Page 8 Estas piezas también son aptas para lavavajillas; únicamente en el estante superior. CÓMO DESCALCIFICAR SU CAFETERA OSTER ® Los minerales (calcio/piedra caliza) que se encuentran en el agua dejarán depósitos en la cafetera y afectarán su rendimiento.
-
Page 9: Us O Y C Ui Da Do De L A J A Rra
US O Y C UI DA DO DE L A J A RRA Siga las instrucciones que se detallan a continuación para reducir o eliminar la posibilidad de que se rompa la jarra de vidrio: • Deseche la jarra inmediatamente si está rajada. •... -
Page 10: Important Safeguards
IM PORTAN T SA FEG UA RDS When using electrical appliances, basic safety precautions should always be followed to reduce the risk of fire, electric shock, and/or injury to persons including the following: 1. Read all instructions. 2. Do not touch hot surfaces. Use handles or knobs. 3. - Page 11 S AV E T H E S E I NS TR UC TI O N S HOUSEHOLD USE ONLY PRODUCT NOTICES 1. Place the appliance on a hard, flat, level surface to avoid interruption of airflow underneath the coffeemaker. 2. Glass decanters only: Discard the decanter immediately if it is ever boiled dry. 3.
-
Page 12: G Et To Kn Ow You R Co Ff Eemak Er
G ET TO KN OW YOU R CO FF EEMAK ER 1. Brew Basket 2. Water Reservoir 3. Brew Later Button 4. Brew Now Button 5. Clock Display 6. Hour/Minute Buttons 7. Carafe 8. Shower Head 9. Warming Plate A. Clock Display E. -
Page 13: Getting Started
G ET TI NG STA RTED UNPACK YOUR COFFEEMAKER 1. Unpack your coffeemaker and remove plastic bags, cartons and any tape on the unit. WARNING: KEEP PLASTIC BAGS AWAY FROM CHILDREN. CLEAN COFFEEMAKER BEFORE USE Just follow these simple steps: 1. - Page 14 HOW TO MAKE YOUR FIRST POT OF COFFEE SUGGESTED COFFEE MEASUREMENT CHART: For best results, brew 4 or more cups of coffee. Water To Brew Ground Coffee 12 cups = 60 oz. 12 tbs. 10 cups = 50 oz. 10 tbs. 8 cups = 40 oz.
- Page 15 BREW LATER IMPORTANT: You must set the clock before using this feature. 1. Press Brew Later. The display flashes “12:00”. To set desired brew time, press the Hour and Minute buttons. Press Brew Later to set clock at time selected. 2.
- Page 16 7. Fill the water reservoir with 12 cups of clean, fresh water. 8. Place the empty carafe back on the coffeemaker, centered on the warming plate. 9. Remove and discard the paper filter used during the cleaning cycle. If an Oster ®...
-
Page 17: User Maintenance
CA RAF E USE A ND C A RE Follow the instructions below to reduce or eliminate the chance of breaking the glass carafe: • Discard the carafe immediately if it is ever cracked. • Protect the carafe from sharp blows, scratches or rough handling. Do not use harsh abrasive cleaners that may scratch the carafe. - Page 18 Características eléctricas de los modelos de la serie: BVSTDCP12B-XXX, BVSTDCP12R-XXX, Electric characteristics of series models: BVSTDCP12G-XXX Voltaje/Voltage Frecuencia/Frequency Potencia/Power 127 V 60 Hz 900 W 220 V 50/60 Hz 900 W 220 V 50 Hz 900 W 220 V 60 Hz 900 W XXX en donde X es cualquier numero entre 0 y 9 o cualquier letra entre A y Z.
Need help?
Do you have a question about the BVSTDCP12B and is the answer not in the manual?
Questions and answers