
Related Manuals for DR. Heater DR-338


Summary of Contents for DR. Heater DR-338
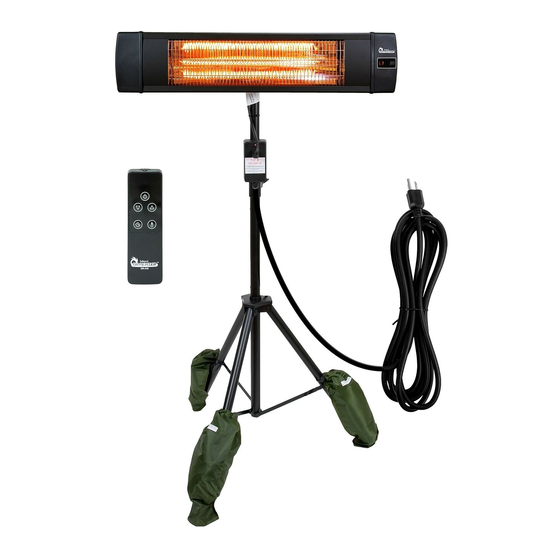
- Page 1 Carbon Infrared Heater Indoor/Outdoor Wall/Ceiling and Tripod Mount Owner’s Manual Model No.: DR-338...
-
Page 2: Important Safety Instructions
Warning THESE INSTRUCTIONS SHOULD BE READ CAREFULLY AND RETAINED FOR FUTURE REFERENCE, We cannot be liable for any damages caused by failure to observe these instructions. IMPORTANT SAFETY INSTRUCTIONS READ CAREFULLY-The infrared heater is designed for safe operation. Nevertheless, installation, maintenance and operation of the heater can be dangerous. - Page 3 The DR- 338 carbon infrared heaters produce instant and comfortable heat like the sun. These robust and weatherproof heaters are designed for domestic and commercial heating applications within outdoor areas, it is for outdoor use only. Model DR-338 Voltage(V) 110-120V AC Wattage(W)
-
Page 4: Installation
INSTALLATION Tools Needed: * Pencil *Hammer *Level *Screw Driver *Power Drill and drill bits A mounting bracket is provide with the heater which has been specifically designed to allow this product to be fitted to ceiling or wall before drilling the holders for the ceiling/wall is solid and that there are no hidden water pipes or electric wires. - Page 5 20. Fasten the brackets securely to the mounting surface and the backside of the heater using the nuts and screws supplied. 21. Fasten the heater securely on the brackets using the nuts and bolts supplied. 22. The brackets can be used to adjust the direction of the heater, adjust the heater angle by loosening the two bolts on the wall mounting bracket, tighten the bolts again when the desired angle is reached.
- Page 6 3. Drill holes with a smaller diameter drill bit than the plastic anchors 4. Insert the point end of plastic anchor into the holes, Tap the anchor with a hammer until the anchor is flush 5. Using a screwdriver attach the mounting bracket to the holes which with plastic anchor inside. P a g e...
- Page 7 6. Fasten the heater on the L shaped bracket with wing nuts on the back of heater Ensure mains power is OFF before commencing installation. The supplied mains cable must not contact the top surface of the heater during operation. The mounting height and intensity should reflect the intended use of the heater.
- Page 8 PLEASE DO NOT LET THE HEATER FACE TO THE FLOOR VERTICALLY Noted: The heater has a tilt function. When the heater exceeds a 45 ° angle, it automatically stops working. P a g e...
- Page 9 ASSEMBLY THE SOCKET WITH TIP-OVER PROTECTION ON THE TRIPOD STAND 1. Attached the Top fixing ring on the “socket position” label. Fasten 4 screws on two fixing rings. Make sure caution light is on the top. Socket position This side up P a g e...
- Page 10 2. Fixing the power cord on the stand, Keep the distance at least 5.9in from the edge of heater 5.9in Min MAKE SURE THE POWER CORD NEVER TOUCH THE HEATER 3. Secured well the cord with zip ties. 4. Plug the heater plug in the socket, and then turn on the heater as heater manual. THE CORD LENGTH OF SOCKET IS 12.5 ft Noted: The socket has a tilt function.
-
Page 11: Function And Operation
Installation – Tripod Mount 1. Placing L-shaped bracket to stand 2. Securing L-shaped bracket to stand with screw 3. Moving the slip panels to the proper place 4. Securing the L-shaped bracket to slip panels on heater with screws. 5. Adjust the height of stand from 3.6 feet to 5.9 feet. AFTER ASSEMBLY WELL THE HEATER AND STAND, ALSO PLEASE FOLLOW THE BELOW IMPORTANT STEPS. -
Page 12: Remote Control Instructions
Product Key Function: 1. Turn on the power, the product is standby mode display (- -); 2. Press key function: press the button, then press the heat levels (L1-L2-L3- standby - off) Remote Control Instructions 1. POWER BUTTON: Turn the heater off. 2. -
Page 13: Troubleshooting
Caution: When the appliance is not operated for a long period of time, cleaning or maintenance is conducted or when the location of the heater is changed, the heater should be turned to OFF and unplugged from the electrical connection. Periodic inspection and removal of dirt and contaminants will ensure that equipment can be operated safely. - Page 14 5. DO NOT immerse the heater in water 6. Wait until the heater is completely dry before use. Storage: Store the heater in a cool, dry location when not in use to prevent dust and dirt build up. Use packaging carton to store. ATTENTION: 1.
-
Page 15: Warranty Information
Please visit: https://www.amazon.com/review/review-your-purchases# At Dr. Heater USA, we are committed to bringing top quality alternative & supplemental heating products to our customers. Note: There may be a trace of smoke or odor when the unit is first operated. Do not be alarmed. This indicates a drop of oil fell on the interior coils during the manufacturing process.
Need help?
Do you have a question about the DR-338 and is the answer not in the manual?
Questions and answers