
Subscribe to Our Youtube Channel
Related Manuals for DR. Heater DR-122X4


Summary of Contents for DR. Heater DR-122X4
- Page 1 Bedbug Heater Model No.: DR-122X4 Owner’s Manual PLEASE READ WARNINGS BEFORE USE SAVE THESE INSTRUCTIONS...
- Page 2 Important Safety Information To reduce the risk of fire, electric shock, or personal injury, read all the instructions before using this heater. This appliance is intended for household or personal use only as described in this manual. Any other use including but not limited to commercial, agricultural, or outdoor use, is not recommended by the manufacturer.
- Page 3 Inspect outlet connection and contact strength before using these heaters. WARNING!- Power Outlets Can Be Dangerous Power outlets with poor electrical connections can become dangerously overheated and may result in fire, severe injury and/or damage to property. Follow the steps below for safe use of ANY high-power appliances: 1.
-
Page 4: Additional Warning
must be used, do not use a cord set rated less than 1500 watts or 15 amps, and of a minimum size of 16 gauge. Use only an extension cord with the UL listed mark. Use of an inadequate extension cord may result in overheating of the extension cord or a risk of fire. -
Page 5: Hints And Tips
CAUTION when heat treating fragile items such as books, items made of wood, and other heat-sensitive items. Consult the manufacturer of items in question (such as electronics) for a maximum safe temperature before placing them in the Bedbug Toaster™. Always monitor the temperature to ensure that the temperature in the Bedbug Toaster™... - Page 6 Always turn the heater on before placing potentially infested items inside the Bedbug Toaster™. Always use indoors with a room temperature above 70℉. If the room temperature is below 70℉, the Bedbug Heater may not reach optimal bed bug killing temperatures. ...
-
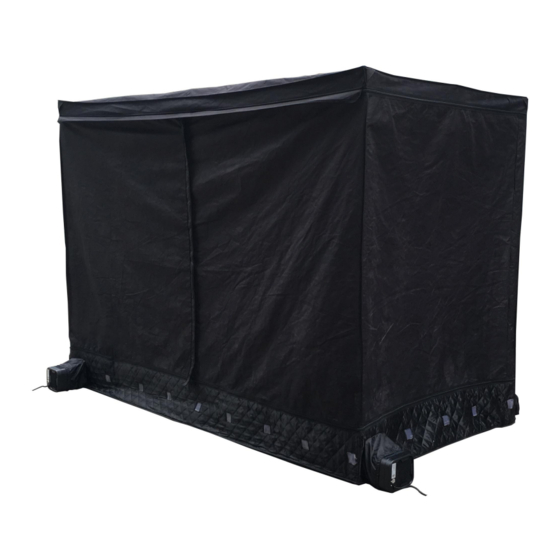
Page 7: Components Included
Components Included The following components are required for proper use of this product. Please contact Dr. Infrared Heater if you did not receive all of the components listed below. Some components may appear different from the illustrations below: Thermometer & Timer Bedbug Toaster™... -
Page 8: Installation Instructions
Installation instructions: 1. Open the Frame and Bedbug Toaster™ as shown below: Toaster with black side need to facing down Unzip all zippers and unfold all sides 2. Extend all legs until locking brackets click into lock position. Then expand the frame as shown below. - Page 9 5. Use zippers to close and open the Bedbug Toaster™: 6. Install a new 1.5V AAA battery into thermometer. 7. Put the thermometer sensor into the Bedbug Toaster™ through the opening as indicated below. Connect the sensor wire to the thermometer. Hang the thermometer on the rear side of the Bedbug Toaster™...
- Page 10 8. Press °C / °F button on the back of the thermometer to switch between Celsius and Fahrenheit. 9. Set alarm temperature to 120℉ by pressing the UP and DOWN button. 10. Turn the power knob on all 4 heaters to ON position. Place heater into the ventilation tube of the Bedbug Toaster™...
- Page 11 properly connects to a building ground. Using heater without properly grounded outlet or adapter could result in an electric shock hazard. The cord has a plug as shown in (A) in the image below. An adapter as shown in (C) is available for connecting three- prong grounding- type plugs to two- slot receptacles.
-
Page 12: Heater Specifications
Parts of the heater, such as the Bedbug Toaster’s™ metal zippers can remain hot long after heat treatment and cause burns. Use extreme caution. Heater Specifications Model: DR-122X4 Voltage:120V, 60Hz Current:50 amps (12.5x4) Output: 20,800 BTUs (5200x4) Max Power:6,000 Watts (1500X4)
Need help?
Do you have a question about the DR-122X4 and is the answer not in the manual?
Questions and answers