Table of Contents
Advertisement
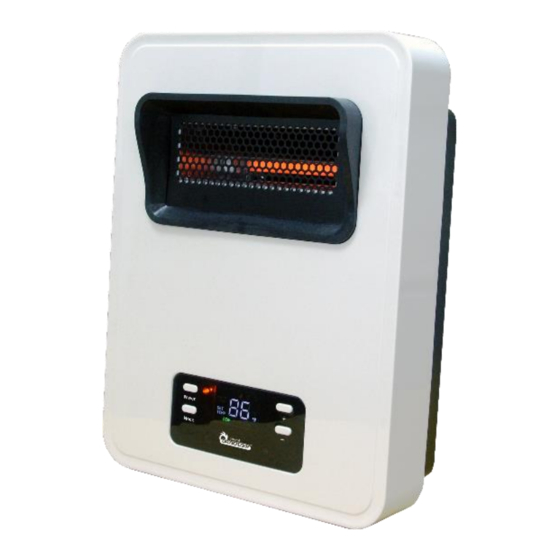
Wall Hung Infrared Heater
•
1500 Watts with
Two Heat Settings
•
Thermal Cutoff Protection
•
Tip-Over Switch
•
Room Temperature
LED Display
•
Precision Temperature
Control
•
Easy Push-Button Controls
•
Advanced Dual Heating System (ADHS)
•
With foldable leg which can be used on floor application
SAVE THESE INSTRUCTIONS
Owner's Manual
PLEASE READ AND
Model No.: DR-908
Advertisement
Table of Contents

Subscribe to Our Youtube Channel
Related Manuals for DR. Heater DR-908


Summary of Contents for DR. Heater DR-908
- Page 1 Room Temperature LED Display • Precision Temperature Control • Easy Push-Button Controls • Advanced Dual Heating System (ADHS) • With foldable leg which can be used on floor application Model No.: DR-908 Owner’s Manual PLEASE READ AND SAVE THESE INSTRUCTIONS...
-
Page 2: Important Instructions
CONGRATULATIONS! he Dr. Infrared Heater you have just purchased is a safe and powerful heater, designed to heat a room after a few minutes of operation. The far-infrared Quartz-PTC heating system is an excellent choice for safely heating whole room, while saving on heating costs. Additionally, this heater includes an overheat protection system, and an inlet air overheat protection system designed to ensure your safety. - Page 3 operating and unattended. 4. Do not operate the heater with a damaged cord or plug, or after the heater malfunctions, has been dropped, or damaged in any manner. Return the heater to an authorized service facility for examination, electrical or mechanical adjustment, or repair.
- Page 4 outlet may result in overheating of the power cord or fire. 18. Make sure the plug is fully inserted into an appropriate receptacle. Be mindful that receptacles also deteriorate due to aging and continuous use. Check periodically for signs of overheating or deformations of the plug. If any overheating or deformation occurs, immediately discontinue using the heater and contact Dr.
-
Page 5: Special Features
This is a safety feature to avoid the possibility of fire should the unit be tipped accidentally. Advanced Dual Heating System (ADHS) - Dr. Heater is the first to feature a dual heating system for maximum heat transfer rate. It combines the energy efficiency of infrared heat with the comfort of convection heat to heat your room fast and comfortably—without hot spots and cold spots. -
Page 6: Installation Instructions
Installation Instructions This heater has foldable legs which can be used on floor application. It can also be mounted on the wall. On the Floor Open wide the foldable legs and the unit can stand freely on the floor. Legs Closed Legs Opened (Bottom View) (Bottom View) - Page 7 2.Hang up the heater with the hanging hole to the screws. Hanging hole Operating Instructions 1. Plug the power supply cord into a grounded wall outlet. (120VAC, 60Hz) IMPORTANT: This heater is for use on 120 volts. This heater comes with a grounded (three-prong) plug.
-
Page 8: Turning The Heater On
The cord has a plug as shown at A in the following figure. An adapter, as shown at C, is available for connecting three-blade grounding type plugs to two-slot receptacles The green grounding lug extending from the adapter must be connected to a permanent ground such as a properly grounded outlet box. -
Page 9: Remote Controller
until the numeric temperature starts flashing. Press the button again to increase the temperature or the button to decrease the temperature. Once the temperature is set, the heater will warm up the room using the selected Mode. Heater will sample the room temperature every 4 minutes after the desired temperature is reached. -
Page 10: Maintenance
Setting the Timer 1. Press the TIMER button until Set Time starts flashing. The default value is 3 hours. 2. Press the “+” button to increase the set time or the “–” button to decrease the set time. The timer can be set from 1 to 12 hours. - Page 11 Figure 2 Warning: Any other servicing needed must be performed by an authorized service representative. Do not attempt to service the unit yourself. Product Specifications Model No.: DR-908 Voltage: 120V, 60Hz Current: Maximum continuous draw: 12.5 amps Output: 5200 BTUs Power: 1500 Watts Blower: Multi-blade;...
- Page 12 Let us know with a customer review. Please visit: https://www.amazon.com/review/review-your-purchases# At Dr. Heater USA, we are committed to bringing top quality alternative & supplemental heating products to our customers. Note: There may be a trace of smoke or odor when the unit is first operated.
Need help?
Do you have a question about the DR-908 and is the answer not in the manual?
Questions and answers
the prong broke off the plug can it be dreplaced
No, the manual does not explicitly state whether the plug prong of the DR. Heater DR-908 can be replaced. However, it emphasizes the importance of using a properly grounded outlet and warns against using an adapter improperly. For safety, it is recommended not to modify the plug.
This answer is automatically generated