Table of Contents
Advertisement
Quick Links
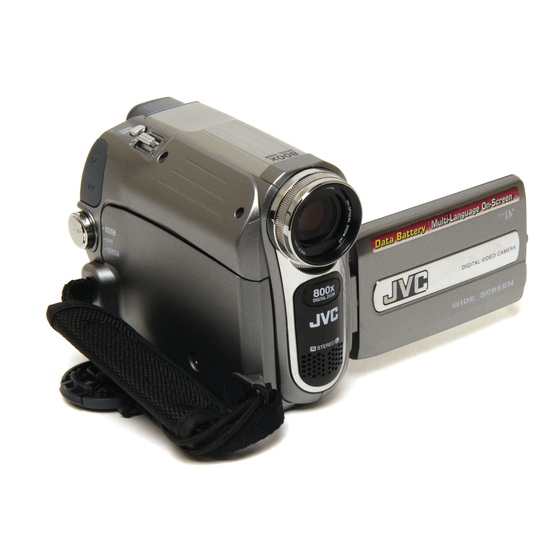
DIGITAL VIDEO CAMERA
GR-D750AS
INSTRUCTIONS
Dear Customer,
Thank you for purchasing this digital
video camera. Before use, please
read the safety information and
precautions contained in the pages
3 – 4 to ensure safe use of this
product.
GETTING STARTED
RECORDING & PLAYBACK
ADVANCED FEATURES
REFERENCES
TERMS
To deactivate the demonstration,
set "DEMO MODE" to "OFF".
(
pg. 22, 24)
LYT1682-001B
ENGLISH
7
16
22
34
40
Advertisement
Table of Contents

Related Manuals for JVC GR-D750AS


Summary of Contents for JVC GR-D750AS
- Page 1 3 – 4 to ensure safe use of this product. ENGLISH DIGITAL VIDEO CAMERA GETTING STARTED GR-D750AS RECORDING & PLAYBACK ADVANCED FEATURES REFERENCES TERMS To deactivate the demonstration, set “DEMO MODE” to “OFF”.
- Page 2 Major Features of this Camcorder Wipe/Fader Effects Backlight Compensation You can use the Wipe/Fader Effects to Simply pressing the button brightens the make pro-style scene transitions. image darkened by backlight. ( pg. 28) pg. 30) Fade in Data Battery You can check the battery status by simply pressing the DATA button.
- Page 3 ● Remember that this camcorder is not compatible with other digital video formats. ● It is recommended that you use JVC brand cassette tapes. Your camcorder is compatible with all brands of commercially available cassette tapes...
- Page 4 Contact your JVC dealer. Do not attempt to repair the malfunction yourself. must be followed strictly. ● To prevent shock, do not open the cabinet. No The apparatus shall not be exposed to dripping user serviceable parts inside.
- Page 5 ● When using a cleaner or chemically treated cloth refer to the cautions of each product. ● To clean the viewfinder, please consult your nearest JVC dealer. USE CLEANING CASSETTE Appears if dirt is detected on the heads during recording. Use an optional cleaning cassette...
-
Page 6: Table Of Contents
CONTENTS GETTING STARTED ADVANCED FEATURES Regarding This Manual .........7 MENUS FOR DETAILED ADJUSTMENT ....22 Provided Accessories ........7 Changing The Menu Settings...... 22 Index..............8 Recording Menus ........23 Grip Adjustment...........11 Playback Menus .......... 25 Power ............12 FEATURES FOR RECORDING ......26 Language Settings........13 Snapshot (Record Still Image On Tape) .. -
Page 7: Getting Started
GETTING STARTED Regarding This Manual Provided Accessories Control Lever LCD Monitor AC Adapter Power Cord Battery Pack AP-V14A BN-VF808U Audio/Video Cable Control lever (ø3.5 mini-plug to RCA plug) There are two kinds of operation using the control lever: moving the lever towards up/down/left/right, or pressing down the lever. -
Page 8: Index
GETTING STARTED Index " & How to open the LCD monitor Pull on the end A of the LCD monitor. NOTES: ● The image will not appear simultaneously on the LCD monitor and the viewfinder. When the viewfinder is pulled out while the LCD monitor is opened, you can select which one to use. - Page 9 GETTING STARTED Controls Indicators à 11 : Left/Rewind (1) ( pg. 19)/ POWER/CHARGE Lamp ( pg. 12) Quick Review [QUICK REVIEW] ( pg. 16) Other Parts â 2 : Right/Fast-Forward (¡) ( pg. 19) ä 3 : Up/Play/Pause (6) ( pg.
- Page 10 GETTING STARTED LCD Monitor/Viewfinder )Selected Wipe/Fader Effect Indicator pg. 30) Indications ~Wind Cut Indicator ( pg. 23) +Tape Running Indicator During Video Recording (Rotates while tape is running.) ,Date/Time ( pg. 24) " -Manual Focus Adjustment Indicator pg. 26) – – –min 10 x 16:9 .Time Code (...
-
Page 11: Grip Adjustment
GETTING STARTED How To Attach The Lens Cap Grip Adjustment To protect the lens, attach Open the pad and make grip adjustments. the provided lens cap to the ● Before making the adjustment, remove any camcorder as shown in the security tags that may be attached to the illustration. -
Page 12: Power
GETTING STARTED Power NOTES: ● If the protective cap is attached to the battery Charging The Battery Pack pack, remove it first. ● During charging, the camcorder cannot be operated. POWER/CHARGE Lamp ● Charging is not possible if the wrong type of Battery pack battery is used. -
Page 13: Language Settings
Using The Battery Pack tried to press DATA several times, there may be a problem with your battery. In such a Perform steps 2 – 3 in “Charging The Battery case, consult your nearest JVC dealer. Pack” ( pg. 12). Using AC Power Maximum continuous recording time Perform step 4 –... -
Page 14: Date/Time Settings
GETTING STARTED Date/Time Settings Brightness Adjustment Of The Display Select CLOCK ADJ. YEAR. MONTH. DATE 24h Select 2007 14 : 10 The date/time is recorded onto the tape at all times, but its display can be turned on or off. pg. -
Page 15: Loading/Unloading A Cassette
GETTING STARTED Loading/Unloading A Cassette • Appears if a tape is loaded while the Power The camcorder needs to be powered up to Switch is set to “REC”. load or eject a cassette. • Blinks when no tape is loaded. TAPE! PUSH Appears if a tape is not loaded when the... -
Page 16: Recording & Playback
VIDEO RECORDING Tape Remaining Time Basic Recording Approximate tape NOTE: remaining time appears on the display. “– – – min” Before continuing, perform the procedures listed below: means the camcorder is ● Power ( pg. 12) calculating the remaining ● Loading A Cassette ( pg. -
Page 17: Zooming
VIDEO RECORDING Zooming Interface Shooting While recording The person you shoot can view himself/ Zoom out Zoom in herself in the LCD monitor, and you can even shoot yourself while viewing your W: Wide angle T: Telephoto own image in the ●... -
Page 18: Time Code
VIDEO RECORDING Time Code Recording From The Middle Of A Tape During recording, a time code is recorded on 1) Play back a tape or use Blank Search the tape. This code is to confirm the location of pg. 20) to find the spot at which you want the recorded scene on the tape during to start recording, then engage the Still playback. -
Page 19: Video Playback
VIDEO PLAYBACK NOTES: Normal Playback ● The playback picture can be viewed in the LCD monitor, viewfinder or on a connected TV. VOL. +/– pg. 21) Lock Button ● BLANK If Stop mode continues for 5 minutes when power is supplied from a battery, the camcorder ¡... -
Page 20: Variable Shuttle Search
VIDEO PLAYBACK Variable Shuttle Search Blank Search Allows variable-speed search in either Helps you find where you should start direction during video playback. recording in the middle of a tape to avoid time 1) During playback, press ¡ once or twice for code interruption. -
Page 21: Connections To A Tv Or Vcr
The S-Video cable is optional. Be sure to use the when the camcorder is turned on. YTU94146A S-Video cable. Consult the JVC Service Centre described on the sheet included in the package for details on its availability. Make sure to connect the end with a core filter to the... -
Page 22: Advanced Features
MENUS FOR DETAILED ADJUSTMENT Changing The Menu Settings Select the desired function, press SET or The selected function menu appears. This camcorder is equipped with an easy-to- Example: FUNCTION menu. use, on-screen menu system that simplifies Current Setting many of the more detailed camcorder settings. pg. -
Page 23: Recording Menus
MENUS FOR DETAILED ADJUSTMENT In the following pages, [ ] refers to Factory TELE MACRO preset settings. [OFF]: Disables the function. ON: When the distance to the subject is less Recording Menus than 1 m (3.3 ft), set “TELE MACRO” to “ON”. You can shoot a subject as large as possible at a distance of approx. - Page 24 MENUS FOR DETAILED ADJUSTMENT BRIGHT pg. 14, “Brightness Adjustment Of The REC MODE Display” [SP]*: To record in the SP (Standard Play) SYSTEM mode The “SYSTEM” functions which are set when LP: Long Play—more economical, providing the Power Switch is set to “REC” are also 1.5 times the recording time.
-
Page 25: Playback Menus
MENUS FOR DETAILED ADJUSTMENT DISPLAY CAM RESET [CANCEL]: Does not reset all settings to the Each setting (except “OFF” in “ON SCREEN”, factory-preset. “DATE/TIME” and “TIME CODE”) is linked with EXECUTE: Resets all settings to the factory- “DISPLAY”, which appears when the Power preset. -
Page 26: Features For Recording
FEATURES FOR RECORDING Snapshot (Record Still Image On Manual Focus Tape) The camcorder’s Full Range AF system offers continuous shooting ability from close-up (as This feature lets you record still images that close as approx. 5 cm to the subject) to infinity. look like photographs onto a tape. -
Page 27: Exposure Control
FEATURES FOR RECORDING Exposure Control Iris Lock Manual exposure control is recommended in Like the pupil of the human eye, the iris the following situations: contracts in well-lit environments to keep too ● When shooting using reverse lighting or when much light from entering, and dilates in dim the background is too bright. -
Page 28: Backlight Compensation
FEATURES FOR RECORDING Backlight Compensation Spot Exposure Control Backlight compensation brightens the subject Selection of a spot metering area enables quickly. more precise exposure compensation. With simple operation, backlight compensation Set the Power Switch to “REC”. feature brightens the dark subject portion by increasing the exposure. -
Page 29: White Balance Adjustment
FEATURES FOR RECORDING White Balance Adjustment Manual White Balance Adjustment The white balance refers to the correctness of colour reproduction under various lighting. If Adjust the white the white balance is correct, all other colours balance manually will be accurately reproduced. when shooting under The white balance is usually adjusted various types of... -
Page 30: Wipe Or Fader Effects
FEATURES FOR RECORDING PROGRAM AE Wipe Or Fader Effects OFF: Disables the function. (Factory-preset) These effects let you make pro-style scene SPORTS transitions. Use them to spice up the transition (Variable Shutter Speed: 1/250 – 1/4000): from one scene to the next. This setting allows fast-moving images to be Wipe or Fader works when video recording is captured one frame at a time, for vivid, stable... -
Page 31: Editing
FEATURES FOR RECORDING EDITING EFFECT Dubbing To A VCR OFF: Disables the function. (Factory-preset) To use this camcorder as a player SEPIA : Recorded scenes have a brownish tint like old photos. Following the illustration, pg. 21, MONOTONE : Like classic black and white “Connections To A TV Or VCR”... -
Page 32: Dubbing To Or From A Video Unit Equipped With A Dv Connector (Digital Dubbing)
DV IN/OUT connector. ● When using a DV cable, be sure to use the optional JVC VC-VDV204U or VC-VDV206U DV cable. To use this camcorder as a recorder Make sure all units are turned off. -
Page 33: Connection To A Personal Computer
13) To DV IN/OUT ● When using a DV cable, be sure to use the optional JVC VC-VDV206U or VC-VDV204U DV cable depending on the type of DV connector (4 or 6 pins) on the PC. ● The date/time information cannot be captured Core filter... -
Page 34: References
VIDEO mode. the LCD monitor become dark. ➜Set the TV to the mode or channel appropriate ➜Consult your nearest JVC dealer. for video playback. ( pg. 21) ● The cassette holder cover is open. - Page 35 SET DATE/TIME! ● Appears when the date/time is not set. pg. 14). ● The built-in clock battery has run out and the previously set date/time has been erased. ➜Consult your nearest JVC dealer for replacement.
-
Page 36: Cautions
CAUTIONS Battery Packs NOTES: ● It is normal for the battery pack to be warm after The supplied battery pack is Terminals charging, or after use. a lithium-ion battery. Before Temperature Range Specifications using the supplied battery Charging: 10°C to 35°C pack or an optional battery Operation: 0°C to 40°C pack, be sure to read the... - Page 37 If, after using the cleaning cassette, the ... near a television set. problems still exist, consult your nearest JVC ... near appliances generating strong magnetic or dealer. electric fields (speakers, broadcasting Mechanical moving parts used to move the antennas, etc.).
- Page 38 1 hour until condensation disappears. Serious malfunctioning If malfunctioning occurs, stop using the unit immediately and consult your local JVC dealer. The camcorder is a microcomputer-controlled device. External noise and interference (from a TV, a radio, etc.) might prevent it from functioning properly.
-
Page 39: Specifications
SPECIFICATIONS Camcorder For Digital Video Camera Format For General DV format (SD mode) Signal format Power supply PAL standard DC 11 V (Using AC Adapter) Recording/Playback format DC 7.2 V (Using battery pack) Video: Digital component recording Power consumption Audio: PCM digital recording, 32 kHz 4-channel Approx. -
Page 40: Terms
TERMS AC Adapter ....13 Manual Focus ....26 Zooming ....17, 23 Auto/Manual Mode ..18 Melody ......24 Motor Drive Mode ..26 16:9 Output ..... 24, 25 Backlight Compensation ..28 Battery Pack ..12, 13, 36 Narration ....... 25 Blank Search ....20 Night Scope ....
Need help?
Do you have a question about the GR-D750AS and is the answer not in the manual?
Questions and answers