DoorBird D21 Series Installation Manual
Ip video door station
Hide thumbs
Also See for D21 Series:
- Installation manual (88 pages) ,
- Manual (4 pages) ,
- Quick start manual (2 pages)

Related Manuals for DoorBird D21 Series


Summary of Contents for DoorBird D21 Series
- Page 1 Installation Manual (Pages 2-27) IP VIDEO DOOR STATION D21x Series Installationsanleitung (Seite 28-55) IP VIDEO TÜRSTATION D21x Serie VERSION 1.1, MIN. HW 1.00...
- Page 2 You can always find the most up-to-date version of the installation manual on www.doorbird.com/support To make things easier we use the term “device” for the product “IP Video Door Station” and “mobile device” for a smartphone or tablet.
- Page 3 Notice: Indicates a situation which, if not avoided, could result NOTIC E in damage to property. Important: Indicates significant information which is essential for the product to function correctly. Note: Indicates useful information which helps in getting the most out of the product. Hazard information WARNING ∙...
- Page 4 WARNING ∙ For safety, approval and licensing reasons (CE/FCC/IC etc.), unauthorized change and/or modification of the device is not permitted. ∙ The device is not a toy; do not allow children to play with it. Do not leave packaging material lying around. Plastic films/bags, pieces of polystyrene, etc.
- Page 5 ∙ Do not put any metal or flammable material into the device. Fire, electric shock, or device trouble could result. ∙ Existing wiring such as chime wiring, etc. may contain high voltage AC electricity. Damage to the device or electric shock could result. Wiring and installation must be done by a qualified eletrician.
- Page 6 WARNING ∙ On devices with intercom, be sure to perform a call test with low audio volume on both intercom devices. A sudden call etc. may arrive causing for example damage to your ear. ∙ If the device does not operate properly, unplug the power supply. ∙...
- Page 7 ∙ Keep the device more than 1 m (3.3') away from microwave, radio, TV, wireless router and any other wireless devices. ∙ On devices with intercom or built-in speaker or built-in microphone or signal transmission functions, keep the wires more than 30 cm (12'') away from AC 100-240 V wiring.
- Page 8 When transporting the device, use the original packaging or NOTIC E equivalent to prevent damage to the device. Warranty Information For information about the device warranty, see www.doorbird.com/warranty COMPONENTS Package Contents ∙ 1x Main Electrical Unit ∙ 1x RFID key fob ∙...
- Page 9 Inside 1) Main Electrical Unit 2) Yellow cable for call button Connected to the illuminated call button with nameplate 3) Red cable for Module Port 1 (unused) 4) Green cable for Module Port 2 (unused) 5) Screw connection terminal 6) LAN/PoE jack 7) Nylon cord To secure the front panel during assembly...
- Page 10 6) Screw connection terminal 7) LAN/PoE jack 8) Nylon cord To secure the front panel during assembly 9) Velcro tape 2 To fix the Multi Tenant Module permanently on the front plate 10) DoorBird Multi Tenant Module MTM18A DoorBird Multi Tenant Module MTM18A...
- Page 11 DEVICE EXAMPLE WITH DISPLAY MODULE AND KEYPAD MODULE Front 1) Night Vision LEDs 7) RFID Reader 2) HDTV Video 8) Motion Sensor 3) Microphone 9) Display Module 4) Light Sensor 10) Keypad Module For night-vision mode The illumination is also acting as Diagnostic LED(s) 5) Security screws 6) Loudspeaker...
- Page 12 DEVICE EXAMPLE WITH INFO MODULE AND KEYPAD MODULE Front 1) Night Vision LEDs 7) RFID Reader 2) HDTV Video 8) Motion Sensor 3) Microphone 9) Info Module 4) Light Sensor 10) Keypad Module For night-vision mode The illumination is also acting as Diagnostic LED(s) 5) Security screws 6) Loudspeaker...
-
Page 13: Installation
Please ensure that the upload speed of your Internet connection is at least 0.5 Mbps. You can also carry out a speed test at any time via the DoorBird App. The user experience is only as good as your network speed, network stability and quality of your network components, such as your Internet Router and WiFi access points or WiFi repeaters. - Page 14 Should these requirements not be fulfilled, it may occur, for example that the performance of audio and video is poor or push notifications are delayed or do not arrive on your smartphone or tablet at all. High-speed Internet (via landline): DSL, cable or optical fibre Network: Ethernet, with DHCP STEP 1: SWITCHING OFF POWER Switch off the power to all wires leading to the assembly location, i.e.
-
Page 15: Step 4: Removing The Front Plate
Router can have a maximum length of 80 meters/262 feet (IEEE 802.3). If you have only two wires available at the assembly location, you may use of the “DoorBird 2-Wire Ethernet PoE Converter A1071”, sold separately. It allows you to transfer network data (Ethernet) and power (PoE) with a simple two-wire cable over long distances. -
Page 16: Step 6: Power Supply Options
To power the device via a PoE-Switch (e.g. D-Link DGS-1008P) or PoE-Injector (e.g. DoorBird Gigabit PoE Injector A1091) in accordance with the PoE standard IEEE 802.3af Mode A, the four wires bearing the numbers 1, 2, 3 and 6 of a Cat.5 cable or better are to be used. -
Page 17: Step 7: Connecting The Device
STEP 7: CONNECTING THE DEVICE It is possible to connect the cables and wires to the device conveniently and safely via labelled connection ports. You can connect all necessary cables and wires to the device now. Please remove any cables and wires from the connection ports of the device that you do not need. - Page 18 1 Ampere. Security feature: The relay keeps its state even in the case of loss of power. You can configure the REL1 default state of the relay (open/close) via the DoorBird REL1 App. These ports can be used to connect e.g. an electric door opener.
- Page 19 BELL, BELL We offer feature-rich IP door chimes (e.g. DoorBird A1061W), which can be securely connected via your network (LAN / WIFI / WAN) to this device. Alternatively BELL...
- Page 20 15 VDC - 15 V DC Power supply input, negative pole (-). Please connect the black wire of the power supply unit (mains adaptor) supplied with the device here, if you do not power the device using PoE. Do not power the device simultaneously via N OT I CE the power supply from the power supply unit (mains adaptor) and the power supply...
-
Page 21: Step 9: Activating The Device
STEP 8: ASSEMLBING THE FRONT PLATE Assemble the front plate of the device to the mounting housing (backbox) of the device. 1.) Pull the front panel 2.) Push the front 3.) Insert the into the mounting panel up. security screws. housing (backbox) STEP 9: ACTIVATING THE DEVICE Switch on the power leading to the assembly location again. -
Page 22: Step 10: Downloading And Installing The App
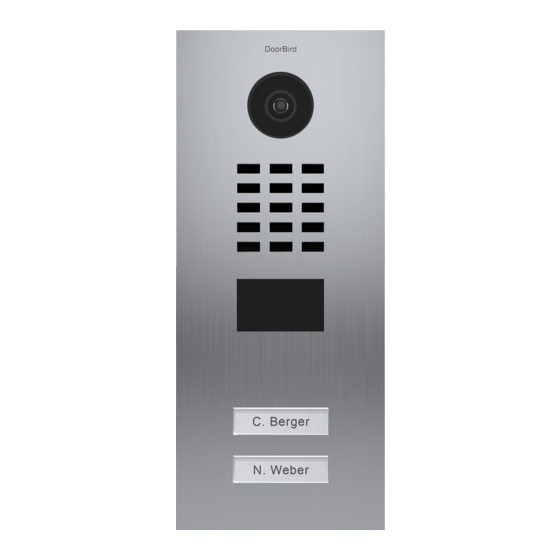
Apple App Store or Google Play Store. You can always find the most up-to-date version of the App manual on www.doorbird.com/support Go to DoorBird App “Settings > Add device” and click on the QR code icon in the “User” field. Scan the user QR code found on the “Digital Passport”... - Page 23 DOORBIRD CONNECT The device features many options to integrate it into third-party applications. For information, terms and conditions see www.doorbird.com/connect CHANGING THE LABEL OF A CALL BUTTON NAMEPLATE Applies only to devices with 1 and more illuminated call buttons with nameplate.
- Page 24 CONNECTING CALL BUTTONS TO THE MULTI TENANT MODULE Applies only to devices with 2 and more illuminated call buttons with nameplate. Connect only call buttons to the Multi Tenant Module (e.g. Multi Tenant Module MTM18A) certified by Bird Home Automation. = 1.
-
Page 25: Technical Specifications
Keypad Module*: 1 x Installation manual 16 keys, illuminated, configurable via app, e.g. Warranty: • Individual PIN codes see www.doorbird.com/warranty • Individual events (e.g. switch a relay, push notification, SIP call [audio/ CURRENT SYSTEM REQUIREMENTS video], HTTP(s) notification) • Individual schedules... - Page 26 RJ45 jack, PoE 802.3af Mode-A Antenna: MOTION SENSOR Internal Type: Compatible Transponder: Active Sold separately, see www.doorbird.com/buy Detection angle: 110° Configuration: Via app, e.g. Range: • Tag (add, delete) 1 – 10 m (3.3 – 32.9 ft), depends on • Individual events (e.g. switch a relay,...
-
Page 27: Legal Notes
LEGAL NOTES General remarks If the device is a door-, indoor station or camera: 1. DoorBird is a registered trademark of Bird Home Automation GmbH. · In many countries video and voice signal may only be transmitted once a visitor has rung the 2.
Need help?
Do you have a question about the D21 Series and is the answer not in the manual?
Questions and answers