
Related Manuals for JVC JY-HM90


Summary of Contents for JVC JY-HM90
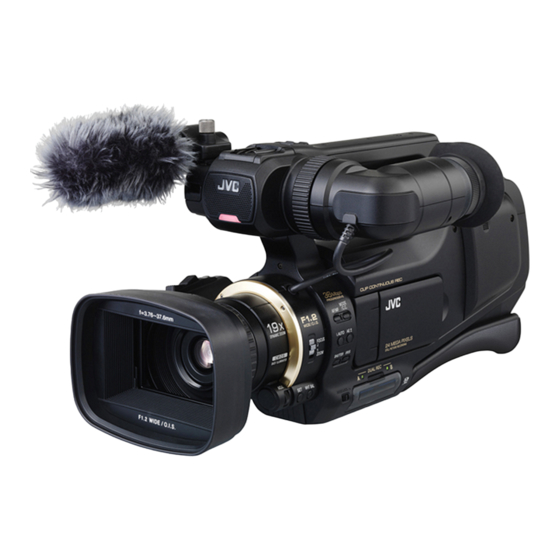
- Page 1 HD MEMORY CARD CAMERA RECORDER Detailed User Guide JY-HM90 * This illustration shows the JY-HM90 with an optional microphone. DUG_C4M_AG_EN...
-
Page 2: Table Of Contents
PLAYBACK OTHER FILE ..........54 Table of Contents Playing Back Still Images ............55 Slideshow Playback ............56 Searching for a Specific Video/Still Image by Date ....57 Getting Started Connecting to and Viewing on TV .......... 58 Verifying the Accessories ............4 Connecting via the HDMI Connector ........ - Page 3 SETUP (video/still image) ............ 120 CONNECTION SETTINGS (video/still image) ..... 122 MEDIA SETTINGS (video/still image) ........123 USB CONNECTION MENU ..........124 Names of Parts ............125 Indications on the LCD monitor ....... 127 Troubleshooting When the unit is not working properly ........130 Battery Pack ................
-
Page 4: Getting Started
Getting Started Verifying the Accessories If any of the items are missing or defective, consult your JVC dealer or the nearest JVC service center. Illustration Description AC Adapter UIA324-1220 Connects to this unit to charge the battery pack. It can also be used when recording or playing back videos indoors. -
Page 5: Charging The Battery Pack
Caution : Be sure to use JVC battery packs. Charge the battery pack immediately after purchase and when the remaining If you use any other battery packs besides JVC battery packs, safety and battery power is low. performance cannot be guaranteed. -
Page 6: Inserting An Sd Card
Getting Started Inserting an SD Card Warning Insert a commercially available SD card before recording. Make sure not to insert the card in the wrong direction. This unit comes with two SD card slots. When two SD cards are inserted and It may cause damage to the unit and card. -
Page 7: Types Of Usable Sd Card
Getting Started Types of Usable SD Card When your computer cannot recognize the SDXC card The following SD cards can be used on this unit. Confirm and update the OS of your computer. Operations are confirmed on the SD cards from the following manufacturers. Windows Panasonic Make sure that the operating system version is SP1 or higher. -
Page 8: Using The Touch Screen
Getting Started Using the Touch Screen Tap “TOUCH SCREEN ADJUST”. SETUP Icon operation buttons, thumbnails, and menu items are displayed on the touch screen according to the mode in use. There are two ways to operate the touch screen, namely “tap” and “drag”. The following are some examples. -
Page 9: Names Of Buttons And Functions On The Lcd Monitor
Getting Started Names of Buttons and Functions on the LCD Monitor Playback Screen (Still Image) The following screens are displayed during the video and still image modes, and operate as the touch screens. Recording Screen (Video/Still Image) MENU ≪CAM A/B (Video/Still Image) Mode Button Switches between video (50i/50p) and still image modes. - Page 10 Getting Started Menu Screen (Recording Mode) Menu Screen (Playback Mode) TOP MENU TOP MENU SILENT INFO. SILENT RECORD SETTING Menu PLAYBACK SETTING Menu “RECORD SETTING Menu (video)” (A p. 109) “PLAYBACK SETTING Menu (video)” (A p. 118) “PLAYBACK SETTING Menu (still image)” (A p. 119) Shortcut Menu CONNECTION SETTINGS Menu “Operating the Shortcut Menu”...
-
Page 11: Turning On/Off The Power
Getting Started “CAM/MEDIA” operation mode and lamp status Turning On/Off the Power Use the “CAM/MEDIA” operation mode selection switch to switch to a different mode. The “CAM” lamp and “MEDIA” lamp change as below. Turning On the Power Mode “CAM” lamp “MEDIA”... -
Page 12: Clock Setting
Getting Started Memo : Clock Setting The clock can be reset again later. “SET DATE/TIME!” appears when you turn on this unit for the first time after “Resetting the Clock” (A p. 12) purchase. When using this unit overseas, you can set it to the local time for recording. Set the clock before recording. -
Page 13: Changing The Display Language
Getting Started Changing the Display Language Set the date and time. CLOCK SETTING The language on the display can be changed. DATE TIME Tap “MENU”. 2016 When the year, month, day, hour, or minute item is tapped, “∧” and “∨” will be displayed. MENU ≪MEDIA Tap ∧... -
Page 14: Viewing The Viewfinder/Lcd Monitor
Getting Started Viewing the Viewfinder/LCD Monitor Adjusting the Grip Belt You can monitor video images on this camera recorder using the viewfinder or LCD monitor. Viewing with the viewfinder Adjust the viewfinder to an easy-to-see position. Loosen the fastening ring, and adjust the position in the horizontal direction. -
Page 15: Preparing The Remote Control
Getting Started Preparing the Remote Control Attaching the External Microphone The functions of the camera recorder can be configured using a wired remote You can attach a microphone (optional) to the microphone holder. control. Knob Microphone Connect a wired remote control to the camera recorder. Connect the wired remote control (sold separately) to the “REMOTE”... -
Page 16: Adjusting The Shoulder Pad Position
Getting Started Adjusting the Shoulder Pad Position Setting the Clock to Local Time when Traveling Change the date and time display to the local time by selecting your travel Loosen the 2 fixing crews on the shoulder strap completely. Adjust the destination in “AREA SETTING”... -
Page 17: Setting Daylight Saving Time
Getting Started Setting Daylight Saving Time Optional Accessories When “ON” is selected in “DST SETTING” of “CLOCK ADJUST”, the time is You can record for a longer time by using the optional battery pack. set 1 hour ahead. Tap “MENU”. Product Name Description Battery Pack... -
Page 18: Recording
Recording Selecting Recording Mode Selecting Focus Mode There are two ways to adjust the focus, namely Auto and Manual. Setting to the Auto Focus mode Selecting Intelligent Auto/Manual Recording Mode Press the AF/MF button to display the auto focus icon (AF). There are two recording modes, namely Intelligent Auto and Manual. -
Page 19: Selecting Video/Still Image Recording Mode
Recording Selecting Video/Still Image Recording Mode There are two recording modes, namely Video recording and Still Image recording. Selecting Video Recording Mode This unit enters into the video recording mode when the power is turned on. If the unit is in the still image recording mode, press the “MODE” button to switch to video recording mode. -
Page 20: Taking Videos In Auto Mode
Recording Taking Videos in Auto Mode Start recording. You can record without worrying about the setting details by using the Intelligent Auto mode. Settings such as brightness will be adjusted automatically to suit the shooting conditions. Before recording an important scene, it is recommended to conduct a trial recording. - Page 21 Recording Indications During Video Recording Operation Buttons for Video Recording 3 4 5 6 10:10 MENU ≪MEDIA 0:00:00 [2:04] MENU ≪MEDIA Operation Description Buttons Display Icon Description Video/Still Image Switches between video (50i/50p) and still A VIDEO QUALITY Displays the icon of the “VIDEO QUALITY” Mode image modes.
- Page 22 - Once deleted, recorded contents (data), including data loss due to malfunctions in this unit, cannot be restored. Please be forewarned. - JVC will not be responsible for any lost data. Please be forewarned. - In order for quality improvement, defective recording medium is subject to be analyzed.
-
Page 23: Capturing Still Images During Video Recording
Recording Capturing Still Images During Video Recording Still images can be captured by pressing the SNAPSHOT button while in the video mode (standby or recording). “PHOTO” lights up on the screen when a still image is being captured. The still images captured during video recording are saved to the destination set in “REC STILLS TO SLOTS”. -
Page 24: Taking Still Images In Auto Mode
Recording Taking Still Images in Auto Mode Set the focus on the subject. You can record without worrying about the setting details by using the Intelligent Auto mode. Open the lens cover. Press halfway When focused, the focus icon lights up in green. Lens cover switch Take a still image. - Page 25 Recording Indications During Still Image Recording Operation Buttons for Still Image Recording 1 2 3 10:10 1/125 F1.8 [6630] MENU ≪MEDIA MENU ≪MEDIA Display Icon Description Operation Description Buttons A IMAGE SIZE Displays the icon of the image size. Video/Still Image Switches between video (50i/50p) and still The size of still images can be changed.
-
Page 26: Zooming
Recording Using the Silent Mode Zooming When the Silent mode is used, the LCD monitor darkens and operation The angle of view can be adjusted using zoom. sounds will not be output. Use this mode to record quietly in dark places such as during a performance. -
Page 27: Adjusting Focus Manually
Recording Adjusting Focus Manually Adjusting Focus by Using Focus Assist Focused subject is outlined in color for more precise focus. Turn the focus ring to adjust the focus manually. Tap “MENU”. Set the focusing mode to “MF”. MENU ≪MEDIA The top menu appears. Tap “RECORD SETTING”. -
Page 28: Displaying Zebra Pattern
Recording Displaying Zebra Pattern Tap “70-80%” or “OVER100%”. During video recording, diagonal lines (zebra pattern) are displayed only at ZEBRA areas with the specified luminance levels. Zebra Pattern 70-80% OVER100% Display Setting Deactivates the function. 70-80% Sections that are close to be over-exposed are Tap “MENU”. -
Page 29: Adjusting Brightness Manually
Recording Adjusting Brightness Manually Setting Backlight Compensation Generally, the brightness of the subject that is being shot is automatically You can correct the image when the subject appears too dark due to adjusted according to the reference values of the camera. However, the backlight. -
Page 30: Adjusting Shutter Speed
Recording Adjusting Shutter Speed Adjusting Aperture The shutter speed can be set to a value according to the user’s preference. The aperture value (F-number) of the lens can be set as follows. When this is set to Auto, the shutter speed is automatically controlled. F-number Details Select the Manual recording mode. -
Page 31: Setting White Balance
Recording Setting White Balance Press the “SET” button. You can set the color tone to suit the light source. Select the Manual recording mode. Confirm the setting and exit the adjustment mode. Memo : When zooming to the Tele end, the aperture value is set according to the zoom and indicated in yellow. -
Page 32: Shooting According To Scene (Subject)
Recording *The image is only an impression. Shooting According to Scene (Subject) Setting Effect Common scenes that are often encountered can be recorded with the most suitable settings. b NIGHTALIVE Increases gain and brightens the scene automatically using a slow shutter when the Select the Manual recording mode. -
Page 33: Taking Close-Up Shots
Recording Taking Close-up Shots Tap “ON”. You can take close-up shots of an object using the tele macro function. TELE MACRO After setting, the tele macro icon o appears. *The image is only an impression. Select the Manual recording mode. Setting Details Enables close-up shots up to 1 m at the telephoto (T) end. -
Page 34: Capturing Subjects Clearly (Touch Priority Ae/Af)
Recording Capturing Subjects Clearly (TOUCH PRIORITY Setting Details AE/AF) Deactivates the function. “TOUCH PRIORITY AE/AF” is a function that adjusts focus and brightness FACE e appears on the screen. Recording is performed while based on a tapped position. TRACKING tracking and automatically adjusting the tapped face This function is available for both videos and still images. -
Page 35: Capturing Smiles Automatically (Smile Shot)
Recording Capturing Smiles Automatically (SMILE SHOT) Point the camera toward the human subject. “SMILE SHOT” automatically captures a still image upon detection of a A still image is automatically captured when smiles are detected. smile. This function is available for both videos and still images. Set “TOUCH PRIORITY AE/AF”... -
Page 36: Setting Smile
Recording Setting SMILE% Tap the desired setting. “SMILE%” allows you to set the items to display when faces are detected. SMILE% This item is only displayed when “TOUCH PRIORITY AE/AF” is set to “FACE TRACKING”. This function is available for both videos and still images. “Capturing Subjects Clearly (TOUCH PRIORITY AE/AF)”... -
Page 37: Reducing Camera Shake
Recording Reducing Camera Shake Setting Details When the image stabilizer is set, camera shake during recording can be b OFF Deactivates image stabilizer. effectively reduced. Reduces camera shake under normal a EIS /OIS Tap “MENU”. shooting conditions. Reduces camera shake more effectively r AIS when shooting bright scenes on the wide (A video mode only) -
Page 38: Recording To Two Sd Cards Simultaneously (Dual Recording)
Recording Recording to Two SD Cards Simultaneously 10:10 (Dual Recording) The dual recording function allows recording to be performed to two SD cards simultaneously. When trouble occurs with one of the SD cards while recording is in progress, [0:34] 0:00:01 [0:34] you can continue recording with the other card. -
Page 39: Recording Into One File (Continuous Clip Recording)
Recording Recording into One File (Continuous Clip 10:10 Recording) When “CLIP CONTINUOUS REC” is set to “ON”, recording is made to a single file until it is closed, regardless of whether you have stopped or resumed recording during the process. [0:34] 0:00:01 [0:34]... -
Page 40: Slow-Motion (High-Speed) Recording
Recording Slow-motion (High-speed) Recording Tap “HIGH SPEED RECORDING”. You can record videos in slow-motion by increasing the recording speed to SPECIAL RECORDING emphasize the movements, and play back the slow-motion video smoothly. This is a handy function for checking movements, such as golf swings. Recording Speed 250 fps Image Size... -
Page 41: Recording At Intervals (Time-Lapse Recording)
Recording Recording at Intervals (TIME-LAPSE Start recording. RECORDING) Enables the changes of a scene that occur slowly over a long period to be shown within a short time by taking frames of it at a certain interval. This is useful for making observations such as the opening of a flower bud. Check that the unit is in the video mode. - Page 42 Recording Time-Lapse Setting The greater the number of seconds, the longer the recording interval. Setting Details Deactivates the function. 1SEC INTERVAL Takes a frame at 1-second intervals. Recorded videos will be played back at 25 times speed. 2SEC INTERVAL Takes a frame at 2-second intervals. Recorded videos will be played back at 50 times speed.
-
Page 43: Recording Automatically By Sensing Movements (Auto Rec)
Recording Recording Automatically by Sensing Recording starts automatically when the subject within the red frame moves. Movements (AUTO REC) This function enables the unit to record automatically by sensing the changes in subject’s movement (brightness) within the red frame displayed on the LCD monitor. -
Page 44: Taking Group Shots (Self-Timer)
Recording Taking Group Shots (Self-timer) Tap “SELF-TIMER”. The 10-second self-timer and Face Detection self-timer are convenient RECORD SETTING functions for taking group photos. The 2-second self-timer is useful for preventing camera shake caused by pressing the shutter button. Memo : When shooting a photo using the self-timer function, use of a tripod is recommended. - Page 45 Recording Using the Face Detection Self-timer After making sure that everyone is facing the camera, press the SNAPSHOT button. Pressing the SNAPSHOT button starts face detection, and shooting is performed three seconds after another person enters the frame. This function is useful when you want to include the photographer in the group photo.
-
Page 46: Checking The Remaining Recording Time
Recording Checking the Remaining Recording Time You can check the remaining recording time on the SD card as well as the remaining battery power. Tap “MENU”. MENU ≪MEDIA The top menu appears. Tap “INFO.”. TOP MENU SILENT INFO. If in the still image mode, go directly to step 4. Display the remaining recording time. - Page 47 Recording Approximate Video Recording Time Quality SDHC/SDXC card Quality 4 GB 8 GB 16 GB 32 GB 48 GB 64 GB 128 GB 15 m 35 m 1 h 10 m 2 h 30 m 3 h 50 m 10 h 10 m 20 m 40 m 1 h 20 m...
-
Page 48: Playback
Playback Playing Back Videos Operation Buttons for Video Playback The followings are the types of playback that can be performed by this unit. During Index Screen Display Normal Playback Plays back the recorded videos. DIGEST You can play back a digest of the recorded videos PLAYBACK (Digest Playback). - Page 49 Playback Memo : During Video Playback Tap or drag on the operation area of the touch screen. Operations buttons on the touch screen disappear if the unit is not operated for about 5 seconds. Tap on the screen to display the operation buttons again.
-
Page 50: Normal Playback
Please be forewarned. Tap on the file to start playback. - JVC will not be responsible for any lost data. Please be forewarned. - In order for quality improvement, defective recording medium is subject to be analyzed. -
Page 51: Checking The Recording Date And Other Information
Playback Checking the Recording Date and Other Information Tap “INFO.”. You can display the recording date and duration of the selected file. TOP MENU Check that the unit is in the video mode. INFO. SILENT Tap L to exit the menu. You can display the recording date and duration of the selected file. -
Page 52: Digest Playback
Playback DIGEST PLAYBACK Tap to select a date for Digest Playback. You can play back a digest of the AVCHD-format videos you have recorded SELECT DATE (Digest Playback). This is useful for checking the content of videos quickly. * This feature is not available for movies recorded in the MOV format. Check that the unit is in the video mode. -
Page 53: Playback Playlist
Playback PLAYBACK PLAYLIST Tap to select a playlist. Play back the playlists that you have created. PLAYBACK PLAYLIST * This feature is not available for movies recorded in the MOV format. Check that the unit is in the video mode. 02 2013.10 .10 PM01:00 CHECK Playback of the playlist starts. -
Page 54: Playback Other File
Playback PLAYBACK OTHER FILE Tap on the file to start playback. The management information of a video may be damaged if recording is not performed correctly, such as turning off the power in the middle of recording. You can perform the following operations to play back the videos with defective management information. -
Page 55: Playing Back Still Images
Playback Playing Back Still Images Operation Buttons for Still Image Playback You can select and play back the recorded still images from an index screen During Index Screen Display (thumbnail display). Check that the unit is in the still image mode. ≪CAM Display Description... -
Page 56: Slideshow Playback
Playback During Still Image Playback Slideshow Playback Still images can be played back in a slideshow. Tap I during still image playback to start the slideshow. MENU ≪CAM MENU ≪CAM Display Description “Operation Buttons for Still Image Playback” (A p. 55) Memo : A Video/Still Image Switches between video (50i/50p) and still... -
Page 57: Searching For A Specific Video/Still Image By Date
Playback Searching for a Specific Video/Still Image by Tap on the file to start playback. Date SEARCH DATE When there is a large number of recorded videos and still images, it is difficult to look for the desired file from the index screen. Use the search function to find the file you want. -
Page 58: Connecting To And Viewing On Tv
Playback Connecting to and Viewing on TV Connecting via the HDMI Connector If you are using an HDTV, you can play back in HD quality by connecting to You can connect this unit to a TV for playback. The image quality on TV the HDMI connector. - Page 59 Playback Operating in Conjunction with TV via HDMI Play back a file. Connecting this unit to an HDMI-CEC-enabled TV using the HDMI cable allows linked operations with the TV to be performed. HDMI-CEC (Consumer Electronics Control) is an industry standard that enables interoperability between HDMI-CEC compliant devices that are connected via HDMI cables.
-
Page 60: Connecting Via The Av Connector
Playback Connecting via the AV Connector Play back a file. To playback videos on TV, connect the provided AV cable to the AV connector of this unit. Refer also to the instruction manual of the TV in use. Connect to a TV. ≪CAM “Playing Back Videos”... -
Page 61: Playing Back A Dvd Or Blu-Ray Disc Created On This Unit
Playback Playing Back a DVD or Blu-ray Disc Created on this Unit BD/DVDs created using the backup function on this unit can be played back on TV using an optional DVD writer (DVDs only) with playback function (CU- VD50U) or a normal BD/DVD player. DVDs can also be played back on this unit by connecting the optional DVD writer with playback function. -
Page 62: Editing
Editing Deleting Unwanted Files Deleting Selected Files Deletes the selected files. Delete unwanted videos and still images when the space in the recording Caution : media is running out. Deleted files cannot be restored. Doing so frees up more space in the recording media. “Deleting the Currently Displayed File”... -
Page 63: Protecting Files
Editing Protecting Files Protecting/Releasing Protection of Selected Files Protects or releases protection of the selected files. Prevent important videos/still images from being deleted accidently by Select video or still image mode. protecting them. “Protecting/Releasing Protection of the Currently Displayed File” Tap <<MEDIA to select the playback mode. -
Page 64: Capturing A Still Image In The Video During Playback
Editing Capturing a Still Image in the Video during Tap “SET” to complete the setting. Playback PROTECT/CANCEL You can capture still images of the scenes you like in the recorded videos. Check that the unit is in the video mode. SEL ALL REL ALL Protect marks I appear on the selected files. -
Page 65: Capturing A Required Part In The Video (Trimming)
Editing Capturing a Required Part in the Video Tap the video to edit. (TRIMMING) TRIMMING Select the required part of a video and save it as a new video file. The original video remains in its existing location. Check that the unit is in the video mode. QUIT Tap e to pause playback at the desired start point, then tap “A”. -
Page 66: Creating Playlists From The Recorded Videos
Editing Creating Playlists from the Recorded Videos Tap “EDIT”. A list created by selecting your favorite videos from the recorded ones TOP MENU (AVCHD format) is called a playlist. By creating a playlist, you can play back only your favorite videos in the order you like. -
Page 67: Creating Playlists By Date
Editing Creating Playlists by Date Tap “ADD” to insert the video onto the lower section. Create a playlist by arranging multiple files according to recording date. 0/999 Check that the unit is in the video mode. 1920 1920 1920 1920 1920 1920 1920... - Page 68 Editing Tap “NEW LIST”. After arranging, tap “SAVE”. EDIT PLAYLIST 0/999 FROM DATE NEW LIST EDIT TOTAL DVD 01 DVD(DL)1 00h00m DELETE SAVE Tap “CREATE BY DATE”. Tap “YES”. EDIT PLAYLIST QUIT PLAYLIST. CREATE FROM SCENE SAVE EDITED CONTENTS? CREATE BY DATE Memo : Tap on the video of the date to add to playlist.
-
Page 69: Editing Playlists
Editing Editing Playlists Tap “EDIT”. You can change the content of a created playlist. EDIT PLAYLIST However, the playlists created from Digest Playback cannot be changed. NEW LIST Check that the unit is in the video mode. EDIT DELETE Tap on the playlist to edit, and tap “NEXT”. EDIT PLAYLIST Check if video mode A is activated. - Page 70 Editing After arranging, tap “SAVE”. 0/999 EDIT 1920 1920 1920 1920 1920 1920 1920 1920 1920 TOTAL DVD 01 DVD(DL)1 00h00m 1920 1920 1920 SAVE Tap “YES”. QUIT PLAYLIST. SAVE EDITED CONTENTS? Memo : Tap L on each screen to exit the menu.
-
Page 71: Deleting Playlists
Editing Deleting Playlists Tap “DELETE”. Delete the playlists that you have created. EDIT PLAYLIST Check that the unit is in the video mode. NEW LIST EDIT DELETE Tap on the playlist to delete, and tap “NEXT”. DELETE DELETE ALL Check if video mode A is activated. If still image mode (B) is activated, switch to video mode (A). -
Page 72: Copying
Memo : When connecting this unit to the BD writer (external Blu ray drive), use an *The JVC external Blu-ray drive is known as “BD writer”. Mini-A (male) - B (male) USB conversion cable. Please note that the You can save recorded movies (AVCHD format) to discs or play back supplied USB cable cannot be used for this purpose. -
Page 73: Creating A Disc
Copying Creating a Disc Set the “STANDBY/ON OFF” switch to “ON”. Creating a Disc Prepare a BD writer (external Blu-ray drive). Insert a new disc into the BD writer (external Blu-ray drive). “Preparing a BD Writer (External Blu-ray Drive)” (A p. 72) Copy files to the disc with the following methods. - Page 74 Copying Caution : Tap the desired method. Do not turn off the power or remove the USB cable until copying is CREATE FROM ALL complete. Files that are not on the index screen during playback cannot be copied. ALL SCENES Special files cannot be copied either.
- Page 75 Copying Copying Files by Date Tap to select a recording date. Videos or still images are sorted and copied according to the date on which CREATE BY DATE they were recorded. Select video or still image mode. Tap “SELECT AND CREATE” (video) or “SELECT AND SAVE” (still image).
- Page 76 Copying Copying Selected Playlists Tap “OK” when “COMPLETED” is displayed. Arrange and copy the created playlists in the order you like. CREATE BY DATE Select video mode. COMPLETED Tap “SELECT AND CREATE”. VIDEO BACKUP CREATE FROM ALL SELECT AND CREATE Turn off this unit and disconnect the USB cable.
- Page 77 Copying Tap on the playlist to copy to disc. Tap “OK”. If step 10 is not displayed, go to step 11. 0/999 CREATE BY PLAYLIST CREATE BY PLAYLIST 1920 1920 1920 1920 1920 1920 1920 1920 1920 THE DISC TOP MENU HEADLINE TOTAL WILL DISPLAY EITHER THE PLAYLIST OR THE DATE...
- Page 78 Copying Copying Selected Files Caution : Do not turn off the power or remove the USB cable until copying is Select and copy the desired videos or still images individually. complete. Select video or still image mode. Files that are not on the index screen during playback cannot be copied. Special files cannot be copied either.
- Page 79 Copying Tap on the videos or still images to copy. Tap “OK” when “COMPLETED” is displayed. SELECT FROM SCENES SELECT FROM SCENES COMPLETED CHECK QUIT P appears on the selected files. Turn off this unit and disconnect the USB cable. To remove P from a file, tap on the file again.
-
Page 80: Playing Back With A Bd Writer (External Blu-Ray Drive)
The production for CU-VD3 and CU-VD50 DVD writer has ended. For Insert the Blu-ray disc to play back into the BD writer (external Blu- details on the stock availability, consult your nearest JVC dealer. ray drive). Tap “PLAYBACK” in the BACK-UP menu. -
Page 81: Preparing A Dvd Writer (Cu-Vd3)
The production for CU-VD50 DVD writer has ended. For details on the Memo : stock availability, consult your nearest JVC dealer. The production for CU-VD3 DVD writer has ended. For details on the stock availability, consult your nearest JVC dealer. -
Page 82: Creating A Disc
Copying Creating a Disc Tap “EXECUTE”. Prepare a DVD writer. ALL SCENES Insert a new disc into the DVD writer. REQUIRED DISC SPACE DVD:2 / DVD(DL):1 “Preparing a DVD Writer (CU-VD3)” (A p. 81) PREPARE AN EMPTY DISC “Preparing a DVD Writer (CU-VD50)” (A p. 81) Copy files to the disc with the following methods. - Page 83 Copying Copying Files by Date Tap “EXECUTE”. Videos or still images are sorted and copied according to the date on which CREATE BY DATE they were recorded. REQUIRED DISC SPACE Select video or still image mode. DVD:2 / DVD(DL):1 PREPARE AN EMPTY DISC Tap “SELECT AND CREATE”...
- Page 84 Copying Copying Selected Playlists Tap “ADD” to insert a playlist. Arrange and copy the created playlists in the order you like. 0/999 Select video mode. Tap “SELECT AND CREATE”. 1920 1920 1920 1920 1920 1920 1920 1920 1920 TOTAL VIDEO BACKUP 00h00m CREATE FROM ALL QUIT...
- Page 85 Copying Copying Selected Files Tap “EXECUTE”. Select and copy the desired videos or still images individually. CREATE BY PLAYLIST Select video or still image mode. REMAINING DVD 02 Tap “SELECT AND CREATE” (video) or “SELECT AND SAVE” (still DVD(DL)1 image). VIDEO BACKUP EXECUTE STOP...
-
Page 86: Playing Back With A Dvd Writer
Copying Playing Back with a DVD Writer Tap “EXECUTE”. You can play back the DVDs created on this unit. SELECT FROM SCENES Connect this unit to the DVD writer and TV. REQUIRED DISC SPACE (If this unit is not connected to a TV, images can be played back on the DVD:2 / DVD(DL):1 LCD monitor of this unit.) PREPARE AN EMPTY DISC... -
Page 87: Creating A Disc Using A Connected Blu-Ray Recorder
Copying Creating a Disc Using a Connected Blu-ray Tap the desired media. Recorder CONNECT TO OTHER SELECT MEDIA TO OPEN You can create discs using a Blu-ray recorder by connecting it to this unit using a USB cable. * * This feature is not available for videos recorded in the MOV format. Memo : SLOT A SLOT B... -
Page 88: Dubbing Files To A Disc By Connecting To A Dvd Recorder
Copying Memo : Dubbing Files to a Disc by Connecting to a When there are many videos to dub, you can create a playlist in advance DVD Recorder and play it back so that all your favorite videos can be dubbed at once. “Creating Playlists with Selected Files”... -
Page 89: Dubbing Files To A Vhs Tape By Connecting To A Vcr
Copying Memo : Dubbing Files to a VHS Tape by Connecting When there are many videos to dub, you can create a playlist in advance to a VCR and play it back so that all your favorite videos can be dubbed at once. “Creating Playlists with Selected Files”... -
Page 90: Using A Usb External Hard Disk Drive
Copying Using a USB External Hard Disk Drive Preparing a USB External Hard Disk Drive Memo : You can copy video (AVCHD format) and still image files to a USB external When connecting to the external hard disk drive, use a USB cable with hard disk drive from this unit. -
Page 91: Copying All Files
Copying Set the “STANDBY/ON OFF” switch to “ON”. Tap the desired method. BACK UP ALL SCENES UNSAVED SCENES “ALL SCENES” (video)/“ALL IMAGES” (still image): When this unit is turned on, the “BACK-UP” menu appears. All videos or still images in this unit are copied. While the USB cable is connected, the “BACK-UP”... - Page 92 Copying Folder Structure on an External Hard Disk Drive Folders and files are created in the external hard disk drive as shown below. They are created only when necessary. [J VC C AM _S] [ BACKUP ] [ XXXXXX01 ] [ DCIM ] [ 100JVCSO ] P I C _ 0 0 0 1 .
-
Page 93: Playing Back Files In The Usb External Hard Disk Drive
Copying Playing Back Files in the USB External Hard Disk Drive Deleting Folders in the USB External Hard Disk Drive Videos or still images saved in an external hard disk drive can be played Files that are copied to the external hard disk drive can be deleted. back on this unit. -
Page 94: Formatting The Usb External Hard Disk Drive
Copying Formatting the USB External Hard Disk Drive Importing Files from the USB External Hard Disk Drive All files on the external hard disk drive can be deleted. You can copy video files from a USB external hard disk drive to the SD card. Caution : Select video mode. - Page 95 Copying Tap “YES”. COPY ALL COPY QUANTITY:30 START COPY? Importing starts when “YES” is tapped. To cancel importing of files, tap “STOP”, then tap “YES”. After importing, tap “OK”. COPY ALL COPYING COMPLETED Turn off this unit and disconnect the USB cable. Memo : Files that are saved to the USB external hard disk drive from other devices cannot be copied to this unit.
-
Page 96: Copying Files To Another Sd Card
Copying Copying Files to Another SD Card Tap on the files to copy. Videos and still images can be copied from the SD card in slot A to slot B, QUANTITY:0030 and vice versa. Caution : Make sure that there is enough space left in the destination medium. Select video or still image mode. -
Page 97: Moving Files To Another Sd Card
Copying Moving Files to Another SD Card Tap on the files to move. Videos and still images can be moved from the SD card in slot A to slot B, QUANTITY:0030 and vice versa. Files that are moved will be deleted from the source SD card. Caution : Make sure that there is enough space left in the destination medium. -
Page 98: Copying To Windows Pc
To create DVD-Video discs, it is necessary to install the additional software. For details, refer to the Pixela homepage. http://www.pixela.co.jp/oem/jvc/mediabrowser/e/ Backing up of files using other softwares is not supported. The provided software does not support videos recorded in MOV format. - Page 99 Copying If a “Computer” icon is shown on desktop, right-click the icon and select “Properties” in the menu to display your computer information. Windows Vista/Windows 7 Click the start button. Right-click “Computer”. Click “Properties”. Check the items with the table below.
- Page 100 Copying Windows 8/Windows 8.1 Windows Vista/Windows 7 Windows 8 64-bit Windows Vista 32/64-bit Windows 8 or Windows 8 Pro Home Basic or Home Premium (Pre-installed versions, desktop mode only) (Pre-installed versions only) Service Pack 2 Windows8.1 64-bit Windows 7 32/64-bit Windows8.1 or Windows8.1 Pro Home Premium (Pre-installed versions, desktop mode only)
-
Page 101: Installing The Provided Software
Copying Installing the Provided Software Backing Up All Files You can display the recorded images in calendar format and perform simple Before making backup, make sure that enough free space is left in the editing using the provided software. computer's hard disk (HDD). Backup will not start if there is not enough free space. - Page 102 China (Chinese): 10800-163-0014 (toll-free) computer. The subsequent operations are to be performed on the computer. Homepage http://www.pixela.co.jp/oem/jvc/mediabrowser/e/ Select the source of the image file. Delete unwanted videos before making backup. It takes time to back up many videos. “Deleting Unwanted Files” (A p. 62)
-
Page 103: Organizing Files
USA and Canada (English): +1-800-458-4029 (toll-free) Click Europe (UK, Germany, France, and Spain) A new user list is added to the user list library. (English/German/French/Spanish): +800-1532-4865 (toll- free) Other Countries in Europe (English/German/French/Spanish): +44-1489-564-764 Asia (Philippines) (English): +63-2-438-0090 China (Chinese): 10800-163-0014 (toll-free) Homepage http://www.pixela.co.jp/oem/jvc/mediabrowser/e/... -
Page 104: Recording Videos To Discs
*To create DVD-Video discs, it is necessary to install the additional software. Drop For details, refer to the Pixela homepage. http://www.pixela.co.jp/oem/jvc/mediabrowser/e/ Click Use Everio MediaBrowser 4 Player to play back an AVCHD disc. Refer to the help file of the provided Everio MediaBrowser 4 software to operate. -
Page 105: Backing Up Files Without Using Provided Software
Copying Backing Up Files Without Using Provided Software Tap “PLAYBACK ON PC”. Copy the files to a computer using the following method. CONNECT TO PC Remove the AC adapter and battery pack from this unit. PLAYBACK ON PC Connect the USB cable and the AC adapter. Tap L to exit the menu. -
Page 106: List Of Files And Folders
Copying List of Files and Folders Folders and files are created in the SD card as shown below. They are created only when necessary. [ JVCCAM _ SD ] [ D CI M] [1 00 J V C S O] **_ 0 0 0 1 . -
Page 107: Copying To Mac Computer
Copying Copying to Mac Computer Tap “PLAYBACK ON PC”. CONNECT TO PC Copy the files to a Mac computer using the following method. PLAYBACK ON PC Remove the AC adapter and battery pack from this unit. Connect the USB cable and the AC adapter. Tap L to exit the menu. -
Page 108: Menu Settings
Menu Settings Operating the Menu Operating the Shortcut Menu There are two types of menus in this unit. TOP MENU: Menu that contains all the items specific to the video recording, still image recording, video playback, and still image playback You can configure various settings of the recommended functions in the modes respectively. -
Page 109: Record Setting Menu (Video)
Menu Settings RECORD SETTING Menu (video) SCENE SELECT Settings to suit the shooting condition can be selected. “Shooting According to Scene (Subject)” (A p. 32) *Displayed only in the manual recording mode. FOCUS ASSIST To adjust focus easily, the contour of focused parts are highlighted in color. “Adjusting Focus by Using Focus Assist”... - Page 110 Menu Settings VIDEO QUALITY Sets the video quality. Available when “VIDEO REC FORMAT” is set to “AVCHD”, and “SYSTEM SELECT” is set to “60i”. Setting Details Enables recording in the best picture quality. (1920 x 1080 pixels) Applies to Blu-ray discs only. Videos taken in high-definition quality cannot be saved to DVDs. Enables recording in high picture quality.
- Page 111 Menu Settings WIND CUT Reduces the noise caused by wind. “AUTO” cannot be selected when VIDEO REC FORMAT is set to MOV or when an external microphone is connected. Setting Details Deactivates the function. Activates the function. AUTO Activate the function automatically. GRID Displays grid lines to identify tilt of the subject.
- Page 112 Menu Settings CLIP CONTINUOUS REC When “CLIP CONTINUOUS REC” is set to “ON”, recording is made to a single file until it is closed, regardless of whether you have stopped or resumed recording during the process. When you edit the movies such as on a PC, you can save the hassle of having to combine different movie files. Available when “VIDEO REC FORMAT”...
- Page 113 Menu Settings MAIN ZOOM Sets the operation of MAIN ZOOM. Setting Details VARIABLE The MAIN ZOOM speed varies with the extent to which the main zoom lever is pressed. The MAIN ZOOM speed is the same as that of the sub-zoom. SUB ZOOM SPEED Sets the sub-zoom speed.
-
Page 114: Special Recording Menu (Video)
Menu Settings MIC LEVEL SETTING Sets the microphone level. Setting Details Increases the microphone input level. Increases the microphone input level slightly. The microphone input level is not changed. Decreases the microphone input level slightly. Decreases the microphone input level. K2 TECHNOLOGY Reduces the degradation of sound quality caused by digital signal processing, and records a sound quality close to the original. -
Page 115: Record Setting Menu (Still Image)
Menu Settings RECORD SETTING Menu (still image) SCENE SELECT Settings to suit the shooting condition can be selected. “Shooting According to Scene (Subject)” (A p. 32) *Displayed only in the manual recording mode. FOCUS ASSIST To adjust focus easily, the contour of focused parts are highlighted in color. “Adjusting Focus by Using Focus Assist”... - Page 116 Menu Settings GAIN Sets the ISO level according to the brightness of the subject. Setting Details AUTO Sets the gain automatically. ISO50 Sets to ISO50. ISO100 Sets to ISO100. ISO200 Sets to ISO200. ISO400 Sets to ISO400. ISO800 Sets to ISO800. ISO1600 Sets to ISO1600.
-
Page 117: Special Recording Menu (Still Image)
Menu Settings SMILE SHOT Automatically captures a still image upon detection of a smile. “Capturing Smiles Automatically (SMILE SHOT)” (A p. 35) SMILE% Displays the smile level of people in percentage. “Setting SMILE%” (A p. 36) IMAGE SIZE Sets the image size (number of pixels) for still images. Setting Details 1920X1080(2.1M) -
Page 118: Playback Setting Menu (Video)
Menu Settings PLAYBACK SETTING Menu (video) SEARCH DATE Narrows down the video index screen according to recording dates. “Searching for a Specific Video/Still Image by Date” (A p. 57) DISPLAY DATE/TIME Sets whether to display the recording date and time during video playback. Setting Details Does not display the date and time during playback. -
Page 119: Playback Setting Menu (Still Image)
Menu Settings PLAYBACK SETTING Menu (still image) SEARCH DATE Narrows down the still image index screen according to recording dates. “Searching for a Specific Video/Still Image by Date” (A p. 57) SLIDE SHOW EFFECTS Sets the transition effects in slideshow playback. Setting Details SLIDE... -
Page 120: Setup (Video/Still Image)
Menu Settings SETUP (video/still image) CLOCK ADJUST Resets the current time or sets to the local time when using this unit overseas. “Clock Setting” (A p. 12) “Setting the Clock to Local Time when Traveling” (A p. 16) “Setting Daylight Saving Time” (A p. 17) DATE DISPLAY STYLE Sets the order of year, month, day and the time display format (24H/12H). - Page 121 You can also check the current firmware version. When a window appears with the “Do you want to start update?” appears, select “No”. For details, refer to the JVC homepage. (When no program to update the software of this unit is available, nothing will be provided on the homepage.)
-
Page 122: Connection Settings (Video/Still Image)
Menu Settings CONNECTION SETTINGS (video/still image) DISPLAY ON TV Displays icons and date/time on a TV screen. Setting Details Does not display icons and date/time on TV. Displays icons and date/time on TV. VIDEO OUTPUT Sets the aspect ratio (16:9 or 4:3) according to the connecting TV. Setting Details Select this when connecting to a conventional TV (4:3). -
Page 123: Media Settings (Video/Still Image)
Menu Settings MEDIA SETTINGS (video/still image) REC VIDEO TO SLOTS Sets the recording/playback media of videos. Setting Details SLOT A Records videos to the SD card in slot A. SLOT B Records videos to the SD card in slot B. REC STILLS TO SLOTS Sets the recording/playback media of still images. -
Page 124: Usb Connection Menu
Menu Settings USB CONNECTION MENU Displayed when connecting the AC adapter after this unit is connected via USB. PLAYBACK ON PC Displays videos recorded by this unit by using the Everio MediaBrowser 4. “Installing the Provided Software” (A p. 101) Saves videos recorded by this unit on your computer without using the provided software. -
Page 125: Names Of Parts
Names of Parts Front 3 45 l m n * Microphone is optional. R “FOCUS/ZOOM” ring operation selection switch A Tally lamp “Selecting a Ring Operation Mode” (A p. 18) “TALLY LAMP” (A p. 121) S i.AUTO (Intelligent Auto) button B Built-in microphone “Selecting Intelligent Auto/Manual Recording Mode”... - Page 126 Names of Parts Rear REMOTE A “BATT. 1” charge indicating lamp N USB connector “Creating Discs with a BD Writer (External Blu-ray Drive)” (A p. 72) B “BATT. 2” charge indicating lamp “Creating Discs with a DVD Writer” (A p. 80) “Charging the Battery Pack”...
-
Page 127: Indications On The Lcd Monitor
Indications on the LCD monitor Common Recording Indications Video Recording 90ab 10:45 1/4000 1/4000 F3.4 F3.4 0:00:12:34 0:12:34[010:00] A TOUCH PRIORITY AE/AF A Video Mode “Capturing Subjects Clearly (TOUCH PRIORITY AE/AF)” (A p. 34) Switches between video (50i/50p) and still image modes. B BACKLIGHT COMP. - Page 128 Indications on the LCD monitor Still Image Recording Video Playback 10:00 00:01:23 00:12:34 1SEC [9999] ≪CAM A Video Mode Switches between video (50i/50p) and still image modes. A Still Image Mode B Video Quality Switches between video (50i/50p) and still image modes. “...
- Page 129 Indications on the LCD monitor Still Image Playback 100-0001 10:00 ≪CAM A Still Image Mode Switches between video (50i/50p) and still image modes. B Folder Number C File Number D Date/Time Displays the recording date and time. E Media “ REC STILLS TO SLOTS ” (A p. 123) F Battery Indicator “Checking the Remaining Recording Time”...
-
Page 130: Troubleshooting
“Selecting Intelligent Auto/Manual Recording Mode” (A p. 18) Start recording. DO YOU WANT THE SETTINGS RESET TO THE FACTORY PRESET? All settings return to their default values. Memo : If the above do not solve the problem, consult the JVC Customer Support Center. Press again to stop. -
Page 131: Battery Pack
Intelligent Auto mode. In this case, adjust the settings manually. or something similar. “Adjusting Focus Manually” (A p. 27) If you use any other battery packs besides JVC battery packs, safety and performance cannot be guaranteed. Be sure to use JVC battery packs. Recording stops automatically. -
Page 132: Card
Troubleshooting Card Playback Cannot insert the SD card. Sound or video is interrupted. Make sure not to insert the card in the wrong direction. Sometimes playback is interrupted at the connecting section between two “Inserting an SD Card” (A p. 6) scenes. -
Page 133: Editing/Copying
Troubleshooting Images do not appear on the TV properly. Editing/Copying Disconnect the cable and connect again. “Connecting via the HDMI Connector” (A p. 58) Unable to delete file. Turn off and on this unit again. Files (videos/still images) that are protected cannot be deleted. Release protection before deleting the file. -
Page 134: Computer
Troubleshooting Computer Screen/Image Unable to copy files to the computer’s HDD. The LCD monitor is difficult to see. If the provided software Everio MediaBrowser 4 is not installed, some The LCD monitor may be difficult to see if used in bright areas such as under functions may not work properly. -
Page 135: Other Problems
Please be forewarned. This unit heats up. - JVC will not be responsible for any lost data. Please be forewarned. This is not a malfunction. (This unit may become warm when used for a long - In order for quality improvement, defective recording medium is subject to time.) Stop using the unit if it gets too warm. -
Page 136: Error Message
Connect the AC adapter, charge the battery for more than 24 hours and set the clock. (If the message still appears, the clock battery is exhausted. THIS FILE IS PROTECTED Consult your nearest JVC dealer.) Switch off the “PROTECT/CANCEL” function in the “EDIT” menu. “Clock Setting” (A p. 12) “Protecting Files”... - Page 137 Troubleshooting PLAYLIST QUANTITY EXCEEDS LIMIT Reduce the number of the playlist to 99 files or less. (Up to 99 playlists can be created.) CANCELLED BECAUSE PLAYLIST AMOUNT EXCEEDED MAXIMUM LIMIT When creating a DVD, reduce the number of playlists to be saved. Reduce the number of videos to add to the playlist to 999 files.
-
Page 138: Maintenance
Maintenance Perform regular maintenance of this unit to enable it to be used for a long time. Caution : Be sure to detach the battery pack, AC adapter, and power plug before performing any maintenance. Camcorder Wipe this unit with a dry, soft cloth to remove any dirt. When it is extremely dirty, soak the cloth in a solution of neutral detergent, wipe the body with it, and then use a clean cloth to remove the detergent. -
Page 139: Specifications
Specifications Camera Item Details Filter diameter 46 mm (screw pitch: 0.75 mm) Item Details Lowest illumination 10 lux (GAIN UP: ON) Power supply Using AC adapter: DC 12 V 1 lux (GAIN UP: AUTO SLOW-SHUTTER) Using battery pack: DC 7.2 V 1 lux (SCENE SELECT: NIGHTALIVE) Power consumption 4.2 W (50i mode, MONITOR BRIGHTNESS: 3... - Page 140 Specifications Connectors Still Image Item Details Item Details HDMI output HDMI connector Recording format JPEG standard connector Extension .JPG AV output Video output: 1.0 V (p-p), 75 Ω Image Size “Approximate Number of Still Images (Unit: connector Audio output: 300 mV (rms), 1 KΩ Number of Shots)”...
- Page 141 Specifications Dimensional Outline Drawing (Unit: mm)
- Page 142 © 2016 JVC KENWOOD corporation 0216TOH-SW-MT...
Need help?
Do you have a question about the JY-HM90 and is the answer not in the manual?
Questions and answers
Menu tab not working jvc h90