Table of Contents
Advertisement
Quick Links
Instructions when using for the first time
1.
Preparing the camera for use
2.
Photograph, video and sound recordings
3.
Playing recordings on the camera
4.
Installing the driver
5.
Installing the applications
6.
Connecting the camera
7.
Playing recordings and transferring them to a PC
8.
Editing recordings on a PC
1
Introduction
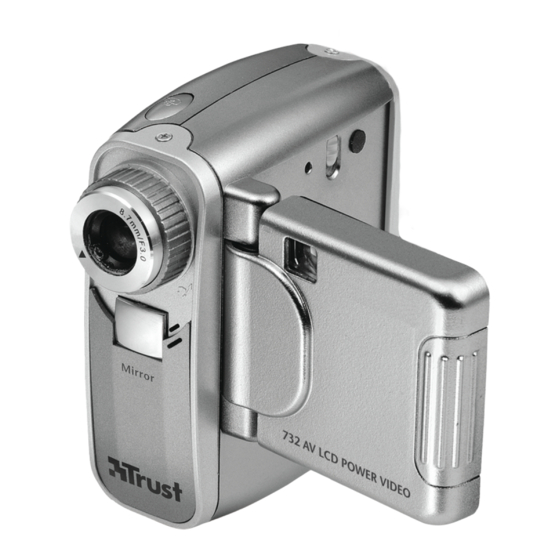
This instruction manual is for users of the TRUST 732AV LCD POWER VIDEO. This
camera can take photographs with a maximum resolution of 2048 x 1536 (3.3M
pixels) and record videos in a quality almost equivalent to VHS quality. The camera
has a webcam function, digital video recording, an automatic exposure function and
a lens with a macro setting for taking close-up pictures. The camera's memory can
be increased up to a maximum of 512 Mbyte using a CF memory card. This camera
needs a CF card to operate.
2
Safety
2.1
General information
Carefully read the following instructions before use.
•
The TRUST 732AV LCD POWER VIDEO does not require any special
maintenance. Use a slightly damp, soft cloth to clean the camera.
•
Do not use aggressive substances, such as white spirit, to clean the device.
These may harm the material.
•
Do not submerge the device in liquid. This may be dangerous and will
damage the device. Do not use this device near water.
•
Do not repair this device yourself.
•
Do not look through the viewfinder if it is aimed directly at the sun, because
this may damage your eyes.
•
Do not point the camera directly at the sun for a long period of time, because
this can damage the sensor.
2.2
Approvals
This product complies with the essential standards and other relevant guidelines of
the European CE rules. The declaration of conformity (DoC) is available trough
www.trust.com/13427/ce.
2.3
Batteries
•
The batteries supplied with the camera are not rechargeable. Do not try to
recharge them, The batteries may explode.
•
Never throw the batteries onto an open fire. The batteries may explode.
•
Never drill holes into the batteries.
•
Keep the batteries out of the reach of small children.
•
Only use AA alkaline or rechargeable AA NiMH batteries with this camera.
•
When the batteries are empty, ask your local authority where you can
dispose of them.
Note:
Do not use old and new batteries at the same time, because the old
batteries may leak and cause damage.
TRUST 732AV LCD POWER VIDEO
Chapter
(4.1 to 4.5)
(4.6)
!
(4.7)
(5.2)
(6)
(5.3)
(7.1)
(7.2 to 7.5)
1
U K
Advertisement
Table of Contents

Subscribe to Our Youtube Channel
Related Manuals for Trust 732AV


Summary of Contents for Trust 732AV
- Page 1 (7.2 to 7.5) Introduction This instruction manual is for users of the TRUST 732AV LCD POWER VIDEO. This camera can take photographs with a maximum resolution of 2048 x 1536 (3.3M pixels) and record videos in a quality almost equivalent to VHS quality. The camera has a webcam function, digital video recording, an automatic exposure function and a lens with a macro setting for taking close-up pictures.
-
Page 2: Description Of The Camera
TRUST 732AV LCD POWER VIDEO Note: The batteries should be removed if the camera is not going to be used for some time. This will save the battery capacity. Description of the camera Front of the camera Use table 1 in combination with figure 1. -
Page 3: Right-Hand Side
TRUST 732AV LCD POWER VIDEO Right-hand side Use table 3 in combination with figure 1. Item Description Function Fixing point for the wrist For securing the wrist strap to the camera. strap. Speaker For emitting sound from video and sound recordings. -
Page 4: Using The Camera
TRUST 732AV LCD POWER VIDEO Item Description Function Deletes the recordings on the CF card and prepares it for new recordings (rewrites the cards directory structure). Table 5b: settings menu Using the camera Attaching the wrist strap and the sticker A wrist strap is supplied with the camera. -
Page 5: Turning The Camera On And Off
Insert the two AA batteries into the camera as shown above the battery holder. Close the battery flap by sliding it closed. The TRUST 732AV LCD POWER VIDEO is now ready for use. Note: Only use non-rechargeable alkaline batteries or NiMH 1600 mA, or higher, rechargeable batteries. -
Page 6: Lcd Screen
4.6.3 Quality You can take photographs in a high and a low quality using the TRUST 732AV LCD POWER VIDEO. The resolution remains the same, but twice as many photographs can be saved in the memory by using a higher compression. However, a higher compression may cause distortion in the image. -
Page 7: Video Standard
4.6.4 Video standard The TRUST 732AV LCD POWER VIDEO has a video output. The default setting is for use in Europe (PAL). If you wish to connect the camera to a TV in the USA, set the output to NTSC. -
Page 8: Set Display Language
4.6.7 Set display language The TRUST 732AV LCD POWER VIDEO has the option to change the screen language. The default setting is English. Make the menu visible using the menu button. Select ‘Settings’ (item 5, figure 2) and press the menu button briefly. - Page 9 TRUST 732AV LCD POWER VIDEO Press the exposure button (1). The photograph will now be taken. The image on the LCD screen will disappear for a short period of time and the LED indicator (above the video button) will be lit.
- Page 10 TRUST 732AV LCD POWER VIDEO Press the video button (button 8, figure 1). The camera will now start recording. The LED above the video button will flash. The counter for the elapsed time will be visible on the LCD screen.
- Page 11 TRUST 732AV LCD POWER VIDEO CF memory Recording card time (hours) 16 MB 32 MB 64 MB 128 MB 256 MB 512 MB Table 10: Total time duration of audio recordings. Viewing and deleting recordings 4.8.1 Viewing Recordings are played via the PLAY menu. All the recordings (video, photo or sound) which can be viewed from this menu are displayed as icons.
-
Page 12: Installing The Software
TRUST 732AV LCD POWER VIDEO Select ‘Settings’ (item 5, figure 2) and press the menu button briefly. Scroll to the delete symbol (12, figure 2). Press the menu button for a short period. The camera will display a warning. Consider whether you wish to delete all the recordings. Select ‘No’ to cancel. -
Page 13: Connecting The Camera
Installer. The Trust Software Installer window will appear See figure 11. Select the language you wish to use for the installation. Click on ‘TRUST 732AV LCD POWER VIDEO‘ to start the installation of the camera. Follow the on-screen instructions. The installation of the driver and software for the TRUST 732AV LCD POWER VIDEO has now been completed. -
Page 14: Checking After The Installation
4.0. Photo Express 4.0 is an application that can be used to load and edit the photographs on your PC which you have taken using your TRUST 732AV LCD POWER VIDEO. This program requires 500 MB free hard disk space. Follow the instructions below to install Photo Express 4.0. -
Page 15: Videolive Mail
DVD-writer or CD-writer, this video film can be saved on a CD-ROM or a DVD. Follow the instructions given below to install the program. Start the Trust Software Installer (see chapter 5.2, points 1 – 3). Figure 11 will appear. -
Page 16: Item Description
Here, you can select recordings for editing. Resolution button For activating the enlargement function to 4 Mpixel. Table 11: Trust DV Power Video Manager used as a storage device. Use this table together with figure 9. 7.1.3 Saving 4 Mpixel photographs If you wish to save photographs with a resolution of 4 Mpix, follow the instructions given in chapter 7.1.2. - Page 17 It is recommended to first stop the image using button 7. Close Closes the program. Table 12: Trust DV Power Video Manager used in the live mode. Use this table together with figure 10. 7.1.5 Opening saved photographs or video clips If you wish to connect the camera (this is not necessary), select the ‘DV disk’...
-
Page 18: Ulead Photo Express
Alternative method for transferring recordings from the camera The TRUST 732AV LCD POWER VIDEO is visible in Windows as an extra removable disk when it is in the ‘Storage medium’ mode (see figure 7). Its use is as easy as moving a file. In contrast to other cameras, this camera, therefore, does not require a separate (TWAIN) driver. - Page 19 The main window will appear. The 'Set-up Internet Connection' window may also appear. Click on the 'Skip for now' button to close this window if it appears. The Trust camera will be visible as a ‘Removable disk’ in the list on the left-hand side of the window.
- Page 20 TRUST 732AV LCD POWER VIDEO Connect the camera to the computer using the USB cable. Select the ‘Live’ mode in the camera’s menu (see figure 8). Start the program by clicking on ‘Start -> Programs -> Cyberlink VideoLive Mail 4.0 -> VideoLive Mail’. Figure 14 will appear.
- Page 21 TRUST 732AV LCD POWER VIDEO automatically. Close Closes VideoLive Mail. Minimize Hides the window, although the program remains active. Help Starts the Help function. Gives information about how to use the program. Table 13: Meaning of the components included in the program...
- Page 22 TRUST 732AV LCD POWER VIDEO After the file has been converted, an extra clip will be visible with a CD icon above it. This is the whole film. The ‘Export’ window will now be visible. Play the entire file to check whether it is correct.
-
Page 23: Webcam & Internet
TRUST 732AV LCD POWER VIDEO The person may not wish to make a connection with you, because this person may be communicating with somebody else. If this is the case, select somebody else from the list. You can find other ‘ils servers’ on the Internet. An example is: http://www.netmeetinghq.com. -
Page 24: Troubleshooting
TRUST 732AV LCD POWER VIDEO Troubleshooting Method Read the solutions given below. Check for up-to-date FAQ’s, drivers and instruction manuals on the Internet (www.trust.com/13427) Problem Cause Possible solution Windows does The computer's USB Check the settings of your USB port does not work. - Page 25 TRUST 732AV LCD POWER VIDEO The drivers have not Install the drivers before connecting The camera is been installed the camera. marked with an correctly. exclamation mark The USB port does Test the USB port using a different ‘!’ in the Device not work correctly.
- Page 26 TRUST 732AV LCD POWER VIDEO A low resolution is Select the video format (320 x 200) The webcam used. (see chapter 7.1.4). image is not The subject being Select the macro setting (see clear. filmed is very close by. chapter 4.6.5).
- Page 27 TRUST 732AV LCD POWER VIDEO A live recording An old version of DirectX 8.0 is included on the Trust DirectX is installed. CD-ROM. This is installed gives a displaced automatically when the drivers are image and the installed. Reinstall the drivers.
- Page 28 TRUST 732AV LCD POWER VIDEO Improve the lighting or select a The video There is insufficient different location. light. recordings contain a lot of noise (snow). Move closer. The sound is very The distance to the low. sound source is too great.
- Page 29 TRUST 732AV LCD POWER VIDEO Connect the cables correctly: yellow The TV The cables have not is for the image signal and white is been connected connection does for the sound signal. correctly. not work. Turn the camera on. The camera is turned off.
- Page 30 Make sure the camera’s drivers are installed. If you still have problems after trying these solutions, please contact one of the Trust Customer Care Centers. You can find more information at the back of this instruction manual. Please have the following information available: •...
-
Page 31: Warranty Conditions
TRUST 732AV LCD POWER VIDEO Warranty conditions • Our products have a two-year manufacturer's warranty which is effective from the date of purchase. • If there is a fault, return the product to your dealer and include an explanation of the fault, the proof of purchase and all the accessories.
Need help?
Do you have a question about the 732AV and is the answer not in the manual?
Questions and answers