SATO Argox OS-200 User Manual
Hide thumbs
Also See for Argox OS-200:
- Quick installation manual (2 pages) ,
- Quick start manual (4 pages) ,
- Quick installation manual (2 pages)

Related Manuals for SATO Argox OS-200


Summary of Contents for SATO Argox OS-200
- Page 1 OS-214EX / OS-200 Printer User Manual http://www.argox.com Version: 1.4 service@argox.com Date: May 8, 2020...
- Page 2 OS-214EX / OS-200 User Manual Revision History Changes to the user manual are listed below: Version Date Description Page (Y/M/D) 2018/10/23 Initial release 2019/12/11 Added a paragraph of warning messages to the Caution section 2019/12/25 Added a back view of the model with USB ONLY 2020/02/03 Added the OS-200 model name...
- Page 3 OS-214EX / OS-200 User Manual FCC ID In a domestic environment this product may cause radio interference in which case the user may be required to take adequate measures. FCC Warning This equipment has been tested and found to comply with the limits for a Class A digital device, pursuant to Part 15 of the FCC Rules.
- Page 4 OS-214EX / OS-200 User Manual Liability Disclaimer ARGOX Corporation takes steps to assure that the company’s published engineering specifications and manuals are correct; however, errors do occur. ARGOX reserves the right to correct any such errors and disclaims any resulting liability. In no event shall ARGOX or anyone else involved in the creation, production, or delivery of the accompanying product (including hardware and software) be liable for any damages whatsoever (including, without limitation, damages for loss of business profits, business...
-
Page 5: Table Of Contents
OS-214EX / OS-200 User Manual Contents 1 Introduction ........................ 1 1.1 Features ......................1 1.2 Unpacking ......................2 1.3 Understand your printer .................. 3 1.3.1 Front view ..................... 3 1.3.2 Back view ....................3 1.3.3 Interior view I ..................4 1.3.4 Interior view II .................. - Page 6 OS-214EX / OS-200 User Manual 5 Troubleshooting ......................46 5.1 LED Diagnosis ....................46 5.2 Printer issues ....................49 5.3 Media issues ....................49 5.4 Ribbon Problems .................... 51 5.5 Other issues ....................52 6 Specifications ......................53 6.1 Printer ......................53 6.2 Media ......................
-
Page 7: Introduction
OS-214EX / OS-200 User Manual 1 Introduction Thank you for purchasing the ARGOX OS-214EX / OS-200 printer. This manual provides information about how to set up and operate your printer, load the media and solve common problems. 1.1 Features Various Connectivity Options USB Device, USB Host, RS-232 and Ethernet ... -
Page 8: Unpacking
OS-214EX / OS-200 User Manual 1.2 Unpacking Make sure all of the following items are included in your package. OS-214EX / OS-200 Quick Installation Guide Label Printer Power Supply AC Power Cord USB Cable Media Hanger / Core for Ribbon Core Media Shields (0.5 inch) When you receive the printer, open the package immediately and inspect for... -
Page 9: Understand Your Printer
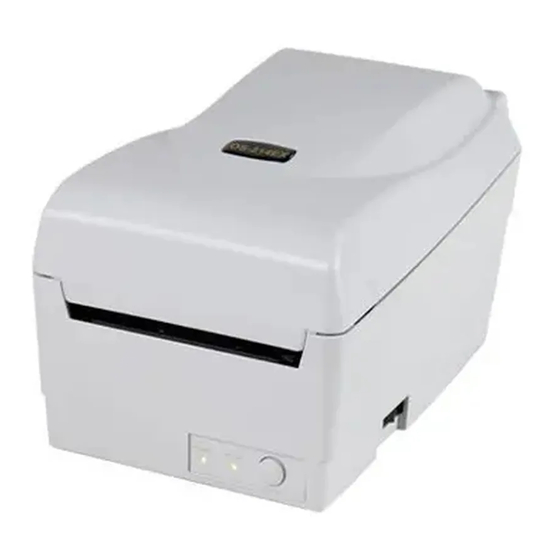
OS-214EX / OS-200 User Manual 1.3 Understand your printer 1.3.1 Front view Top Cover Power LED Indicator Power Switch Ready LED Indicator Feed Button 1.3.2 Back view For OS-214EX with USB (Host/Client), Ethernet, and RS-232 USB (Client) USB (Host) Power Jack RS-232... -
Page 10: Interior View I
OS-214EX / OS-200 User Manual For OS-200 with USB (Client) only Power Jack USB (Client) Caution To avoid injury, be careful not to trap your fingers in the Paper Slot while opening or closing the Top Cover. 1.3.3 Interior view I Ribbon Pick-up Holder Media Hanger Release Lever... -
Page 11: Interior View Ii
OS-214EX / OS-200 User Manual 1.3.4 Interior view II Ribbon Supply Holder Thermal Print Head Platen Roller Power Switch Warning The thermal print head becomes very hot during printing. Do not touch the print head or touch around it directly after printing. By doing so you may get burnt. -
Page 12: Controls And Indicators
OS-214EX / OS-200 User Manual Controls and Indicators The following table explains control and indicator functions. Control / Function Indicator On: turns on normal operation Off: turns off power Power Switch Note: Turn power off before connecting or disconnecting cables Green light shows the power-on ... -
Page 13: Get Started
OS-214EX / OS-200 User Manual 2 Get started 2.1 Loading ribbon Note: This section does not apply to direct thermal printing. 1. Lift the top cover to expose the media compartment. 2. Unlatch the print head module by pushing the two white release levers on the sides toward the rear. - Page 14 OS-214EX / OS-200 User Manual 3. Turn over the print head module to expose the ribbon supply holder. Ribbon Supply Holder 4. Unwrap the ribbon roll pack and separate the ribbon roll and the bare core. 5. Attach the edge of the ribbon on the bare core and wind it a little bit onto the core.
- Page 15 OS-214EX / OS-200 User Manual 7. Turn back the print head module and then insert the bare core into the pick-up holder. (First snap in the left side, and then the right side.) Ribbon Pick-up Holder Bare Core 8. Turn the wheel of the print head module to ensure the ribbon is tightly wound.
- Page 16 OS-214EX / OS-200 User Manual 9. Press down the print head module firmly until you hear a snap. In order to confirm the complete and rigid fixing, please visually check whether the black tenon is fully inserted into the white print head module switch, that is, the white print head module switch should be fixed onto the black tenon.
-
Page 17: Load Media
OS-214EX / OS-200 User Manual 2.2 Load media There are various types and sizes for the media roll. Load the applicable media to satisfy your need. 2.2.1 Prepare media The inside wound and outside wound media roll can be loaded into the printer the same way. - Page 18 OS-214EX / OS-200 User Manual 2. Remove the media hanger. Media Compartment Media Hanger 3. Insert the hanger into the hollow portion of cylinder of the media roll from right to left. Media Hanger Media Roll 4. Click the media hanger back into the media compartment. Media Compartment...
- Page 19 OS-214EX / OS-200 User Manual 5. Align the media roll to the left end. Media Roll 6. Move the shield from right to left until it leans against the media. Shield 7. Unlatch the print head module. 8. Hold the print head module upright with one hand to allow the media to pass under it.
- Page 20 OS-214EX / OS-200 User Manual 1. Press down the print head module firmly until you hear a snap. In order to confirm the complete and rigid fixing, please visually check whether the black tenon is fully inserted into the white print head module switch, that is, the white print head module switch should be fixed onto the black tenon.
-
Page 21: Attach The Power Cord
OS-214EX / OS-200 User Manual 2.3 Attach the power cord This chapter describes how to set up your printer. Caution Do not use your printer in areas exposed to splashing water or any other liquid. Caution Do not drop your printer, or place it in an area subject to humidity, vibration or shock. -
Page 22: Turn On/Off Your Printer
OS-214EX / OS-200 User Manual 2.4 Turn on/off your printer When your printer is connected to a host (a computer), it is good to turn on the printer before turning on the host, and turn off the host before turning off the printer. -
Page 23: Turn Off Your Printer
OS-214EX / OS-200 User Manual 2.4.2 Turn off your printer 1. Make sure LED 2 is off and LED 1 is solid green before turning off the printer. 2. To turn off your printer, turn off the Power Switch as below. The “O” is the OFF position. -
Page 24: Test Media Feed
OS-214EX / OS-200 User Manual 2.4.3 Test media feed 1. Power on the printer, and press the FEED button to feed a label. Feed Button 2. Flip the media and tear it along the edge of the top cover. -
Page 25: Media Types
OS-214EX / OS-200 User Manual 2.5 Media types Your printer supports various media types, including non-continuous media, continuous media, and fanfold media. The following table provides details about them. Media Type Looks Like Description Non-Continuous Non-continuous media is the typical media for Media bar code printing. -
Page 26: Media Sensing
OS-214EX / OS-200 User Manual Media Type Looks Like Description Fanfold Media Fanfold media is in continuous form, but it can be used as non-continuous media, because its labels are separated by folds. Some fanfold media also has black marks or liners. 2.6 Media sensing OS-214EX / OS-200 printers offer one type of media sensor: reflective. - Page 27 OS-214EX / OS-200 User Manual Multi Columns Notch Black Mark Flip the media so the black-mark side is facing down to align with the sensor.
-
Page 28: Printer Operation
OS-214EX / OS-200 User Manual 3 Printer operation This chapter provides information about printer operation. 3.1 Printing Media Calibration & Configuration You will want the printer to work properly before starting your print jobs. To do this, you need to calibrate the media sensor. Printers provide reflective sensor calibration. - Page 29 OS-214EX / OS-200 User Manual...
- Page 30 OS-214EX / OS-200 User Manual OS-214EX-V01.00 20181219 PPLA The firmware version and its build date Standard RAM Display SDRAM size Available RAM RAM is able to be used Flash Type The flash memory type and size Available Flash Flash is able to be used No of DL soft fonts (FLASH) The number of fonts is downloaded in Flash No of DL soft fonts (RAM)
- Page 31 OS-214EX / OS-200 User Manual Lab Len (Top to Top) For non-continues media, it is the length between the tops of two labels. Speed Printing speed unit is inch per second (ips). Darkness Display the current darkness. Thermal Transfer Print method. It is thermal transfer printing. Print Length Display total print length.
- Page 32 OS-214EX / OS-200 User Manual Backfeed Enabled/Disabled Enable or disable backfeed during the printing process. When it is enabled, the printer moves the paper forward in a predefined length 1 second after printing, and pulls the paper back in a predefined length once the printing begins again.
- Page 33 OS-214EX / OS-200 User Manual SNMP When it is enabled, the host gets or sets parameters registered as SNMP entities. Socket Communication When it is enabled, the host communicates with the printer via the socket. Socket Port Display printer port number. IPv6 Mode It determines how you get the IPv6 address of your printer.
- Page 34 OS-214EX / OS-200 User Manual rso(0)<0.01mm> See-through sensor offset. This is for developers to debug. Font Image You can use them as the reference to check your label font. TPH Test Pattern You can use them to check broken pins on the printhead.
-
Page 35: Restore Your Printer
OS-214EX / OS-200 User Manual 3.2 Restore your printer By resetting your printer, you can return your printer to the state it was in when you receive it. This can help you solve some problems caused by settings changed during the printing. Do the following to reset your printer: 1. - Page 36 OS-214EX / OS-200 User Manual USB Interface Requirements The Universal Serial Bus (USB) interface is compatible with your existing PC hardware. The USB’s “plug and play” design makes installation easy. Multiple printers can share a single USB port/hub. The different usage of type A and B as below. USB type A USB Flash drive, USB keyboard or USB Scanner.
-
Page 37: Driver Installation
OS-214EX / OS-200 User Manual 3.4 Driver installation The bundled printer driver can be applied to all applications under Windows Vista / Windows 7 / Windows 8 / Windows 10, supporting 32-bit/ 64-bit operation systems. With this driver you can operate any popular Windows software applications including Argox Bartender UL label editing software or MS Word, etc., to print to this printer. - Page 38 OS-214EX / OS-200 User Manual 3. Run the driver from Argox website. On the prompt, Windows Printer Driver, select “I accept…” and click "Next". 4. Assign the directory to keep Seagull driver and click "Next".
- Page 39 OS-214EX / OS-200 User Manual 5. Click "Finish". 6. Click “Yes” to allow this app to make changes to your device.
- Page 40 OS-214EX / OS-200 User Manual 7. Select Install printer drivers and Click "Next". 8. On the Seagull Driver Wizard prompt, select the first radio button to “Install a driver for a Plug and Play printer” Then click “Next.”...
- Page 41 OS-214EX / OS-200 User Manual 9. This driver is being installed. Wait while your system is uploaded. 10. After driver installation is complete, click "Close". The driver should now be installed.
-
Page 42: Installing A Printer Driver (For Other Interfaces Except Usb)
OS-214EX / OS-200 User Manual 3.4.2 Installing a Printer Driver (for other interfaces except USB) 1. Turn off the printer. Plug the power cable into the power socket on the wall, and then connect the other end of the cable to printer's power socket. Connect the Parallel cable, Serial cable, or Ethernet cable to the proper port on the printer and on your computer. - Page 43 OS-214EX / OS-200 User Manual 3. Assign the directory to keep Seagull driver and click "Next". 4. Click "Finish".
- Page 44 OS-214EX / OS-200 User Manual 5. Click “Yes” to allow this app to make changes to your device. 6. Select “Install printer drivers” and Click "Next"...
- Page 45 OS-214EX / OS-200 User Manual 7. Make sure printer is connected to PC, select “Other” and click “Next”: 8. Select model & emulation - the following examples are based on model OS-214EX PPLB, and click “Next”.
- Page 46 OS-214EX / OS-200 User Manual 9. Select the port of the printer and click ““Next”. 10. Enter Printer name (i.e. Argox OS-214EX PPLB) and select "do not share this printer”, and click "Next".
- Page 47 OS-214EX / OS-200 User Manual 11. Check all the data on the showing screen, if it is correct, click "Finish”. 12. After the related files have been copied to your system, click "Finish".
- Page 48 OS-214EX / OS-200 User Manual After driver installation is complete, click "Close". The driver should now be installed.
-
Page 49: Maintenance
OS-214EX / OS-200 User Manual 4 Maintenance This chapter describes routine cleaning procedure. 4.1 Cleaning To maintain print quality and prolong the printer’s life, you need to perform some routine maintenance. Daily maintenance should be done for high volume printing, and weekly for low volume printing. Caution Always turn off the printer before cleaning. -
Page 50: Media Housing
OS-214EX / OS-200 User Manual Cleaning steps: 1. Moisten a soft cloth or a cotton swab with ethyl alcohol. 2. Gently wipe the printhead in one direction. That is, wipe it only from left to right or vice versa. Do not wipe back-and-forth, in case dust or dirt attaches to the printhead again. -
Page 51: Sensor
OS-214EX / OS-200 User Manual 4.1.3 Sensor Media sensors may not be able to detect the media correctly if it becomes dirty. 1. Moisten a soft cloth or a cotton swab with absolute ethyl alcohol. 2. Gently brush sensors to remove the dust away. 3. -
Page 52: Troubleshooting
OS-214EX / OS-200 User Manual 5 Troubleshooting This chapter provides the information about printer problems and solutions. Normally, when the printer is in not working properly, the "Power" LED blinks continuously; while printing and communication between the host and printer stops. 5.1 LED Diagnosis Power and Ready LEDs blinking continuously indicates printer errors. - Page 53 OS-214EX / OS-200 User Manual LED Indicators: Power and Ready LEDs blink alternately Power LED Ready LED Possible Problems Solutions Remarks Ribbon out Supply the ribbon roll Not applicable to direct thermal Ribbon jam Recover the jam type. Ribbon sensor error Replace ribbon sensor LED Indicators: Only the Power LED blinks Power LED Ready LED...
- Page 54 OS-214EX / OS-200 User Manual LED Indicators: Only the Power LED blinks Power LED Ready LED Possible Problems Solutions Remarks Cutter failed, or jam Check the cutter Occurs only when at cutter installing or setting the Recover the jam cutter Hardware error Call for service LED Indicators: Only the Ready LED blinks...
-
Page 55: Printer Issues
OS-214EX / OS-200 User Manual 5.2 Printer issues The printer is not turned on Did you attach the AC power cord? Make sure the power supply’s connector is inserted into the printer power jack. Check the power connection from the wall socket to the printer. Test the power cord and the socket with other electrical devices. - Page 56 OS-214EX / OS-200 User Manual The printing position is not correct Did you use the correct media type for printing? The media is not loaded correctly. See the “Loading Media” section to reload the media. The media sensor needs to be calibrated. See the “Media Sensor Calibration” section to calibrate the sensor.
-
Page 57: Ribbon Problems
OS-214EX / OS-200 User Manual 5.4 Ribbon Problems The ribbon is out Load a new ribbon roll. The ribbon is broken Check the print darkness and adjust it if it is too high, and take the following steps to fix the broken ribbon: Unload the ribbon supply roll and take-up roll from the printer. -
Page 58: Other Issues
OS-214EX / OS-200 User Manual 5.5 Other issues There are broken lines in the printed label The ribbon is wrinkled. Adjust or reload the ribbon. Or, print a few labels until the wrinkled part goes away. The printhead is dirty. Clean the printhead. An error occurred when writing data to the USB memory ... -
Page 59: Specifications
OS-214EX / OS-200 User Manual 6 Specifications This chapter provides specifications for the printer. Specifications are subject to change without notice. Argox reserves the right to enhance and modify the specification without prior notice. Please check Argox sales representative for most updated specifications. -
Page 60: Media
OS-214EX / OS-200 User Manual Standard Memory (Flash ROM): 16 MB On-Board Memory Standard Memory (SDRAM): 32 MB External Memory USB: Max 16 GB 2 LED, 1 Button (Feed) Panel LED: Power (Green) LED: Ready (Green) Software -- Windows Driver (Vista/Win 7/ Win 8/ Win 10), BarTender®... -
Page 61: Fonts, Barcodes, And Graphics Specification
OS-214EX User Manual 6.3 Fonts, Barcodes, and Graphics Specification The specifications of fonts, bar codes and graphics depends on the printer emulation. The emulations PPLA, PPLB, and PPLZ are printer programming languages, through which the host can communicate with your printer. Printer Programming Language PPLA Programming Language PPLA... - Page 62 OS-214EX User Manual Printer Programming Language PPLB Programming Language PPLB Internal fonts 5 fonts with different point size 8 bits code page : 437, 850, 852, 860, 863, 865, 857, 861, 862, 855, 866, 737, 851, 869, 1252, 1250, Symbol sets 1251, 1253, 1254, 1255 (Code pages) 7 bits code page: USA, BRITISH, GERMAN, FRENCH, DANISH,...
- Page 63 OS-214EX User Manual Printer Programming Language PPLZ Programming Language PPLZ 8 (A~H) fonts with different point size. 8 AGFA fonts: 7 (P~V) fonts with fixed different point size Internal fonts (not scalable). 1 (0) font with scaling point size. Code39, UPC-A, UPC-E, Postnet, Code128 subset A/B/C, Interleave 2 of 5 Interleaved 2 of 5 with check sum, Symbol sets Interleaved 2 of 5 with human readable check digit Code...
-
Page 64: Electrical And Operating Environment
OS-214EX User Manual Ethernet Properties Description Port RJ-45 Speed 10Base-T/100Base-T (Auto Detecting) Protocol ARP, IP, ICMP, UDP, TCP, HTTP, DHCP, Socket, LPR, IPv4, SNMPv2 Mode TCP Server/Client, UDP Client Technology HP Auto-MDIX, Auto-Negotiation 6.4 Electrical and operating environment Properties Range Power Supply Universal Switching Power Supply Input: 100V~240V±10%, 1.8A, 50~60Hz,... -
Page 65: Interfaces
OS-214EX User Manual 6.6 Interfaces This section provides information about IO port specifications for the printer. 6.6.1 USB There are two common USB connectors. Typically, type A is found on hosts and hubs; type B is found on devices and hubs. The figure below shows their pinouts. -
Page 66: Ethernet
OS-214EX User Manual 6.6.2 Ethernet The Ethernet uses RJ-45 cable, which is 8P8C (8-Position 8-Contact). The figure below shows its pinout. 1 2 3 4 5 6 7 8 Signal Transmit+ Transmit- Receive+ Reserved Reserved Receive- Reserved Reserved... -
Page 67: Rs-232C
OS-214EX User Manual 6.6.3 RS-232C The RS-232C on the printer is DB9 female. It transmits data bit by bit in asynchronous start-stop mode. The figure below shows its pinout. Signal Description No Function Transmit Receive No Function Ground No Function Clear to Send Request to Send No Connection...
Need help?
Do you have a question about the Argox OS-200 and is the answer not in the manual?
Questions and answers