Table of Contents
Advertisement
Quick Links
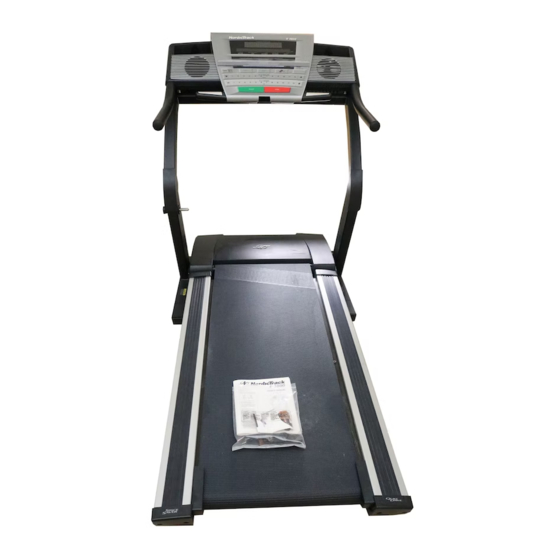
Model No. NCTL19920
Serial No. ___________________
Find the serial number in the location
shown below. Write the serial number
in the space above for reference.
Serial Number Decal
QUESTIONS?
As a manufacturer, we are com-
mitted to providing complete
customer satisfaction. If you
have questions, or if there are
missing parts, please call:
1-888-936-4266
Mon.–Fri. 8h00 until 18h30 EST
(excluding holidays).
CAUTION
Read all precautions and instruc-
tions in this manual before using
this equipment. Save this manual
for future reference.
USER'S MANUAL
Visit our website at
www.nordictrack.com
Advertisement
Table of Contents

Related Manuals for NordicTrack NCTL19920


Summary of Contents for NordicTrack NCTL19920
- Page 1 Model No. NCTL19920 USER’S MANUAL Serial No. ___________________ Find the serial number in the location shown below. Write the serial number in the space above for reference. Serial Number Decal QUESTIONS? As a manufacturer, we are com- mitted to providing complete customer satisfaction.
-
Page 2: Table Of Contents
LIMITED WARRANTY ............. . .Back Cover Note: An EXPLODED DRAWING is attached in the center of this manual. NordicTrack is a registered trademark of ICON IP, Inc. -
Page 3: Important Precautions
IMPORTANT PRECAUTIONS WARNING: To reduce the risk of burns, fire, electric shock, or injury to persons, read the following important precautions and information before operating the treadmill. 1. It is the responsibility of the owner to ensure tem is damaged, the walking belt may change that all users of this treadmill are adequately speed or stop unexpectedly, which may result informed of all warnings and precautions. - Page 4 and/or incline may change before the per- 26. Never insert or drop any object into any sonal trainer describes the change. opening. DANGER: 23. When using iFIT.com CDs and videos, you Always unplug the power can manually override the speed and incline cord immediately after use, before cleaning settings at any time by pressing the speed the treadmill, and before performing the main-...
-
Page 5: Before You Begin
The nience of your home. And when you’re not exercising, model number of the treadmill is NCTL19920. The ser- the unique E 3800 treadmill can be folded up, requiring ial number can be found on a decal attached to the less than half the floor space of other treadmills. -
Page 6: Assembly
ASSEMBLY Assembly requires two people. Set the treadmill in a cleared area and remove all packing materials. Do not dispose of the packing materials until assembly is completed. Assembly requires the included allen wrench and your own phillips screwdriver, wire cutters, and rubber mallet Note: The underside of the treadmill walking belt is coated with high-performance lubricant. - Page 7 4. Cut the plastic tie holding the Upright Wire Harness (98) in the right Upright (69). Have a second person hold the Handrails (66) near the Uprights as shown. Connect the Upright Wire Harness to the wire harness extending from the Console Base (81).
-
Page 8: How To Use The Chest Pulse Sensor
HOW TO USE THE CHEST PULSE SENSOR HOW TO PUT ON THE CHEST PULSE SENSOR dried. If the chest pulse sensor is not dried after each use, it may remain activated longer than nec- The chest pulse sensor consists of two components: essary, draining the battery prematurely. -
Page 9: Operation And Adjustment
Adapter Surge Suppressor chase a surge suppressor, see your local NordicTrack dealer or call 1-888-936-4266. Use only a single-outlet surge suppressor that is UL 1449 listed as a transient voltage surge sup- pressor (TVSS). The surge suppressor must have a... - Page 10 Program Display Main Display Pulse Pulse Sensor Sensor Note: If there is a thin sheet Clip of clear plastic on the face of the console, remove it. FEATURES OF THE CONSOLE CD programs automatically control the speed and in- cline of the treadmill as a personal trainer guides you The advanced console offers a selection of features through every step of your workout.
- Page 11 Move the on/off circuit breaker to the reset po- CAUTION: sition. Before operating the console, read the following precautions. Locate the on/off circuit • Do not stand on the walking belt when turn- breaker on the treadmill ing on the power. near the power cord.
- Page 12 change by 0.5%. To change the incline quickly, HOW TO USE THE MANUAL MODE press the 1-step Incline buttons. The incline range is 0% to 12%. Note: After the buttons are pressed, it may take a moment for the treadmill to reach the Insert the key fully into the console.
- Page 13 Distance/Laps—The Measure your heart rate if desired. center section of the To measure your heart rate, use the chest pulse main display shows sensor (see page 8) or the handgrip pulse sensor the distance that you (follow the instructions below). have walked and the number of 1/4-mile To measure your...
- Page 14 Press the Start button or the Speed + button to HOW TO USE PRESET PROGRAMS start the program. Insert the key fully into the console. A moment after the button is pressed, the tread- mill will automatically adjust to the first speed and See GETTING STARTED on page 11.
- Page 15 If the speed or incline setting is too high or too low Follow your progress with the displays. during the program, you can manually override the setting by pressing the Speed or Incline but- See step 5 on page 12. tons on the console.
- Page 16 Refer to the program display. Each custom pro- HOW TO CREATE CUSTOM PROGRAMS gram is divided into one-minute segments. One speed setting and one incline setting can be pro- grammed for each segment. The speed setting for Insert the key fully into the console. the first segment will be shown in the See GETTING STARTED on page 11.
- Page 17 When only three seconds remain in the first seg- HOW TO USE CUSTOM PROGRAMS ment of the program, both the Current Segment column and the column to the right will flash, a se- Insert the key fully into the console. ries of tones will sound, the speed setting and the incline setting will flash in the main display, and all speed settings will move one column to the left.
- Page 18 During heart rate HOW TO USE HEART RATE PROGRAMS programs, the pro- gram display will Heart rate programs automatically adjust the speed show a graphic that and incline of the treadmill to keep your heart rate near represents your a target level while you exercise. heart rate.
- Page 19 If the speed or incline setting is too high or too low Press the Start button or the Speed + button to during the program, you can adjust the setting start the program. with the Speed or Incline buttons. However, each time the console compares your heart rate to the A moment after the button is pressed, the tread- current target heart rate setting, the speed and/or...
- Page 20 HOW TO CONNECT YOUR PORTABLE STEREO HOW TO CONNECT THE TREADMILL TO YOUR CD PLAYER, VCR, OR COMPUTER Note: If your stereo has an RCA-type AUDIO OUT jack, see instruction A below. If your stereo has a 3.5mm LINE OUT jack, see instruction B. If your To use iFIT.com CDs, the treadmill must be connected stereo has only a PHONES jack, see instruction C.
- Page 21 HOW TO CONNECT YOUR HOME STEREO HOW TO CONNECT YOUR COMPUTER Note: If your stereo has an unused LINE OUT jack, Note: If your computer has a 3.5mm LINE OUT jack, see instruction A below. If the LINE OUT jack is see instruction A.
- Page 22 HOW TO CONNECT YOUR VCR HOW TO USE IFIT.COM CD AND VIDEO PRO- GRAMS Note: If your VCR has an unused AUDIO OUT jack, see instruction A below. If the AUDIO OUT jack is being used, see instruction B. If you have a TV To use iFIT.com CDs or videocassettes, the treadmill with a built-in VCR, see instruction B.
- Page 23 If the speed or incline settings are too high or too • Adjust the volume of your CD player or VCR. low, you can manually override the settings at any If the volume is too high or too low, the con- sole may not detect the program signals.
- Page 24 Return to the treadmill and stand on the foot HOW TO USE PROGRAMS DIRECTLY FROM rails. Find the clip attached to the key and slide OUR WEB SITE the clip onto the waistband of your clothes. When the on-screen countdown ends, the program Our Web site at www.iFIT.com allows you to access will begin and the walking belt will begin to move.
- Page 25 THE INFORMATION MODE/DEMO MODE HOW TO ADJUST THE CUSHIONING SYSTEM The console features an information mode that keeps The treadmill fea- track of the total number of hours that the treadmill has tures a cushion- been operated and the total number of miles that the ing system that walking belt has moved.
-
Page 26: How To Fold And Move The Treadmill
HOW TO FOLD AND MOVE THE TREADMILL HOW TO FOLD THE TREADMILL FOR STORAGE Before folding the treadmill, adjust the incline to the lowest position. If this is not done, the treadmill may be- come damaged. Remove the key and unplug the power cord. - Page 27 HOW TO LOWER THE TREADMILL FOR USE 1. Hold the upper end of the treadmill with your right hand as shown. Using your left hand, pull the lock knob to the left and hold it. Pivot the treadmill down until the frame is past the lock pin.
-
Page 28: Troubleshooting
TROUBLESHOOTING Most treadmill problems can be solved by following the steps below. Find the symptom that applies, and follow the steps listed. If further assistance is needed, please call our Customer Service Department at 1-888-936-4266, Monday through Friday, 8h00 until 18h30 eastern time (excluding holidays). PROBLEM: The power does not turn on SOLUTION: a. - Page 29 PROBLEM: The walking belt slows when walked on SOLUTION: a. Use only a single-outlet surge suppressor that meets all of the specifications described on page 9. b. If the walking belt is overtightened, treadmill perfor- mance may decrease and the walking belt may be- come damaged.
- Page 30 PROBLEM: The incline of the treadmill does not change correctly or does not change while iFIT.com CDs and videos are played SOLUTION: a. With the key in the console, press one of the Incline buttons. While the incline is changing, re- move the key.
-
Page 31: Conditioning Guidelines
CONDITIONING GUIDELINES ergy. Only after the first few minutes does your body WARNING: begin to use stored fat calories for energy. If your goal Before beginning this is to burn fat, adjust the speed and incline of the tread- or any exercise program, consult your physi- mill until your heart rate is near the lowest number in cian. - Page 32 SUGGESTED STRETCHES The correct form for several basic stretches is shown at the right. Move slowly as you stretch—never bounce. 1. Toe Touch Stretch Stand with your knees bent slightly and slowly bend forward from your hips. Allow your back and shoulders to relax as you reach down toward your toes as far as possible.
-
Page 33: Part List
PART LIST—Model No. NCTL19920 R0604A To locate the parts listed below, see the EXPLODED DRAWING attached in the center of this manual. Key No. Qty. Description Key No. Qty. Description Foot Rail Insert Walking Platform Left Foot Rail Front Platform Screw 2”... - Page 34 Key No. Qty. Description Key No. Qty. Description Extension Cap Belly Pan Plug Incline Warning Decal Motor Isolator Idler Arm Bolt Idler Arm 106* Extension Leg Assembly Idler Spring Idler Arm Nylon Washer Book Holder Pulley Nut Power Cord Grommet Pulley Washer Frame Idler Pulley...
-
Page 35: Ordering Replacement Parts
If you have additional questions, please call our customer service department at 1-888-936-4266, Monday through Friday 8h00 until 18h30 eastern time (excluding holidays). When ordering parts, please be prepared to give the following information: • the MODEL NUMBER OF THE PRODUCT (NCTL19920) • the NAME OF THE PRODUCT (NordicTrack ®... -
Page 36: Limited Warranty
LIMITED WARRANTY ICON OF CANADA, INC., (ICON), warrants the motor for three years after the date of purchase. The belt and deck, all mechanical components, and all electrical components are covered for one year after the date of pur- chase. Labor is covered for one year. This warranty extends only to the original purchaser. ICON's obligation under this warranty is limited to replacing or repairing, at ICON's option, the product through one of its authorized service centers. - Page 37 EXPLODED DRAWING—Model No. NCTL19920 R0604A To identify the parts shown on this exploded drawing, refer to the PART LIST on pages 33 and 34 of the USER’S MAN- UAL.
- Page 38 EXPLODED DRAWING—Model No. NCTL19920 R0604A...
Need help?
Do you have a question about the NCTL19920 and is the answer not in the manual?
Questions and answers
If possible please help :) How many laps would it take to equal one kilometre on the Nordictrack E3800?. Thank. You in advance