
Subscribe to Our Youtube Channel
Related Manuals for Superabrasive LAVINA ELITE L20GE


Summary of Contents for Superabrasive LAVINA ELITE L20GE
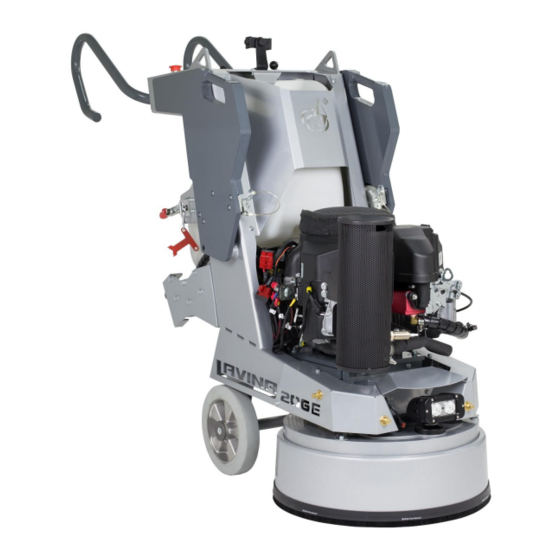
- Page 1 Lavina® 20GЕ Superabrasive User Manual Original Language 7/2020 LAVINA ELITE L20GE User Manual Tech Support Line: 800-987-8403 | www.superabrasive.com | info@superabrasive.us...
- Page 2 Superabrasive User Manual Original Language Lavina® 20GЕ 7/2020...
-
Page 3: Table Of Contents
Superabrasive User Manual Original Language Lavina® 20GЕ 7/2020 Table of Contents WARRANTY AND RETURNS ................................. 6 ® WARRANTY POLICY FOR LAVINA ELITE MACHINES ..........................6 ® RETURN POLICY FOR LAVINA ELITE MACHINES ............................. 6 1. GENERAL INFORMATION ................................. 7 1.1 MANUFACTURER ....................................7 1.2 GENERAL DESCRIPTION .................................. - Page 4 Superabrasive User Manual Original Language Lavina® 20GЕ 7/2020 4.2.1 SYSTEM COMPONENTS ................................. 16 4.2.2 OVERVIEW OF FEATURES ................................16 CLOSED LOOP FUEL MANAGEMENT SYSTEM ..........................16 FAULTY O2 SENSOR DETECTION..............................16 BUILT-IN FUEL LOCKOFF CONTROLLER ............................16 EMISSIONS WARNINGS AND SHUTDOWN ............................ 16 DUAL HOUR METERS ..................................
- Page 5 Superabrasive User Manual Original Language Lavina® 20GЕ 7/2020 8.9 CORRECTING DEFLECTION OF THE USED PLANETARY CHAIN ......................36 8.10 MOUNTING NEW PLANETARY CHAIN ............................36 8.11 REPLACING THE PLANETARY DRIVING CHAIN WHEEL AND PLANETARY TENSIONER ..............38 8.12 REPLACING PULLEY UNITS................................38 8.13 MOUNTING THE BELT ..................................
-
Page 6: Warranty And Returns
Superabrasive. Thereafter, the customer will have to cover the shipping charges to Superabrasive and back. Superabrasive will not warranty Goods after a period of 2 years from the time of delivery and receipt by the original customer, or 600 operating hours on the machine - whichever occurs first. -
Page 7: General Information
1.1 MANUFACTURER Superabrasive was founded in 1987, as a manufacturer of high quality diamond tools for the stone and concrete industry. Today, Superabrasive is one of the world’s leading companies in the production of diamond tools and floor grinding machinery. At Superabrasive, we strive to deliver the very best solutions to our customers, and enable them to work more efficiently. -
Page 8: Vacuum Connection
The data on the label provides the correct Voltage and kW (needed for operational purposes); Weight (needed for transportation purposes); production year and serial number (needed for maintenance purposes). 1.11 CUSTOMER SERVICE For customer assistance and technical support call your local distributor or call Superabrasive Inc. at 1‐800‐987‐8403 or visit us at: www.superabrasive.com... -
Page 9: Safety Instructions
Superabrasive User Manual Original Language Lavina® 20GE 7/2020 2. SAFETY INSTRUCTIONS please ensure that all protection devices are mounted 2.1 RECOMMENDED USE and function properly. The LAVINA® 20GE machine is designed and manufactured to - The Envirogard Emissions Monitoring System. -
Page 10: Fire Safety
Superabrasive User Manual Original Language Lavina® 20GE 7/2020 2. Shut off the service valve on the propane cylinder if possible. Be careful not to be burned. 3. Move the machine outside if possible. If not possible, move it to a well‐ventilated area away from flammable materials. -
Page 11: Residual Risks
Superabrasive User Manual Original Language Lavina® 20GE 7/2020 Local law enforcement agencies such as the local Fire Marshall 2.15 AFTER WORK IS COMPLETED also rely on independent testing labs such as UL and CGA before giving their approval of the use of some equipment. -
Page 12: Operator
Superabrasive User Manual Original Language Lavina® 20GE 7/2020 1) AMBIENT AIR MONITORING refers to the model of the cylinder. Actual propane capacity DRAGER Model 190: Manufactured by National achieved during filling can be less than, equal to, or slightly Drager. -
Page 13: Transporting Cylinders
Superabrasive User Manual Original Language Lavina® 20GE 7/2020 building but with at least five feet (1.5 m) of space When transporting cylinders to a propane dealer or to a job, between the cabinet and the nearest building opening make sure the cylinders are securely fastened and standing in (door or window), also away from heat and direct sunlight. -
Page 14: Handling And Transportation
6Superabrasive User Manual Original Language Lavina® 20GE 7/2020 3. HANDLING AND TRANSPORTATION 3.1 ADJUSTING THE HANDLE The Handle on the frame is adjustable in height and allows the operator to work in a correct and safe posture (fig. 3.1). To adjust the handle first you should release the pin (fig. 3.3) then lift the locking plate (fig. -
Page 15: Lifting The Machine From Working To Tool Mounting Position
6Superabrasive User Manual Original Language Lavina® 20GE 7/2020 3.2 LIFTING THE MACHINE FROM WORKING TO TOOL MOUNTING POSITION Figure 3.9 Lock the weights in upward position. Put the handles of the carriage as shown on (fig. 3.9). Ensure that the water tank is empty before flipping the machine. -
Page 16: Operation
6Superabrasive User Manual Original Language Lavina® 20GE 7/2020 4. OPERATION 4.1 PRELIMINARY CONTROLS Inspect the working area as explained in the safety instructions. Fill in the water tank for wet use or connect the vacuum extractor and ensure that the vacuum hose is clear and it will follow the machine easily. Make sure the bonnet air filter on top of the engine is clean. -
Page 17: E) Dual Hour Meters
6Superabrasive User Manual Original Language Lavina® 20GE 7/2020 E) DUAL HOUR METERS The Fuel-Minder has two hour meters, one for the engine and the other for equipment. The Engine Hours are resettable, which should only be done if the engine is replaced. The Equipment Hours (located in Options Menu) is non-resettable and shows the total hours on the equipment, similar to the odometer of a vehicle. -
Page 18: B) Led Alerts & Resetting Service Intervals
Password required if set. Factory Unlock-This option is only used by Superabrasive and requires a factory assigned pin number to activate. Tach Settings- This allows you to adjust the tachometer for a carbureted or fuel injected engine. It should come pre-set to the correct option and will not require changes. -
Page 19: Safety Information
6Superabrasive User Manual Original Language Lavina® 20GE 7/2020 4.2.2.3 SAFETY INFORMATION Safety Information- Read all safety information before using this device to ensure safe and proper use. Do not interact with the device while operating your equipment. Doing so may distract your attention and cause an accident, or may be illegal depending on your region. -
Page 20: Water Flow Control System
6Superabrasive User Manual Original Language Lavina® 20GE 7/2020 4.3 WATER FLOW CONTROL SYSTEM The operator can direct water to be sprayed in front of the machine (Fig.4.1) by positioning the lever in the horizontal position (Fig.4.2). Water will spray under the cover of the machine when the lever is in the vertical position (Fig.4.2). The pressure regulator is located above the lever (Fig.4.3) and controls the water pressure in the system. -
Page 21: Adjusting And Mounting Tools
6Superabrasive User Manual Original Language Lavina® 20GE 7/2020 4.4 ADJUSTING AND MOUNTING TOOLS Lavina® 20GE uses tool holder A63. With this new holder every one of our tools uses the “Quickchange” connection. To change the tools you need first to unlock the butterfly (fig 4.6 in blue) by using the key we provide you (you can see it in the pictures fig. -
Page 22: Use Horizontal Propane Tank
6Superabrasive User Manual Original Language Lavina® 20GE 7/2020 4.6 USE HORIZONTAL PROPANE TANK The standard Lavina 20GE is equipped with vertical propane tank with vapor draw. If necessary the machine can work with horizontal tank but obligatory with vapor draw. Here is how to readjust the machine for horizontal propane tank: ... -
Page 23: Operating The Machine
6Superabrasive User Manual Original Language Lavina® 20GE 7/2020 4.9 OPERATING THE MACHINE Guide the machine in straight lines across the floor, slightly overlapping the previously completed surface with each new line. Work at a constant speed, allowing the tools time to work at a speed appropriate for the tools’ grit size. Avoid vibrations. Do not stop the machine while tools are still running as they will mark the surface of the floor. -
Page 24: Tools And Accessories
6Superabrasive User Manual Original Language Lavina® 20GE 7/2020 5. TOOLS AND ACCESSORIES The tool holder key (Fig. 5.1) is used for mounting and dismounting the security plate. Always use the key for mounting. Item number is A03.00.00.00 Figure 5.1 Security Plate (Fig.5.2) used to ensure the “Quickchange” tools. Item number is A63.00.01 Figure 5.2... -
Page 25: Popular Tools
® V‐HARR Premium Polishing Pads are designed for mechanically polishing and restoring concrete; also ideal for terrazzo and hard stone floors. Dry use is strongly recommended. Use Only Superabrasive’s Recommended Tools. For More Tooling Options, Visit www.superabrasive.com... -
Page 26: Maintenance And Inspection
6Superabrasive User Manual Original Language Lavina® 20GE 7/2020 7. MAINTENANCE AND INSPECTION REMARK Tampering w/Emission Control System Prohibited Federal law and California State law prohibits the following acts or the causing thereof: (1) the removal or rendering inoperative by any person other than far purposes of maintenance, repair, or replacement, of any device or element at design incorporated into any new engine for the purpose of emission control prior to its sale or delivery to the ultimate purchaser or while it is in use, or (2) the use of the engine after such device or element of design has been removed or rendered inoperative by any person. -
Page 27: Check And Replace Every 50 Working Hours
6Superabrasive User Manual Original Language Lavina® 20GE 7/2020 7.6 CHECK AND REPLACE EVERY 50 WORKING HOURS Change engine oil, while changing check for leakage of engine oil at the various seals. The hour meter will blink between 48‐52 hours as a reminder. /"Engine Oil Capacity" is 1.5L (1.6US.qt) when oil filter is not removed 1.7L (1.8US.qt) when oil filter is removed/. -
Page 28: Troubleshooting
6Superabrasive User Manual Original Language Lavina® 20GE 7/2020 8. TROUBLESHOOTING 8.1 ENGINE When troubles occur, be sure to check the simple causes which at first, may seem too obvious to be considered. For example, a starting problem could be caused by fuel starvation due to an empty propane cylinder or an unopened service valve. If you do not check for this, starter burnout could result. -
Page 29: Checking And Changing Oil
6Superabrasive User Manual Original Language Lavina® 20GE 7/2020 8.2 CHECKING AND CHANGING OIL Check the engine oil level, screw the dipstick in to get reading. While changing engine oil, check for leakage of engine oil at the various seals. Do not exceed the 50‐hour oil change interval. Oil changes more frequent than 25 hours will give even longer engine In any case, always use 30HD or 10W30 engine oil with all of the following ratings: SF, SG, and CC. - Page 30 Lavina® 20GЕ Superabrasive User Manual Original Language 7/2020 5 . Unscrew the four bolts to remove the panel /Fig.8.4.5;Fig.8.4.6;Fig.8.4.7/. 6. Disconnect the control panel carrying the throttle lever and move it to the main head /Fig.8.4.8;Fig.8.4.9;Fig.8.4.10/. Figure 8.4.5 Figure 8.4.6 Figure 8.4.7...
- Page 31 6Superabrasive User Manual Original Language Lavina® 20GE 7/2020 8. Dismount the right cover on the control panel. Underneath is the coupling to disconnect the control module from the motor. Disconnect the coupling, disconnect the cable and move it to the main head. /Fig.8.4.11;Fig.8.4.12;Fig.8.4.13;Fig.8.4.14;Fig.8.4.15;Fig.8.4.16;Fig.8.4.17/.
- Page 32 6Superabrasive User Manual Original Language Lavina® 20GE 7/2020 9. Remove the mist nozzles system and carefully stop the connection to the water system. Figure 8.4.20 Figure 8.4.19 Figure 8.4.21 Figure 8.4.18 10. Now it is possible to separate the head by removing the pins. This will require two people: one person holds the carriage while the other pulls the pins (Fig.
-
Page 33: Dismounting/Mounting The Engine
Lavina® 20GЕ Superabrasive User Manual Original Language 7/2020 8.5 DISMOUNTING/MOUNTING THE ENGINE Figure 8.5.1 Figure 8.5.3 Figure 8.5.4 Figure 8.5.2 Separate head from carriage (see previous chapter). Remove front (Fig. 8.5.1) and back belt protection (Fig. 8.5.2). Loose the motor base plate (Fig. 8.5.3), release the tension device (Fig. 8.5.4), and take out the belt (Fig. 8.5.5). Take off the engine (Fig. -
Page 34: Replacing The Clutch
6Superabrasive User Manual Original Language Lavina® 20GE 7/2020 8.6 REPLACING THE CLUTCH Figure 8.6.1 Figure 8.6.2 Figure 8.6.3 In case the electric clutch has to be replaced, remove the engine (see previous chapter) and lay it on its side with the oil drainage up (Fig. 8.6.1) and loose the front nut to dismount the clutch (Fig. -
Page 35: Disassembling And Mounting Tool Holder To Change Buffers And Elastic Element
6Superabrasive User Manual Original Language Lavina® 20GE 7/2020 8.8 DISASSEMBLING AND MOUNTING TOOL HOLDER TO CHANGE BUFFERS AND ELASTIC ELEMENT When the TOOL HOLDER is disassembled you can change defective parts – elastic element, buffers, etc. Lift the locking pin (Fig.8.8.1) to dismount the retaining washer (Fig.8.8.2). Take out the screws on the buffers and the nuts of the elastic element (Fig.8.8.3;Fig.8.8.4). -
Page 36: Correcting Deflection Of The Used Planetary Chain
6Superabrasive User Manual Original Language Lavina® 20GE 7/2020 8.9 CORRECTING DEFLECTION OF THE USED PLANETARY CHAIN Unscrew the two bolts (Fig.8.9.1) and take out the cover. Lift the machine in position to change the tools. Turn manually the holders in order to turn the main head, stop when you see through the window the chain tensioner (Fig.8.9.2). - Page 37 6Superabrasive User Manual Original Language Lavina® 20GE 7/2020 inclination. Then unscrew the nuts pos.2 (Fig.8.9.2) and pos.7 (Fig.8.9.2), as well as the nuts in pos. 1 and pos.8 to have possibility to dismount the two old chains. Mount the new chains (Fig.8.10.3 - Fig.8.10.6), using the the chain link pin and the split pin. First tighten the longer chain (Fig.8.9.7;Fig.8.9.8) then the second one (Fig.8.10.9;Fig.8.10.10).The tensioner of the planetary chain should allow chain sagging 3...5mm/1/8...3/16 in/ controlled in span X (Fig.8.9.2).
-
Page 38: Replacing The Planetary Driving Chain Wheel And Planetary Tensioner
6Superabrasive User Manual Original Language Lavina® 20GE 7/2020 8.11 REPLACING THE PLANETARY DRIVING CHAIN WHEEL AND PLANETARY TENSIONER Check and repeat the instruction in 8.9 MONTING NEW PLANETARY CHAIN. Unscrew bolt pos.3 take the chain pulley pos.5 . Apply lithium grease on the shaft and mount back the wheel and the front washer pos.4 as shown on (Fig.8.11.1). - Page 39 6Superabrasive User Manual Original Language Lavina® 20GE 7/2020 If all the pulley units have to be replaced, dismount motor base disc and motor. Before removing the belt unscrew the central pulley (so it does not turn while unlocking) (Fig.8.12.7) (Fig.8.12.8). Pull the central pulley off (Fig.8.12.9). Figure 8.12.11 Figure 8.12.12 Figure 8.12.10...
-
Page 40: Mounting The Belt
6Superabrasive User Manual Original Language Lavina® 20GE 7/2020 8.13 MOUNTING THE BELT Figure 8.13.4 Figure 8.13.2 Figure 8.13.3 Figure 8.13.5 Figure 8.13.1 Figure 8.13.6 Figure 8.13.7 Figure 8.13.9 Figure 8.13.10 Figure 8.13.8 The mounting of the belt is shown on Fig. 8.13.11. Putting the belt is possible when the tensioner is in starting position: - loosen the nuts pos.2... -
Page 41: Checking The Tension Of The Belt
PLEASE MAKE SURE YOU CHECK THE TENSION OF THE BELT AFTER THE FIRST 15 HOURS OF OPERATION 9. DISPOSAL If your machine after time is not usable or needs to be replaced, send the machine back to Superabrasive or a local distributor, where a professional disposal complying with the environment laws and directives is guaranteed. -
Page 42: Emission Control Warranty Statemen
Superabrasive Inc. cannot deny warranty solely for the lack of receipts or for your failure to ensure the performance of all scheduled maintenance. As the SORE owner you should however be aware that Superabrasive Inc. may deny your warranty if your SORE or its part has failed due to abuse, neglect, improper maintenance or unapproved modification. - Page 43 Superabrasive Inc. will not be liable to warrant failures of warranted parts caused by the use of a non-exempted add-on or modified part.
-
Page 44: Spare Parts
6Superabrasive User Manual Original Language Lavina® 20GE 7/2020 12. SPARE PARTS ASSEMBLY AND PARTS SPECIFICATIONS 1. LAVINA® 20GE GENERAL PARTS Item No. Description Pcs. A50.00.00.00 LED light with magnetic base L20GE01.00.00 Bumper L20GE10.00.00-3 Main Head L25SPS-07.03.00.00 Pin Assembly L20GE20.00.00-2 Carriage W2504 Propane Tank L20GX-40.10.00... -
Page 45: Lavina® 20Ge Vacuum Hose
6Superabrasive User Manual Original Language Lavina® 20GE 7/2020 3. LAVINA® 20GE VACUUM HOSE Item No. Description Pcs. L20GX-02.10.00 Vacuum Port 30301210051 Bolt M6x16DIN6921 30301240098 Flange Nut M6DIN6923 30308000400 Clamp for Vacuum Hose D50L470PU Soft Vacuum Hose 4. LAVINA® 20GE CONTROL BOARD Item No. -
Page 46: Lavina® 20Ge Carriage
6Superabrasive User Manual Original Language Lavina® 20GE 7/2020 6. LAVINA® 20GE CARRIAGE 1 Item No. Description Pcs. L20GX-20.10.00 Right Weight L25E20.10.00 Right Weight L20GX-20.30.00 Right Weight Support 30301240106 Nut М8DIN985 L20GX-23.00.03 Handle support plate 30301230257 Screw M8x30DIN7984 30311000506 Clamp 30301210043 Bolt M6x10DIN6921 30301240022 Nut М6DIN934... - Page 47 6Superabrasive User Manual Original Language Lavina® 20GE 7/2020 7. LAVINA® 20GE CARRIAGE 2 Item No. Description Pcs. L20GX-25.10.00 Strap L20GX-25.20.00 Strap holder left L20GX-25.00.03 Strap axle 30301210051 Bolt M6x16DIN6921 L25E20.60.00 Wheel Assembly L25E20.60.00-K Wheel Set 30301210031 Bolt M8x20DIN6921 L20GX-20.00.22-2 Support left L20GE21.00.00-K Frame 30301240103...
-
Page 48: Lavina® 20Ge Water Pump
6Superabrasive User Manual Original Language Lavina® 20GE 7/2020 10. LAVINA® 20GE WATER PUMP Item No. Description Pcs. 30326000003 Pump 30313000348 Fixed Elbow NPT Thread 30313000056 Stud Fitting 30301240090 Nut M5DIN985 30301221015 Washer M5DIN9021 30301230113 Screw M5X25DIN84A 30313000341 Male Hex Plug 11.LAVINA®... -
Page 49: Lavina® 20Ge Water Tank
6Superabrasive User Manual Original Language Lavina® 20GE 7/2020 13. LAVINA® 20GE WATER TANK Item No. Description Pcs. A56.00.01-K Water Tank A56 30323000209 Filter_LP 1/4 FNPT GFPP CB 80X80 SST CG BN 30313000077 Filter 30313000342 Fixed Elbow Male NPTF Thread -3/8 INC- NPT1/4 30316000001 Filter 30313000348... -
Page 50: Lavina® 20Ge Engine Base Parts
6Superabrasive User Manual Original Language Lavina® 20GE 7/2020 14. LAVINA® 20GE ENGINE BASE PARTS Item No. Description Pcs. Complete Engine FS481L20GX Assembly L20GX-10.08.00 Coil carrier Carrier for two L20GX-10.07.00 brackets Cable harness for L20GX-40.30.00 L20GX L25GS-10.02.06 Clutch Washer 5215 Electric Clutch L25G-10.02.02.S Bolt Set 30301210038... -
Page 51: Lavina® 20Ge Planetary Drive Parts
6Superabrasive User Manual Original Language Lavina® 20GE 7/2020 16. LAVINA® 20GE PLANETARY DRIVE PARTS Item No. Description Pcs. Item No. Description Pcs. 30301210096 Bolt M10X25DIN6921 L20GX-17.00.00 Tensioner assembly L25GX-10.00.55 Front Washer 12.1 L20GX-17.10.00 Chain Tensioner L20GX-15.00.04 Pulley Unit 12.2 30301240023 Nut M8DIN934 30301210031 Bolt M8X20DIN6921... -
Page 52: Lavina® 20Ge Bottom Cover Parts 1
6Superabrasive User Manual Original Language Lavina® 20GE 7/2020 18. LAVINA® 20GE BOTTOM COVER PARTS 1 Item No. Description Pcs. A63.00.00 Tool Holder A63 A42.03.00 Adaptor 30301210072 Bolt М8х16DIN6921 Screw 30301230017 M6X10DIN7991/10.9/ L25LS-14.00.03 Outer Cover 30309000000 Felt Ring 30302000005 V-Ring Type A L25LS-14.00.02 Flange 30301210051... -
Page 53: Lavina® 20Ge Bottom Cover Parts 2
6Superabrasive User Manual Original Language Lavina® 20GE 7/2020 20. LAVINA® 20GE BOTTOM COVER PARTS 2 Item No. Description Pcs. Item No. Description Pcs. 30308000103 Endless Transmission V Belt L20GX-15.20.00 Base plate 30301230153 Screw M10X25DIN7991/10.9/ L20GE15.20.00 Base plate L25SPS- Front Washer L25G-10.00.59 Insert 00.00.00.15-S254... -
Page 54: Lavina® 20Ge Pulley Units
6Superabrasive User Manual Original Language Lavina® 20GE 7/2020 21. LAVINA® 20GE PULLEY UNITS Item No. Description Pcs. Item No. Description Pcs. L20GX-16.00.00 Driving Pulley Unit L20NS-10.00.12 Sector L20S-16.00.11-K Flange with seal L20NS-12.00.00 Tensioning Support L20S-16.00.14 Washer reflective 30301240099 Nut M10DIN934 L20GX-16.00.02 Drive chain pulley L32C-14.20.04... -
Page 55: Lavina® 20Ge Driving Pulley Unit Parts
6Superabrasive User Manual Original Language Lavina® 20GE 7/2020 23 . LAVINA® 20GE DRIVING PULLEY UNIT PARTS Item No. Description Pcs. 30301260055 Key 5x5x25DIN6885A L20GX-16.00.13-K Shaft 30301260060 Key 5x5x16DIN6885A L20S-16.00.11-K Flange 30301230042 Screw М6х30 DIN 912/10.9/ L20S-16.00.14 Washer L20GX-16.00.03 Distancing sleeve L20GX-16.00.02 Drive chain pulley L25X-10.00.46...
Need help?
Do you have a question about the LAVINA ELITE L20GE and is the answer not in the manual?
Questions and answers