Table of Contents
Advertisement
Quick Links
Owner's Manual
Please read before using this equipment.
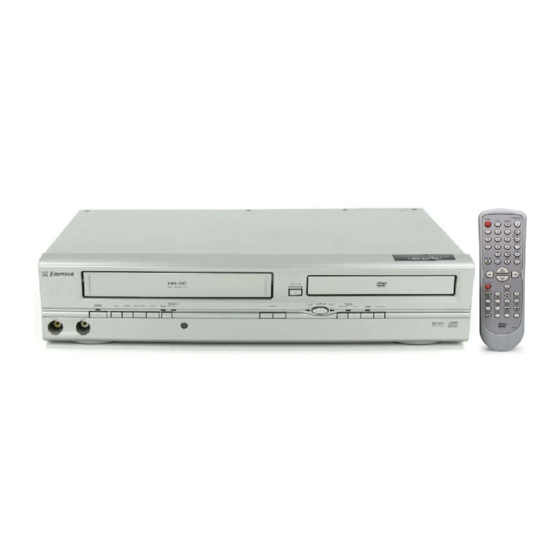
DVD/CD Player with Video Cassette Recorder
EWD2004
Supplied Accessory
• Remote control
(NB100UD or NB150UD)
with two AA batteries
Table of Contents
Laser Safety . . . . . . . . . . . . . . . . . . . . . . . . . . . . . . . . . . . . . . . . . 2
s Important Safeguards . . . . . . . . . . . . . . . . . . . . . . . . . . . . . . . . . 3
Installation Location . . . . . . . . . . . . . . . . . . . . . . . . . . . . . . . . . . . 4
Avoid the Hazards of Electrical Shock and Fire . . . . . . . . . . . . . . . 4
Moisture Condensation Warning . . . . . . . . . . . . . . . . . . . . . . . . . . 4
About Copyright . . . . . . . . . . . . . . . . . . . . . . . . . . . . . . . . . . . . . . 4
Symbol Used in This Manual . . . . . . . . . . . . . . . . . . . . . . . . . . . . . 4
Maintenance . . . . . . . . . . . . . . . . . . . . . . . . . . . . . . . . . . . . . . . . . 4
s About the Video Cassettes and Discs . . . . . . . . . . . . . . . . . . . . 5
Playable Video Cassettes . . . . . . . . . . . . . . . . . . . . . . . . . . . . . . . 5
Playable Discs . . . . . . . . . . . . . . . . . . . . . . . . . . . . . . . . . . . . . . . 5
Unplayable Discs . . . . . . . . . . . . . . . . . . . . . . . . . . . . . . . . . . . . . 5
s Connections . . . . . . . . . . . . . . . . . . . . . . . . . . . . . . . . . . . . . . . . 5
RF Output Channel . . . . . . . . . . . . . . . . . . . . . . . . . . . . . . . . . . . . 5
Hint for Cable Box or Satellite Box. . . . . . . . . . . . . . . . . . . . . . . . . 6
Connection to an Audio System . . . . . . . . . . . . . . . . . . . . . . . . . . 6
Connection to a TV . . . . . . . . . . . . . . . . . . . . . . . . . . . . . . . . . . . . 7
Front & Rear Terminals . . . . . . . . . . . . . . . . . . . . . . . . . . . . . . . . . 7
s About the Remote Control and Front Panel . . . . . . . . . . . . . . . . 8
s VCR/DVD Switching. . . . . . . . . . . . . . . . . . . . . . . . . . . . . . . . . . . 9
s Preset for Use . . . . . . . . . . . . . . . . . . . . . . . . . . . . . . . . . . . . . . 10
Turn on the unit for the first time . . . . . . . . . . . . . . . . . . . . . . . . . 10
Clock Set Up. . . . . . . . . . . . . . . . . . . . . . . . . . . . . . . . . . . . . . . . 10
s Playback. . . . . . . . . . . . . . . . . . . . . . . . . . . . . . . . . . . . . . . . . . . 11
s Recording & OTR (One Touch Recording) . . . . . . . . . . . . . . . . 11
s Other Operations . . . . . . . . . . . . . . . . . . . . . . . . . . . . . . . . . . . . 11
s On-Screen Operations. . . . . . . . . . . . . . . . . . . . . . . . . . . . . . . . 12
s Recording Features . . . . . . . . . . . . . . . . . . . . . . . . . . . . . . . . . . 12
Timer Recording . . . . . . . . . . . . . . . . . . . . . . . . . . . . . . . . . . . . . 12
Basic TV Connection / Conexión básica del televisor
Antenna
Cable
Signal
Antena
Señal
de Cable
or
o
(Back of TV)
(Parte posterior
de una TV)
Disconnect
Desconecte
5
Please refer to "Connections" on page 5.
• RF cable
(WPZ0901TM002)
Cable
Antenna
Signal
(Back of
Antena
DVD/VCR)
Señal
de Cable
(Parte posterior
or
del
o
DVD/VCR)
2
Connect
Conexiones
EMERSON AND THE G-CLEF LOGO ARE
REGISTERED TRADEMARKS OF
EMERSON RADIO CORP., PARSIPPANY,
NEW JERSEY, U.S.A.
INSTRUCCIONES EN ESPAÑOL INCLUIDAS.
If you need additional operating assistance after
reading this owner's manual or to order replace-
ment accessories, please call
TOLL FREE : 1-800-256-2487
or visit our web site at http://www.funai-corp.com
• Audio/Video cables
(WPZ0102TM015 or
WPZ0102LTE01)
Hint for Timer Recording . . . . . . . . . . . . . . . . . . . . . . . . . . . . . . . 13
Copying a Video Tape . . . . . . . . . . . . . . . . . . . . . . . . . . . . . . . . . 13
s Special Features . . . . . . . . . . . . . . . . . . . . . . . . . . . . . . . . . . . . 14
Time Search / Index Search / Auto Repeat . . . . . . . . . . . . . . . . . 14
s Playback. . . . . . . . . . . . . . . . . . . . . . . . . . . . . . . . . . . . . . . . . . . 15
s The On-Screen Display . . . . . . . . . . . . . . . . . . . . . . . . . . . . . . . 16
s Search Function . . . . . . . . . . . . . . . . . . . . . . . . . . . . . . . . . . . . 17
Track Search / Title/Chapter Search / Time Search . . . . . . . . . . 17
s Marker Setup . . . . . . . . . . . . . . . . . . . . . . . . . . . . . . . . . . . . . . . 17
s Repeat / Random / Programmed Playback . . . . . . . . . . . . . . . . 18
s Special Settings. . . . . . . . . . . . . . . . . . . . . . . . . . . . . . . . . . . . . 19
s DVD Set Up . . . . . . . . . . . . . . . . . . . . . . . . . . . . . . . . . . . . . . . . 20
LANGUAGE Setting . . . . . . . . . . . . . . . . . . . . . . . . . . . . . . . . . . 20
DISPLAY Setting . . . . . . . . . . . . . . . . . . . . . . . . . . . . . . . . . . . . . 21
AUDIO Setting . . . . . . . . . . . . . . . . . . . . . . . . . . . . . . . . . . . . . . 21
PARENTAL Setting . . . . . . . . . . . . . . . . . . . . . . . . . . . . . . . . . . . 22
(except for PARENTAL) to the Default Setting . . . . . . . . . . . . . . . 22
s Troubleshooting Guide . . . . . . . . . . . . . . . . . . . . . . . . . . . . . . . 23
s Specifications . . . . . . . . . . . . . . . . . . . . . . . . . . . . . . . . . . . . . . 24
s Language List . . . . . . . . . . . . . . . . . . . . . . . . . . . . . . . . . . . . . . 24
s Limited Warranty . . . . . . . . . . . . . . . . . . . . . . . . . . . . . . . . . . . . 24
Español . . . . . . . . . . . . . . . . . . . . . . . . . . . . . . . . . . . . . . 25
Quick Use Guide . . . . . . . . . . . . . . . . . . . . . . . . . . . . . . . 27
(Back of TV)
(Parte posterior
reproductor
de una TV)
3
Connect
ANT-IN
Conexiones
ANT-OUT
RF Cable (supplied)
Cable RF (incluíd)
• Owner's Manual
(1VMN20189)
Owner's Manual
4
Plug in
Enchufe
AC outlets
Toma de CA
From DVD/VCR
De la DVD/VCR
From TV
De la TV
Advertisement
Table of Contents

Related Manuals for Emerson EWD2004OM


Summary of Contents for Emerson EWD2004OM
-
Page 1: Table Of Contents
Owner’s Manual Please read before using this equipment. EMERSON AND THE G-CLEF LOGO ARE REGISTERED TRADEMARKS OF DVD/CD Player with Video Cassette Recorder EMERSON RADIO CORP., PARSIPPANY, NEW JERSEY, U.S.A. EWD2004 INSTRUCCIONES EN ESPAÑOL INCLUIDAS. If you need additional operating assistance after reading this owner’s manual or to order replace-... -
Page 2: Precautions
Precautions WARNING : TO REDUCE THE RISK OF FIRE OR ELECTRIC SHOCK, DO NOT EXPOSE THIS APPLIANCE TO RAIN OR MOISTURE. The lightning flash with arrowhead symbol, within an CAUTION equilateral triangle, is intended to alert the user to the presence of uninsulated “dangerous voltage”... -
Page 3: Important Safeguards
Important Safeguards 1. Read Instructions - All the safety and operating instructions they exit from the appliance. should be read before the appliance is operated. 13. Outdoor Antenna Grounding - If an outside antenna or cable sys- 2. Retain Instructions- The safety and operating instructions tem is connected to the video product, be sure the antenna or should be retained for future reference. -
Page 4: Installation Location
Installation Location Maintenance For safety and optimum performance of this unit: SERVICING • Install the unit in a horizontal and stable position. Do ¡Please refer to relevant topics on the Troubleshooting not place anything directly on top of the unit. Do not Guide on page 23 before return the product. -
Page 5: Setup
Setup About the Video Cassettes and Discs Playable Video Cassettes Use only cassettes marked with this unit. Playable Discs Recorded Playable Disc size Region code Disc types Mark (logo) signals discs DVD-Video * 1,2,4,6 Example 12 cm Title 1 Title 2 DVD-R Digital video DVD-RW... -
Page 6: Hint For Cable Box Or Satellite Box
Hint for Cable Box or Satellite Box Connection B (Back of DVD/VCR) Connection A (Back of DVD/VCR) (Cable box or (Cable box or Satellite box) ANT-IN ANT-IN Satellite box) Cable OU T ANT-OUT ANT-OUT RF Cable Signal Cable OU T (supplied) Signal (Back of TV) -
Page 7: Connection To A Tv
Connection to a TV Method 1 Method 2 Method 3 Basic Audio Good picture Better picture Best picture COMPONENT VIDEO IN AUDIO IN S-VIDEO IN VIDEO IN S-Video Video Audio cable cable cable (supplied) (commercially (supplied) available) Component Video cables (commercially DVD/VCR DVD/VCR... -
Page 8: About The Remote Control And Front Panel
About the Remote Control and Front Panel About the Remote Control and Front Panel VCR mode DVD mode Disc/Tape Remote Control Button DVD-V DVD-V (Alphabetical order) To select channel. • The +10 button has no effect • To select chapter or title directly. • To select track directly. •... -
Page 9: Vcr/Dvd Switching
Front Panel Display Lights up when the disc is inserted. Lights up when the inserted Lights up during a recording. disc is being played back. Lights up when power is on. Flashes when a recording is paused. Flashes when an unaccept- able disc is installed. -
Page 10: Preset For Use
Preset for Use To Preset the Channel Again Turn on the unit for the first CLOCK SET time 1) Press the MENU button until the main MONTH DAY YEAR 0 3 / 1 5 2 0 0 4 menu appears. 2) Select "CHANNEL SET UP"... -
Page 11: Vcr Functions
VCR Functions Playback Before: Hint Hint Turn on the TV and set it to OPEN/CLOSE POWER channel 3. /EJECT SPEED AUDIO • When a tape with- • If channel 3 is already occupied for broad- out record tab is casting, see “RF Output Channel” section. inserted, the SKIP/CH. -
Page 12: On-Screen Operations
On-Screen Operations SKIP/CH. To call up the main menu To decide VCR/TV -MENU- SLOW MENU CHANNEL SET UP B TIMER PROGRAMMING DISPLAY PAUSE AUTO SET UP AUTO REPEAT [OFF] CHANNEL SET UP B MANUAL SET UP CLOCK SET PLAY LANGUAGE SELECT STOP To select an item To exit the menu... -
Page 13: Hint For Timer Recording
Hint for Timer Recording • If there is a power failure or the DVD/VCR has been unplugged for more than 30 seconds, the clock setting and all timer settings will be lost. • If a tape is not in the DVD/VCR or does not have the record tab, the TIMER REC light flashes and timer recording cannot be performed. -
Page 14: Special Features
Special Features Time Search Index Search Auto Repeat You can specify the time for fast You can specify the number of pro- You can repeat playback of a whole tape automatically. forwarding or rewinding. grams to be skipped. • Insert a tape into this unit. •... -
Page 15: Dvd Functions
DVD Functions Playback Hint Before: Turn on the TV, amplifier and any other components which Hint are connected to this unit. Make sure the TV and audio receiver • A “prohibited OPEN/CLOSE POWER (commercially available) are set to the correct channel. /EJECT SPEED AUDIO... -
Page 16: The On-Screen Display
The On-Screen Display You can check the information about the current disc by pressing the DISPLAY button on the remote control. DVD-V DVD-V DISPLAY Current playback status DISPLAY 4/12 0:03:21 - 0:02:15 Remaining time of the current track Current playback status 11/16 0:00:00 - 0:03:30 Elapsed time of the current track Remaining time of the current chapter... -
Page 17: Search Function
Search Function Track Search Title / Chapter Search Time Search DVD-V DVD-V DVD-V DVD-V Using the n umber b uttons Using the SEARCH MODE utton Using the n umber b uttons Using the SEARCH MODE utton PLAY 1:29:00 TOTAL SEARCH MODE SEARCH Press repeatedly until... -
Page 18: Repeat / Random / Programmed Playback
Repeat / Random / Programmed Playback Repeat Playback Repeat A-B Playback Programmed Playback DVD-V DVD-V DVD-V DVD-V You may determine the order in which Repeat function is available only during playback. tracks will play. PLAY STOP PLAY CD-DA TOTAL 0:00:00 at your desired starting point (A). -
Page 19: Special Settings
Special Settings Subtitle Language Audio Language Stereo Sound mode DVD-V DVD-V DVD-V DVD-V This unit allows you to select a subtitle This unit allows you to select an audio This unit allows you to select a sound language (if available) during DVD play- language (if multiple languages are mode during CD playback. -
Page 20: Dvd Set Up
DVD Set Up UICK SETUP Men UICK SETUP Men You can select the “PLAYER MENU”, “TV ASPECT”, or “DOLBY DIGITAL” from the QUICK SETUP menu quickly. SETUP STOP Select the desired item <SETUP MENU> Confirm that QUICK is selected ENTER ENTER SETUP QUICK... -
Page 21: Display Setting
DISPLAY Setting You can change the display functions. Follow the step 1) to 3) in the “CUSTOM Menu” section on page 20. To exit the menu Select the desired item SETUP TV ASPECT: QUICK Select the (Default: 4:3 LETTER BOX) desired See Hint to the right. -
Page 22: Parental Setting
PARENTAL Setting Parental Control limits the disc viewing that exceed your settings. (an incorrect password will not play.) This feature prevents your children from viewing inappropriate materials. arental vels arental vels Parental Level allows you to set the rating levels of your DVD discs. Playback will stop if the ratings exceed the levels you set. Follow the steps 1) to 3) in the “CUSTOM Menu”... -
Page 23: Information
Information Troubleshooting Guide If this unit does not perform properly when operated as instructed in this Owner's Manual, check this unit consulting the follow- ing checklist. PROBLEM CORRECTIVE ACTION No power. • Make sure the power plug is connected to an AC outlet. •... -
Page 24: Specifications
‘---’ will be displayed instead. (3 letter language code is written in bracket.) Limited Warranty FUNAI CORP. will repair this Emerson product, free of charge in the USA in EVENT BE LIABLE FOR ANY GENERAL, INDIRECT OR CONSEQUEN-... -
Page 25: Español
Español Conexiones Activación de la unidad Ajuste del reloj por primera vez Consulte la "Conexión básica del televisor" en la página delantera antes de utilizar esta unidad. -MENU- MENU Canal de salida RF PROGRAMAR AUTOREPETIR [OFF] Si el canal 3 se está utilizando para AJUSTE CANAL B AJUSTE DE RELOJ Encienda el televisor y sin-... - Page 26 Español Reproducción de la grabadora de vídeo Reproducción de DVD/CD Antes: Encienda el televisor y cambie al canal 3. Antes: Encienda el televisor, amplificador y otros equipos que puedan estar conectados a esta unidad. Asegúrese que el televisor y el sintoamplificador de •...
-
Page 27: Quick Use Guide
Quick Use Guide Connections Turn on the unit for the Clock Set Up first time Please refer to “Basic TV Connection” on the front page before you use this unit. -MENU- MENU RF Output Channel TIMER PROGRAMMING AUTO REPEAT [OFF] If channel 3 is already occupied for CHANNEL SET UP B CLOCK SET... - Page 28 Quick Use Guide VCR Playback DVD/CD Playback Before: Turn on the TV and set it to channel 3. Before: Turn on the TV, amplifier and any other components which are con- • If channel 3 is already occupied for broadcasting, see “RF nected to this unit.
Need help?
Do you have a question about the EWD2004OM and is the answer not in the manual?
Questions and answers