Advertisement
Table of Contents
- 1 Specifications Table
- 2 General Safety Warnings and Precautions
- 3 Specific Product Warnings and Precautions
- 4 Assembly Instructions
- 5 Operating Instructions
- 6 Troubleshooting Guide
- 7 Inspection, Maintenance, and Cleaning
- 8 Please Read the Following Carefully
- 9 Parts List
- 10 Assembly Diagram
- Download this manual
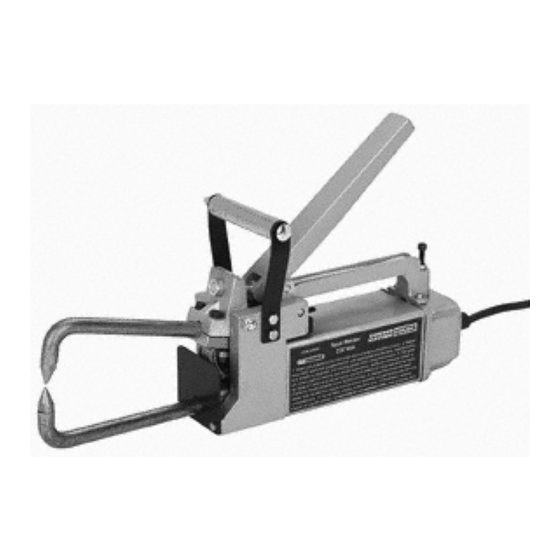
spot welder
asseMbly and operating instructions
visit our website at: http://www.harborfreight.com
read this material before using this product.
Failure to do so can result in serious injury.
save this Manual.
Copyright
2001 by Harbor Freight Tools
©
contained herein may be reproduced in any shape or form without the express written consent of Harbor
Freight Tools. Diagrams within this manual may not be drawn proportionally. Due to continuing improve-
ments, actual product may differ slightly from the product described herein. Tools required for assembly
and service may not be included.
For technical questions or replacement parts, please call 1-800-444-3353.
Revised Manual 02b, 09l
230 volt
Model
45690
. All rights reserved. No portion of this manual or any artwork
®
Advertisement
Table of Contents

Summary of Contents for Chicago Electric 45690
- Page 1 Tools required for assembly and service may not be included. For technical questions or replacement parts, please call 1-800-444-3353. Revised Manual 02b, 09l 230 volt Model 45690 . All rights reserved. No portion of this manual or any artwork ®...
-
Page 2: Specifications Table
Do not wear loose clothing or jewelry as they can become caught in moving parts. Wear a protective hair covering to prevent long hair from becoming caught in moving parts. If wearing a long-sleeve shirt, roll sleeves up above elbows. INDUSTRIAL APPLICATIONS MUST FOLLOW OSHA REQUIREMENTS. SKU 45690 SPECIFICATIONS TABLE description 230 Volt 1.5 KVA @ 50% Duty Cycle... -
Page 3: Specific Product Warnings And Precautions
Do not operate this product in the presence of flammable liquids, gases, or dust. To avoid accidental electric shock, do not let your body come in contact with grounded surfaces such as pipes, radiators, ranges and refrigerators. Always keep a fire extinguisher nearby. SKU 45690 PAGE 3 Rev 02b... - Page 4 DO NOT FORCE THE EQUIPMENT. This Spot Welder will do the work better and safer at the speed and capacity for which it was designed. AVOID UNINTENTIONAL STARTING. Make sure you are prepared to begin work before turning the Control Switch (part #25) “ON”.
-
Page 5: Assembly Instructions
Tong (part #46) when fully assembled. (See Figure B, and Assy. Diagram.) Re-tighten the four Cap Screws (part #3). To attach the Upper Tong (part #46) to the Spot Welder, loosen the four Cap Screws (parts #3, #11) located at the top/front of the tool. (See Figure A, and Assy. - Page 6 LOWER TONG (#47) To Attach The Handle To The Spot Welder: To attach the Wooden Handle (part #17) to the Spot Welder, insert the Bolt (part #19) through the following parts in this order: through a Handle Bracket (part #18), through the Wooden Handle, and through the remaining Handle Bracket.
- Page 7 Next, Attach the complete Handle Assembly (parts #17, #18, #19, #20) to the Front Housing (part #28) of the Spot Welder, using the four Hex Head Screws (part #16). (See Figure D, and Assy. Diagram.) WASHER (#20) POWER SWITCH (#25)
-
Page 8: Operating Instructions
To Adjust The Tong And Operating Lever Pressure: Caution: Prior to adjusting the Tongs (parts #46, #47) and Operating Lever (part #5) pressure, make sure the Spot Welder is disconnected from its electrical supply source. NOTE: Excessive Tong (parts #46, #47) can damage the Tong Tips (part #48). - Page 9 (#48) To Use The Power Switch: The Power Switch (part #25) allows electrical current to the Spot Welder to be turned “ON” and “OFF”. (See Figure D, and Assy. Diagram.) Turn the Power Switch (part #25) sideways in either direction to start the electrical current.
-
Page 10: Troubleshooting Guide
Caution: Always disconnect the Spot Welder from its electrical power supply source before performing any inspection, maintenance, or cleaning. Before each use, inspect the general condition of the Spot Welder. Inspect switch, power plug and cord assembly, and extension cord (if used) for damage. Check for loose screws, misalignment, binding of moving parts, broken parts and any other condition that may affect its safe operation. -
Page 11: Please Read The Following Carefully
Do not use solvents to wipe off the Spot Welder, as damage may result. If necessary, wipe with a damp cloth. You may use a mild detergent. Once clean, lubricate all moving parts with a light oil. When storing, keep the Spot Welder in a box or covered with a cloth cover. -
Page 12: Parts List
Cable, Power 10 Ft. 16 Gauge 1/C (Models w/out Timer) Tubing, Gl Acrylic No. 7 x 2.500 Screw, 10-32 x .500 Hex Head Slt Stl Upper Tong Lower Tong Tong Tip Lock Washer SKU 45690 PARTS LIST Description PAGE 12 Qty. REV 03d... -
Page 13: Assembly Diagram
ASSEMBLY DIAGRAM NOTE: Some parts are listed and shown for illustration purposes only, and are not available individually as replacement parts. SKU 45690 PAGE 13... - Page 14 (if appli- cable), welding clamps, electrode holders, cables and accessories packed with the welder are free of defects in materials and workmanship. This Limited 90 Day/1 Year Warranty shall not apply to consumable parts such as tips, welding wire, and gas nozzles.


Need help?
Do you have a question about the 45690 and is the answer not in the manual?
Questions and answers