Table of Contents
Advertisement
Quick Links
Advertisement
Table of Contents

Related Manuals for Comfort Bilt HP61


Summary of Contents for Comfort Bilt HP61
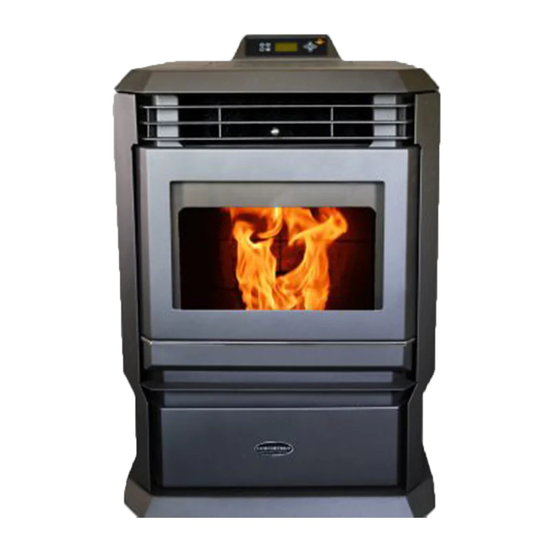
- Page 1 Operator's Manual HP61 Pellet Stove WWW.COMFORTBILT.NET...
-
Page 2: Table Of Contents
TABLE OF CONTENTS Safety Precautions......3-6 Introduction and Pellets......7 Safety and Other Features....8 Specifications........9 Installation and Placement....10 Floor Protection Requirements..10 Clearances to Combustibles.....11 Stove Venting........12-14 Outside Air Connection.....15 Mobile Home Installation....15 Stove Venting Examples....16-21 Controller Operations....22-23 Pre-Operation........24 Startup and Operation Modes...25 Setting Data on Controller...26-28 Diagnostics.........29 Maintenance and Care....30-32... - Page 3 WARNING WARNING Please read this entire manual before HOT! Do not touch. Severe burns installation or use of this pellet fuel- and/or the ignition of clothing may burning room heater. Failure to follow occur. Glass and other surfaces are hot these instructions may result in property during operation and cool down.
-
Page 4: Safety Precautions
WARNINGS AND SAFETY IMPORTANT SAFETY PRECAUTIONS PRECAUTIONS This symbol points out important safety instructions which, if not Please read this section carefully. followed, could endanger your Operate the stove according to the safety personal safety. Read and follow all instructions and recommendations outlined here instructions in this manual before and inserted throughout the text. - Page 5 WARNING WARNING Read this entire manual before you install and DO NOT use your new pellet stove. Failure to follow Burn garbage in this unit. The burning of instructions may result in property damage, other solid fuels such as cord wood or wood bodily injury, or even death.
- Page 6 CAUTION CAUTION Installation and repair of this pellet stove All applicable building codes for your location should be done by a qualified service person. must be followed. In areas where building codes The appliance should be inspected before require additional steps to the installation of this use and at least once per year by a qualified product that are not included in this manual, the service person.
-
Page 7: Introduction And Pellets
INTRODUCTION PELLETS Congratulations on your investment in quality. We This pellet stove is designed and approved to have worked hard to ensure that this pellet stove burn wood pellets, that comply with pellet fuels meets the highest standards for usability and industry standards. -
Page 8: Safety And Other Features
AUTOMATIC SAFETY FEATURES UNDERSTANDING YOUR STOVE Your stove utilizes a vertical auger fuel feed system POWER OUTAGE that is operated by a microprocessor controlled During a power outage, the stove will shut down digital circuit board. The digital circuit board allows safely. -
Page 9: Specifications
SPECIFICATIONS WARNING Model Number HP61 BTU/Hour Output (1) 22,000-50,000 This stove has a manufacturer set minimum low Heating Capacity (2) Up to 3,000 sq. ft. burn rate that must not be altered. It is against Particulate Emissions 1.211 g/hr federal regulations to alter this setting or otherwise... -
Page 10: Installation And Placement
WARNING INSTALLATION It is recommended that the stove be installed and Read this entire manual before you install and use serviced by an authorized professional. this stove. Failure to follow the instructions may Proper installation of this stove is necessary for result in property damage, bodily injury, or even safe and efficient operation. -
Page 11: Clearances To Combustibles
CLEARANCES TO COMBUSTIBLES NOTE: These are minimum clearances to combustible walls. 3" " 6" 3" Figure 4: Corner Insallation through wall Figure 5: Straight Insallation through wall 3" 2" 2" 6" 3" Figure 6: Corner Insallation interior vertical vents Figure 7: Straight Insallation interior vertical vents NOTE: When Interior Vent is installed vertically, the clearance to the back wall is determined by the vent size used. -
Page 12: Stove Venting
WARNING VENTING Before venting, consult vent manufacturer's Do Not connect this unit to a chimney flue that specifications and recommendations for all services another appliance. venting installations. Do Not install a flue damper in the exhaust The following installation guidelines must be venting system of this unit. - Page 13 PELLET VENT TERMINATION CLEARANCE The stove vent must terminate on the outside of the building. Horizontal terminations must extend a minimum of 12" from the wall. Vertical terminations must protrude a minimum of 24" from the roof surface. In addition, all clearances listed below must be met. SEE FIGURE 8 Must have an approved cap (to prevent water from entering) or a 45 degree downturn with rodent screen.
- Page 14 VENTING THE PELLET STOVE Do not install flue damper in the exhaust venting system of this unit. Use an approved wall thimble when passing the vent through walls. Use a ceiling support/fire stop spacer when passing the vent through ceilings. (Make sure to maintain minimum clearances to combustibles) If using more than one T-vent or exceed...
-
Page 15: Outside Air Connection
CAUTION OUTSIDE AIR CONNECTION The efficiency of ComfortBilt pellet stoves can be The operation of exhaust fans, such as bathroom impacted by the temperature of the air supplied to and attic fans, could create a negative pressure in the burn pot, and the temperature of the air that is the room, causing the stove to be starved of drawn past the heat exchange tubes to heat the combustible air. -
Page 16: Stove Venting Examples
SIMPLE STOVE VENTILATION EXAMPLES... - Page 17 COMPLEX STOVE VENTILATION EXAMPLES INTERIOR VERTICAL INSTALLATION...
- Page 18 CLASS A CHIMNEY RETROFIT...
- Page 19 MASONRY FIREPLACE HEARTH STOVE...
- Page 20 ZERO-CLEARANCE (METAL) FIREPLACE HEARTH STOVE...
- Page 21 FREESTANDING MASONRY CHIMNEY...
-
Page 22: Controller Operations
BECOMING FAMILIAR WITH YOUR CONTROLLER Figure 17: Control keypad CONTROLLER BUTTONS Infrared Receiver: Receives signal from 11. Enter Button: Pressing "Enter" button allows remote control. (Available separately) you to adjust and select data on the screen. Power Indicator: Illuminates when main Pressing the "Enter"... - Page 23 MAIN OPERATION CONTROLLER SCREEN DISPLAY Figure 19: Display Screen Date and Time: Displays time and 7. Igniter Indicator: Indicates when the date. igniter is being fired. Heating Power Level: Indicates the Combustion Blower Indicator: level of power at which the stove is Indicates when the exhaust/combustion fan currently heating.
-
Page 24: Pre-Operation
Make sure the hopper is clean and free of WARNING foreign matter, including pellet fines and dust. Fill the hopper with wood pellets, making sure Never use flammable liquids such as gasoline, that NO parts of the bag or any foreign objects gasoline-type lighter fuel, charcoal, lighter enter the hopper, as this may cause harm to fluid, or fire starting gels in or around the... -
Page 25: Startup And Operation Modes
TEMPERATURE CONTROL MODE OPERATION After you have chosen the desired operation The Thermostat Mode allows you to set the mode for your stove, press the ON/OFF button temperature of the room. The stove will increase or decrease the level of heat it outputs automatically to start the stove ignite cycle. -
Page 26: Setting Data On Controller
SETTING DATA ON YOUR CONTROLLER SETTING THE TIME AND DATE Press and hold the "Enter" button. This will take you to the "Set Data" screen. See Figure 22 Press "Enter" again to enter the "Set Clock" screen. See Figure 23 To change the hour, press "Enter". - Page 27 5. "Yes" will be highlighted. Pressing "Enter" will TIP: If at any point, you need to leave the confirm your selection and will take you out of weekly schedule screen or once you have your first set time. finished setting all of your times, select the If you wish to erase a scheduled time, use the "Exit"...
- Page 28 To Set Blower Voltage: IMPORTANT: Changing the exhaust voltage does Press and hold the "Enter" button. This will take NOT change the feed rate. Therefore, on high heat you to the "Set Data" screen. power levels, where the feed rate is faster, a low Using the "Scroll Down"...
-
Page 29: Diagnostics
Component Keywords: DIAGNOSTICS Your stove's controller comes equipped with an Stalls: Changing the stall # will allow you to test on-board diagnostics option that will let you test the components in the various heating power levels. some components of the stove. NOTE: You will only be able to enter the Fire: Tests whether the igniter is working diagnostic screen when the stove is turned... -
Page 30: Maintenance And Care
MAINTENANCE SOOT AND FLY ASH The products of combustion will contain small NORMAL CARE AND MAINTENANCE particles of fly ash. The fly ash will collect in the A majority of all problems with pellet stoves are exhaust venting system and restrict the flow of the either directly or indirectly related to general flue gasses. - Page 31 DAILY MAINTENANCE BURN POT Remove and clean the burn pot daily. Make sure all airflow holes burn unobstructed. Using a small metal pick or drill bit can aid you if these get plugged through general use. Every time the hopper is filled with fuel, the burn pot should be emptied.
- Page 32 CONTINUING MAINTENANCE REAR AIRFLOW/EXHAUST CHAMBER In addition to daily and weekly maintenance tasks, the exhaust chamber covers should be removed and the entire chamber vacuumed thoroughly once every 1.5 tons of pellets burned. First, you will need to locate the cover plates to the rear exhaust chambers.
-
Page 33: Troubleshooting & Warranty
TROUBLESHOOTING & REPAIR We build quality and durability into the design of our products; but no amount of careful design by us, and careful maintenance by you, can guarantee a repair free life for your stove. Most repairs will be minor, and easily fixed by following the suggestions in the troubleshooting guides on our website.
Need help?
Do you have a question about the HP61 and is the answer not in the manual?
Questions and answers