Table of Contents
Advertisement
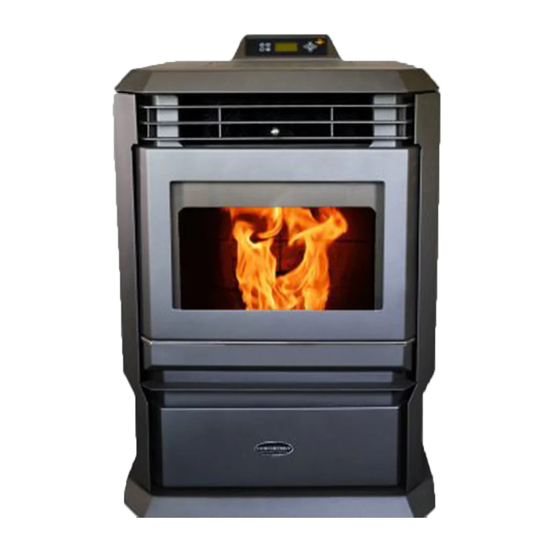
O W N E R ' S M A N U A L
H P 6 1 P E L L E T S T O V E
WARNING!
Please read this entire manual before installation and use of this fuel-burning pellet room heater, and save for future reference.
Failure to follow these instructions could result in property damage, bodily injury, or even death.
Contact local building or fire officials about restrictions and installation inspection requirements in your area.
Advertisement
Table of Contents

Related Manuals for Comfort Bilt HP61


Summary of Contents for Comfort Bilt HP61
- Page 1 O W N E R ' S M A N U A L H P 6 1 P E L L E T S T O V E WARNING! Please read this entire manual before installation and use of this fuel-burning pellet room heater, and save for future reference. Failure to follow these instructions could result in property damage, bodily injury, or even death.
- Page 3 S t a y S a f e ! Safety Alert Key: It is important to pay attention to alerts you will see throughout this manual to ensure your safety. DANGER! Indicates a hazardous situation which, if not avoided, will result in death or serious injury. WARNING! Indicates a hazardous situation which, if not avoided, could result in death or serious injury.
- Page 4 S t a y S a f e ! CAUTION! This stove should NOT be used as the only source of heat in the home. Power outages and periodic maintenance will result in a total loss of heat. Contact local building or fire officials regarding restrictions and installation inspection requirements for your area.
-
Page 5: Table Of Contents
T a b l e o f C o n t e n t s Safety Key Additional Warnings G e t t i n g S t a r t e d ............... . . 6 Getting Familiar with Your Stove What's Included I n s t a l l a t i o n . -
Page 6: G E T T I N G S T A R T E D
G e t t i n g S t a r t e d Getting Familiar with your Stove Hopper Lid Switch (Beneath Hopper Fill Lid) Control Panel Inside the Stove Body: -Auger System Heat Exchange Tubes -Circuit Board -Combustion Blower -Convection Blower Heat Tube -Vacuum Switch... -
Page 7: What's Included
G e t t i n g S t a r t e d What's Included Online Guides and 1 Year Warranty Owner's Manual Remote Control Videos Power Cord Data Cable Control Panel & Bracket WARNING! CAUTION! Inspect stove and components for damage. Risk of cuts, abrasions, or flying Damaged parts may impair safe operation. -
Page 8: I N S T A L L A T I O N
I n s t a l l a t i o n Pre-Installation Unpacking: Remove cardboard lid, outer box sleeve, and packing foam. Inspect for any shipping damage. (Preferably before delivery team leaves) Unscrew the mounting L brackets that secure the rear of the stove to the pallet. -
Page 9: Floor Protection
I n s t a l l a t i o n Floor Protection The stove must be installed on a noncombustible floor, with proper floor protection, or on a masonry hearth. When a clean out T-vent is installed on the inside of a home, the floor protector must extend 2 inches beyond the rear of the T-vent. -
Page 10: Clearances To Combustibles
I n s t a l l a t i o n Clearances to Combustibles Confirm required clearances to combustibles (Combustibles include wood, drywall, etc...) 5" 2" 7" 5" Horizontal installation Back walls to Stove rear corners: 5" (13cm) Back wall to Stove back: 2" (5cm) Side wall to Stove: 7"... -
Page 11: Vent Termination Clearances
I n s t a l l a t i o n Vent Termination Clearances The stove vent must terminate on the outside of the building. Horizontal terminations must extend a minimum of 12" from the wall. Vertical terminations must protrude a minimum of 24" from the roof surface. In addition, all clearances listed below must be met. -
Page 12: Venting
I n s t a l l a t i o n Venting Adding bends in the exhaust path restricts air flow, reduces performance, and provides a collection point for ash deposits requiring more frequent cleaning. CAUTION! Do NOT connect to any air distribution duct or system. Do NOT install a flue damper in the exhaust venting system of this stove. - Page 13 I n s t a l l a t i o n Venting (Continued) Do not install flue damper in the exhaust venting system of this unit. Use an approved wall thimble when passing the vent through walls. Use a ceiling support/fire stop spacer when passing the vent through ceilings.
- Page 14 I n s t a l l a t i o n Simple Horizontal Installation Wall Wall Thimble Exhaust cap Air Intake Appliance Adapter Floor Protection Simple Vertical Installation (preferred) Wall Thimble 90° Elbow 90° Elbow Exhaust cap Exhaust cap Wall strap Wall Thimble Wall...
- Page 15 I n s t a l l a t i o n Through Roof Vertical Installation Class A Chimney Retrofit Installation Masonry Fireplace Hearth Install Freestanding Masonry Chimney install comfortbilt.net...
-
Page 16: O P E R A T I O
O p e r a t i o n Fuel Guide Fuel Material and Storage Wood pellets are generally produced out of wood waste such as sawdust and shavings. The raw material is dried, mechanically fractioned to size and extruded into pellets under high pressure. This pellet stove is designed and approved to burn wood pellets, that comply with pellet fuels industry standards. -
Page 17: Getting Ready
O p e r a t i o n Getting Ready What to Expect Combustion blower will turn on. (Panel will display "Igniting") Igniter will heat up. Auger system will deliver pellets into the burn pot. (Smoke may occur during ignition but will evacuate once the flame appears in the burn pot.) Convection blower will turn on once the stove heats up. -
Page 18: Control Panel Operation
O p e r a t i o n Control Panel Operation 1) Infrared Receiver: Receives signal from remote control. (Included) 2) Power Indicator: Illuminates when main power is switched on. 3) Alarm Light: Illuminates when a fault is encountered (Low Temperature, High Temperature, Ignite Failed, etc... -
Page 19: Control Panel Display
O p e r a t i o n Control Panel Display Mode: Displays operation mode (Manual, Temp, Weekly, or Thermostat). Work Stage: Displays the operational stage the stove is currently in. (Igniting, Heating, Fire Off, Cleaning, Standby, Stop, etc...) Desired Temperature: In Temp or Weekly mode, this will show the currently set temperature. -
Page 20: Pre-Ignition Checklist
O p e r a t i o n Pre-Ignition Checklist Check Hopper - Make sure the hopper is clean and free of foreign matter. (Including pellet fines and dust). Fill Hopper - Fill the hopper with wood pellets. (Make sure that NO parts of the bag or any foreign objects enter the hopper, as this may cause harm to the auger feed system). -
Page 21: Operational Modes
O p e r a t i o n Operational Modes Before actually starting your stove, you will need to determine which operating mode you would prefer the stove to run in. This stove can operate in one of three modes - Manual, Temp, and Weekly. (Thstat mode requires wifi and remote thermostat to operate correctly, but otherwise works similarly to Temp mode) Manual: In this mode, you can adjust and set the heating power level to control the heat level. -
Page 22: Starting Your Stove
O p e r a t i o n Starting your Stove After you have chosen the desired operation mode for your stove, press the ON/OFF button to start the stove's ignite cycle. When the stove turns on, "Igniting" will appear in the work stage box on the screen. Once the fire is lit, and the stove achieves operating temperature, the work stage box on the screen will read "Heating", and the room blower fan will engage. -
Page 23: Settings
O p e r a t i o n Settings There are a number of settings that can be altered or adjusted within your stove. (Weekly schedules, Time/date, temperature units, etc...) Press and hold the Enter button (#11). This will take you to the "Set Data"... - Page 24 O p e r a t i o n Settings Continued 1: General - This menu has four internal settings. Time and Day Temperature Units Language Wifi Reset / On Time and Day: Press Enter to select and highlight the block you wish to edit, use the Up and Down buttons to change the value, and then press Enter again to lock in your edits and highlight the next block.
- Page 25 O p e r a t i o n Settings Continued 3: Set Combustion - This menu has eight internal combustion levels. Five heat levels (H01 - H05) and three ignition levels (IG01 - IG03). Within each level, there are three settings specific to that level.
- Page 26 O p e r a t i o n Settings Continued 5: Set ECO - This menu lets you to toggle on or off the ECO function, which will allow the stove to automatically cycle on and off based on the desired temperature set in the Temp mode. Press the Enter button to highlight the Off or On tag.
- Page 27 O p e r a t i o n Settings Continued 8: Information - This menu allows you to view some specific information about the stove. (See information screen on pg. 21) Press the Up or Down button to select the submenu you wish to view, and then press Enter to confirm.
-
Page 28: Maintenance & Cleaning Video
m a i n t e n a n c e Maintenance & Cleaning A majority of all problems with pellet stoves are related to general maintenance and cleaning. Regularly cleaning your stove will allow it to function properly and extends the life of most of the stove’s components. Due to differences in fuel quality, stove cleaning intervals can vary wildly. - Page 29 m a i n t e n a n c e Maintenance & Cleaning Continued Burn Pot: Daily or as Needed Remove and clean the burn pot every time the hopper is filled with fuel, or as needed. To empty the burn pot, lift it out of the cradle and dump it directly into the ash pan to either side.
- Page 30 m a i n t e n a n c e Maintenance & Cleaning Continued Ash Pan Drawer: Weekly or as Needed Ashes should be contained in a metal container with a tight fitting lid. The container of ashes should be placed on a noncombustible floor or, well away from any combustible materials.
- Page 31 m a i n t e n a n c e Maintenance & Cleaning Continued (IMPORTANT) Rear Exhaust Chambers: Every ton (50 Bags) of Pellets Burned or as Needed In addition to daily and weekly maintenance tasks, the exhaust chamber covers should be removed and the entire chamber vacuumed thoroughly once every ton (50 bags) of pellets burned or more often depending on pellet quality.
-
Page 32: T R O U B L E S H O O T I N
T r o u b l e s h o o t i n g Troubleshooting Videos visit: https://comfortbilt.net/pages/our-videos or scan the code. Check out our written guides here: https://comfortbilt.net/pages/troubleshooting-component-guides CAUTION! Whenever performing maintenance on your stove, ensure that the stove is cool to the touch, and that power has been disconnected. -
Page 33: Troubleshooting Video
T r o u b l e s h o o t i n g Problem: Alarm - High Temperature/Overheat The stove giving a Hight Temp or overheat alarm could be caused by the room blower not moving enough hot air out of the stove, limited combustion airflow, an improper fuel-to-air ratio in the settings, or an install with excessive bends/elbows. -
Page 34: C E R T I F I C A T I O N
**Maximum BTU output based on HHV efficiency and the high burn section of the EPA emissions test. ***Heating capacity depends on climate zone, structure layout, insulation ratings, and other facrors. Electrical Rating (On High) HP61: 115VAC, 60Hz, Start 4.3 Amps, Run 1.8 Amps Room Blower: 115VAC, 60Hz, 0.70 Amps Combustion Blower: 115VAC, 60Hz, 0.55 Amps Auger Motor: 115VAC, 60Hz, 0.55 Amps... - Page 35 c e r t i f i c a t i o n s To register your stove, visit https://comfortbilt.net/apps/product-registration or scan the code. SMG Hearth & Home LLC - Comfortbilt Limited Warranty SMG Hearth & Home LLC (SMG), on behalf of its Comfortbilt brand, extends the following warranty for Comfortbilt stoves purchased from an authorized retailer.
Need help?
Do you have a question about the HP61 and is the answer not in the manual?
Questions and answers