
Subscribe to Our Youtube Channel
Related Manuals for Be Cool BC121TU2004F


Summary of Contents for Be Cool BC121TU2004F
- Page 1 BC121TU2004F HERZLICHEN GLÜCKWUNSCH! VIELEN DANK, DASS SIE SICH FÜR EIN PRODUKT VON BE COOL ENTSCHIEDEN HABEN. Diese Bedienungsanleitung gibt es in folgenden Sprachen Seite 2 – 10 DEUTSCH Seite 11 – 19 ENGLISH...
- Page 2 Inhaltsverzeichnis Wichtige Informationen zur Sicherheit, Standort und zum elektrischen 2 - 3 Anschluss 3 – 4 Recycling, Entsorgung, Konformitätserklärung Beschreibung des Geräts Montage 6 – 8 Inbetriebnahme Reinigungshinweise Technische Informationen Garantie LESEN SIE BITTE DIE BEDIENUNGSANLEITUNG SORGFÄLTIG DURCH BEVOR SIE MIT DER INSTALLATION, BEDIENUNG ODER WARTUNG BEGINNEN.
- Page 3 (Nichtbeachtung führt zum Verlust der Garantie und Gewährleistung). Weist das Gerät einen Defekt auf, so schalten Sie es aus und kontaktieren Ihren Händler oder die Kundenhotline. Wenden Sie sich für eventuelle Reparaturen des Geräts, des Netzsteckers oder Kabels stets und ausschließlich an vom Hersteller autorisierte Kundendienststellen. Die Kundendienststellen können Sie online unter www.becool.com abrufen.
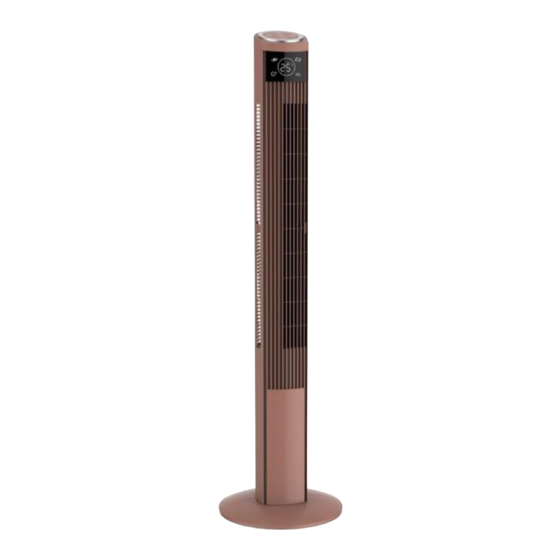
- Page 4 Ihren Händler oder die örtlichen Behörden. KONFORMITÄTSERKLÄRUNG Hiermit bestätigen wir, dass dieser Artikel den grundlegenden Anforderungen, Vorschriften und Richtlinien der EU entspricht. Die ausführliche Konformitätserklärung können Sie jederzeit unter folgendem Link einsehen: she.at/downloads/doc/bc121tu2004f.pdf Irrtümer und technische Änderungen vorbehalten. www.becool.com BESCHREIBUNG DES GERÄTS Bedienfeld Display Luftauslass Rückseite...
- Page 5 MONTAGE Fügen Sie die beiden Bestandteile des Standfußes zueinander, während Sie das Kabel durch die Mitte ziehen. Drücken Sie anschließend die beiden Teile ineinander und achten dabei darauf, dass diese einrasten. Setzen Sie den Standfuß auf das Ventilatorgehäuse und ziehen vorsichtig das Stromkabel durch die Öffnung des Standfußes.
- Page 6 INBETRIEBNAHME 1. Stellen Sie das Gerät auf eine ebene und trockene Fläche (Keine Verwendung in Nassräumen). 2. Stecken Sie den Stecker in eine Standard 220~240V Steckdose. 3. Die Funktionen des Ventilators können sowohl mit Hilfe der Fernbedienung als auch direkt am Gerät mit den Tasten des Bedienfeldes eingestellt werden. 4.
- Page 7 EIN/AUSSCHALTEN: Um den Ventilator ein- und auszuschalten, verwenden Sie die -Tasten. GESCHWINDIGKEIT EINSTELLEN: Der Turmventilator ist mit drei verschiedenen Geschwindigkeitsstufen ausgestattet. Betätigen Sie so oft die -Tasten, bis die gewünschte Geschwindigkeit am Display aufleuchtet: Niedrige Geschwindigkeit Mittlere Geschwindigkeit Hohe Geschwindigkeit MODE: Der Turmventilator hat zwei verschiedene Modi, aus denen Sie auswählen können:...
- Page 8 OSZILLATION Durch Drücken der -Tasten startet oder stoppt die Schwenkfunktion. HINWEIS Mit dieser Funktion wird die ausgeblasene Luft nach links und rechts verteilt. Dadurch erreichen Sie eine horizontale Luftverteilung im Raum. Der Ventilator ist mit einem Ionisator ausgestattet. Dieser verteilt ionisierte Luft in die Räume und entfernt statische Aufladung.
- Page 9 Technische Informationen Nennspannung 220-240V Frequenz 50Hz Nenneingangsleistung Höhe 121cm Gewicht 3.75kg Bezeichnung Symbol Wert Einheit Maximaler Volumenstrom 43.2 m³/min Ventilator-Leistungsaufnahme 64.8 Serviceverhältnis 0.66 (m³/min)W Ventilator-Schallleistungspegel 0.227 dB(A) Kontaktadressen für weitere Schuss Home Electronic GmbH Informationen und Serviceline: Scheringgasse A-1140 Wien Tel: +43 (1) 97 0 21 –...
- Page 10 Mit diesem Qualitätsprodukt von BE COOL haben Sie eine Entscheidung für Innovation, Langlebigkeit und Zuverlässigkeit getroffen. Für dieses BE COOL Gerät gewähren wir eine Garantiezeit von 2 Jahren ab Kaufdatum gültig in Österreich! Sollten in diesem Zeitraum wider Erwarten dennoch Servicearbeiten an Ihrem Gerät notwendig sein, garantieren wir Ihnen hiermit eine kostenlose Reparatur (Ersatzteile und Arbeitszeit) oder (nach Ermessen der Firma Schuss) das Produkt auszutauschen.
-
Page 11: Table Of Contents
Table of contents 11 – 12 Important information on safety, location and electrical connection 12 – 13 Recycling, Disposal and Declaration of Conformity Technical description Assembly 15 – 17 Startup Cleaning instructions Technical instructions Warranty PLEASE READ THIS INSTRUCTION MANUAL CAREFULLY BEFORE STARTING INSTALLATION, OPERATION OR MAINTENANCE. -
Page 12: Recycling, Disposal And Declaration Of Conformity
● 11. Children under the age of 8 and persons with limited physical, psychological, sensory or mental abilities and lack of experience and knowledge may only use this device under appropriate supervision and if comprehensively briefed on the safe use of the device and the associated hazards. -
Page 13: Technical Description
DECLARATION OF CONFORMITY We hereby confirm that this item complies with the basic requirements, regulations and directives of the EU. You can view the detailed Declaration of Conformity by clicking on the following link: www.she.at/downloads/doc/she121tu200x.pdf Subject to errors and technical changes. www.she.at TECHNICAL DESCRIPTION Control panel... -
Page 14: Assembly
ASSEMBLY Attach the two components of the base to each other while pulling the cable through the middle. Then push the two parts into each other, making sure that they click into place. Place the base on the fan housing and gently pull the power cord through the opening of the base. -
Page 15: Startup
START UP 1. Place the device on a flat and dry surface (no use in wet rooms). 2. Plug the plug into a standard 220 ~ 240V outlet. 3. The functions of the fan can be adjusted both with the remote control and directly on the unit with the buttons on the control panel. - Page 16 ON/OFF: To turn on the fan, use the -buttons. SPEED: The tower fan has three different speed settings. Use the -buttons, until the desired speed setting lights up on the display: Low speed Medium speed High speed MODE: The tower fan has two different mode you can chose from: ...
-
Page 17: Cleaning Instructions
The fan is equipped with an ionizer. This distributes ionized air into the rooms and removes static electricity. To start the ionizer function please proceed as follows: • Control panel Press the - button for 3 seconds. • Remote control Press the - button. -
Page 18: Technical Instructions
Technical information Rated voltage 220-240V Frequency 50Hz Rated input power Height 121cm Weight 3.75kg Name Symbol Value Unit Maximum volume flow 43.2 m³/min Fan power consumption 64.8 Service value 0.66 (m³/min)/W Fan sound power level 64.6 dB(A) Consumption in standby mode 0.227 Contact address for further information Schuss... -
Page 19: Warranty
WARRANTY By purchasing a SHE quality product you have acquired an innovative, long lasting and reliable item. For this SHE device we grant a warranty of 2 years from the date of purchase, valid in Austria only. In the unlikely event that service work is required on your device in this period we warrant free repair (spare parts and labour) or (subject to Schuss’s decision) to replace the product.
Need help?
Do you have a question about the BC121TU2004F and is the answer not in the manual?
Questions and answers