Page 1
Network Receiver Réseau Ampli-Tuner Owner’s Manual Mode d’emploi Manual de instrucciones 
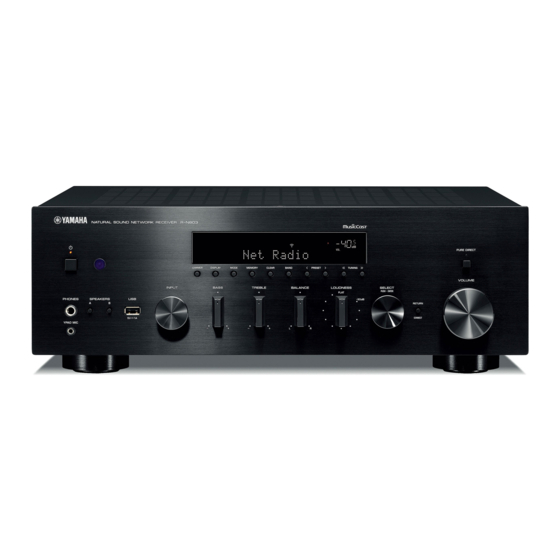
• The R-N803 and R-N803D network receivers allow you to play back sound in high-quality stereo at your own home. • This manual explains preparations and operations for everyday users of the unit. •...
Page 2
English IMPORTANT SAFETY INSTRUCTIONS 1 Read these instructions. 2 Keep these instructions. 3 Heed all warnings. CA UT IO N 4 Follow all instructions. RISK OF ELECTRIC SHOCK 5 Do not use this apparatus near water. DO NOT OPEN 6 Clean only with dry cloth. 7 Do not block any ventilation openings.
Page 3
Yamaha Corporation of America or its found in the users manual, may cause interference subsidiaries. harmful to the operation of other electronic devices. * This applies only to products distributed by YAMAHA CORPORATION OF AMERICA. (class B) FCC CAUTION COMPLIANCE INFORMATION STATEMENT...
Page 4
If any liquid such as • Yamaha cannot be held responsible for damage caused by water seeps into the device, turn off the power immediately and improper use or modifications to the unit.
Page 5
Using the unit when it is not plugged in sufficiently can cause purchased the unit or from qualified Yamaha service personnel. dust to accumulate on the plug, causing a fire or burns.
Page 6
Notice and Information Notice Information Indicates points that you must observe in order to Indicates information of note regarding this product. prevent product failure, damage or malfunction and ■ data loss, as well as to protect the environment. About content in this manual •...
Contents Contents Playing back music stored on a USB storage INTRODUCTION device ..............39 What you can do with this unit ......... 2 Connecting a USB storage device ....... 39 Sources that can be played back on this unit ....2 Playback of USB storage device contents ....
INTRODUCTION What you can do with this unit This unit is a network receiver compatible with a network source such as a media server and mobile device. It supports playback from not only audio sources such as a CD player or radio, but also from Bluetooth devices and network streaming services.
Supplied accessories Supplied accessories Check that the following accessories are supplied with the product. Remote control AM antenna (R-N803) FM antenna (R-N803) DAB/FM antenna (R-N803D) One of the above is supplied depending on the region of purchase. Batteries (x2) YPAO microphone Power cord (AA, R6, UM-3) * The supplied power cord...
Controls and functions Front panel 4 5 6 7 8 9 : PURE DIRECT DIMMER DISPLAY MODE MEMORY CLEAR BAND PRESET TUNING VOLUME INPUT BASS BALANCE LOUDNESS SELECT TREBLE PUSH - ENTER FLAT PHONES SPEAKERS -30dB RETURN CONNECT YPAO MIC 1 A (power) 7 MEMORY Turns on/off the unit.
Page 11
Controls and functions PURE DIRECT DIMMER DISPLAY MODE MEMORY CLEAR BAND PRESET TUNING VOLUME INPUT BASS TREBLE BALANCE LOUDNESS SELECT PUSH - ENTER FLAT PHONES SPEAKERS -30dB RETURN CONNECT YPAO MIC D PHONES jack L LOUDNESS control Outputs audio to your headphones for private listening. Retains a full tonal range at any volume level (p.
Controls and functions Front display 6 7 8 STEREO TUNED SLEEP YPAO VOL. VOL. MUTE Note • If you turn on the power to the unit right after you purchase or 7 YPAO VOL. indicator initialize it, the unit will display “WAC” (Wireless Accessory Lights up when the YPAO volume (p.
Controls and functions Rear panel NETWORK AC IN OPTICAL COAXIAL ANTENNA SPEAKERS PHONO 75Ω LINE TRIGGER SUBWOOFER 0.1A (R-N803) 1 LINE 1-3 jacks 8 AC IN jack For connecting the supplied power cord (p. 14). For connecting to analog audio components (p. 10). 2 PHONO jacks 9 CD jacks For connecting to a turntable (p.
Controls and functions Remote control 1 Infrared signal transmitter Sends infrared signals. 2 SPEAKERS A/B SPEAKERS Turns on and off the set of speakers connected to the SPEAKERS A and/or SPEAKERS B terminals on the rear panel of this unit PHONO SLEEP when the corresponding key is pressed.
Page 15
Controls and functions ■ A A (power) Installing batteries Turns on/off (standby) the unit. Note The A (power) key on the remote control works only when the A (power) on the front panel is on. B SLEEP Sets the sleep timer (p. 24). C OPTION Displays the “Option”...
PREPARATION Connections Connecting audio devices Make sure to connect L (left) to L, R (right) to R, “+” to “+” and “–” to “–”. If the connections are faulty, no sound will be heard from the speakers, and if the polarity of the speaker connections is incorrect, the sound will be unnatural and lack bass.
“SP. IMP” (p. 52) in the ADVANCED SETUP menu. noise without the GND connection. • If you have a Yamaha subwoofer that supports a system Speaker impedance (SP IMP.) connection, you can switch the power of the subwoofer in...
Page 18
Connections ■ Bi-wire connection Bi-wire connection separates the woofer from the combined midrange and tweeter section. A bi-wire compatible speaker has four binding post terminals. These two sets of terminals allow the speaker to be split into two independent sections. With these connections, the mid and high frequency drivers are connected to one set of terminals and the low frequency driver to another set of terminals.
Connections Connecting the FM/AM antennas Connecting the DAB/FM antenna (R-N803) (R-N803D) Connect the supplied FM/AM antenna to this unit. Connect the supplied DAB/FM antenna to this unit and fix Fix the end of the FM antenna to a wall, and place the AM the antenna ends to a wall.
Connections Connecting the network cable Connecting the power cord Connect the unit to your router with a commercially- After all the connections are complete, connect the available STP network cable (CAT-5 or higher straight supplied power cord to this unit and then to an AC wall cable).
Connecting to network Connecting to network There are several methods to connect the unit to a network. Select a connection method according to your environment. Note • Some security software installed on your PC or the firewall settings of network devices (such as a router) may block the access of the unit to the network devices or the Internet.
Connecting to network ■ Connecting with the wired router You can connect to the network by Connecting using the DHCP server function of the simply making a wired LAN router connection (p. 14) Note • You can configure the network parameters (such as IP address) in “IP Address” (p. 49) in the “Setup” menu. •...
Connecting to network Configuring with the router's WPS On the iOS device, select the unit as the AirPlay speaker in the Wi-Fi screen. push button Example (iOS 10) You can easily set up a wireless connection with one push of the WPS button. Note This configuration does not work if the security method of your wireless router (access point) is WEP or WPA2-TKIP.
Connecting to network Set the wireless network connection Use the cursor keys (D / E) to select desired security method and press RETURN. manually Settings Before performing the following procedure, check the None, WEP, WPA2-PSK (AES), Mixed Mode security method and security key on the wireless router (access point).
Connecting to network Use the cursor keys (D / E) to select desired Connecting a mobile device to the security method and press RETURN. unit directly (Wireless Direct) Settings Using Wireless Direct, this unit can operate as a wireless None, WPA2-PSK (AES) network access point that mobile devices can directly connect to.
To return to the previous state, press RETURN. Note For details on MusicCast, download the MusicCast Setup Guide Use the cursor keys (B / C) to select from the Yamaha Download website. “Information” and press ENTER. http://download.yamaha.com/ Use the cursor keys (B / C) to select ■...
Page 27
Connecting to network Operate “MusicCast CONTROLLER” following the on screen instructions, then hold down CONNECT on the front panel of this unit for 5 seconds. CONNECT Operate “MusicCast CONTROLLER” following the onscreen instructions to set up the network. This completes the MusicCast network registration and wireless network connection settings.
BASIC OPERATION Playback Playing a source Switching information on the front display When you select a network source or USB as the input SPEAKERS source, you can switch playback information on the front SPEAKERS A/B A (power) display. PHONO SLEEP COAX 1 COAX 2 BLUETOOTH OPT 1...
Playback ■ Front panel operations Adjusting the BASS and TREBLE controls ■ Enjoying pure high fidelity sound (Pure Direct) PURE DIRECT When the PURE DIRECT switch is turned on, routes DIMMER DISPLAY MODE MEMORY CLEAR BAND PRESET TUNING VOLUME input signals from your audio sources so that the input INPUT BASS TREBLE...
Playback ■ Using the sleep timer Adjusting the LOUDNESS control Use this feature to automatically set this unit to standby mode after a certain amount of time. The sleep timer is PURE DIRECT DIMMER DISPLAY MODE MEMORY CLEAR BAND PRESET TUNING useful when you are going to sleep while this unit is VOLUME...
Listening to FM/AM radio Listening to FM/AM radio ■ Improving FM reception (FM mode) Note If the signal from the station is weak and the sound quality R-N803D does not include an AM tuner. is not good, set the FM band reception mode to monaural mode to improve reception.
Page 32
Listening to FM/AM radio ■ Registering a radio station manually LINE 1 LINE 2 LINE 3 TUNER BAND TUNING TUNER BAND MEMORY TUNING PRESET j / i PRESET BAND MEMORY MEMORY PRESET j / i PRESET ENTER Cursor keys B / C ENTER ENTER HOME...
Page 33
Listening to FM/AM radio ■ Use the cursor keys (B / C) to select a preset Recalling a preset station You can recall preset stations that were registered using station to be cleared and press ENTER. automatic station preset or manual station preset. CLEAR STEREO TUNED...
Listening to FM/AM radio Radio Data System tuning (U.K. and Europe models only) Radio Data System is a data transmission system used by FM stations in many countries. The unit can receive various types of Radio Data System data, such as “Program Service”, “Program Type,”...
Listening to DAB radio (R-N803D) Listening to DAB radio (R-N803D) DAB (Digital Audio Broadcasting) uses digital signals for Selecting a DAB radio station for clearer sound and more stable reception compared to reception analog signals. This unit can also receive DAB+ (an upgraded version of DAB) that allows for more stations You can select a DAB radio station from the stations using MPEG-4 audio codec (AAC+), which has a more...
Listening to DAB radio (R-N803D) ■ Using preset function Recalling a preset station Tune into a registered DAB radio station by selecting its preset number. You can register up to 40 DAB radio stations as presets. Once you have registered stations, you can easily tune in Press TUNER to select “TUNER”...
Listening to DAB radio (R-N803D) Displaying the DAB information Checking reception strength of each DAB channel label This unit can receive various types of DAB information when it is tuned in to a DAB radio station. You can check reception strength of each DAB channel label (0 [none] to 100 [best]).
Playing back music via Bluetooth You can play back music files stored on a Bluetooth On the Bluetooth device, select the unit device (such as mobile device) on the unit. (network name) from the available device list. Please also refer to the owner’s manual of your Bluetooth After pairing has been completed and the unit is device.
Note obstacles, radio wave conditions and the type of equipment. • Yamaha does not guarantee all wireless connections You can use the playback keys on the remote control to control between this unit and devices compatible with Bluetooth playback.
Playing back music stored on media servers (PCs/NAS) You can play back music files stored on your PC or Click “Turn on media streaming”. DLNA-compatible NAS on the unit. This unit Note Select “Allowed” from the drop-down list • To use this function, the unit and your PC/NAS must be next to the unit’s model name.
Playing back music stored on media servers (PCs/NAS) Use the following remote control keys to control Playback of PC music contents playback. Follow the procedure below to operate the PC music Keys Function contents and start playback. Select a music file or folder. Cursor keys Note Starts playback if pressed while...
Page 42
Playing back music stored on media servers (PCs/NAS) ■ Automatic playback setting Use this setting to choose whether to automatically play back music from your PC or from the NAS when turning on the unit or when selecting “Server” as the input source. When the input source is “Server”, press OPTION.
Listening to Internet radio Listening to Internet radio You can listen to Internet radio stations from all over the Use the cursor keys to select an item and world. press ENTER. If an Internet radio station is selected, playback starts Note and the playback information is displayed.
Playing back iPhone/iTunes music via a network (AirPlay) The AirPlay function allows you to play back iPhone/ Select a song and start playback. iTunes music on the unit via network. The unit automatically selects “AirPlay” as the input source and starts playback. The playback information is displayed on the front display.
Playing back music stored on a USB storage device Playing back music stored on a USB storage device You can play back music files stored on a USB storage device on the unit. Refer to the instruction manuals for the USB storage device for more information.
Page 46
Playing back music stored on a USB storage device ■ Use the following remote control keys to control playback. Automatic playback setting Use this setting to choose whether to automatically play Keys Function back music from your USB storage device when turning on the unit or when selecting “USB”...
Registering the current playback song/station (Preset function) Registering the current playback song/station (Preset function) When you select network sources and USB as the input Recalling a preset source, you can register the current playback song or streaming station as a preset up to 40. Press NET or USB to select the desired input You can then easily recall any preset song/station by selecting its preset number.
ADVANCED OPERATION Optimizing the speaker settings automatically (YPAO) The Yamaha Parametric room Acoustic Optimizer Press A (power) on the front panel to turn on (YPAO) function detects speaker connections, measures this unit. the distances from them to your listening position, and...
Page 49
Optimizing the speaker settings automatically (YPAO) Place the YPAO microphone at your listening To check the measurement result, press the position and connect it to the YPAO MIC jack cursor key (E). If “No Warning” appears on the front display, the on the front panel.
MIC jack firmly and start the measurement The YPAO microphone cannot detect test tones. again. If this error occurs repeatedly, contact the E-2 No Signal nearest authorized Yamaha dealer or service center. Connect the YPAO microphone to the YPAO The YPAO microphone has been removed.
Optimizing the speaker settings automatically (YPAO) Warning messages If a warning message is displayed after the measurement, you can still save the measurement results. However, we recommend you perform YPAO again in order to use this unit with the optimal speaker settings. YPAO W-1 Out of Phase Warning message...
Configuring playback settings for different playback sources (Option menu) You can configure separate playback settings for different Item Function Page playback sources. This menu allows you to easily Enables/Disables volume controls from Vol.Interlock configure settings during playback. iPhone/iTunes via AirPlay. (Volume interlock) Selects whether to automatically play MEMORY...
Configuring various functions (Setup menu) Configuring various functions (Setup menu) You can configure the unit’s various functions. MEMORY PRESET Cursor keys ENTER B / C / D / E ENTER HOME RETURN RETURN SETUP OPTION SETUP VOLUME NOW PLAYING MUTE Press SETUP.
When this unit is in the MusicCast extended mode, “Extend” is Subnet mask displayed. For details on the extended mode, refer to “MusicCast SUBNET Setup Guide” on the Yamaha website. The IP address of the default gateway GATEWAY The IP address of the primary DNS server...
Page 55
Configuring various functions (Setup menu) ■ ■ IP Address Standby (Network Standby) Configures the network parameters (such as IP address). Selects whether the unit can be turned on from other network devices (network standby). DHCP Select whether to use a DHCP server. Disables the network standby function.
Configuring various functions (Setup menu) ■ YPAO Update (Network Update) Updates the firmware via the network. Configures the setting related to YPAO. Starts the process to update the unit’s firmware. The following settings are available for each speaker Perform For details, see “Updating the unit’s firmware via Update system (Speaker A, Speaker B, Speaker A+B).
Configuring various functions (Setup menu) AutoPowerStdby (Auto Power Standby) Enables/disables the auto-standby function. If you do not operate the unit for the specified time, the unit will automatically go into standby mode. Does not set the unit to standby mode automatically.
Updates the firmware. UPDATE REMOTE ID••ID1 Change the unit’s remote control ID so that it matches the remote control’s ID. Select “ID1” normally. Select “AUTO” only when you use the remote control supplied with some Yamaha player. Settings ID1 (Default), AUTO...
Configuring the system settings (ADVANCED SETUP menu) Setting tuner frequency step (TU) Updating the firmware (UPDATE) TU••••FM50/AM9 UPDATE•NETWORK New firmware that provides additional features or product (Asia and General models only) improvements will be released as needed. If the unit is Selects the step size for locating tuner frequencies.
Updating the unit’s firmware via the network New firmware that provides additional features or product improvements will be released as needed. If the unit is connected to the Internet, you can download the firmware via the network and update it. Notice •...
As a safety precaution, capability to turn on the power The power does not three times consecutively. If the unit is in is disabled. Contact your nearest Yamaha dealer or turn on. — this condition, the power indicator on the service center to request repair.
Page 62
Troubleshooting Problem Possible cause Remedy page The protection circuitry has been activated Set the speaker impedance to match your speakers. The sound suddenly because of a short circuit, etc. goes off. Check that the speaker wires are not touching each other and then turn the power of this unit back on.
Page 63
Troubleshooting ■ FM reception Problem Possible cause Remedy page The unit is receiving radio interference, Change the antenna height, direction, or place of The FM radio ― such as multipath reflections. installation. reception strength is poor, and noise can The unit is receiving in a region located Press MODE on the front panel to select “MONO”...
Page 64
Troubleshooting Problem Possible cause Remedy page The DAB radio signal is weak. Change the antenna height, direction, or place of The DAB radio installation. reception strength is poor, and noise (such as hiss, crackle and jitter) can be heard. The DAB station may be temporarily out Contact the DAB broadcaster.
Page 65
Troubleshooting ■ USB/network Problem Possible cause Remedy page The USB storage device is not connected Turn off the unit, reconnect your USB device, and The unit does not to the USB jack securely. turn the unit on again. detect the USB storage device.
Page 66
Troubleshooting Problem Possible cause Remedy page A wireless LAN router (access point) The network separator function on the wireless LAN This unit cannot be that supports multiple SSIDs is used. router (access point) may be preventing this unit detected when using from being accessed.
Error indications on the front display Error indications on the front display Message Possible cause Remedy Access to the PC is denied. Configure the sharing settings and select the unit as a device to Access denied which music contents are shared (p. 34). The unit cannot access the USB device.
Supported devices and file formats Supported devices ■ ■ Bluetooth device AirPlay • This unit supports Bluetooth devices that support • AirPlay works with iPhone, iPad, and iPod touch with A2DP audio profile and AVRCP control profile. iOS 4.3.3 or later, Mac with OS X Mountain Lion or •...
Media Player are either registered trademarks or information on GPL/ LGPL open source software, how to trademarks of Microsoft Corporation in the United States obtain it, and the GPL/LGPL license, refer to the Yamaha and/or other countries. Corporation website (http://download.yamaha.com/sourcecodes/musiccast/).
Specifications (Cut off frequency) ............90 Hz Network PHONES (8 load) ..........470 mV/470 • Input jack: NETWORK x 1 (100Base-TX/10Base-T) • Frequency response • PC client function CD, etc. (20 Hz to 20 kHz) ........... 0 ± 0.5 dB • Compatible with DLNA ver. 1.5 CD, etc.
Page 71
* Including legs and protrusions • Weight..............11.0 kg (24.25 lbs) * The contents of this manual apply to the latest specifications as of the publishing date. To obtain the latest manual, access the Yamaha website then download the manual file.
Index Front display ..............6 Front display, switching information......22 AC IN jack............... 7 ADVANCED SETUP menu.......... 52 AirPlay................38 HOME, remote control ........... 8 AM antenna ..............13 AM radio ............... 25 ANTENNA terminals............7 Information, Network, setup menu ....... 48 Auto Playback, option menu .........
Page 73
Index PHONES jack ..............5 VOLUME control ............5 PHONES, front display message ........44 Volume Trim, option menu........... 46 PHONO jacks ..............7 Volume, setup menu ............. 50 Playback keys ..............9 Playback, Bluetooth device contents ......32 WAC ................15 Playing back, PCs/NAS content ........