Table of Contents
Advertisement
Advertisement
Table of Contents

Summary of Contents for DeLonghi PAC AN125HPEC
- Page 1 5715111181_00/ 11.12...
-
Page 2: Portable Air Conditioner
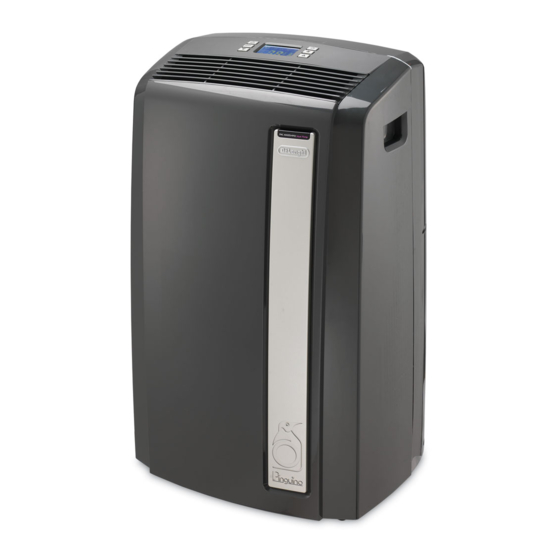
PORTABLE AIR CONDITIONER Instructions for use PAC AN125HPEC Keep these instructions Visit www.delonghiregistration.com Electrical Specifications to register your product online 115 V~ 60 Hz 10,8 A Visit www.delonghi.com for a list of service centers near you... - Page 4 Description ACCESSORIES...
- Page 5 I m p o r t a n t s a f e g u a rd s • Use this appliance only as described in this instruction manual. As with any electrical appliance, the instructions aim to cover as many situations as possible.
-
Page 6: Electrical Connections
Pre p a r i n g f o r u s e DESCRIPTION air exhaust hose 1 air outlet grille hose adaptor 2 control panel accessory for wall mounting 3 handles window bracket with pins 4 castors additional window bracket 5 filter window outlet 6 evaporator air intake grille... -
Page 7: Semi-Permanent Installation
Pre p a r i n g f o r u s e then fix the bracket by using the locking pin provided. When extracting the win- dow bracket and joining the two pieces pay attention you do not cover the hole. Keep the air hoses as short and free of curves as possible to avoid bottlenecks. - Page 8 Pre p a r i n g f o r u s e When the hose is not fitted, the hole can be closed with the flange cap NOTE: When installing the air conditioner semi-permanently, you should leave a door slightly open (as little as 1 cm) to guarantee correct ventilation.
-
Page 9: The Control Panel
Control panel THE CONTROL PANEL °C °F DESCRIPTION OF THE CONTROL PANEL A ON /OFF button B MODE selection button Air conditioning, dehumidifying, heating, fan C Reduce temperature/programme mode time button D Timer button E Fan speed button (MAX/MED/MIN) F Increase temperature/programme mode time button G Air conditioning symbol H Dehumidifying symbol Heating symbol... -
Page 10: Operation
Operation Before plugging the appliance check: the caps on the back of the unit are correctly inserted and screwed on the drai- nage TURNING THE APPLIANCE ON Plug the appliance into the mains. Two lines appear on the display indicating that the appliance is in stand-by. Press the button (A). -
Page 11: Setting The Timer
Setting the timer SETTING THE TIMER The timer can be used to delay when the appliance comes on or goes off. This avoids wasting electricity by optimising opera- ting periods. How to programme delay ON • Plug the appliance into the mains socket. It will be in STAND- •... -
Page 12: Heating Mode
Operation NOTE: In this mode, with room temperature above 77 degree F, the fan speed is adjustable. If the temperature is below, fan speed is selected automatically by the appliance and cannot be set manually. HEATING MODE This is ideal in spring and autumn when outdoor temperatures are not particularly severe. -
Page 13: Using The Remote Control Unit
Using the remote control unit DESCRIPTION OF THE REMOTE CONTROL 22) "ON/OFF" button 23) Temperature decrease/increase and programme mode button 24) "MODE" button 25) "TIMER" button 26) °F/°C switching button 27) Fan speed button (MAX/MED/MIN) Replacing the batteries • Remove the cover on the back of the remote control;... - Page 14 T i p s To get the best from your air conditioner, fol- • Never use the appliance in very damp low these recommendations: rooms (laundries for example). • Never use the appliance outdoors. • close the doors and windows of the room to be air conditioned.
-
Page 15: Cleaning The Cabinet
C l e a n i n g Before cleaning or maintenance, turn the START OF SEASON CHECKS Make sure the power cable and plug are appliance off by pressing the ON/OFF button (A) or in models with remote control, by pressing the undamaged and the earth system is efficient. -
Page 16: Troubleshooting
Troubleshooting PROBLEM CAUSE REMEDY The air conditioner • there is no current • the appliance is not plugged into the mains • plug into the mains socket does not come on • the safety device of the plug has • reset the plug safety device, if tripped. -
Page 17: Technical Specification
Technical specification TECHNICAL CHARACTERISTICS: LIMIT CONDITIONS Power supply voltage see rating plate Max. power input during air conditioning “ Room temperature for air conditioning 70 ÷ 95°F Max. power input during heating “ Refrigerant “ Room temperature for Cooling capacity “... -
Page 18: Limited Warranty
If repairs become necessary, see contact information below: U.S. Residents: Please contact our toll free hotline at 1-800-322-3848 or log onto our website at www.delonghi.com CANADA Residents: Please contact our toll free hotline at 1-888-335-6644 or log onto our website at www.delonghi.com...


Need help?
Do you have a question about the PAC AN125HPEC and is the answer not in the manual?
Questions and answers
When plugging the unit into a wall outlet, turning the unit on will trip the breaker. any suggestions?
The DeLonghi PAC AN125HPEC may trip the breaker when turned on due to a bad component shorting to ground. Most commonly, this is caused by a failed compressor with electrically damaged windings. Other possible causes include a shorted condensing fan motor or evaporator fan motor. A faulty 55 microfarad capacitor could also affect the compressor, but this typically prevents it from running rather than tripping the breaker.
This answer is automatically generated