Table of Contents
Advertisement
Advertisement
Table of Contents

Related Manuals for Klutch 101670


Summary of Contents for Klutch 101670
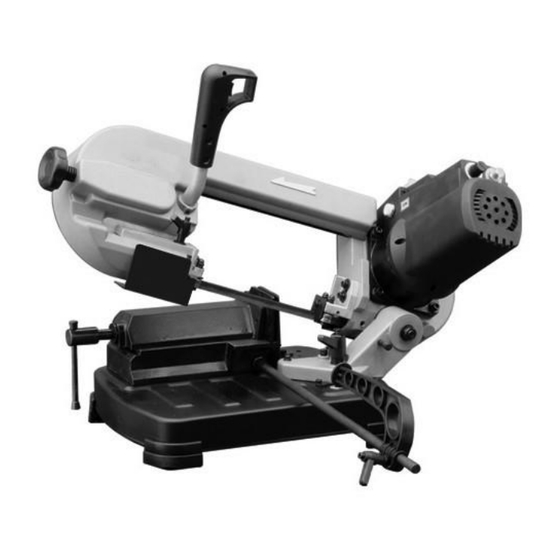
- Page 1 Metal Cutting Band Saw Owner’s Manual WARNING: Read carefully and understand all ASSEMBLY AND OPERATION INSTRUCTIONS before operating. Failure to follow the safety rules and other basic safety precautions may result in serious personal injury. Item #101670 READ & SAVE THESE INSTRUCTIONS...
- Page 2 Thank you very much for choosing a Klutch® product! For future reference, please complete the owner’s record below: Serial Number/Lot Date Code (if applicable): _____________________ Purchase Date: ____________________________________________ Save the receipt, warranty, and this manual. It is important that you read the entire manual to become familiar with this product before you begin using it.
-
Page 3: Table Of Contents
Table of Contents Intended Use ............................4 Packaging Contents ..........................4 Technical Specifications ........................4 Important Safety Information ....................... 4 Grounding .............................. 6 Extension Cords ............................ 7 Main Parts of Product ........................... 8 Assembly Instructions .......................... 8 Before Each Use ............................ 9 Operating Instructions ........................ -
Page 4: Intended Use
Intended Use This Klutch® Benchtop Metal Cutting Band Saw is a compact yet powerful metal cutting band saw that's easy to move right where you need it. Packaging Contents • • • Work stop with lock Metal band saw (1) - Page 5 ⚠WARNING PROP 65 • This product can expose you to chemicals including lead, which is known to the State of California to cause cancer. For more information, go to www.p65warnings.ca.gov. • Some dust created by power sanding, sawing, grinding, drilling, and other construction activities contains chemicals known to the state of California to cause cancer, birth defects, or other reproductive harm.
-
Page 6: Grounding
the tool while you are tired or under the influence of drugs, alcohol, or medication. A moment of inattention while operating the tool may result in serious personal injury. • Dress properly. Do not wear loose clothing, dangling objects, or jewelry. Keep your hair, clothing and gloves away from moving parts. -
Page 7: Extension Cords
CHECK with a qualified electrician or service person if you do not completely understand the grounding instructions, or if you are not sure the tool is properly grounded. Grounded Tools: Tools with 3-Prong Plugs Tools marked with Grounding Required have a 3-wire cord and 3-prong grounding plug. The plug must be connected to a properly grounded outlet. -
Page 8: Main Parts Of Product
• As the distance from the supply outlet increases, you must use a heavier gauge extension cord. Using extension cords with inadequately sized wire causes a serious drop in voltage, resulting in loss of power and possible tool damage. • The smaller the wire’s gauge number, the greater the capacity of the cord. -
Page 9: Before Each Use
2. Place the band saw on a workbench or the optional band saw stand item 101740 and secure with the three bolts. 3. Screw the guide rail to the thread hole on vise base. Tighten the nut to fix it. 4. - Page 10 Positioning the work stop Use the work stop if you have to do several cuts on pieces of the same length. 1. Loosen the lock handle A and place the work stop at the desired distance from the blade. 2. Retighten the lock handle. CAUTION Make sure that the work stop does not interfere with the downward movement of the blade! Cutting angle adjustment...
-
Page 11: Operating Instructions
3. Retighten the lock handle C. Set cutting speed The cutting speed always depends on the material being cut. 1. Turn the control knob D to increase or decrease the speed as required. Sample speeds: Common steel: 40-60m/min Aluminum, alloy: 80m/min Pipes/sections: 70-80m/min... - Page 12 2. Use the vice to securely clamp the workpiece. Vice Check workpiece stop and cutting speed adjustments. 4. Push the green button to turn on the main switch. Using the index finger of your right hand, press the run button. 5.
-
Page 13: Maintenance
Maintenance ⚠WARNING Always wear protective gauntlets before changing saw blade! Changing the Saw Blade 1. Remove the protective casing unscrewing the six screws. 2. Loosen the blade tension, turning the knob E in the anti-clockwise direction. 3. Extract the blade first from the guides and then from the cast iron pulleys. 4. -
Page 14: Troubleshooting
Use a brush and a shop vacuum to remove chips and other debris from the machine. Always keep the machine handgrip clean to prevent accidental slipping during use. Remove the processing residues from the cutting area and the blade guides whenever necessary. If you do not intend to use the band saw for a long time, clean it and put it in a dry place if possible. -
Page 15: Parts Diagram
Parts Diagram Page 15 of 20... -
Page 16: Parts List
Parts List Reference Part Number Part Description Quantity Speed adjusting knob Circuit breaker Motor housing 2.9-1X13mm Thread forming screw Motor driver M4X8mm Pan head screw M4X8mm Pan head screw 4mm Serrated washer Motor assembly M5X10mm Socket head screw Strain relief Switch 2.9-1X9.5mm Thread forming screw Switch box... - Page 17 Reference Part Number Part Description Quantity Blade Bevel plate 6201ZZ Ball bearing 32mm Retaining ring Rear blade wheel M8X12mm Flat head screw 4X4X20mm Key Front blade wheel Flat washer M6X12mm Flat head screw Frame Spring washer Blade tension knob Cord clamp M5X 8mm Pan head screw M6X8mm Set screw Lock handle...
-
Page 18: Replacement Parts
Reference Part Number Part Description Quantity End stop washer Bushing 8mm Retaining ring Lock pin M4X8mm Pan head screw Angle scale Base Foot M10X40mm Carriage bolt 6mm Flat washer M6 Nut Vise base M6X12 Flat head screw Vise jaw Sliding case M10 nut Screw 5X12mm Spring pin... -
Page 19: Limited Warranty
Northern Tool and Equipment Company, Inc. ("We'' or "Us'') warrants to the original purchaser only ("You'' or "Your") that the Klutch® product purchased will be free from material defects in both materials and workmanship, normal wear and tear excepted, for a period of one year from date of purchase. - Page 20 Distributed by: Northern Tool & Equipment Company, Inc. Burnsville, Minnesota 55306 www.northerntool.com Made in China Page 20 of 20...
Need help?
Do you have a question about the 101670 and is the answer not in the manual?
Questions and answers
What saw blade is used
The compatible saw blade for Klutch part number 101670 is 1435 x 12.7 x 0.65 mm with 8/12 teeth per inch.
This answer is automatically generated