Table of Contents
Advertisement
Quick Links
Advertisement
Table of Contents

Related Manuals for Felix Instruments F-900


Summary of Contents for Felix Instruments F-900
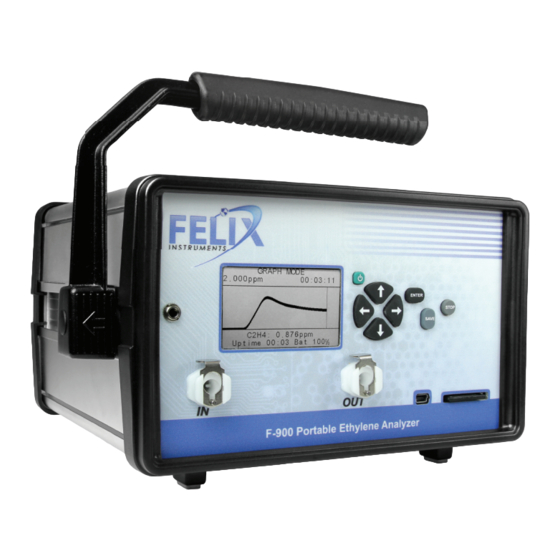
- Page 1 Operation Manual F-900 Portable Ethylene Analyzer...
- Page 3 DECLARATION OF CONFORMITY Manufacturer: CID Bio-Science, Inc. 1554 NE 3 Camas, WA 98607 Declares that the CE-marked Product: Product Models (s): Model F-900 Complies With: 89/336/EEC Electromagnetic Compatibility Directive 73/23/EEC Low Voltage Directive Compliance Standards: EN 55027 RF Emissions Information...
-
Page 4: Table Of Contents
GC Emulation Mode Operation Procedure ..............................25 Ethylene Sensor Zero Calibration .................................... 30 Manually Set Zero ......................................30 Automatically Set Zero: Offset Autocorrection ..............................31 F-900 Controller Software for Calibration ................................32 Ethylene Sensor Span Calibration ..................................33 Set C PPB Span ......................................33 F-900 Menu System Diagram .................................... - Page 5 FELIX INSTRUMENTS HARDWARE WARRANTY ................................ 84 APPENDIX I: Material Safety Data Sheet for 2N Sulfuric Acid Solution ........................85 APPENDIX II: Procedure for F-900 Validation Using Fruit ............................90 APPENDIX III: Guidelines for Measuring Sample Bags ............................. 92 F-900 Production Test Check Sheet ..................................94 Warranty Registration Card .....................................
-
Page 6: Introduction
The F-900 analyzes the concentration of ethylene in a gas sample for the purpose of research or ethylene management. The F-900 employs electro-chemical sensors as well as several other... -
Page 7: Features
External wire terminals for fixed location monitoring or control applications GC Emulation Mode for small sample volumes ranging 0.8 – 20 ppm C (optional) Figure 2: The removable SD card on the F-900 makes data transfer quick and simple. 1554 NE 3 Ave, Camas, WA 98607, USA Phone: (360) 833-8835 sales@felixinstruments.com... -
Page 8: F-900 Specifications
F-900 Instruction Manual 10/30/2015 Specifications F-900 Specifications Display Sunlight visible transflective graphic LCD Operating environment 0°C - 45°C (0-90% humidity non-condensing) Battery Capacity 4 hours - Rechargeable Li-Ion (5000 mAh) Dimensions 183.5 mm x 111 mm x 120 mm Weight 2.43 kg... - Page 9 F-900 Instruction Manual 10/30/2015 Optional Sensors PPM Sensor Low-Power Non-Dispersive Infrared Gas Analyzer Chopping Frequency Source Life 5000 Hours Nominal Range 1 – 2000 ppm (Standard) 0 – 3000 ppm (Optional) Zero Scale Resolution 0.1 ppm Full Scale Resolution 1 ppm Repeatability ±0.1 ppm (short term)
-
Page 10: Warnings
Keep the analyzer in a clean and ventilated room at ambient temperature. Do not allow fluid to aspirate in the analyzer, which can destroy the sensors. Do not use the F-900 in a high RF (radio frequency) environment. High RF will disrupt the F-900. -
Page 11: Theory Of Operation
(C) counter electrode (E) electrolyte. Image credit: doi:10.1093/aob/mcs259. The F-900 flow rate is regulated by a pump and a flow meter. Additional optional sensors are enabled/disabled in the Setup Menu (see page 41), as well as “conditioning chambers” on the back of the instrument (see page 54). -
Page 12: Interfering Gases
F-900 Instruction Manual 10/30/2015 Figure 4: Flow path diagram of the F-900 ethylene analyzer. Dashed line indicates optional flow path capabilities. Interfering Gases No analytical method is completely specific. Gases present in the environment, other than the “target” gas of a measurement, may affect instrument response. Interferences are not necessarily linear, and may also exhibit time dependent characteristics. -
Page 13: Polarcept
This causes the ethylene value to be falsely high in the presence of interfering gas. Felix Instruments has tested a method to absorb some of the competing gases and provide better ethylene measurements. This method, PolarCept, uses distilled water in conditioning Chamber In and has been shown to filter out alcohols and produce less interference. - Page 14 F-900 Instruction Manual 10/30/2015 PolarCept: Measure Regeneration: cleans the waeter PolarCept: Clean Figure 5: Top: diagram of measure period during use of PolarCept. Bottom: diagram of cleaning period of PolarCept. 1554 NE 3 Ave, Camas, WA 98607, USA Phone: (360) 833-8835 sales@felixinstruments.com...
-
Page 15: Unpacking The F-900
F-900 Instruction Manual 10/30/2015 Unpacking the F-900 The F-900 base unit arrives with the F-900, strap and several accessory parts to use with the instrument. Included are the heavy duty USB cable, charger, tubing accessory kit, potassium permanganate (KMnO ) and an F-900 Instruction Manual. Several different styles of connector pieces and various lengths of tubing that do not outgas (ex: Viton or Teflon) are provided as part of the tubing accessory kit. -
Page 16: F-900 Research Kit Accessories
F-900 Instruction Manual 10/30/2015 F-900 Research Kit Accessories The F-900 Research Kit (F-900RK) includes parts to non-destructively sample fruit in the field or laboratory. The F-900RK arrives in a hard-sided carrying case with a fruit chamber and wand with flexible tubing to sample fruit or plants. The fruit chamber includes a closed chamber lid and a lid with a seal to allow sampling of fruit still intact on the plant. -
Page 17: Operating Instructions
F-900. Note: To force a power off and reset of the F-900 at any point, press and hold the power button for 10 seconds. This “emergency hard shut-down” feature exists to address hardware or software problems and should not be used except when needed. -
Page 18: Charging The Internal Battery
F-900 Instruction Manual 10/30/2015 Charging the Internal Battery The F-900 arrives with a wall charger that can be used to recharge the F-900 battery, as well as for continually powering the unit during long-term monitoring. To charge the F-900: Connect the mini-USB cable to the front panel of the F-900 ... - Page 19 The CO PPM sensor will draw power when turned on, even if the F-900 is not actively measuring. Always turn the CO PPM sensor to “off” for the fastest recharge, either using the mini-USB cable and computer or with a wall charger.
-
Page 20: Measure Menu: Taking A Measurement
Sensor Stability The F-900 will begin to warm-up. The F-900 will display the “Sensor Stability” screen after pressing the RIGHT arrow to get into the Measure Menu. The display will show the File that is open and the Flow of gas being pumped through the instrument. -
Page 21: Graph Mode
Graph Mode will be entered automatically when the unit has stabilized in Sensor Stability mode. Or to enter Graph Mode, press the right arrow when the F-900 is at the Sensor Stability screen. This view graphically displays the measured C value over time. -
Page 22: Monitor Mode
Press the right arrow to get to the Measurement Settings menu. The temperature and relative humidity sensors are located inside the instrument. Therefore, the temperature sensor is subject to heating by the F-900 internal electronics. The temperature reading is often 4-5 C above ambient and in turn, relative humidity readings are affected. -
Page 23: Measurement Settings
) for cleaning water and setting the instrument’s offset. Changes cannot be made to the settings menu if the F-900 is “correcting offset”. If the measurement is setup for PolarCept (Setup > Chamber > Chamber In = Special) then Chamber In cannot be turned on/off from the Measure >... -
Page 24: Electrochemical Sensor Response
F-900 Instruction Manual 10/30/2015 a. The settings will automatically change to turn on Chamber Out, turn off Chamber In and turn on the Closed Loop. 12. The instrument will wait until no more than a 40 ppb change is detected for 10 minutes before setting the zero calibration point. -
Page 25: Auto-Escape Feature
F-900. There is a white hydrophobic filter directly down the flow path Chamber In to be checked for water, as well as a hydrophobic filter near the in port on the front of the F-900. If water is found inside the tubing or filters, Stop the measurement and allow the instrument to dry out. Be careful no further water damage occurs when turning the pump back on. - Page 26 Attach the chamber to the F-900 by screwing on the wand to the top of the chamber. Next, connect one of the tubes from the wand to the Intake port on the front of the F-900. Connect the black power chamber cable to the left of the display to power the fans in the fruit chamber.
-
Page 27: Gc Emulation Mode
F-900 Instruction Manual 10/30/2015 GC Emulation Mode To use the F-900 to analyze a small sample in a syringe, the GC Emulation Mode should be used. With the simple addition of our inline injection port, small volumes of analyte can be accurately measured. -
Page 28: How Gc Emulation Mode Works
Recommended minimum injection volume is 15 ml. Once injection volume is set, please make sure to maintain the same volume of injection throughout all measurements. The F-900 requires about 10 minutes of warm-up time when using GC Emulation Mode, especially for the CO PPM sensor. - Page 29 F-900 Instruction Manual 10/30/2015 If the injection port does not have a pressure-release valve, please disconnect and reconnect port at end of each measurement (when “Results” displayed) to prevent pressure build-up. The pressure release valve is circled in red in the figure below.
-
Page 30: Gc Emulation Mode Operation Procedure
F-900 Instruction Manual 10/30/2015 GC Emulation Mode Operation Procedure Section 1: Warm up 1. Turn on GC Emulation Mode in the Setup>Measure menu. Press Save to save changes and exit to the main menu. Setup Measure Mode GC Emulation 2. Enter the measure menu and wait for the instrument to stabilize. To skip the stabilization, press the right arrow. - Page 31 F-900 Instruction Manual 10/30/2015 5. Wait 10 minutes (600 sec) for the environment to stabilize. When using GC Emulation Mode, the F-900 sensors require a warm up of 10 minutes. Proper warm-up is especially important for the CO sensors. If already warmed-up, press Enter to skip and continue to the next step.
- Page 32 F-900 Instruction Manual 10/30/2015 Figure 15: Example of proper injection technique for GC Emulation Mode. 8. Wait for processing countdown to complete from 210 seconds. 9. Set the sample as your calibration standard by pressing Enter for “Yes” when asked “set as calibration”?
- Page 33 Note: If injection port does not have a pressure-release valve on the OUT side, briefly remove and replace the injection port from the F-900 to manually release the internal pressure build-up between injections.
- Page 34 F-900 Instruction Manual 10/30/2015 15. Choose “No” by pressing Stop when asked “Set as calibration?” to view the ethylene concentration on the display. peak count 2729747 1.92ppm 0.05% 20.4% Uptime 00:58 Bat 85% 16. Press Enter to start another measurement. Press Stop to exit to the Main Menu.
-
Page 35: Ethylene Sensor Zero Calibration
F-900 Instruction Manual 10/30/2015 Ethylene Sensor Zero Calibration The baseline or zero of the ethylene sensor is known to drift, especially the C ppb sensor. The zero calibration should be performed daily. This can be done manually or automatically, as described below. -
Page 36: Automatically Set Zero: Offset Autocorrection
F-900 Instruction Manual 10/30/2015 SETTINGS Chamber OUT Chamber IN Closed Loop Set zeros C2H4 Uptime 01:15 Bat 75% Figure 17: Measurement > Settings Menu display (left); flow path of internal gas stream (right). Automatically Set Zero: Offset Autocorrection Please see Setup>Calibration>Offset Autocorrection on page 44 for additional information or to enable/disable the automatic set zero feature. -
Page 37: F-900 Controller Software For Calibration
Controller software is primarily used for the C2H4 PPB sensor span calibration, which is recommended weekly. Other sensors on the F-900 can be calibrated using the F-900 Controller software. The calibration of the RH sensor requires an external relatively humidity sensor. Each sensor must have the zero calibration set before carrying out the span calibration. -
Page 38: Ethylene Sensor Span Calibration
Set C PPB Span 1. Connect the F-900 to the PC using the USB cable. Power on the F-900 and open the F-900 Controller software. a. If the F-900 display becomes frozen consistently when connecting ot the PC, it is possible the SD card is corrupted. - Page 39 Press the right arrow again to skip the sensor stabilization. a. There is a short lag in the F-900 Controller software as it pulls data from the F-900 instrument. This lag interval is adjustable in 1 second intervals. The monitor view...
- Page 40 F-900. Alternatively, a flow meter can be connected to be sure that the flow going into the F-900 is appropriate levels and gas is not being wasted. Always open the regulator very slowly and allow only 1-2 PSI (6-13 kPa) until the ethylene value starts to increase on the F-900.
- Page 41 10. Once the set span button is pressed, the span concentration (ex: 1.555 ppm) should appear on the F-900 display as well as in the F-900 Controller software. There will be a decrease/increase in the monitor data as the new calibration point is set and saved.
- Page 42 F-900 Instruction Manual 10/30/2015 11. Disconnect the calibration gas and watch the data trend toward ambient ethylene levels. 1554 NE 3 Ave, Camas, WA 98607, USA Phone: (360) 833-8835 sales@felixinstruments.com www.felixinstruments.com...
-
Page 43: F-900 Menu System Diagram
F-900 Instruction Manual 10/30/2015 F-900 Menu System Diagram Below is a map of the F-900 ethylene analyzer menu system. Press the right arrow to enter a menu and the left arrow or Stop to exit. 1554 NE 3 Ave, Camas, WA 98607, USA Phone: (360) 833-8835 sales@felixinstruments.com... -
Page 44: Setup Menu
Monitor Mode or GC Emulation Mode. Instructions to use Monitor Mode are found on page 17. GC Emulation Mode is available with the F-900 Research Kit and requires the use of the inline injection port with septum. To save changes in the Setup>Measure menu, press Save. Use the up and down arrows to toggle between options. - Page 45 F-900 Instruction Manual 10/30/2015 In the Setup>Autosave menu, the top line of the display will read “enter” and “save” and the directional arrows. Next to Autosave and “Yes” or “No” indicating whether this feature is turned on or off. Below Autosave is the “Interval” option where the user can set the time interval. This is the length of time in seconds between saves, when the autosave feature is selected.
-
Page 46: Setup Sensor
Press Enter to continue to the selection. Not all F-900’s are built with all sensors, so see the Production Check Sheet at the end of the manual to see which sensors are included in your unit. All units are equipped with a High Resolution C ethylene sensor (PPB) and an extended range C , ethylene sensor (PPM). - Page 47 The weight is set to 0.00 grams when the electrochemical cell is completely full, prior to it being shipped from Felix Instruments. As the cell loses water, the weight will become a negative value. If the weight is greater than -10.0 g, the instrument should be hydrated by 10 cc (1cc = 1 g). A positive value indicates hydration, a negative value indicates dehydration of the cell.
- Page 48 F-900 Instruction Manual 10/30/2015 Finally, reset the hydration value in the Cell Hydration menu to the current weight minus the shipped weight using the up/down arrows to adjust the value for weight. (Current weight – original weight). RH Sync feature will synchronize the two relative humidity sensors inside the instrument (upstream and downstream of the ethylene sensor).
-
Page 49: Setup Calibration
Calibration Parameters menu, where solving for “x” is the new internal gain. The measured concentration is what the F-900 is reading the calibration gas as. Do not use the Chamber In with water when performing calibrations. -
Page 50: Offset Autocorrection
F-900 Instruction Manual 10/30/2015 Enter the temperature on the display of the F-900 as the “calibrated T” when the gain is adjusted. Press Save to save the new internal gain calibration value. = measured concentration Original gain standard gas concentration... -
Page 51: Sensitivity Correction
Calibration It is recommended to use the F-900 Controller software for automated calibration of the F-900 span (page 32), but a manual calibration is possible Always perform a zero calibration of the sensor before setting the span. - Page 52 F-900 Instruction Manual 10/30/2015 Re-calibration allows the user to re-calibrate the sensor, setting a new zero and span for the selected sensor. PPM zero calibration is recommended daily. CO PCT zero calibration is recommended every six months. However, if the unit is in an environment where the temperature fluctuates frequently, zero calibration may be necessary more often than the recommended intervals.
- Page 53 Tips for Calibrating the F-900 CO Sensor with a buffer system: The operator should stand away from the F-900. Use extra tubing to get the intake source away from human breath. Use a buffer tank system to stabilize the intake source.
- Page 54 F-900 Instruction Manual 10/30/2015 Span Buffer Tank System Instructions 1. Find and clean an empty bottle with cap, which is at least 3L in volume. 2. Drill two small holes in the cap of the buffer bottle: 1 hole is for the intake tube and 1 hole is for the out tubing.
- Page 55 F-900 Instruction Manual 10/30/2015 5. Make sure that the tube and cap has no leaks. 6. Connect the “in” tubing to the intake port on the instrument. 7. To use the buffer bottle, make sure that the tubing is clear from obstruction. Connect the In tubing to the unit.
-
Page 56: O 2 Calibration
F-900 Instruction Manual 10/30/2015 Calibration It is recommended to use the F-900 Controller software for automated calibration of the F-900 O span (page 32), but a manual calibration is possible Always perform a zero calibration of the sensor before setting the span. -
Page 57: Flow Rate Calibration
Setup Time and Date To change the time and date on the F-900, press the right arrow when “Time” is highlighted on the Setup Menu. This utility allows the user to set-up the instrument in different time zones or to adjust the time after daylight savings. -
Page 58: Setup Flow
F-900 Instruction Manual 10/30/2015 Setup Flow The air flow of the F-900 is an important factor for taking good measurements. The default flow rate is 200 ml/min. Flow rate is adjustable from 100-500 ml/min. A flow value below 100 ml/min can negatively impact sensor functionality. If measuring bottled gas, a lower flow rate may be used in order to reduce gas waste. -
Page 59: Setup Chamber
The removable plastic containers are used to hold the consumables potassium permanganate, distilled water, soda lime, and silica gel. Keep the plastic containers on the F-900, even when empty, to protect the brass intakes. Always ensure the conditioning chamber is seated properly when screwing it on the F-900. - Page 60 Setup>Chamber menu and fill Chamber Out with the appropriate consumable. Connect the fruit chamber hoses to both the IN and OUT ports on the front of the F-900. Figure 21: The back of the F-900 with removable and refillable containers for distilled water and KMnO (left) and a diagram showing the flow path of the gas stream (right).
- Page 61 The water level of Chamber In should to be refilled every 120 hours when using PolarCept. This mode may not be applicable at high ethylene concentrations. When the F-900 is using the water to filter out alcohol, the water must be cleaned by running a longer cleaning period than the measure period.
- Page 62 Chamber In is enabled in Special mode. Next, the current state (measure or cleaning) will be shown. If the F-900 is in a state of Measure, the data will reflect the current measurement. If the F-900 is in a state of Cleaning, “Clean” is shown in the upper right corner of the display.
-
Page 63: Setup Terminals
The terminal block is located between the chambers for consumables on the back panel of the F-900. The F-900 can turn on and off the gas based on the measured ethylene concentration of the room (or chamber). Other control applications using the terminal block are possible, such as controlling ethylene scrubbers or connection to an external control system. -
Page 64: Setup Board
The removable section of the terminal block is designed to stay with the fan, gas or external control so, if the F-900 needs to be moved, the terminal block can be disconnected easily. -
Page 65: View Menu
View Files The View>Files Menu allows the user to review the filenames and file size of any files on the F-900. To view collected and saved data, either download files via USB or eject the SD card and insert it in a computer. -
Page 66: View Voltage
Press the left arrow or Stop to exit back to the View Menu. Voltage is set for each individual unit before leaving the Felix Instruments factory and is board specific. For default voltage values, please see the Production Test Check Sheet at the end of the Instruction Manual for factory voltage settings. -
Page 67: Other View Menu Options
512B GPS System Features The F-900 has a built-in GPS system which can relay the longitude, latitude and altitude of the instrument when performing measurements. The View>GPS screen displays the mode of the GPS sensor (SEN= $GPGGA), as well as the values for latitude, longitude, altitude and indicates the number of satellites currently connected to. -
Page 68: File Menu
Here, the user can manipulate files on the F-900, with options to clear, delete, create and open files. The F-900 uses an SD card to store all measurements. This means the user is able to create, clear and delete any measurement file. -
Page 69: Delete A File
F-900 Instruction Manual 10/30/2015 Delete a File Press the right arrow when “Delete” is highlighted on the display to get the unit into the File > Delete Menu. This mode will erase a file (and filename) completely from the SD card. In this mode, the top line of the display reads “Delete”... - Page 70 <stop> The F-900 will save all parameters for each measurement on the SD card. Once finished creating the file name, press the Enter key, or press Stop to abort the process. The F-900 will exit to the File Menu. 1554 NE 3...
-
Page 71: Open File
F-900 Instruction Manual 10/30/2015 Open File Press the right arrow when “Open” is highlighted on the display to get the unit into the File > Open Menu. The top line of the screen will read “Open” on the left, and “File” on the right. Filenames are listed on the left and the file size is listed in the right column. -
Page 72: Data Transfer To A Computer
(computer). The user can only view/manipulate data on a computer via the USB connection, or with the removable SD card. Data cannot be viewed after it is saved on the F-900. Once the instrument is connected to the computer via USB cable, it is strongly recommended that the user copy and re-save the files and images to the hard drive of the computer. - Page 73 For the mode, monitor indicates measurements without PolarCept, sm_measure or sm_clean indicate PolarCept, and offset indicates zero calibration. Figure 23: Example data spreadsheet for a F-900 measurement. REMEMBER: Always save the data files to the computer before making changes or starting analysis.
- Page 74 F-900 Instruction Manual 10/30/2015 Below is an example of ethylene data plotted for PolarCept, that shows the typical peaks and valleys for the measure/cleaning cycle. At the end of the cleaning time, the ethylene level should be low (below 0.2 ppm). If a low ethylene concentration is not seen at the end of the cleaning period, lengthen the Cleaning period in Setup >...
-
Page 75: Firmware Update
1. Connect the F-900 to the computer using the mini-USB to USB cable. 2. Launch F-900_Package_Setup_v1.0.exe 3. Set up device as prompted message below 4. The F-900 requires an libusb driver. In the Zadig window, select Options > List All Devices. 1554 NE 3 Ave, Camas, WA 98607, USA Phone: (360) 833-8835 sales@felixinstruments.com... - Page 76 F-900 Instruction Manual 10/30/2015 5. In the dropdown list, select CI-DFU (Interface 1) device. 6. At the spinner list (green arrow), select libusb-win32. 7. Click Install Driver to proceed installing libusb driver. This could take up to 1 minute to complete.
- Page 77 7. Release the Power button when instructed. 8. Wait for the flash to be erased and then written. When the firmware transfer is complete, the software will indicate reset sent, followed by “leaving open”. The F-900 will power off. 1554 NE 3...
- Page 78 3. Connect the device to computer via USB and repeat the download firmware procedure. After the firmware update is successful, it is recommended to let the F-900 measure with the Closed Loop On (Measure > Settings) for 12 hours.
-
Page 79: Cleaning And Maintenance
Cleaning and Maintenance The F-900 housing can be wiped down with a damp cloth if the unit becomes dirty or dusty. Please make sure to always keep the IN and OUT ports on the front panel clear from any obstructions. - Page 80 Note: Weighing the entire F-900 unit on an analytical balance when the sensor is full will allow you to monitor the water level of the sensor, by keeping track of the weight loss of the whole F-900 unit. Remember to always weigh the F-900 with the same setup and to follow the instructions above to remove and refill the sensor, when it has lost 20-25 grams of water.
-
Page 81: Technical Support
F-900 Instruction Manual 10/30/2015 Technical Support If you have a question about the F-900, first look in the F-900 Operation Manual. There is also online support available for the F-900 at http://felixinstruments.com/support/f-900-support. If you cannot find the answer, you can contact a Technical Support Representative located in your country. -
Page 82: Frequently Asked Questions
F-900 Instruction Manual 10/30/2015 Frequently Asked Questions If there are any questions about the F-900, please check the Frequently Asked Questions below, as well as the Felix Instruments support webpage at http://felixinstruments.com/support/f-900- support. 1. What type of fruit produces ethylene? a. - Page 83 5. How do I create and open a file to start using the F-900? a. To start using the F-900, create a file to save data into. Go to File>Create. Change the file00 to the desired file-name and press save. Next, open the file to save measurements.
- Page 84 Both are portable, but the research kit includes the other components as listed in the “Unpacking the F-900” section of the User Manual, such as the fruit chamber and wand and hard-sided, wheeled carrying case. The Research Kit is designed to make measurement of fruits non-destructively or in a closed chamber.
- Page 85 The air should be scrubbed by enabling conditioning Chamber Out (filled with potassium permanganate). Attach the tubing from the wand that returns to the fruit chamber to the Out port on the front of the F-900. 13. How is Chamber In used to rehydrate the electrochemical cell? a.
- Page 86 F-900 Instruction Manual 10/30/2015 17. What types of tubing materials have been found to outgas? a. Several types of material have been found to outgas interfering gases of the ethylene sensor, such as Tygon. Viton and Teflon have successfully been found to not outgas.
-
Page 87: Supporting Sciences References
F-900 Instruction Manual 10/30/2015 Supporting Sciences References The following list of citations represent Chemistry, volume 47, 1646-1651, 1999.. current peer-reviewed and other literature DOI: 10.1021/jf980906c concerning electrochemical sensors, the study of climacteric fruit and ethylene. Hale, C., Coombe, B., Hawker, J. - Page 88 F-900 Instruction Manual 10/30/2015 Morgan, P.W. Another Look at Interpreting Research to Manage the Effects of Ethylene in Pech, J., Bouzayen, M., Latche, A. Climacteric Ambient Air. Crop Science, volume 51, pages fruit ripening: Ethylene-dependent and 903-913, 2011. independent regulation of ripening pathways DOI:10.2135/cropsci2010.05.0280...
-
Page 89: Felix Instruments Hardware Warranty
The purchaser is to pack, ship, or deliver the instrument to Felix Instruments, in Camas, Washington, USA, within 30 days after Felix Instruments has received written notice of the defect at the customer’s expense. No other arrangements may be made unless otherwise approved in writing by Felix Instruments. -
Page 90: Appendix I: Material Safety Data Sheet For 2N Sulfuric Acid Solution
F-900 Instruction Manual 10/30/2015 APPENDIX I: Material Safety Data Sheet for 2N Sulfuric Acid Solution SECTION 1: CHEMICAL PRODUCT AND COMPANY IDENTIFICATION Product Name: Sulfuric Acid, 2N Catalog Codes: CAS#: Mixture. RTECS: Not applicable. TSCA: TSCA 8(b) inventory: Sulfuric acid; Water CI#: Not applicable. - Page 91 F-900 Instruction Manual 10/30/2015 SECTION 4: FIRST AID MEASURES Eye Contact: Check for and remove any contact lenses. Immediately flush eyes with running water for at least 15 minutes, keeping eyelids open. Cold water may be used. Do not use an eye ointment. Seek medical attention.
- Page 92 F-900 Instruction Manual 10/30/2015 SECTION 7: HANDLING AND STORAGE Precautions: Keep container dry. Do not breathe gas/fumes/ vapor/spray. Never add water to this product In case of insufficient ventilation, wear suitable respiratory equipment If ingested, seek medical advice immediately and show the container or the label. Avoid contact with skin and eyes Keep away from incompatibles such as alkalis.
- Page 93 F-900 Instruction Manual 10/30/2015 Incompatibility with various substances: Extremely reactive or incompatible with alkalis. Slightly reactive to reactive with metals. Corrosivity: Extremely corrosive in presence of aluminum, of zinc. Highly corrosive in presence of steel, of copper. Slightly corrosive to corrosive in presence of stainless steel(304), of stainless steel(316).
- Page 94 F-900 Instruction Manual 10/30/2015 HMIS (U.S.A.): Health Hazard: 1 Fire Hazard: 0 Reactivity: 0 Personal Protection: National Fire Protection Association (U.S.A.): Health: 1 Flammability: 0 Reactivity: 0 Specific hazard: Protective Equipment: Gloves. Full suit. Vapor respirator. Be sure to use an approved/certified respirator or equivalent. Wear appropriate respirator when ventilation is inadequate.
-
Page 95: Appendix Ii: Procedure For F-900 Validation Using Fruit
This can be thought of as the baseline response Procedure: 1. Turn on the F-900, verify chambers are set to off and flow is set to 200 ml/min. 2. Connect experimental setup as shown in Figure 25. 3. Load the sample specimen into the fruit chamber. - Page 96 Procedure: 1. Fill conditioning Chamber In with distilled water and clean the water using potassium permanganate in an in-line column connected to the intake port of the F-900, until the background signal is below 40ppb. 2. Verify that Chamber In is set to “Special” with a sufficient cleaning period for the produce being monitored.
-
Page 97: Appendix Iii: Guidelines For Measuring Sample Bags
F-900 using the accessory parts. Ensure that the bag material and fittings are appropriate for the compounds to be sampled. - Page 98 Connect the sample bag to the IN port of the F-900. Open the sample bag to allow gas to start flowing to the F-900. It takes about 3-5 minutes to measure a sample bag if the concentration of ethylene before measuring the sample bag is low.
-
Page 99: F-900 Production Test Check Sheet
F-900 Instruction Manual 10/30/2015 F-900 Production Test Check Sheet SERIAL NUMBER: Firmware Version: SENSOR: Weight (grams): C2H4 PPB: F-900 fully assembled: Optional Sensors Included (Yes/No) C02 PPM CO2 PCT O2 PCT CALIBRATION PARAMETERS C2H4 PPB C2H4 PPM Internal offset Internal gain... - Page 100 F-900 Instruction Manual 10/30/2015 1554 NE 3 Ave, Camas, WA 98607, USA Phone: (360) 833-8835 sales@felixinstruments.com www.felixinstruments.com...
-
Page 101: Warranty Registration Card
Ave, Camas, WA 98607, USA Phone: (360) 833-8835 Fax: (360) 833-1914 e-mail: sales@felixinstruments.com Web: www.felixinstruments.com PRODUCT REGISTRATION CARD Please complete and return this form to Felix Instruments within 30 days to validate your Warranty on Parts and Labor. Registration Information:...
Need help?
Do you have a question about the F-900 and is the answer not in the manual?
Questions and answers