Table of Contents
Advertisement
Quick Links
Advertisement
Table of Contents

Related Manuals for Inateck BCST-53


Summary of Contents for Inateck BCST-53
- Page 1 BCST-53 BCST-53 2D Barcode Scanner Instruction Manual...
-
Page 2: Table Of Contents
Content Notes ..........................1 Product Overview ......................2 Product Specification ......................2 How to Set up the Scanner ....................5 Basic Settings ........................6 System Setting ........................6 Keyboard Setting ........................6 Write to Custom Defaults ....................... 7 Restore Factory Setting......................8 Reveal Software Version Number ................... - Page 3 Enable/Disable Codabar ........................ 16 Transmit START/STOP Characters....................16 Code 11 ..........................16 Enable/Disable Code 11 ......................... 16 Checksum Code ..........................17 Code 128 ..........................18 Enable/Disable Code 128 ....................... 18 GS1-128 (UCC-128/EAN-128 ) ....................18 Enable/Disable GS1-128 (UCC-128/EAN-128 ) ................18 USPS and FedEx Barcode ......................
- Page 4 Convert EAN-13 into ISBN ......................22 Convert EAN-13 into ISSN ......................23 MSI ............................23 Enable/Disable MSI ........................23 Checksum Code ..........................24 UPC-A ........................... 25 Enable/Disable UPC-A ........................25 UPC-A Outputs 0 ........................... 25 Checksum Code ..........................25 UPC-A Number System Digit ......................26 UPC-E............................
- Page 5 Normal/Inverted QR Code Recognition ..................29 Data Matrix .......................... 29 Enable/Disable Data Matrix ......................29 Normal/Inverted Data Matrix Recognition..................30 PDF 417 ..........................30 Enable/Disable PDF 417 ......................... 30 Aztec code ..........................31 Enable/Disable Aztec Code ......................31 Maxi code ..........................31 Enable/Disable Maxi Code ......................
- Page 6 Use of Shortcut Barcodes ..................... 44 Settings of Data Coding Format .................... 44 Replace GS (^]) with Specific Character ................45 Appendix Ⅰ: Characters ...................... 47 Appendix Ⅱ: Independent Function Key ................54 Appendix Ⅲ: Function Key Combinations ................57...
-
Page 7: Notes
Notes Safety Notes Please do not dismantle the barcode scanner or place any foreign parts in it to prevent short circuit or circuit damage. Please do not leave the barcode scanner or battery near fire. Maintenance Notes Use a clean wet mop to wipe the outer shell of the barcode scanner. Store the barcode scanner at the place that is dustless, dry, away from light and strong magnetic area. -
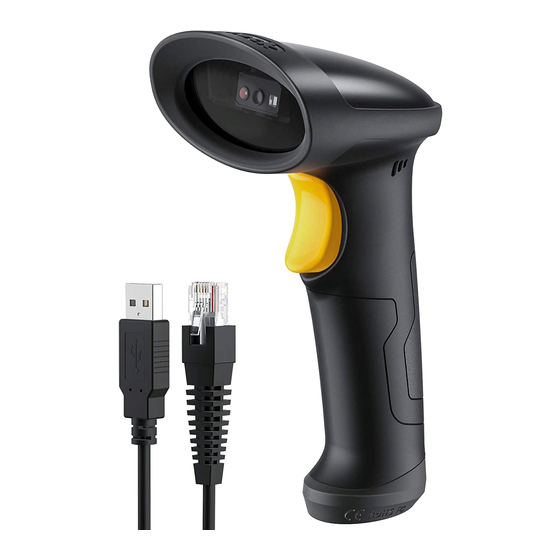
Page 8: Product Overview
Product Overview Product Specification Physical Parameters Model BCST-53 Material PC+TPU Prompt Type Buzzer, LED Indicator Data Port Voltage DC 5V Performance Parameter Code 128, EAN-13, EAN-8, UPC-A, UPC-E, Code 39, Code 93, Codabar, Interleaved 2 of 5, Standard 2 of 5,... - Page 9 Indicate correct settings (volume from low to high) Barcodes Supported The barcode types supported by the BCST-53 can be found in the chart below. For more details, please refer to the barcode type setting in Barcode Type Setting. Barcodes Supported...
- Page 10 Interleaved 2 of 5 Enabled Matrix 2 of 5 Disabled Standard 2 of 5 / Industrial 2 of 5 Disabled QR Code Enabled PDF-417 Enabled Aztec Code Disabled Maxi Code Disabled Data Matrix Enabled Han Xin Code Disabled GS1 DataBar、GS1 DataBar Expanded、GS1 DataBar Enabled Limited...
-
Page 11: How To Set Up The Scanner
How to Set up the Scanner You may change the settings of BCST-53 barcode scanner by reading the setting barcode in this manual. The examples of settings for the BCST-53 scanner are as below. Note: If there is a (*) before a certain setting barcode in this manual, it indicates the factory preset. -
Page 12: Basic Settings
Note: If you want to use the BCST-53 with an Android device, please use the Gboard input method, and set the scanner as "Windows/Android Mode" and the input keyboard as "American Keyboard". -
Page 13: Write To Custom Defaults
Enter Setup Italian Keyboard UK Keyboard Japanese Keyboard(Roman Character) Canadian Keyboard Serbian Keyboard Write to Custom Defaults You may change factory defaults and customize some functions suitable for your applications when using your scanner. You need to scan “Enter Setup” → “Function setup barcode you want to customize (e.g.: Output Code ID)”... -
Page 14: Restore Factory Setting
Reveal Software Version Number Scan the barcode "Enter Setup" - "Reveal Software Version Number". The software version number will be output to the device connected with the BCST-53. The "Reveal Software Version Number" function is a kind of setting, so you need to scan the "Exit and Save"... -
Page 15: Data Transmission Speed
Enter Setup Data Transmission Speed The product defaults working under high-speed transmission mode. By default, the data transmission interval is 0ms, which can improve your working efficiency. If you want to use the product with some low-speed software, please adjust the data transmission interval accordingly, as the issue of data loss or garbled characters can happen if the interval is too short. -
Page 16: Illuminative Light Control
Enter Setup Illuminative Light Control (*) Light up When Scanning Stay on Stay off Navigation Light Control (*) Light up When Scanning Stay on Stay off Navigation Light Flashes (*) Navigation Light Flashes Navigation Light Does Not Flash Exit and Save... -
Page 17: Volume Control
Enter Setup Volume Control Silent Low Volume (*) Medium Volume High Volume Scanning Mode Auto Red Light Shut off Mode Auto red light shut off mode is the default mode. When under this mode, the red light will not become lit unless you press the scan button. If no barcode is scanned, the red light will stay on for some time which can be set as 1s, 2s, 3s, 5s or 50s (2s is the default setting), and then go off. -
Page 18: Consecutive Scanning Mode
Enter Setup (*)2s Consecutive Scanning Mode You don't need to push the button to trigger scanning under this mode. The red LED is on automatically and ready to scan a barcode. If no barcodes are scanned, the red LED will stay on. After a successful scanning, the red LED goes off first and becomes lit again automatically. -
Page 19: Manual Scanning Mode
Enter Setup 400ms 800ms (*) 2s Manual Scanning Mode When under the manual scanning mode, a red-light beam will appear when you press the scan button which indicates the scanner is ready to scan barcodes. The red light will not go off until one of the situations below occurs. 1. -
Page 20: Hands-Free Scanning Mode
Enter Setup Hands-free Scanning Mode When under the hands-free scanning mode, the red light won't go off when the scanner reads a barcode successfully. Each barcode will be read only once no matter how long it exposes under the red light. Hands-free Mode Exit and Save... -
Page 21: Connection
Enter Setup Connection Wired USB Mode If you have connected the BCST-53 with your computer via the USB cable, the BCST-53 will prioritize using the USB data transmission mode. Exit and Save... -
Page 22: Barcode Settings
Enter Setup Barcode Settings Codabar Enable/Disable Codabar (*) Enable Codabar Disable Codabar Transmit START/STOP Characters (*) Enable Codabar START/STOP Disable Codabar START/STOP Characters Characters Code 11 Enable/Disable Code 11 (*) Disable Code 11 Enable Code 11 Exit and Save... -
Page 23: Checksum Code
Enter Setup Checksum Code Data in a Code 11 barcode may not include the checksum code. If there is, the checksum code is the last one or two digit(s) of the data output. The checksum code is the value added from all data collected, to check if the data is correct. After you set the "Code 11 without Checksum"... -
Page 24: Code 128
Enter Setup Do not Transmit Code 11 Checksum Code 128 Enable/Disable Code 128 (*) Enable Code 128 Disable Code 128 GS1-128 (UCC-128/EAN-128 ) Enable/Disable GS1-128 (UCC-128/EAN-128 ) Enable GS1-128 (*) Disable GS1-128 USPS and FedEx Barcode Enable/Disable USPS and FedEx Barcode (*) Enable USPS and FedEx Barcode Disable USPS and FedEx Barcode Exit and Save... -
Page 25: Code 39
Enter Setup Code 39 Enable/Disable Code 39 (*) Enable Code 39 Disable Code 39 Transmit START/STOP Character Enable Code 39 START/STOP Character (*) Disable Code 39 START/STOP Character Checksum Code The data in a Code 39 may not contain the checksum code. If there is, the checksum code is the last character of the data. -
Page 26: Ascii Code Recognition Range Setting
Enter Setup Enable and Transmit Code 39 Checksum Enable but Do not Transmit Code 39 Checksum ASCII Code Recognition Range Setting Enable All Code 39 ACSII Character Disable All Code 39 ASCII character VIN (Vehicle Identification Number) Enable/Disable Code 39 VIN (Vehicle Identification Number) Enable VIN (*) Disable VIN Exit and Save... -
Page 27: Code 32
BCST-53 defaults disabling Code 32. Enable Code 32 (*) Disable Code 32 The fixed initial character of a Code 32 is "A". The BCST-53 supports the function of enabling or disabling the initial character, and defaults disabling it. Enable Initial Character Output "A"... -
Page 28: Checksum Code
Enter Setup Checksum Code (*) Transmit EAN-8 Checksum Code Do not Transmit EAN-8 Checksum Code EAN-13 Enable/Disable EAN-13 (*) Enable EAN-13 Disable EAN-13 Checksum Code (*) Transmit EAN-13 Checksum Do not Transmit EAN-13 Checksum ISBN Convert EAN-13 into ISBN You may decide whether to convert EAN-13 into ISBN. The scanner won't convert EAN-13 into ISBN by default. -
Page 29: Convert Ean-13 Into Issn
Enter Setup Convert EAN-13 into ISSN You may decide whether to convert EAN-13 into ISSN. The scanner disables the conversion by default. Convert EAN-13 into ISSN (*) Do not Convert EAN-13 into ISSN Enable/Disable MSI Enable MSI (*) Disable MSI Exit and Save... -
Page 30: Checksum Code
Enter Setup Checksum Code The MSI barcode contains 1-digit compulsory checksum code. If there is a checksum code, it will be the last 1 or 2 digit(s). The checksum is the value added from all data collected to check if the data input is correct. After you set the "MSI without Checksum"... -
Page 31: Upc-A
Enter Setup Do not Transmit MSI Checksum UPC-A Enable/Disable UPC-A (*) Enable UPC-A Disable UPC-A UPC-A Outputs 0 You may decide whether to add a character "0" to the output of UPC-A. The scanner defaults disabling the 0 output. UPC-A Outputs 0 (*) UPC-A Do not Output 0 Checksum Code You may decide whether to transmit checksum code. -
Page 32: Upc-A Number System Digit
Enter Setup UPC-A Number System Digit The first digit of a UPC-A barcode is the number system digit. The scanner default enabling the output of number system digit. You may disable it as per your needs. (*) UPC-A Outputs Number System UPC-A Do not Output Number System Digit Digit... -
Page 33: Checksum Code
Enter Setup Convert UPC-E to UPC-A (*) Do not Convert UPC-E to UPC-A Checksum Code (*) Transmit UPC-E Checksum Do not Transmit UPC-E Checksum IATA 2 of 5 Enable/Disable IATA 2 of 5 Enable IATA 2 of 5 (*) Disable IATA 2 of 5 Interleaved 2 of 5 Enable/Disable Interleaved 2 of 5 (*) Enable Interleaved 2 of 5... -
Page 34: Matrix 2 Of 5
Enter Setup Matrix 2 of 5 Enable/Disable Matrix 2 of 5 Enable Matrix 2 of 5 (*) Disable Matrix 2 of 5 Standard 2 of 5 / Industrial 2 of 5 Enable/Disable Standard 2 of 5 / Industrial 2 of 5 Enable Standard 2 of 5 / Industrial 2 of 5 (*) Disable Standard 2 of 5 / Industrial 2 of 5... -
Page 35: Qr Code
Enter Setup QR Code Micro QR Code share the same setting barcodes below with QR Code. Enable/Disable QR Code (*) Enable QR Code Disable QR Code Normal/Inverted QR Code Recognition "Read Normal QR Code Only" means the scanner will only read the QR codes with white background and black lines. -
Page 36: Normal/Inverted Data Matrix Recognition
Enter Setup Normal/Inverted Data Matrix Recognition "Read Normal Data Matrix Only" means the scanner will only be capable of reading Data Matrix barcodes with white background and black lines. "Read Inverted Data Matrix Only" means the scanner will only be capable of reading the Data Matrix with black background and white lines. -
Page 37: Aztec Code
Enter Setup Aztec code Enable/Disable Aztec Code Enable Aztec Code (*) Disable Aztec Code Maxi code Enable/Disable Maxi Code (*) Disable Maxi Code Enable Maxi Code Han Xin Code Enable/Disable Han Xin Code Enable Maxi Code (*) Disable Han Xin Code Normal/Inverted Han Xin Code Recognition (*) Read Normal Han Xin Code Only Read Inverted Han Xin Code Only... -
Page 38: To Edit Data Format
Enter Setup To Edit Data Format Code ID A Code ID character identifies the code type of a scanned barcode. This is useful when decoding more than one code type. You may decide whether to add code ID in front of a barcode output. The scanner defaults disabling Code ID. -
Page 39: Code End Character Setting
Enter Setup ISBN ISSN QRCode PDF-417 Aztec Code Maxi Code Data Matrix Han Xin Code GS1 128 GS1 DataBar、GS1 DataBar Expanded、GS1 DataBar Limited Code End Character Setting You may decide whether to add a "Enter" after a barcode output. The scanner defaults adding an "Enter"... -
Page 40: Custom Code Prefix/Suffix Setting
4. Read the "Set Suffix" barcode. 5. Read the "D" barcode in Appendix I. 6. Read the "Exit and Save" barcode. Note: After you successfully set prefix and suffix, the BCST-53 will by default output scanning result with prefix and suffix. Set prefix... -
Page 41: Delete Characters On Output Result
Enter Setup Delete Characters on Output Result When outputting scanning result, the BCST-53 supports deleting 0–99 digit(s) front characters and 0–99 digit(s) end characters from a barcode. Steps to set deleting front 12-digit characters and end 4-digit characters are as below: 1. -
Page 42: Upper/Lower Case Setting
9 Digits Upper/Lower Case Setting The BCST-53 can convert all letters in a barcode into upper case form, or all into lower case form. The case of letters remains unchanged by default. You may change the setting of the upper and lower case by reading the barcodes below. -
Page 43: Additional Code
Barcodes like EAN-8, EAN-13, ISBN, ISSN, UPC-A and UPC-E can have additional codes. These additional codes appear on the right of the main code and are shorter than the main code, which can be 2-5 digits. The BCST-53 will only read the main code after you disable the additional code. -
Page 44: Caps Lock Control
(*) Do not Add Separation Character Caps Lock Control When using the BCST-53 on a Windows system, the content of a barcode may change with the status of the caps lock key. To avoid errors caused by such change, you may enable the "Rid Barcode of Caps Lock Control". -
Page 45: Read Code With Specific Initial Characters Only
4. Read the "6" barcode in Appendix I; 5. Read the "Exit and Save" barcode. Note: After you set the initial characters by steps above, the BCST-53 will only recognize the barcodes with specific initial characters. If you want to disable the function, please read the "Enter Setup"... -
Page 46: Read 1D Inverted Barcode
"Part Number", and character "Q" can indicate quantity. The BCST-53 can hide such initial characters. If the initial characters are set to be hidden, the initial characters for code 128 and code 39 including D, K, P, Q, S, V, 1P, 1T, 10D, 17V, 2P or 4L will be hidden and won't output. -
Page 47: Time Stamp Function
Time Stamp Function The time stamp includes time (hour/minute/second) and date (day/month/year). The BCST-53 disables time stamp function by default. You may decide whether to output it. You can enable either the time or date, or both time and date output. - Page 48 Enter Setup Set the Minute of Time Stamp Set the Second of Time Stamp Number 0 Number 1 Number 2 Number 3 Number 4 Number 5 Number 6 Number 7 Number 8 Number 9 Exit and Save...
- Page 49 Enter Setup For example, if you want to set the time stamp as "09:34:07 2019/04/18", you may follow the steps as indicated below: 1. Read the "Enter Setup" barcode. 2. Read the "Set the Year of Time Stamp" barcode. 3. Read the "Number 1" barcode. 4.
-
Page 50: Use Of Shortcut Barcodes
If the shortcut barcode is enabled and you scan some shortcut barcodes of input type, BCST-53 will output corresponding characters. When you scan the shortcut barcodes of function type, BCST-53 will simulate the effect on a keyboard, like a standalone function key or combination ones. -
Page 51: Replace Gs (^]) With Specific Character
Enable Original and GBK Chinese Character Recognition Replace GS (^]) with Specific Character The BCST-53 supports replacing the GS separation character (^]) with specific characters. The scanner defaults disabling the function. Steps to set replacing GS separation character with character "A" are as below: 1. - Page 52 Enter Setup (*) Disable Replacing GS with Other Characters Exit and Save...
-
Page 53: Appendix Ⅰ: Characters
Enter Setup Appendix Ⅰ: Characters " & Exit and Save... - Page 54 Enter Setup Exit and Save...
- Page 55 Enter Setup < > Exit and Save...
- Page 56 Enter Setup Exit and Save...
- Page 57 Enter Setup Exit and Save...
- Page 58 Enter Setup Exit and Save...
- Page 59 Enter Setup Exit and Save...
-
Page 60: Appendix Ⅱ: Independent Function Key
Enter Setup Appendix Ⅱ: Independent Function Key Enter Key Space Key Exit and Save... - Page 61 Enter Setup Backspace Delete Move Cursor Upward Move Cursor Downward Move Cursor Leftward Move Cursor Rightward Ctrl Insert Home Exit and Save...
- Page 62 Enter Setup Page Up Page Down Exit and Save...
-
Page 63: Appendix Ⅲ: Function Key Combinations
Enter Setup Appendix Ⅲ: Function Key Combinations NUL(Ctrl+@) SOH(Ctrl+A) STX(Ctrl+B) ETX(Ctrl+C) EOT(Ctrl+D) ENQ(Ctrl+E) ACK(Ctrl+F) BEL(Ctrl+G) BS(Ctrl+H) HT(Ctrl+I) LF(Ctrl+J) VT(Ctrl+K) Exit and Save... - Page 64 Enter Setup FF(Ctrl+L) CR(Ctrl+M) SO(Ctrl+N) SI(Ctrl+O) DLE(Ctrl+P) DC1(Ctrl+Q) DC2(Ctrl+R) DC3(Ctrl+S) DC4(Ctrl+T) NAK(Ctrl+U) SYN(Ctrl+V) ETB(Ctrl+W) CAN(Ctrl+X) EM(Ctrl+Y) Exit and Save...
- Page 65 Enter Setup SUB(Ctrl+Z) ESC(Ctrl+[) FS(Ctrl+\) GS(Ctrl+]) RS(Ctrl+^) US(Ctrl+-) Exit and Save...
Need help?
Do you have a question about the BCST-53 and is the answer not in the manual?
Questions and answers