Table of Contents
Advertisement
Quick Links
Advertisement
Table of Contents
Troubleshooting

Related Manuals for Dukane 6542W


Summary of Contents for Dukane 6542W
- Page 1 Projector 6542W/6545X/6442W/6445X/6540U User’s Manual...
- Page 2 Ver. 1 3/21 • Apple and Mac are trademarks of Apple Inc. registered in the U.S. and other countries. • Microsoft and Windows are either a registered trademark or trademark of Microsoft Corporation in the United States and/or other countries. •...
- Page 3 Important Information Safety Cautions Precautions Please read this manual carefully before using your Dukane projector and keep the manual handy for future reference. CAUTION To turn off main power, be sure to remove the plug from power outlet. The power outlet socket should be installed as near to the equipment as possible, and should be easily accessible.
- Page 4 The Federal Communications Commission does not allow any modifications or changes to the unit EXCEPT those specified by Dukane in this manual. Failure to comply with this government regulation could void your right to operate this equipment. This equipment has been tested and found to comply with the limits for a Class B digital device, pursuant to Part 15 of the FCC Rules.
- Page 5 Important Information - Please consult your dealer for more information. • Do not install and store the projector in the below circumstances. Failure to do so may cause of malfunction. - In powerful magnetic fields - In corrosive gas environment - Outdoors •...
- Page 6 Important Information • Prevent foreign objects such as paper clips and bits of paper from falling into your projector. Do not attempt to retrieve any objects that might fall into your projector. Do not insert any metal objects such as a wire or screwdriver into your projector.
- Page 7 Important Information Remote Control Precautions • Handle the remote control carefully. • If the remote control gets wet, wipe it dry immediately. • Avoid excessive heat and humidity. • Do not short, heat, or take apart batteries. • Do not throw batteries into fire. •...
- Page 8 Important Information About Copyright of original projected pictures: Please note that using this projector for the purpose of commercial gain or the attraction of public attention in a venue such as a coffee shop or hotel and employing compression or expansion of the screen image with the following functions may raise concern about the infringement of copyrights which are protected by copyright law.
-
Page 9: Table Of Contents
Table of Contents Table of Contents Important Information ............... I 1. Introduction ................. 1 ❶ What’s in the Box? ......................1 ❷ Introduction to the Projector ..................2 About this user’s manual ..................2 ❸ Part Names of the Projector ..................3 Front/Top ......................... - Page 10 Table of Contents HDMI1 and HDMI2 ....................28 Video ........................28 USB-A ........................28 LAN ........................28 ❹ Menu Descriptions & Functions [Display menu] ............29 [Auto PC adj.] ......................29 [Fine sync] ......................29 [H position] ......................29 [V position] ......................30 [H.
- Page 11 Table of Contents 6. Network control ..............57 ❶ Network control operation ................... 57 ❷ Enter through a Web browser ..................58 Connecting Your Computer ................... 58 ❸ [System status] page ....................59 4 [General setup] page ....................59 ❺ [Picture setup] page ....................59 ❻...
-
Page 12: Introduction
Computer cable (VGA) Strap × 1 (US: 310004900) (310002200) (410035000) (EU: 310003100) Dukane Projector CD-ROM User’s manual (PDF) (510048500) • Important Infomation (510048600) • Quick Setup Guide(UG) (510048900) Quick Setup Guide(G2) (510048700) Unless otherwise described in the user’s manual, the drawings for the projector cabinet show examples of the ME403U. -
Page 13: ❷ Introduction To The Projector
1. Introduction ❷ Introduction to the Projector This section introduces you to your new projector and describes the features and controls. • Simple Computer System Setting The projector has the Multi-scan system to conform to many computer output signals quickly. Up to WUXGA resolution can be accepted. -
Page 14: ❸ Part Names Of The Projector
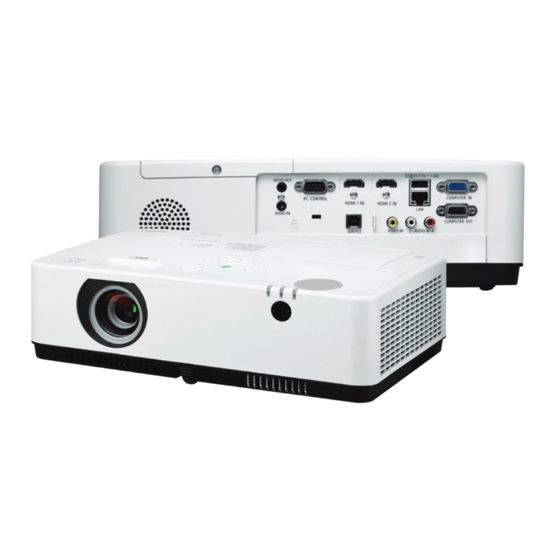
1. Introduction ❸ Part Names of the Projector Front/Top Controls Lamp Cover (→ page 5) (→ page 86) Focus Ring (→ page 15) Indicators (→ page 5) Zoom Lever Exhaust Vent (→ page 15) Heated air is exhausted from here. Lens Front Remote Sensor (→... -
Page 15: Rear
1. Introduction Rear Built-in Security Slot ( Terminal Panel (→ page 6) Monaural Speaker (16 W) Intake Vent / Filter Cover (→ page 82, 88) Security chain opening Rear Remote Sensor Attach an anti-theft device. (→ page 8) The security chain opening accepts As the theft and dropping-off security wires or chains up to prevention measure, fix on the... -
Page 16: Top Features
1. Introduction Top Features (POWER) Button (→ page 11, 18) 2. POWER Indicator (→ page 10, 11, 18, 90) 3. STATUS Indicator (→ page 90) 4. LAMP Indicator (→ page 90) 5. ECO Button (→ page 21) 6. INPUT Button (→... -
Page 17: Terminal Panel Features
1. Introduction Terminal Panel Features 1. COMPUTER IN/ Component Input Terminal (Mini D-Sub 15 Pin) 12. PC CONTROL Port (D-Sub 9 Pin) (→ page 10, 71, 75) (→ page 98) 2. COMPUTER AUDIO IN Mini Jack (Stereo Mini) Use this port to connect a PC or control system. (→... -
Page 18: ❹ Part Names Of The Remote Control
1. Introduction ❹ Part Names of the Remote Control 1. Infrared Transmitter 17. PIP Button (→ page 8) (PIP button does not work on this 2. ( ) POWER ON Button series of projectors) (→ page 11) 18. FREEZE Button 3. -
Page 19: Battery Installation
1. Introduction Battery Installation 1. Press firmly and slide the bat- 2. Install new batteries (AAA). 3. Slip the cover back over the tery cover off. Ensure that you have the bat- batteries until it snaps into teries’ polarity (+/−) aligned place. -
Page 20: Projecting An Image (Basic Operation)
2. Projecting an Image (Basic Operation) This section describes how to turn on the projector and to project a picture onto the screen. ❶ Flow of Projecting an Image Step 1 • Connecting your computer / Connecting the power cord (→ page 10) Step 2 •... -
Page 21: ❷ Connecting Your Computer/Connecting The Power Cord
2. Projecting an Image (Basic Operation) ❷ Connecting Your Computer/Connecting the Power Cord 1. Connect your computer to the projector. This section will show you a basic connection to a computer. For information about other connections, see “6. Installation and Connections” on page 71. Connect the computer cable (VGA) between the projector’s COMPUTER IN terminal and the computer’s port (mini D-Sub 15 Pin). -
Page 22: ❸ Turning On The Projector
2. Projecting an Image (Basic Operation) ❸ Turning on the Projector 1. Remove the lens cap. Press and hold both ends of the lens cap and pull it toward you. 2. Press the (POWER) button on the projector cabinet or the POWER ON button on the remote control. The POWER indicator will blink and the projector will become ready to use. -
Page 23: ❹ Selecting A Source
2. Projecting an Image (Basic Operation) ❹ Selecting a Source Selecting the computer or video source NOTE: Turn on the computer or video source equipment connected to the projector. Detecting the Signal Automatically Press the INPUT button once. The projector will search for the available input source and display it. -
Page 24: ❺ Adjusting The Picture Size And Position
2. Projecting an Image (Basic Operation) ❺ Adjusting the Picture Size and Position Use the adjustable tilt foot, the zoom function or the focus ring to adjust the picture size and position. In this chapter drawings and cables are omitted for clarity. Adjusting the throw angle (the height of an image) Finely adjusting the size of an image [Tilt foot] (→... -
Page 25: Adjust The Tilt Foot
2. Projecting an Image (Basic Operation) Adjust the Tilt Foot 1. Lift the front edge of the projector. CAUTION: Do not try to touch the exhaust vent during Tilt Foot adjustment as it can become heated while the projector is turned on and after it is turned off. -
Page 26: Zoom
2. Projecting an Image (Basic Operation) Zoom Use the ZOOM lever to adjust the image size on the screen. Zoom Lever Focus Use the FOCUS ring to obtain the best focus. Focus Ring... -
Page 27: ❻ Correcting Keystone Distortion [Keystone]
2. Projecting an Image (Basic Operation) ❻ Correcting Keystone Distortion [KEYSTONE] You may adjust keystone distortion of image in your projector with the V keystone adjustment. Follow steps below to adjust keystone distortion of projected image manually. Press the KEYSTONE button on your remote controller. The keystone adjustment dialog box displays ( including H/V keystone, 4-Corner correction, 6-Corner correction, Curved correction, Grid Image Tune, Reset) , press ▲▼◀... -
Page 28: ❼ Optimizing Computer Signal Automatically
2. Projecting an Image (Basic Operation) ❼ Optimizing Computer Signal Automatically Adjusting the Image Using Auto Adjust Optimizing a computer image automatically. (COMPUTER) Press the AUTO ADJ. button to optimize a computer image automatically. This adjustment may be necessary when you connect your computer for the first time. -
Page 29: ❾ Turning Off The Projector
2. Projecting an Image (Basic Operation) ❾ Turning off the Projector To turn off the projector: 1. First, press the (POWER) button on the projector cabinet or the STANDBY button on the remote control. The confirmation message will be displayed. Power off? Carbon savings-session 66.5200... -
Page 30: ❿ When Moving The Projector
2. Projecting an Image (Basic Operation) ❿ When Moving the Projector Preparation: Make sure that the projector is turned off. 1. Put on the lens cap. 2. Unplug the power cord. 3. Disconnect any other cables. • Remove the USB memory if it is inserted into the projector. (→... -
Page 31: Convenient Features
3. Convenient Features ❶ Turning off the Image and Sound Press the AV-MUTE button to turn off the image and sound for a short period of time. Press again to restore the image and sound. The projector’s power-saving function will work 10 seconds after the image is turned off. - Page 32 3. Convenient Features 2. Press the ▲▼◀▶ button. The area of the magnified image will be moved.
-
Page 33: Using The Viewer
4. Using the VIEWER Memory viewer function When the USB memory inset into the projector, the viewer memory function can Project the video and pictures stored in the USB memory. The projected content of memory viewer function Memory viewer function supports the following picture files. Extension Format Description... - Page 34 4. Using the VIEWER The termination of memory viewer The slide show mode in the USB-A menu is set to a special setting ,all images in the same folder can play automatically. 1) Press button to select , displayed in the left corner of the screen. 2) Press <ENTER >...
-
Page 35: Using On-Screen Menu
5. Using On-Screen Menu ❶ Menu item overview Main menu Submemu ① Display Auto PC adj. ② Fine sync H position ③ V position H.size ④ Aspect Normal Orientation Front ⑤ Menu position Upper left Background display Blue ⑥ System 1. -
Page 36: ❷ List Of Menu Items
5. Using On-Screen Menu ❷ List of Menu Items Some menu items are not available depending on the input source. Main menu Sub-menu Setting Remarks Auto PC adj. Fine sync 0-31 H position -5 - +5 V position -5 - +5 The range of H. - Page 37 5. Using On-Screen Menu Main menu Sub-menu Setting Remarks 0-63 Green 0-63 Color adjust Blue 0-63 Sharpness 0-15 On start On/Off* Standby mode Normal*/Sleep/Network standby High altitude On/Off* ECO mode Normal*/ECO1/ECO2/Boost Cooling fast Normal*/0 Sec/30 Sec Closed caption Off*/CC1/CC2/CC3/CC4 Key lock On/Off* Iris On/Off*...
- Page 38 5. Using On-Screen Menu Main menu Sub-menu Setting Remarks Ready* Shut down Power management Timer Ready countdown Filter counter Timer Filter Filter counter reset Filter clogging check O f f,G r a y s c a l e(1-4),C o l o r bar,...
-
Page 39: ❸ Menu Descriptions & Functions [Input]
5. Using On-Screen Menu ❸ Menu Descriptions & Functions [INPUT] Computer HDMI 1 HDMI 2 Video USB-A Computer Selects the computer connected to your Computer input terminal signal. NOTE: When the component input signal is connected to the COMPUTER IN terminal, select [Computer]. HDMI1 and HDMI2 Selects the HDMI compatible equipment connected to your HDMI1 or 2 IN terminal. -
Page 40: ❹ Menu Descriptions & Functions [Display Menu]
5. Using On-Screen Menu ❹ Menu Descriptions & Functions [Display menu] [Auto PC adj.] Display Auto PC adj. Fine sync H position V position H.size Aspect Normal Orientation Front Menu position Upper left Background display Blue System Select Auto PC Adj. function can adjusts Fine sync, H position, V position , H. size to be compatible with the com- puter automatically. -
Page 41: [V Position]
5. Using On-Screen Menu [V position] (Only for PC signal input) On the premise that the relative position of both projector and the screen is set up right, you can move the image vertical position, if the position of the projected image on the screen is deviated. 1) Press ▲... -
Page 42: [Orientation]
5. Using On-Screen Menu [Orientation] Select this function to set the project way. Please change the projection way, if the OSD displays inversely or reversedly. Press < MENU > button on the remote controller or on the top control panel to display the OSD menu. Press ▲ ▼ button to select the Display menu ,then press <ENTER>... -
Page 43: [Background Display]
5. Using On-Screen Menu [Background display] Select this function can adjust background color. Press < MENU > button on the remote controller or on the top control panel to display the OSD menu. Press ▲ ▼ button to select the Display menu ,then press <ENTER> or ▶ button. 1) Press ▲... - Page 44 5. Using On-Screen Menu Select the computer Signal format manually. 1. Press the MENU button on remote controller and the OSD displays. Press button to point to the Input icon, press ▲ ▼ button or ENTER button and the Input menu displays. 2.
-
Page 45: ❺ Menu Descriptions & Functions [Color Adjust]
5. Using On-Screen Menu ❺ Menu Descriptions & Functions [Color adjust] Select color adjustment to set the image mode and adjust the quality of the projected image. [Image mode] Direct operation Press the PICTURE select button on remote controller to select required image mode. Menu operation Press <... - Page 46 5. Using On-Screen Menu Contrast Press ▼ button to decrease contrast, range from 0 - +63. Press ▼ button to increase contrast,range from 0 - +63. Brightness Press ▼ button to decrease brightness, range from 0 - +63. Press ▲ button to increase brightness, range from 0 - +63. Color temp.
-
Page 47: Menu Descriptions & Functions [Setting]
5. Using On-Screen Menu 6 Menu Descriptions & Functions [Setting] The projector has setting fuction, you can select other functions as described below. Menu operation Press < MENU > button on the remote controller or on the top control panel to display the OSD menu.Press ▲ ▼ button to select the setting menu ,then press <ENTER>... -
Page 48: [Standby Mode]
5. Using On-Screen Menu [Standby mode] Set power consumption in standby mode, no matter whenever your projector is operated through network. 1) Press ▲ ▼ button to select [Standby mode] menu. 2) Press <ENTER> button. 3) Press ▲ ▼ button to adjust levels. Normal..Some function will be disabled once your projector is in ECO. -
Page 49: [Eco Mode]
5. Using On-Screen Menu [ECO mode] Change lamp brightness according to the environment and aim your projector is operating. 1) Press ▲ ▼ button to select [ECO mode] menu. 2) Press <ENTER> button. 3) Press ▲ ▼ button to switch required menu. Normal..Normal brightness. -
Page 50: [Closed Caption]
5. Using On-Screen Menu [Closed caption] Closed Caption is used for displaying the program sound or other information on the screen. select this function to switch channel with input signal of closed caption. 1) Press ▲ ▼ button to select [Closed caption] menu. 2) Press <ENTER>... -
Page 51: [Iris]
5. Using On-Screen Menu [Iris] Adjust the light output to the image signal and perform projection with emphasis on contrast. 1) Press ▲ ▼ button to select [Iris] menu. 2) Press <ENTER> button. 3) Press ▲ ▼ button to adjust levels. Off..No correction. -
Page 52: [Sound]
5. Using On-Screen Menu [Sound] Select this function to adjust the sound. 1) Press ▲ ▼ button to select [Sound] menu. 2) Press <ENTER> button. 3) Press ▲ ▼ button to switch required menu. Setting Setting On start Sound Standby mode Normal Volume Mute... - Page 53 5. Using On-Screen Menu Image Auto Set the signal level automatically. [64-940] When external device (such as:a blu ray disc player) is connected to the HDMI setup terminal . When the output of an external device (such as a computer), via a conversion cable or a similar cable, is connected to the HDMI setup terminal.
-
Page 54: ❼ Menu Descriptions & Functions [Expand]
5. Using On-Screen Menu ❼ Menu Descriptions & Functions [Expand] The projector has expand fuction, you can select other functions as described below. Menu operation Press < MENU > button on the remote controller or on the top control panel to display the OSD menu. Press ▲ ▼ button to select the Expand menu, then press <ENTER>... -
Page 55: [Auto Setup]
5. Using On-Screen Menu [Auto setup] Select this function to store or reset the keystone or some related setting after unpluging the AC power. Press < MENU > button on the remote controller or on the top control panel to display the OSD menu.Press ▲ ▼ Press the AUTO button on your remote controller to execute the following functions : Input search, Auto PC adj. - Page 56 5. Using On-Screen Menu Expand Expand Language Keystone Auto setup Keystone Store Keystone . . . H/V Keystone Security 4-Corner correction Power management 6-Corner correction Filter Curved correction Test pattern Grid image tune Network setup Reset value Control ID Factory default Lamp counter reset Keystone Select this function to correct the projected images horizontally or vertically.
- Page 57 5. Using On-Screen Menu Curved correction Select this function to correct the projected images with linearity uneven or vertical and horizontal bending deformation. press ▲ ▼ ▶ button to adjust options. Item Operation Adjustment Press Extend left and right vertically Curved cerrection X/Y gain Press ...
- Page 58 5. Using On-Screen Menu Item Operation Adjustment Correct the horizontal line on the left. Press Expand the top and bottom Curved cerrection X Offset while maintaining the central Curved correction area. Correct the horizontal line to the X offset right.
-
Page 59: [Security]
5. Using On-Screen Menu NOTE: • After adjusting values about h/v keystone , if users adjust conner correction, values about h/v keystone will be reset . and after adjusting values about conner correction, if users adjust about h/v keystone, values about conner correction will be reset also. •... -
Page 60: [Power Management]
5. Using On-Screen Menu Expand Expand Language Security Auto setup PIN code lock Keystone PIN code change Security . . . Power management Filter Test pattern Network setup Control ID Factory default Lamp counter reset [Power management] To reduce power consumption and maintain life cycle of light source, the power management function will turn off the projection light source if your projector has no signals for a period of time. -
Page 61: [Filter]
5. Using On-Screen Menu [Filter] Set this function to reset the filter usage time and set up warning display. 1) Press ▲ ▼ button to select [Filter] menu. 2) Press <ENTER> button. 3) Press ▲ ▼ button to switch required item. When the projector reaches the user-set cleaning time, filter warning icon will appear on the screen to notify the user needs to clean the projector filter. -
Page 62: [Network Setup]
5. Using On-Screen Menu Expand Expand Test pattern Test pattern White Gray scale1 Black Gray scale2 Raster gray Gray scale3 Gray scale4 Color bar Green Blue Cross hatch [Network setup] Function: This function is designed to allow the computer control the projector remotely via intranet. 1.Required equipment: Projector, computer, network cable 2.Connection: Connect your projector to a router or switch in the LAN with normal or jumper network cable. -
Page 63: [Control Id]
5. Using On-Screen Menu [Control ID] 1. Turn on the projector. 2. Press the ID SET button on the remote control. The CONTROL ID screen will be displayed. Control ID(Inactive) Control ID Number Control ID(Active) Control ID Number If the projector can be operated with the current remote control ID, the [ACTIVE] will be displayed. -
Page 64: [Factory Default]
5. Using On-Screen Menu [Factory default] This function resets all your settings to factory default. 1) Press button to select [Factory default] menu. 2) Press <ENTER or > button. 3) Press button to select yes ,then press <ENTER> button. Return to factory default? :... -
Page 65: ❽ Menu Descriptions & Functions [Usb-A]
5. Using On-Screen Menu ❽ Menu Descriptions & Functions [USB-A] The projector has expand fuction, you can select other functions as described below. When the USB memory inset into the projector, the viewer memory function can project the video and pictures stored in the USB memory. -
Page 66: [Sort Order]
5. Using On-Screen Menu [Sort order] Select this function to set the slide's order. 1) Press button to select [Sort order] menu. 2) Press < ENTER > button. 3) Press button to switch required item. Extend order..Sort by extend names of file or folder. Size order...Sort by size of file or folder. -
Page 67: ❾ Menu Descriptions & Functions [Info.]
5. Using On-Screen Menu ❾ Menu Descriptions & Functions [Info.] Select info. function to detect the projected image signal and the projector operating status. Press <HELP > button on the remote controller or <MENU> button on the control panel to display the OSD menu. Press button to select the info. -
Page 68: Network Control
6. Network control ❶ Network control operation Function: This function is designed to remote control computer in the same LAN. Preparation 1. Required equipment: Projector, Computer, Network cable 2. Connection: Connect your projector to a router or switch in the LAN with normal or jumper network cable. In case a normal net- work cable failed to connect successfully, use a jumper cable instead. -
Page 69: ❷ Enter Through A Web Browser
6. Network control ❷ Enter through a Web browser Connecting Your Computer 1) Start the computer's Web browser. 2) Enter the IP address on the projector set in the URL input field of the Web browser. 3) Enter the password in the [Password], then click [Login]. "* "the factory default setting is the user name: "admin"... -
Page 70: ❸ [System Status] Page
6. Network control ④ Image setup: Click this option to display the [image setup] page. ⑤ Network setup: Click this option to display [Network setup] page. ❸ [System status] page ① ② ① Versions: Displays the firmware version of the projector. ②... -
Page 71: ❻ [Image Setup] Page
6. Network control ① Brightness:Adjust the brightness of the projected image. ② Contrast:Adjust the contrast of the projected image. ③ Sharpness:Adjust the sharpness of the projected image. ④ Color Temperature:Adjust the color temperature of the projected image. ❻ [Image setup] page ①... -
Page 72: ❼ [Network Setup] Page
6. Network control ❼ [Network setup] page ① ② ③ ④ ② ① Network setup If you want to enable the DHCP client, select the IP address automatically. IP address: Please enter the IP address when you do not use the DHCP server. Subnet : Please enter a subnet shield,when you do not use the DHCP server . -
Page 73: Installation And Connections
7. Installation and Connections ❶ Setting Up the Screen and the Projector Use this to get a general idea of what the screen size will be when set in a certain position, what size screen you will need, and what distance you will need to project images of the desired size. The projection distance range at which focusing is possible is 0.9 m (for 30 inches) to 10.9 m (for 300 inches). - Page 74 7. Installation and Connections The projection distance range at which focusing is possible is 0.8 m (for 30 inches) to 13.8 m (for 300 inches). Install within this range. [ME453X] (inch) When zoom lever turned to wide When zoom lever turned to telescopic [Projection distance] When zoom lever turned to wide...
- Page 75 7. Installation and Connections The projection distance range at which focusing is possible is 0.8 m (for 30 inches) to 13.4 m (for 300 inches). Install within this range. [ME423W/ME383W] (inch) When zoom lever turned to wide When zoom lever turned to telescopic [Projection distance] When zoom lever turned to wide...
- Page 76 7. Installation and Connections The projection distance range at which focusing is possible is 1.0 m (for 30 inches) to 11.6 m (for 300 inches). Install within this range. [MC393W] (inch) When zoom lever turned to wide When zoom lever turned to telescopic [Projection distance] When zoom lever turned to wide...
- Page 77 7. Installation and Connections The projection distance range at which focusing is possible is 0.9 m (for 30 inches) to 10.7 m (for 300 inches). Install within this range. [MC423W] (inch) When zoom lever turned to wide When zoom lever turned to telescopic [Projection distance] When zoom lever turned to wide...
- Page 78 7. Installation and Connections The projection distance range at which focusing is possible is 0.8 m (for 30 inches) to 12.9 m (for 300 inches). Install within this range. [ME403U] When zoom lever turned to wide (inch) When zoom lever turned to telescopic [Projection distance] When zoom lever turned to wide...
-
Page 79: Throw Distance And Screen Size
7. Installation and Connections Throw Distance and Screen Size The following shows the proper relative positions of the projector and screen. Refer to the table to determine the position of installation. Distance Chart B = Vertical distance between lens center and screen center C = Throw distance D = Vertical distance between lens center and... - Page 80 7. Installation and Connections [MC393W] α Screen Size Diagonal Width Height Wide Tele Wide Tele inch inch inch inch inch inch inch Degree Degree 1149 10.3 1016 1277 1536 10.2 1524 1295 1922 2311 10.2 2032 1727 1067 2567 3086 10.2 2540 2159...
- Page 81 7. Installation and Connections WARNING • Installing your projector on the ceiling must be done by a qualified technician. Contact your Dukane dealer for more information. • Do not attempt to install the projector yourself. • Only use your projector on a solid, level surface. If the projector falls to the ground, you can be injured and the projector severely damaged.
-
Page 82: ❷ Making Connections
7. Installation and Connections ❷ Making Connections Connecting Your Computer Computer cables, HDMI can be used to connect to a computer. The connection cable is not enclosed with the projector. Please get ready a suitable cable for the connection. NOTE: Signals supported by Plug & Play (DDC2) INPUT COMPUTER IN HDMI 1 IN... - Page 83 7. Installation and Connections NOTE: The projector is not compatible with video decoded outputs of the ISS-6020 switcher. NOTE: An image may not be displayed correctly when a Video source is played back via a commercially available scan converter. This is because the projector will process a video signal as a computer signal at the default setting. In that case, do the following. * When an image is displayed with the lower and upper black portion of the screen or a dark image is not displayed correctly: Project an image to fill the screen and then press the AUTO ADJ.
-
Page 84: Connecting An External Monitor
7. Installation and Connections Connecting an External Monitor AUDIO OUT COMPUTER OUT Computer cable (VGA) (supplied) Stereo mini-plug audio cable (not supplied) Computer cable (VGA) (not supplied) You can connect a separate, external monitor to your projector to simultaneously view on a monitor the computer analog image you’re projecting. -
Page 85: Connecting Your Dvd Player Or Other Av Equipment
7. Installation and Connections Connecting Your DVD Player or Other AV Equipment Connecting Video Input AUDIO IN VIDEO IN Video cable (not supplied) Audio cable (not supplied) Audio equipment Audio cable (not supplied) • Select the source name for its appropriate input terminal after turning on the projector. INPUT button on the projector Input terminal Button on the remote control... -
Page 86: Connecting Component Input
7. Installation and Connections Connecting Component Input COMPUTER IN AUDIO IN 15-pin - to - RCA (female) × 3 cable adapter (ADP-CV1E) Stereo mini plug - to - RCA audio cable (not supplied) Audio Equipment Component video RCA × 3 cable (not supplied) DVD player Audio cable (not supplied) •... -
Page 87: Connecting Hdmi Input
7. Installation and Connections Connecting HDMI Input You can connect the HDMI output of your DVD player, hard disk player, Blu-ray player, or notebook type PC to the HDMI IN terminal of your projector. HDMI 1 IN HDMI 2 IN HDMI cable (not supplied) Use High Speed HDMI Cable. -
Page 88: Connecting To A Wired Lan
7. Installation and Connections Connecting to a Wired LAN The projector comes standard with a LAN port (RJ-45) which provides a LAN connection using a LAN cable. To use a LAN connection, you are required to set the LAN on the projector menu. (→ page 51) Example of LAN connection Server LAN cable (not supplied) - Page 89 7. Installation and Connections 1. Press the POWER button to turn off the projector and set it into standby condition, and disconnect the power cord. 2. Slowly insert the USB Wireless LAN Unit into the USB port. Remove the cap from the USB Wireless LAN Unit, and then insert it with the surface (side of indicator) facing down.
- Page 90 7. Installation and Connections 1. Connect a computer to the projector via wired LAN. (→ page 57) 2. Use the computer’s browser to display the projector’s HTTP server. (→ page 61) 3. Use an HTTP server to set the wireless LAN. (→ page 57) NOTE: •...
-
Page 91: Connecting To A Network
8. Connecting to a Network 1 Things you can do by connecting the projector to a network • You can send screen images via a wired LAN/wireless LAN from a terminal installed with our MultiPresenter app to the projector and project them onto a screen. •... -
Page 92: Connecting To Multipresenter
8. Connecting to a Network 2 Connecting to MultiPresenter Preparations: • When connecting the projector to a wired LAN, connect a LAN cable to the projector. (→ page 77) • When connecting the projector to a wireless LAN, install a separately-sold (or the enclosed) LAN unit (NP05LM) in the projector. -
Page 93: Maintenance
9. Maintenance This section describes the simple maintenance procedures you should follow to clean the filter, the lens, the cabinet, and to replace the lamp and the filter. ❶ Cleaning the Filter The air-filter sponge keeps dust and dirt from getting inside the projector and should be frequently cleaned. If the filter is dirty or clogged, your projector may overheat. - Page 94 9. Maintenance 4. Attach the filter to the filter cover. 5. Put the filter unit back to the projector cabinet. Insert two catches of the tip of the filter unit into the groove of the cabinet, and push the button to close the filter unit. •...
-
Page 95: ❷ Cleaning The Lens
9. Maintenance ❷ Cleaning the Lens • Turn off the projector before cleaning. • The projector has a plastic lens. Use a commercially available plastic lens cleaner. • Do not scratch or mar the lens surface as a plastic lens is easily scratched. •... -
Page 96: ❹ Replacing The Lamp And The Filter
Your projector’s lamp is a consumable. you can comfirm your usage time according to "Lamp counter" on the Info. menu. (→ page 56) you'd better ask a professional technician to replace the lamp, contact your Dukane dealer for lamp replacement. CAUTION •... - Page 97 9. Maintenance To replace the lamp: 1. Remove the lamp cover. (1) Loosen the lamp cover screw. • The lamp cover screw is not removable. (2) Push and slide the lamp cover off. 2. Remove the lamp housing. (1) Loosen the three screws securing the lamp housing until the phillips screwdriver goes into a freewheeling condition.
- Page 98 9. Maintenance 3. Install a new lamp housing. (1) Insert a new lamp housing until the lamp housing is plugged into the socket. (2) Push the top center of the lamp housing to secure it. (3) Secure it in place with the three screws. •...
- Page 99 9. Maintenance To replace the filter: NOTE: • Before replacing the filter, wipe off dust and dirt from the projector cabinet. • The projector is precision equipment. Keep out dust and dirt during filter replacement. • Do not wash the filter with soap and water. Soap and water will damage the filter membrane. •...
- Page 100 9. Maintenance 5. Put the filter unit back to the projector cabinet. Insert two catches of the tip of the filter unit into the groove of the cabinet, and push the button to close the filter unit. • Push the filter unit until it clicks into place. This completes the filter replacement.
-
Page 101: 10. Appendix
10. Appendix ❶ Troubleshooting This section helps you resolve problems you may encounter while setting up or using the projector. Feature of each indicator ① POWER indicator This indicator informs the power status of the projector. ② STATUS indicator This indicator lights/blinks when a button is pressed while the CONTROL PANEL LOCK function is utilized, or while performing the specific operations. -
Page 102: Indicator Message (Error Message)
10. Appendix Indicator Message (Error message) POWER STATUS LAMP Projector status Procedure A button has been pressed while the The projector's keys are locked. The KEY LOCK is activated. setting must be canceled to operate the → Orange projector. ( page 39) →... -
Page 103: ❷ Specifications
10. Appendix ❷ Specifications This section provides technical information about projector’s performance. Optical Model Number ME403U ME423W ME383W MC423W MC393W ME453X MC453X LCD Panel 0.64 inch LCD 0.64 inch LCD 0.59 inch LCD 0.64 inch LCD 0.59 inch LCD 0.63 inch LCD with Micro Lens with Micro Lens with Micro Lens with Micro Lens... - Page 104 10. Appendix Model Number ME403U ME423W ME383W MC423W MC393W ME453X MC453X Compatible Signals* Analog: VGA/SVGA/XGA/WXGA/Quad-VGA/SXGA/SXGA+/WXGA+/WXGA++/UXGA/WSXGA+/HD/Full HD/WUXGA/ Mac 13", 16", 23" Component: 480i/480p/576i/576p/720p/1080i/1080p HDMI: VGA/SVGA/XGA/WXGA/Quad-VGA/SXGA/SXGA+/WXGA+ /WXGA++/WSXGA+/4K/480p/576p/720p/1080i/1080p Horizontal Resolution 540 TV lines: NTSC/PAL 300 TV lines: SECAM Scan Rate Horizontal: 15 kHz to 100 kHz (RGB: 24 kHz or over) Vertical: 24 Hz to 85 Hz Sync Compatibility Separate Sync...
-
Page 105: ❸ Cabinet Dimensions
10. Appendix ❸ Cabinet Dimensions Unit: mm (inch) [ME403U] 345 (13.6) 104.6 (4.1) 95 (3.7) 113.5 (4.5) 175 (6.9) 195 (7.7) 5 (0.2) - Page 106 10. Appendix Unit: mm (inch) [ME423W/ME383W/MC423W/MC393W/ME453X/MC453X] 104.6 (4.1) 345 (13.6) 108.4 (4.3) 95 (3.7) 175 (6.9) 195 (7.7) 5 (0.2)
-
Page 107: ❹ Pin Assignments Of D-Sub Computer Input Terminal
10. Appendix ❹ Pin Assignments of D-Sub COMPUTER Input Terminal Mini D-Sub 15 Pin Terminal Pin No. RGB Signal (Analog) YCbCr Signal 11 12 13 14 15 Green or Sync on Green Blue Ground Signal Level Ground Video signal : 0.7Vp-p (Analog) Red Ground Cr Ground Sync signal : TTL level... -
Page 108: ❺ Compatible Input Signal List
10. Appendix ❺ Compatible Input Signal List Source Specification OSD Display "Pixel clock HDMI Video Resolution H-freq(KHz) V-freq(Hz) (MHz)" - ○ - NTSC NTSC 15.734 59.940 - - - ○ NTSC-443 NTSC 4.43 - - ○ PAL-60 PAL60 - - ○... - Page 109 10. Appendix Source Specification OSD Display "Pixel clock HDMI Video Resolution H-freq(KHz) V-freq(Hz) (MHz)" ○ ○ - 1280x1024,60Hz 108.000 63.981 60.020 ○ ○ - 1280*1024,65Hz 118.500 65.180 ○ ○ - 1280x1024,72Hz 1280x1024 135.060 78.16 71.97 ○ ○ - 1280x1024,75Hz 135.000 79.976 75.025 ○...
-
Page 110: ❻ Pc Control Codes And Cable Connection
10. Appendix ❻ PC Control Codes and Cable Connection PC Control Codes Function Code Data POWER ON POWER OFF INPUT SELECT COMPUTER INPUT SELECT HDMI1 INPUT SELECT HDMI2 INPUT SELECT VIDEO INPUT SELECT USB-A INPUT SELECT LAN PICTURE MUTE ON PICTURE MUTE OFF SOUND MUTE ON SOUND MUTE OFF... - Page 111 10. Appendix ABOUT THE ASCII CONTROL COMMAND This device supports the common ASCII Control Command for controlling our projector and monitor. Please visit our web site for detailed information about the command. HOW TO CONNECT WITH AN EXTERNAL DEVICE There are two methods to connect the projector with an external device such as a computer. Connection thru the serial port.
-
Page 112: ❼ Troubleshooting Check List
10. Appendix ❼ Troubleshooting Check List Before contacting your dealer or service personnel, check the following list to be sure repairs are needed also by referring to the “Troubleshooting” section in your user’s manual. This checklist below will help us solve your problem more efficiently. - Page 113 10. Appendix In the space below please describe your problem in detail. Information on application and environment where your projector is used Projector Signal cable Dukane standard or other manufacturer’s cable? Model number: Serial No.: Model number: Length: inch/m Date of purchase:...
Need help?
Do you have a question about the 6542W and is the answer not in the manual?
Questions and answers