Table of Contents
Advertisement
Quick Links
Advertisement
Table of Contents

Related Manuals for Onyx BOOX 60


Summary of Contents for Onyx BOOX 60
- Page 1 BOOX 60 User Manual Version 1.0...
-
Page 2: Table Of Contents
5.7 Volume Keys ..................19 5.8 Wifi Key ....................19 5.9 Headphone Jack ..................19 5.10 Indicator Light ..................19 6 User Interface....................20 6.1 Main View ....................20 6.1.1 Internal Flash................21 Copyright © 2009 Onyx International. All rights reserved. - Page 3 6.3.2 Progress Bar................42 6.3.3 Stylus Indicator ................47 6.3.3.1 Sketch ................. 47 6.3.3.2 Erase Sketches ............47 6.3.3.3 Hand Tool ..............47 6.3.3.4 Selection Zoom ............47 6.3.3.5 Annotate ..............47 Copyright © 2009 Onyx International. All rights reserved.
- Page 4 ............51 6.4.6.3 Thumbnail View ............. 53 6.4.6.4 By Name ..............54 6.4.6.5 By Type ..............55 6.4.6.6 By Size ..............56 6.4.6.7 By Access Time ............. 57 6.4.6.8 By Rating ..............58 Copyright © 2009 Onyx International. All rights reserved.
- Page 5 ..........64 6.4.8.5 Format Flash ..............65 6.4.8.6 About ..............65 6.4.9 Font ................... 65 6.4.9.1 By Levels ................66 6.4.9.2 By Numbers............... 67 6.4.9.3 By Ratio ................68 6.4.9.4 Bold ..................69 Copyright © 2009 Onyx International. All rights reserved.
- Page 6 6.4.11.3 All Annotations ............. 78 6.4.11.4 Sketch ..............79 6.4.11.5 Erase Sketch ............80 6.4.11.6 Sketch Colors ............80 6.4.11.7 Sketch Shapes ............. 82 6.4.12 Layout ................83 6.4.12.1 Single Page ............83 Copyright © 2009 Onyx International. All rights reserved.
- Page 7 ............94 6.4.13.10 Thumbnail View ..........95 6.4.13.11 Table of Content ..........96 6.4.13.12 Export ..............97 6.4.13.13 Insert Page ............97 6.4.13.14 Remove Page ............97 6.4.14 Font Family ..............98 Copyright © 2009 Onyx International. All rights reserved.
- Page 8 6.6 Music Player ..................103 6.6.1 Playlist..................104 6.6.2 Minimize Button .............. 104 6.6.3 Close Button ..............105 6.6.4 Repeat Playlist Button ............ 105 6.6.5 Shuffle Switch Button .......... 105 6.6.6 Previous Song Button ............ 105 Copyright © 2009 Onyx International. All rights reserved.
- Page 9 6.8.1.1 Input Box ................. 111 6.8.1.2 Search Button ..............111 6.8.1.3 Clear Button ..............112 6.8.2 File Search ................. 113 6.8.2.1 Input Box ................. 113 6.8.2.2 Search Button ..............114 6.8.2.3 Clear Button ..............115 Copyright © 2009 Onyx International. All rights reserved.
- Page 10 8.1 Add Annotation..................126 8.2 Erase Annotations................127 9 OTA Functionalities ..................128 9.1 Activate Boox 60.................. 128 9.2 Fulfillment .................... 130 10 Software Update ..................133 11 Connect to PC ....................135 Copyright © 2009 Onyx International. All rights reserved.
-
Page 11: Preface
FCC Class B Notice ..................136 1 Preface Boox, presented by Onyx International, a group of professionals who dedicate themselves in designing state-of-the-art reading terminal. The beauty of the Boox is embodied in both its simplicity and its power. As we are going to show you, Boox is an open and flexible platform for both consumers and content providers. - Page 12 Safari and Chrome, customized for the e-ink screen. Boox, the new reading experience. Copyright © 2009 Onyx International. All rights reserved.
-
Page 13: Guidelines
The outer layer of the display is scratch resistant, but if handled roughly it can still be damaged. Operating temperature is 0°C to 50°C Storage temperature is –20°C to 70°C Copyright © 2009 Onyx International. All rights reserved. -
Page 14: Precautions
Never open the device as this will invalidate any warranty or manufacturer’s responsibility. Please contact your Onyx retailer if you have any technical difficulties. Do NOT expose the device to excessive moisture, rain or heat sources caused by heating equipment. -
Page 15: Components
4 Components 4.1 Boox 60 4.2 Power Adaptor 4.3 USB Cable 4.4 Cover 4.5 SD Card Copyright © 2009 Onyx International. All rights reserved. -
Page 16: Boox
5 Boox Indicator Light MENU button 4-Direction Navigation button OK button PREV button NEXT BACK button Copyright © 2009 Onyx International. All rights reserved. - Page 17 USB Connector Headphone Jack SD Card Slot Volume Control button Power On/Off button WIFI On/Off button Copyright © 2009 Onyx International. All rights reserved.
-
Page 18: Power Key
Flip to previous screen while viewing document Flip to previous screen while browsing documents in main view 5.6 Direction Key Navigate items on current screen, e.g. navigate from Library to SD Card by pressing Copyright © 2009 Onyx International. All rights reserved. -
Page 19: Volume Keys
Turn off the wifi by sliding the wifi key from top to bottom 5.9 Headphone Jack Diameter of the headphone jack is 3.5mm. 5.10 Indicator Light The indicator light is on while charging. Copyright © 2009 Onyx International. All rights reserved. -
Page 20: User Interface
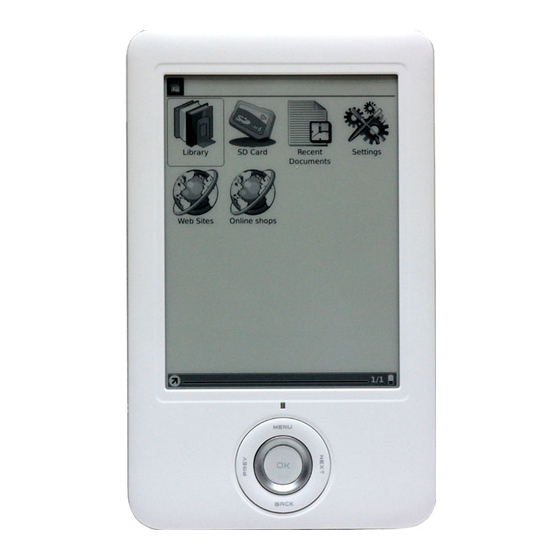
6.1 Main View Like the desktop of the most popular PC OS, main view of Boox provides entries to access the storages, device settings and common websites. Fig. 6.1 Snapshot of Main View Copyright © 2009 Onyx International. All rights reserved. -
Page 21: Internal Flash
6.1.1 Internal Flash Select the Internal Flash button (by stylus or keyboard), all of the items stored in internal flash are retrieved. Fig. 6.1.1 Snapshot of Internal Flash View Copyright © 2009 Onyx International. All rights reserved. -
Page 22: Sd Card
6.1.2 SD Card Select the SD Card button, all of the items stored in SD card are retrieved. Fig. 6.1.2 Snapshot of SD Card View Copyright © 2009 Onyx International. All rights reserved. -
Page 23: Recent Document
6.1.3 Recent Document Select the Recent Document button, all of the recent read documents are displayed. Fig. 6.1.3 Snapshot of Recent Document View Copyright © 2009 Onyx International. All rights reserved. -
Page 24: Shortcuts
Select button Shortcuts, all of the shortcuts to specified applications or documents are displayed in a single view. Once you create shortcut for an application or a document, you can easily start or open it by Shortcuts function. Fig. 6.1.4 Snapshot of Shortcuts View Copyright © 2009 Onyx International. All rights reserved. -
Page 25: Notes
6.1.5 Notes Select button Notes, you can create a new notepad or open the existing notes. Fig. 6.1.5 Snapshot of Notes View Copyright © 2009 Onyx International. All rights reserved. -
Page 26: Create Note
6.1.5.1 Create Note Create a new notepad. Before you sketch any ideas on Boox 60, a dialog pops up letting you select the background of notes, as shown in Fig. 6.1.5.1. Fig. 6.1.5.1 Snapshot of Selecting Background Note: You can customize any backgrounds as you like. The steps are:... -
Page 27: Open Existing Notes
600 × 800 then you will get best performance. 6.1.5.2 Open Existing Notes Any notes are saved in internal flash of Boox 60. You can see and open them in Notes view, just like opening a normal document. The thumbnail of first sketched page will be display in Notes view. -
Page 28: Date
Fig. 6.1.4 Settings 6.1.6.1 Date Select the Date button in settings, you can set current date (year, month, day) and time (hour, minute, second) of device. Copyright © 2009 Onyx International. All rights reserved. - Page 29 Fig. 6.1.6.1 Data Configuration Dialog Copyright © 2009 Onyx International. All rights reserved.
-
Page 30: Time Zone
6.1.6.2 Time Zone Select button Time Zone in settings, you can update time zone setting on Boox 60. The time zone setting is very IMPORTANT for DRM functionalities so make sure your device is set to correct time zone. Fig.6.1.6.2 Time Zone Settings... -
Page 31: Locale
6.1.6.3 Locale Select the Locale Button in settings, you can set the current operation language of the device. Fig. 6.1.6.3 Locale Dialog Copyright © 2009 Onyx International. All rights reserved. -
Page 32: Power Management
Note, if the time of shutdown is set, the device won’t enter standby status anymore; in the other side, if you set the time of standby, the device won’t shutdown automatically. Fig. 6.1.6.4 Power Management Dialog Copyright © 2009 Onyx International. All rights reserved. -
Page 33: Stylus Calibration
Follow the guideline displayed on the screen: ‘Please press once at each of the marks shown on the screen’. After you click on the center of the mark, the screen will refresh Copyright © 2009 Onyx International. All rights reserved. - Page 34 Fig. 6.1.6.5 (2) Snapshot of Step 1 Copyright © 2009 Onyx International. All rights reserved.
- Page 35 Fig. 6.1.6.5 (3) Snapshot of Step 2 Copyright © 2009 Onyx International. All rights reserved.
- Page 36 Fig. 6.1.6.5 (4) Snapshot of Step 3 Copyright © 2009 Onyx International. All rights reserved.
- Page 37 Fig. 6.1.6.5 (5) Snapshot of Step 4 Copyright © 2009 Onyx International. All rights reserved.
-
Page 38: Format Flash
Select Format Flash button in settings, you can format the internal flash. Note, after doing this operation all of the data in internal flash would be removed. Fig. 6.1.6.6 Snapshot of Formatting Flash Copyright © 2009 Onyx International. All rights reserved. -
Page 39: About
6.1.6.7 About Select About button to see the information of Onyx International and Onyx’s partners. Fig. 6.1.6.7 Snapshot of About Dialog Copyright © 2009 Onyx International. All rights reserved. -
Page 40: Web Sites
6.1.7 Web sites Boox provides entries to access the most common websites. Fig. 6.1.7 Common Websites Copyright © 2009 Onyx International. All rights reserved. -
Page 41: Navigation Bar
Navigation bar displays the path of document. Each folder in this path is displayed as a button. You can jump into any parent folder by clicking the button. Fig, 6.2 Snapshot of Navigation Bar Copyright © 2009 Onyx International. All rights reserved. -
Page 42: Tool Bar
Progress bar displays the reading progress of viewing documents. The number of current page and the total pages are displayed on the right of the progress bar. Clicking or dragging on the progress bar leads to flipping screens. Copyright © 2009 Onyx International. All rights reserved. - Page 43 Fig. 6.3.2 (1) Snapshot of Progress Bar while Viewing Document Progress bar displays the progress of viewing contents in main view. The number of current screen and the total screens are displayed on the right of the progress bar. Copyright © 2009 Onyx International. All rights reserved.
- Page 44 Fig. 6.3.2 (2) Snapshot of Progress Bar in Main View Progress bar displays the progress (in ratio) of loading a website. Copyright © 2009 Onyx International. All rights reserved.
- Page 45 Fig. 6.3.2 (3) Snapshot of Progress Bar while Loading Website Progress bar displays the relative position of current viewport while viewing a website. Clicking or dragging on the progress bar leads to moving the viewport. Copyright © 2009 Onyx International. All rights reserved.
- Page 46 Fig. 6.3.3 (3) Snapshot of Progress Bar while Viewing Website Copyright © 2009 Onyx International. All rights reserved.
-
Page 47: Stylus Indicator
6.3.3.5 Annotate This icon appears when device enters annotation status. You can take annotations on the text-based content. The annotated texts are highlighted following the track of the Copyright © 2009 Onyx International. All rights reserved. -
Page 48: Erase Annotations
6.3.4 Power Indicator Power indicator shows current status of the battery. 6.3.5 Clock The current date time as well as the reading time are displayed if you click the clock on toolbar. Copyright © 2009 Onyx International. All rights reserved. -
Page 49: Menu
Fig.6.3.4 Snapshot of Clock 6.4 Menu 6.4.1 Screen Rotation Rotate the screen by clicking this button. The screen rotates between 0° and 270° Copyright © 2009 Onyx International. All rights reserved. -
Page 50: Save Remove Sd Card
View means the way of displaying and arranging contents in main view. 6.4.6.1 List View Display the contents by listing. The name, type, size and last access time of the document are displayed. Copyright © 2009 Onyx International. All rights reserved. -
Page 51: Details View
Fig. 6.4.6.1 Snapshot of List View 6.4.6.2 Details View Display the contents in details. The details includes name, last access time, read count and reading progress. Copyright © 2009 Onyx International. All rights reserved. - Page 52 6.4.6.2 Snapshot of Details View Copyright © 2009 Onyx International. All rights reserved.
-
Page 53: Thumbnail View
Display the contents in thumbnails. For image format (including JPEG/BMP/PNG/…), the thumbnail of image is displayed. For other document format, the large icon of the format is displayed. Fig. 6.4.6.3 Snapshot of Thumbnail View Copyright © 2009 Onyx International. All rights reserved. -
Page 54: By Name
6.4.6.4 By Name Sort the contents in current directory by name. Fig. 6.4.6.4 Snapshot of Sorting the Contents in Current Directory by Name Copyright © 2009 Onyx International. All rights reserved. -
Page 55: By Type
6.4.6.5 By Type Sort the contents in current directory by document type. Fig. 6.4.6.5 Snapshot of Sorting the Contents in Current Directory by Type Copyright © 2009 Onyx International. All rights reserved. -
Page 56: By Size
6.4.6.6 By Size Sort the contents in current directory by document size. Fig. 6.4.6.6 Snapshot of Sorting the Contents in Current Directory by Size Copyright © 2009 Onyx International. All rights reserved. -
Page 57: By Access Time
6.4.6.7 By Access Time Sort the contents in current directory by access time. Fig. 6.4.6.7 Snapshot of Sorting the Contents in Current Directory by Access Time Copyright © 2009 Onyx International. All rights reserved. -
Page 58: By Rating
6.4.6.8 By Rating Sort the contents in current directory by rating. Fig. 6.4.6.8 Snapshot of Sorting the Contents in Current Directory by Rating Copyright © 2009 Onyx International. All rights reserved. -
Page 59: Ascending
6.4.6.9 Ascending Sort the contents in current directory by ascending order. Fig. 6.4.6.9 Snapshot of Sorting Contents in Current Directory by Ascending Order Copyright © 2009 Onyx International. All rights reserved. -
Page 60: Descending
6.4.6.10 Descending Sort the contents in current directory by descending order. Fig. 6.4.6.10 Snapshot of Sorting Contents in Current Directory by Descending Order 6.4.7 File File means the operations to a file. Copyright © 2009 Onyx International. All rights reserved. -
Page 61: Delete
6.4.7.1 Delete Delete a selected file. Fig. 6.4.7.1 Delete a Selected File Copyright © 2009 Onyx International. All rights reserved. -
Page 62: Search
6.4.7.2 Search Search for target file by given pattern. The search results are displayed in the main view. Fig. 6.4.7.2 Search Files by Given Pattern Copyright © 2009 Onyx International. All rights reserved. -
Page 63: Create Shortcut
Fig. 6.4.7.3 Search Results 6.4.7.3 Create shortcut Create shortcut on selected file. Copyright © 2009 Onyx International. All rights reserved. -
Page 64: Return Book
Configure the device language, as the same as 6.1.6.3. 6.4.8.3 Power Management Configure the time of standby and automatically shutdown, as the same as 6.1.6.4. 6.4.8.4 Screen Calibration Enter the screen calibration application, as the same as 6.1.6.5. Copyright © 2009 Onyx International. All rights reserved. -
Page 65: Format Flash
Format the internal flash, as the same as 6.1.6.6. 6.4.8.6 About Display the information of the device, as the same as 6.1.6.7. 6.4.9 Font Configure the font size and/or shape while viewing document. Copyright © 2009 Onyx International. All rights reserved. -
Page 66: By Levels
6.4.9.1 By Levels Configure the font size by several font levels: small, medium, large, larger and largest. This function is activated while viewing PDF/EPub document. Fig. 6.4.7.1 Configure the Font Size by Levels Copyright © 2009 Onyx International. All rights reserved. -
Page 67: By Numbers
6.4.9.2 By Numbers Configure the font size by actually number. This function is activated while viewing TXT/Mobi(non-drm)/RTF/PDB document. Fig. 6.4.7.2 Configure the Font Size by Numbers Copyright © 2009 Onyx International. All rights reserved. -
Page 68: By Ratio
6.4.9.3 By Ratio Configure the font size by ratio. This function is activated while viewing HTML/CHM document. Fig. 6.4.7.3 Configure the Font Size by Ratio Copyright © 2009 Onyx International. All rights reserved. -
Page 69: Bold
6.4.9.4 Bold Set the font bold. Fig. 6.4.7.4 Configure the Font to be Bold Copyright © 2009 Onyx International. All rights reserved. -
Page 70: Italic
6.4.9.5 Italic Set the font italic. Fig. 6.4.7.5 Configure the Font to be Italic Copyright © 2009 Onyx International. All rights reserved. -
Page 71: Zooming
Zoom the current page/image to fit the screen. 6.4.10.2 To Width Zoom the current page/image to fit the width of screen. 6.4.10.3 To Height Zoom the current page/image to fit the height of screen. Copyright © 2009 Onyx International. All rights reserved. -
Page 72: Selection Zoom
6.4.10.4 Selection Zoom Scale up the current screen by selecting a box. The content in the selected box is enlarged to fill the whole drawing area. Fig. 6.4.8.4 (1) Snapshot of Selection Zoom Copyright © 2009 Onyx International. All rights reserved. - Page 73 Fig. 6.4.8.4 (2) Snapshot of the Render Result after Selection Zoom Copyright © 2009 Onyx International. All rights reserved.
-
Page 74: By Ratio
6.4.10.5 By Ratio Zoom the current page/image by ratio. Fig. 6.4.8.5 Snapshot of Zooming by Ratio Copyright © 2009 Onyx International. All rights reserved. -
Page 75: Annotations
6.4.11 Annotations Annotations means a group of annotation operations, including annotating and sketching. 6.4.11.1 Add Annotation Take annotation on the text of current screen. The annotated texts are highlighted. Copyright © 2009 Onyx International. All rights reserved. - Page 76 Fig. 6.4.9.1 Snapshot of Adding Annotation Copyright © 2009 Onyx International. All rights reserved.
-
Page 77: Erase Annotation
6.4.11.2 Erase Annotation Erase annotation on current screen. The annotations are erased when you click on them or drag the stylus through them. Fig. 6.4.9.2 Snapshot of Erasing Annotation Copyright © 2009 Onyx International. All rights reserved. -
Page 78: All Annotations
6.4.11.3 All Annotations Display all of the annotations by list. The highlighted texts as well as the corresponding page numbers are displayed on the list view. Fig. 6.4.9.3 Display All Annotations Copyright © 2009 Onyx International. All rights reserved. -
Page 79: Sketch
6.4.11.4 Sketch Sketch on the content area of current screen by stylus. 6.4.9.4 Sketch on the Screen Copyright © 2009 Onyx International. All rights reserved. -
Page 80: Erase Sketch
Erase existing sketches by stylus. The sketches are erased when you click on them or drag the stylus through them. 6.4.11.6 Sketch Colors Select the color of sketches. Now black and white are supported. Copyright © 2009 Onyx International. All rights reserved. - Page 81 Fig. 6.4.9.6 Sketch Colors Copyright © 2009 Onyx International. All rights reserved.
-
Page 82: Sketch Shapes
6.4.11.7 Sketch Shapes Select the shape (line width) of sketches. Now five levels of line widths are supported. Fig. 6.4.9.7 Sketch Shapes Copyright © 2009 Onyx International. All rights reserved. -
Page 83: Layout
6.4.12 Layout Select the layout of pages while viewing document. 6.4.12.1 Single Page Only one page is displayed on screen. Fig. 6.4.10.1 Snapshot of Single Page Copyright © 2009 Onyx International. All rights reserved. -
Page 84: Scroll
Multiple pages can be displayed on screen. If there are enough blanks besides one page on the screen, the parts of adjacent pages fill these blanks. There is a small spacing between two pages. Fig. 6.4.10.2 Snapshot of Scroll Pages Copyright © 2009 Onyx International. All rights reserved. -
Page 85: Tools
Tools represents a group of assistant functions for better reading. 6.4.13.1 Search Search for the pattern in current document. The search results in a screen are highlighted. Fig. 6.4.11.1 (1) Input Search Pattern Copyright © 2009 Onyx International. All rights reserved. - Page 86 Fig. 6.4.11.1 (2) Display Search Results Copyright © 2009 Onyx International. All rights reserved.
- Page 87 Fig. 6.4.11.1 (3) Search for Next Results Copyright © 2009 Onyx International. All rights reserved.
-
Page 88: Dictionary Lookup
6.4.13.2 Dictionary Lookup Look up for the explanation of a pattern string. Fig. 6.4.11.2 (1) Popup Dictionary Lookup Dialog Copyright © 2009 Onyx International. All rights reserved. - Page 89 Fig. 6.4.11.2 (2) Select a Word on Content Area Copyright © 2009 Onyx International. All rights reserved.
-
Page 90: Add Bookmark
6.4.13.3 Add Bookmark Add a bookmark of current page. Fig. 6.4.11.3 Snapshot of Adding Bookmark Copyright © 2009 Onyx International. All rights reserved. -
Page 91: Delete Bookmark
Show all bookmarks in a list view. The front text portion as well as the number of the bookmarked page is displayed in an item. You can jump to the target page by selecting the bookmark item. Copyright © 2009 Onyx International. All rights reserved. -
Page 92: Hand Tool
Fig. 6.4.11.5 Snapshot of Bookmarks View 6.4.13.6 Hand Tool Select the hand tool item in the menu to enable browsing through document by stylus. Copyright © 2009 Onyx International. All rights reserved. -
Page 93: Previous View
View to return to previous screen while browsing document. 6.4.13.8 Next View Select item Next View to go to next screen while browsing document. This button is activated only if you have chosen Previous View. Copyright © 2009 Onyx International. All rights reserved. -
Page 94: Slide Show
6.4.13.9 Slide Show Continuously display the pages of a document (or documents, e.g. images files) by slide show. 6.4.11.9 Snapshot of Slide Show Copyright © 2009 Onyx International. All rights reserved. -
Page 95: Thumbnail View
6.4.13.10 Thumbnail View Display the images by thumbnail view. Now the thumbnails are displayed by two columns and 2 rows. Fig. 6.4.11.10 Snapshot of Thumbnail View Copyright © 2009 Onyx International. All rights reserved. -
Page 96: Table Of Content
Display the table of content of current document by list view. You can jump to a target page by selecting an item. 6.4.11.11 Snapshot of Table of Content 6.4.11.12 Select Background (of Notepad) Copyright © 2009 Onyx International. All rights reserved. -
Page 97: Export
Export all of the pages in a notepad to SD card. The exported images are saved in folder “notes” of SD card. 6.4.13.13 Insert Page Insert a new page before current one. 6.4.13.14 Remove Page Remove current page. Copyright © 2009 Onyx International. All rights reserved. -
Page 98: Font Family
6.4.14 Font Family Configure the font family while viewing a document. The existing font families of Boox are shown on the menu. Fig. 6.4.12 Snapshot of Font Family Configuration Copyright © 2009 Onyx International. All rights reserved. -
Page 99: Encoding
6.4.15 Encoding Configure the encoding type while viewing text-based document. The configurable encoding types are shown on the menu. Fig.6.4.13 Snapshot of Encoding Configuration Copyright © 2009 Onyx International. All rights reserved. -
Page 100: Full Refresh Switch
Go forward to next website. This button is activated only if you have chosen Backward. 6.4.17.3 Home Go to the home page. 6.4.18 Network Configure the network connection. 6.4.18.1 Wifi Configure the wifi connection. Copyright © 2009 Onyx International. All rights reserved. -
Page 101: Web Browser
6.5 Web Browser Through built-in web browser, you can access the specified websites. Fig. 6.5 Snapshot of Web Browser Copyright © 2009 Onyx International. All rights reserved. -
Page 102: Tool Bar
You can input text on website by stylus if the page provides standard form widget. A keyboard appears after you put focus on the form. The input text string is displayed on the form after you confirm the input is done (by clicking OK button). Copyright © 2009 Onyx International. All rights reserved. -
Page 103: Music Player
6.5.2 Snapshot of Inputting Text on Website 6.6 Music Player Music player of Boox supports MP3 files. Copyright © 2009 Onyx International. All rights reserved. -
Page 104: Playlist
6.6 Snapshot of Music Player 6.6.1 Playlist Displays the music list and the current song. 6.6.2 Minimize Button Minimize the music player. Copyright © 2009 Onyx International. All rights reserved. -
Page 105: Close Button
6.6.6 Previous Song Button Turn to previous song. 6.6.7 Play/Pause Switch Button Switch between playing and pausing modes. 6.6.8 Stop Button Stop the music playing. 6.6.9 Next Song Button Turn to the next song. Copyright © 2009 Onyx International. All rights reserved. -
Page 106: Repeat Current Song Button
6.6.10 Repeat Current Song Button Repeat playing current song. 6.6.11 Previous Page Button Turn to previous page of playlist. 6.6.12 Next Page Button Turn to next page of playlist. Copyright © 2009 Onyx International. All rights reserved. -
Page 107: Playing Status Bar
6.6.13 Playing Status Bar Display the playing progress of current song. Fig. 6.6.13 Snapshot of Playing Status Bar Copyright © 2009 Onyx International. All rights reserved. -
Page 108: Keyboard
6.7.1 Number Keys You can input numbers by these keys. 6.7.2 Character Keys You can input characters by these keys. 6.7.3 Caps Key Switch all of the characters between lowercase and uppercase. Copyright © 2009 Onyx International. All rights reserved. -
Page 109: Back Key
Fig. 6.7.3 Caps is Activated 6.7.4 Back Key Move the cursor to previous character and remove current one. 6.7.5 Space Key Insert a space character. 6.7.6 Shift Key Shift between characters (including numbers) and symbols. Copyright © 2009 Onyx International. All rights reserved. -
Page 110: Search View
Fig. 6.7.6 Shift Key is Activated 6.8 Search View Search view is used for inputting the pattern string and other requirements when you search for files or texts. 6.8.1 Free Text Search Copyright © 2009 Onyx International. All rights reserved. -
Page 111: Input Box
Fig. 6.8.1 Snapshot of Free Text Search 6.8.1.1 Input Box Display the input pattern string. 6.8.1.2 Search Button Start searching after clicking this button. The search results of a screen are highlighted. Copyright © 2009 Onyx International. All rights reserved. -
Page 112: Clear Button
Fig. 6.8.1.2 (1) Search Results of Texts If no matched result is found, the dialog displays ‘No More Matches’. Fig, 6.8.1.2 (2) No More Matches 6.8.1.3 Clear Button Clear the input pattern string. Copyright © 2009 Onyx International. All rights reserved. -
Page 113: File Search
6.8.2 File Search Fig. 6.8.2 Snapshot of File Search 6.8.2.1 Input Box Display the pattern string used for searching the files. Copyright © 2009 Onyx International. All rights reserved. -
Page 114: Search Button
6.8.2.2 Search Button Start searching after clicking this button. The search results of all matched files are displayed. Fig. 6.8.2.2 Search Results of Files Copyright © 2009 Onyx International. All rights reserved. -
Page 115: Clear Button
Dictionary view is used for translating or explaining a pattern string. You select a string from the texts of current screen, then the translation or explanation of this string displays on the content view. Copyright © 2009 Onyx International. All rights reserved. -
Page 116: Content View
Fig. 6.9 Dictionary View 6.9.1 Content View Display the translation or explanation of the pattern string. 6.9.2 Explanation Button Click this button to display the explanation of the pattern string. Copyright © 2009 Onyx International. All rights reserved. -
Page 117: Similar Words Button
6.9.3 Similar Words Button Click this button to display the similar words of the pattern string. 6.9.4 Dictionaries Button Click this button to display the translation of the pattern string. Copyright © 2009 Onyx International. All rights reserved. -
Page 118: Annotations View
6.10 Annotations View Display all of the annotations of the document by list view. Fig. 6.10 Snapshot of Annotations View Copyright © 2009 Onyx International. All rights reserved. -
Page 119: Bookmarks View
Display all of the bookmarks of the document by list view. Fig. 6.11 Snapshot of Bookmarks View 6.12 Wifi Configuration Dialog Configure the wifi through this dialog. The operations used for activating a wifi access Copyright © 2009 Onyx International. All rights reserved. - Page 120 All of the connectable access points are listed You select one then Boox starts connecting to it If it is an encrypted access point, a keyboard dialog pops up. You can input password for connection. Copyright © 2009 Onyx International. All rights reserved.
-
Page 121: Scanning List
6.12.1 Scanning List List all of the scanned results (wifi access points). 6.12 2 Connecting Message Area Display the current status of connection. 6.12.3 Refresh Button Click Refresh button to rescan the access points. Copyright © 2009 Onyx International. All rights reserved. -
Page 122: Configuring Wpa Security Access Point
6.12.4 Configuring WPA Security Access Point Input the password for WPA security access point. Fig. 6.12.4 Snapshot of Configuring WPA Security Access Point Copyright © 2009 Onyx International. All rights reserved. -
Page 123: Configuring Wep Security Access Point
6.12.5 Configuring WEP Security Access Point Input the password for WEP security access point. Fig. 6.12.5 Snapshot of Configuring WEP Security Access Point Copyright © 2009 Onyx International. All rights reserved. -
Page 124: Sketch
After activating sketch functions (by menu 6.4.9.4), you can make new sketches or erase existing ones. 7.1 Make new sketches You can sketch on the drawing area by stylus. Fig. 7.1 Snapshot of Sketching Copyright © 2009 Onyx International. All rights reserved. -
Page 125: Erase
7.2 Erase You can erase the drawn sketches by stylus. You can click on the stroke or drag across it, then the stroke disappears immediately. Copyright © 2009 Onyx International. All rights reserved. -
Page 126: Annotation
8.1 Add Annotation After selecting function ‘Add Annotation’, you can highlight the texts you are interested on by dragging the stylus pen. You can also highlight the word by clicking any Copyright © 2009 Onyx International. All rights reserved. -
Page 127: Erase Annotations
Fig. 8.1 Add Annotation 8.2 Erase Annotations You can erase an annotation by stylus. You can click on the highlighted area or drag across it, then the annotation is removed. Copyright © 2009 Onyx International. All rights reserved. -
Page 128: Ota Functionalities
DRMed contents. 9.1 Activate Boox 60 Boox 60 must be activated before you use any DRM functionalities, such as purchasing, loaning and returning. The steps of activation are: 1. Get an Adobe ID. You can create an account from the server hosted by the content provider. - Page 129 Note: If your device has been activated by ADE, you need only sign in. At this time, a sign-in dialog pops up asking you input the password for a given Adobe ID(you used in ADE). Copyright © 2009 Onyx International. All rights reserved.
-
Page 130: Fulfillment
ACS(Adobe Content Server) prepares a DRMed book after you decide to purchase(buy or borrow) it. The book will be downloaded from the server after the DRM process finishes. The whole fulfillment might take several Copyright © 2009 Onyx International. All rights reserved. - Page 131 The web browser displays “Please wait…” notice during this procedure. 9.2(1) Snapshot of “Please wait…” message You will see the success message after fulfillment finishes. A dialog pops up asking you whether opening the book immediately. Copyright © 2009 Onyx International. All rights reserved.
- Page 132 The errors will be displayed if the fulfillment fails by any causes. 9.3 Return a Loan Book You can return a borrowed book by selecting “return book” functionality in menu of main view. You need configure the network before returning it. Copyright © 2009 Onyx International. All rights reserved.
-
Page 133: Software Update
Fig.9.3 Snapshot of Returning Book 10 Software Update You can update the software by follow steps: Download latest updates package from Onyx website: www.onyx-international.com Copyright © 2009 Onyx International. All rights reserved. - Page 134 Hold it until you see the message ‘Software update request detected, checking updates…’. Boox updates itself automatically. It restarts after update finishes. Reminder: Make sure Boox has enough power to finish the software update (at least 2 grids displayed). Copyright © 2009 Onyx International. All rights reserved.
-
Page 135: Connect To Pc
Select ‘Yes’ to confirm the connection. Fig. 10 USB Connection Dialog You can find at least one removable disk (internal flash of Boox) on the OS of PC. If you Copyright © 2009 Onyx International. All rights reserved. - Page 136 Consult the dealer or an experienced radio/television technician for help. Modifications: Any modifications made to this device that are not approved by Onyx International, Inc. may void the authority granted to the user by the FCC to operate this equipment.
Need help?
Do you have a question about the BOOX 60 and is the answer not in the manual?
Questions and answers