
Subscribe to Our Youtube Channel
Related Manuals for Swift M10DB-MP


Summary of Contents for Swift M10DB-MP
- Page 1 Swift M10D Series Digital Microscope Use and Care Manual SWIFT OPTICAL Enduring Quality and Technical Excellence...
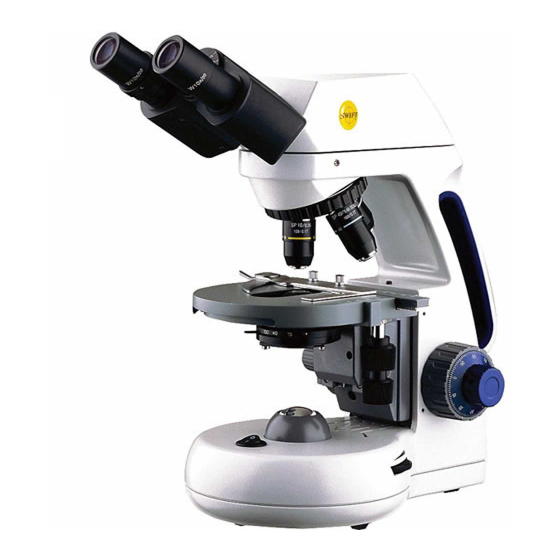
- Page 2 SWIFT M10D SERIES (with 3MP built-in digital camera) The Swift M10D microscope is equipped with superior optics offering bright clarity and crisp resolution, Siedentopf binocular head for ergonomic viewing and durable construction to withstand the rigors of a busy clinical practice or lab. A built-in 3MP digital camera enables users to display, capture pictures or capture video clips of live images.
- Page 3 UNPACKING THE SWIFT M10D SERIES MICROSCOPE 1. Remove head and body from styrofoam packaging. 2. Remove both shipping blocks from the body of the microscope as pictured below. 3. Secure the head to the body of the microscope with the head locking...
-
Page 4: Components Of The Microscope
COMPONENTS OF THE MICROSCOPE ARM – the vertical column (attached to the base) which supports the stage, and contains the coarse and fine adjusting knobs and mechanism. BASE – the housing and platform of the instrument to which the arm is attached. -
Page 5: Important Terminology
IRIS DIAPHRAGM – a multi-leaf round shaped device which is controlled by a lever. It is similar to a camera shutter, and is installed under the condenser. By moving the lever back and forth, the iris diaphragm opens and closes, increasing and decreasing the contrast of the specimen. If the image is “washed out”... - Page 6 magnification and convert the image into a field of view easily seen by the human eye. COVER GLASS – thin glass cut in circles, rectangles, or squares, for covering the specimen (usually a thickness of 0.15 to 0.17mm). The majority of specimens should be protected by a cover glass, and must be covered when using 40XRD or 100XRD objectives.
- Page 7 WORKING DISTANCE – the distance from the lens of the objective to the cover slip on the slide, when the specimen is in focus. USING THE SWIFT M10D SERIES MICROSCOPE Once you have learned the terminology and purpose of each component of the microscope, use of the microscope is simple.
- Page 8 100XRD objective (between the slide and the objective tip). It is essential to thoroughly clean the objective tip after use. Please contact Swift Optical or your authorized Swift dealer for the appropriate immersion oil to use.
- Page 9 This discipline requires a strong and wide arc of transmitted light. Swift microscopes fitted for phase condensers have high- output halogen or LED illumination, but their characteristic arcs of light may require some experimentation to achieve the desired effect.
- Page 10 P100X phase objective may not produce the desired results. Please be sure to clean the oil from the lens surfaces when you are finished. Please consult your Swift Use and Care manual for proper objective cleaning and care instructions.
- Page 11 Aligning the Multi Phase System: As mentioned at the beginning of these instructions, this system has been calibrated by Swift technicians at the factory before shipment. This calibration consists of centering the condenser holder and aligning the annuli. These annuli, also called annular stops, are inside the condenser and are specific for each of the phase magnifications.
- Page 12 Alignment of the Phase Annulus: To align each annulus, begin by removing the eyepiece from the eyepiece tube that does not have the diopter adjustment (the right eyepiece). (Please note: Should the eyepiece be locked onto the microscope, use a jeweler’s screwdriver to loosen the eyepiece set screw to enable you to remove the eyepiece).
- Page 13 Place the 2 alignment tools (1.5mm allen wrenches) into the condenser on both sides as shown: Turn the adjustment tools carefully and gently (both directions) to manipulate the rings into correct alignment. Important: do not force the adjustment wrenches. Avoid turning the adjustment all the way to one side Please note: when the condenser disc is in the BF or DF position, no adjustments can be made...
-
Page 14: Digital Photography
DIGITAL PHOTOGRAPHY The M10D model features a built-in 3MP (2048 X 1536 pixel) digital camera to capture still images. In order to use the camera, the imaging software must first be installed on a computer. The minimum computer requirements to use the camera is having an available USB 2.0 port, Windows 7 or Mac OS X operating system installed on the computer, 1GB of RAM, 1GB free hard drive space and 2Ghz CPU. - Page 15 MOTIC IMAGES 2.0 SOFTWARE You can use your transfer images with the Motic Images 2.0 software included with microscope to annotate, save and file your images. Full Help Menu The full software manual for Motic Images is accessible within the software’s main page.
- Page 16 Motic Live 2.0 Live Imaging Module If you are connecting your camera via WiFi to your laptop of WiFi enabled computer, you can use the Motic Images 2.0 software to view and capture your images. Full Help Menu The full Live Imaging Module manual is accessible within the live Imaging main page.
- Page 17 MOTIC IMAGES 3.0 SOFTWARE The Motic Images 3.0 software, like the Motic Images 2.0 software will allow you to view, capture, annotate and save your images. For further assistance in using the Motic Images 3.0 software please refer to the Motic Help files.
- Page 18 Motic Live Imaging Module Help To access the Motic Images Live Imaging help menu, click on Help located at the top left hand side of the screen. Once the Help window open you will find the help guide within.
- Page 19 CAUTION – Never disassemble, electrical, mechanical or optical components. This servicing should only be done by an authorized Swift technician. The Limited Lifetime Warranty will be null and void if disassembled by a non-Swift dealer.
- Page 20 Never attempt to dismantle any parts other than the ones described below. If you notice any malfunction, contact your nearest Swift Optical supplier. Optics Keeping the optics of your microscope clean is essential for obtaining clear images.
- Page 21 Once the cleaning process is finalized if the image is still not clear, you can either contact us or you can contact your Swift Optical supplier. For users that have a digital camera mounted on the...
- Page 22 If the dirt persist you can either contact us or you can contact your Swift Optical supplier. Mechanics The mechanical components of the microscope require less maintenance than the optical components.
-
Page 23: Led Replacement
LED, you should always turn off the unit when not in use. It is important that you only use a Swift replacement LED because it is integrated on to a circuit board. This LED has been tested and approved for life span, color temperature and brightness. - Page 24 SWIFT OPTICAL INSTRUMENTS, INC. LIMITED LIFETIME WARRANTY Please see our website, www.swiftoptical.com, for complete warranty details and exclusions. Swift Optical Instruments, Inc.● (877) 967-9438 ● www.swiftoptical.com...
Need help?
Do you have a question about the M10DB-MP and is the answer not in the manual?
Questions and answers