Advertisement
Quick Links
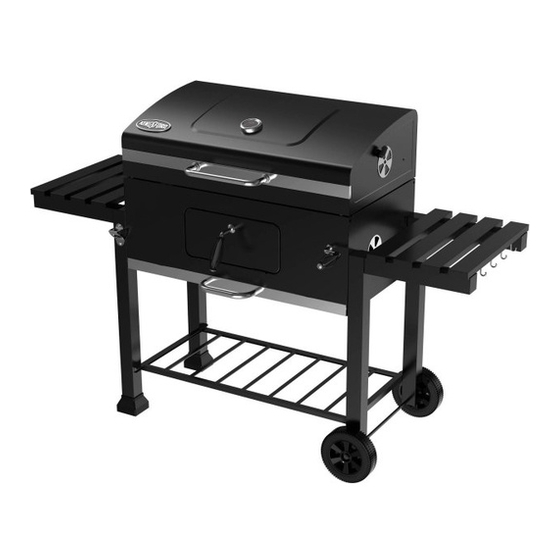
32" CHARCOAL GRILL
INSTRUCTION MANUAL
PLEASE READ INSTRUCTIONS CAREFULLY BEFORE ASSEMBLY
RETAIN THIS MANUAL FOR FUTURE REFERENCE.
If you have any questions or problems, you can call our
customer service department at 1-855-CHANT-US
(1-855-242-6887) from 8:00am to 5:00pm Eastern time,
Monday through Friday for assistance.
DO NOT RETURN TO THE PLACE OF PURCHASE.
Kingsford and the Kingsford logo are registered trademarks of the Kingsford Products Company, LLC and are used under license by
Chant Kitchen Equipment(H.K.)Ltd. All rights reserved.
FOR OUTDOOR USE ONLY.
Vendor Stock No.: BC251
Advertisement

Related Manuals for Kingsford BC251


Summary of Contents for Kingsford BC251
- Page 1 Monday through Friday for assistance. DO NOT RETURN TO THE PLACE OF PURCHASE. Kingsford and the Kingsford logo are registered trademarks of the Kingsford Products Company, LLC and are used under license by Chant Kitchen Equipment(H.K.)Ltd. All rights reserved.
-
Page 2: Lighting A Fire
SAFETY WARNINGS – READ CAREFULLY Before assembling or using your new KINGSFORD® CHARCOAL GRILL -- carefully read the instruction manual and all safety warnings! This symbol “!” indicates a safety warning – pay special attention to the information following this warning when assembling or using your grill. - Page 3 GRILL USAGE AND OPERATION It is always recommended to pre burn your grill prior to your first use. By lighting a small charcoal fire to simulate the cooking process, you will burn off any residues or oils created during the manufacturing process.
- Page 4 SAVE THIS INSTRUCTION MANUAL FOR FUTURE REFERENCE.
- Page 5 Parts List Part Part Name Photo Part No. ※ Temperature 2406912 Gauge ※ Lid Decorative 5204464 Plate Hood Assembly 5204463 Upper Hood Hinge 2pcs 5013985 Warming Rack 2406917 Cooking Grid 3pcs 2409634 Lower Hood Hinge 2pcs 5014001 Fire Box Back 5207575 Panel Fire Box Left Panel...
- Page 6 Part Part Name Photo Part No. Butterfly Damper 4pcs 5201618 ※ Butterfly 4pcs 2100065 Damper Handle Side Shelf with hooks 2pcs 5204476 (pre-assembled) ※ 4pcs 2100486 Small Pipe Plug ※ 12pcs 2100478 Large Pipe Plug ※ 8pcs 2409448 Tool Hook Ash Pan 5204469 ※...
- Page 7 Part Part Name Photo Part No. Number Leg End Cap 2pcs 2404950 Hood Handle 5201617 Spacers 2pcs 5201175 Fire Box Right 5109379 Panel Charcoal Tray 5204467 Shaft Assembly 5204470 Fire Box Front Panel with 5204465 charcoal door (pre-assembled) Right Shaft 5204472 Support Bracket Handle Locking...
- Page 8 Part Part Name Photo Part No. Number ※ 2pcs 5201622 Handle Grip Door Locking 5207049 Lever Trim 5207050 Charcoal Door 2409446 Handle Ash Pan Handle 5201620 Bottle Opener 5014838 Right Front Leg 5201802 Right Back Leg 5201798 Wheel 2pcs 2100530...
- Page 9 Part Part Name Photo Part No. Number Axle 2307601 Bottom Shelf 5204475 ※ :NO ASSEMBLY REQUIRED...
- Page 10 HARDWARE Part Part Name Photo Number M6x12 Bolt 26pcs M6x35 Bolt 8pcs M6 Half Screw Thread Bolt 8pcs M6 Nut 8pcs M10 Nut Hinge Pin 2pcs Cotter Pin 2pcs Note: Tools required for assembly (not included): Phillips #2 screwdriver Pliers and Adjustable Wrench...
- Page 11 ASSEMBLY INSTRUCTIONS ! Read all safety warnings and assembly instructions carefully before assembling or operating your grill. FOR ASSEMBLY ASSISTANCE, MISSING OR DAMAGED PARTS, Contact Customer Service, Call:1-855-242-6887 Monday thru Friday 08:00 A.M. to 05:00 P.M., Eastern Standard Time. (proof of purchase required) Inspect contents of box to make sure all parts are included and not damaged.
- Page 12 STEP3 STEP4...
- Page 13 STEP5 STEP6...
- Page 14 STEP7 STEP8 Self-Tapping Bolt Loosen the pre-assembled Self-Tapping Bolt from the end of Crank Handle (30), then rotate the Crank Handle (30) into the hole of the front panel.
- Page 15 Self-Tapping Bolt Fasten the Self-Tapping Bolt to the end of the Crank Handle ( 30), after rotating the Crank Handle(30) into the hole of the front panel. Note: Make sure to rotate the crank handle counterclockwise completely to the end.
- Page 16 STEP9 Put the Bolts of the Shaft Assembly (26) into the slot of the Left & Right Fire box side panel. Fit the shaft onto the slot of the bracket of the fire box front panel.
- Page 17 STEP10 STEP11 Make sure the holes of the charcoal pan(25) are matched with the holes on Shaft Assembly brackets. Screw the M6x12 Bolts(A) as shown, then tighten them one by one.
- Page 18 STEP12 M8 Nut Φ8 Spring Washer Door Loosen the pre-assembled M8 Nut and spring washer from the handle (34), and then assemble the handle to Charcoal Door according to the diagram as shown. STEP13...
- Page 19 STEP14 STEP15...
- Page 20 STEP 16 STEP 17...
- Page 21 STEP 18 M5x28 Bolt Loosen the pre-assembled M5x28 Bolts from Hood Handle (22), and then assemble the handle together with spacer (23) to the hood according to the diagram as shown. STEP 19...
- Page 22 STEP20 Repeat step 21 to install another side shelf (13).
- Page 23 STEP21 M5x12 Bolt Loosen the pre-assembled M5x12 Bolts from Ash Pan Handle (35), and then assemble the handle to Ash Pan (17) according to the diagram as shown.
- Page 24 STEP22 Finish...
-
Page 25: Ash Cleanout
USING AND CARING FOR YOUR KINGSFORD® CHARCOAL GRILL ASH CLEANOUT It is imperative that you clean out the ashes from your GRILL after both grill and ashes have completely cooled – and before moisture can combine with the ash. Ash and moisture can create lye, which is very acidic, and can cause rusting. -
Page 26: Controlling The Fire
Both deserve your best! Once a fire is burning happily, it is easy to keep it going with just a little attention. You will be pleased at how long your KINGSFORD® CHARCOAL GRILL will burn on a little charcoal. -
Page 27: Cooking Methods
To achieve the extended cooking times needed for barbecuing or slow smoking (or if you’re using your KINGSFORD® CHARCOAL GRILL to make enough hot dogs and hamburgers to feed an army), additional charcoal can be added through the charcoal pan access door. Lower the adjustable charcoal pan to its lowest setting. - Page 28 SMOKING WOODS Adding smoking woods to your KINGSFORD® CHARCOAL GRILL is an easy and effective way to create wonderful flavor combinations for all types of grilled, barbecued, or slow smoked foods. Wood chips are typically used for shorter cooking times, where chunks are better for longer cooking times.
- Page 29 2 YEAR LIMITED WARRANTY This warranty is non-transferable and does not cover failures due to misuse of improper installation or maintenance. This warranty is for replacement of defective parts only. We are not responsible for incidental or consequential damages or labor costs. This warranty does not cover corrosion or discoloration after the grill is used, or lack of maintenance, hostile environment, accidents, alterations, abuse or neglect.
Need help?
Do you have a question about the BC251 and is the answer not in the manual?
Questions and answers