Table of Contents
Advertisement
Quick Links
Advertisement
Table of Contents

Related Manuals for AEG KMS561000M


Summary of Contents for AEG KMS561000M
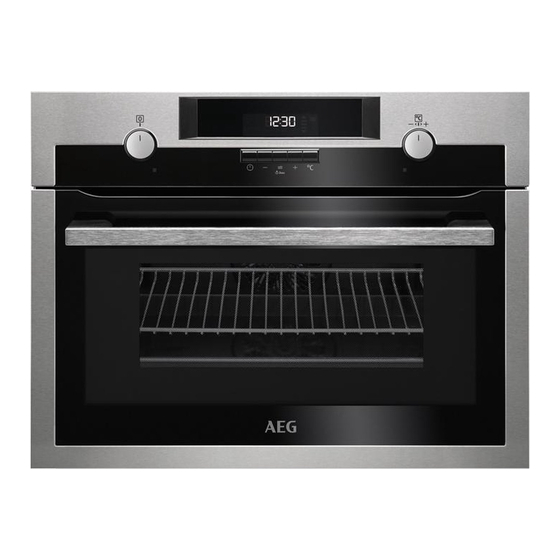
- Page 1 KMS561000M User Manual Microwave combi-oven USER MANUAL...
-
Page 2: Table Of Contents
12. TROUBLESHOOTING..................... 35 FOR PERFECT RESULTS Thank you for choosing this AEG product. We have created it to give you impeccable performance for many years, with innovative technologies that help make life simpler features you might not find on ordinary appliances. Please spend a few minutes reading to get the very best from it. - Page 3 ENGLISH damages that are the result of incorrect installation or usage. Always keep the instructions in a safe and accessible location for future reference. 1.1 Children and vulnerable people safety This appliance can be used by children aged from 8 •...
- Page 4 Ensure that the appliance is switched off before • replacing the lamp to avoid the possibility of electric shock. Do not use a steam cleaner to clean the appliance. • Do not use harsh abrasive cleaners or sharp metal •...
-
Page 5: Safety Instructions
ENGLISH Microwave heating of beverages can result in delayed • eruptive boiling. Care must be taken when handling the container. The contents of feeding bottles and baby food jars • shall be stirred or shaken and the temperature checked before consumption, in order to avoid burns. Eggs in their shell and whole hard-boiled eggs should •... - Page 6 Make sure that there is • Do not use microwave function to access to the mains plug after the preheat the oven. installation. WARNING! • If the mains socket is loose, do not Risk of damage to the connect the mains plug.
-
Page 7: Product Description
ENGLISH Contact the Authorised Service for household appliances. Do not use Centre. it for house lighting. • Make sure the cavity and the door are WARNING! wiped dry after each use. Steam Risk of electrical shock. produced during the operation of the appliance condensates on cavity walls •... -
Page 8: Before First Use
3.2 Accessories Baking tray Wire shelf For cakes and biscuits. For cookware, cake tins, roasts. 4. BEFORE FIRST USE WARNING! Refer to "Care and Refer to Safety chapters. cleaning" chapter. Clean the appliance and the accessories To set the Time of day refer before first use. - Page 9 ENGLISH 3. To deactivate the appliance, turn the knob for the oven functions to the off position. 5.3 Oven functions Oven function Application Off position The appliance is off. Light To activate the lamp without a cooking function. Microwave Creates the heat directly in the food. Use it to heat pre- prepared meals and drinks, to defrost meat or fruit, and to cook vegetables and fish.
-
Page 10: Microwave Mode
5.4 Display A. Timer B. Heat-up and residual heat indicator C. Microwave function D. Core temperature sensor (selected models only) E. Door lock (selected models only) F. Hours / minutes G. Clock functions 5.5 Buttons Button Function Description CLOCK To set a clock function. - Page 11 ENGLISH microwave. Only cook food without a • Turn the food after half the defrosting cover if you want to keep a crust. time. If possible, divide and then • Do not overcook the dishes by setting remove the pieces that have started the power and time too high.
- Page 12 Cookware / Material Microwave Grilling Defrost- Heating Cooking Heat-resistant plastic up to 200 °C Cardboard, paper Clingfilm Roasting film with microwave safe clo- sure Roasting dishes made of metal, e.g. enamel, cast iron Baking tins, black lacquer or silicon-...
- Page 13 ENGLISH Other things to think about… When the Microwave function is running • Food items have different shapes and you can: qualities. They are prepared in • change the power settings. different quantities. Because of this, • check the power settings. Press the necessary time and power for defrosting, heating or cooking can When you open the oven...
-
Page 14: Clock Functions
Power setting • 1000 Watt Heating liquids • 900 Watt Searing at the start of the cooking process • 800 Watt Cooking vegetables • 700 Watt Melting gelatine and butter • 600 Watt Defrosting and heating frozen meals • 500 Watt... - Page 15 ENGLISH 7.2 Setting and changing the 4. Press any button or open the oven door to stop the acoustic signal. time 5. Turn the knob for the oven functions to the off position. After the first connection to the mains, wait until the display shows 7.5 Setting the TIME DELAY "12:00".
-
Page 16: Using The Accessories
7.7 COUNT UP TIMER To reset the Count Up Timer, press and hold . The timer starts to count up again. 8. USING THE ACCESSORIES WARNING! Refer to Safety chapters. 8.1 Inserting the accessories Use only suitable cookware and material. -
Page 17: Hints And Tips
ENGLISH 9.4 Automatic Switch-off and time settings of a running oven function. For safety reasons the appliance 1. Select an oven function and set it deactivates automatically after some according your preferences time if an oven function operates and 2. Press and hold you do not change any settings. - Page 18 10.2 Tips on baking Baking results Possible cause Remedy The bottom of the cake is The shelf position is incor- Put the cake on a lower not browned sufficiently. rect. shelf. The cake sinks and becomes The oven temperature is too The next time you bake, set soggy, lumpy or streaky.
- Page 19 ENGLISH Food Function Tempera- Time (min) Shelf posi- ture (°C) tion Flan base - short pas- True Fan Cook- 170 - 180 10 - 25 Flan base - sponge mix- True Fan Cook- 150 - 170 20 - 25 ture Apple pie / Apple pie (2 True Fan Cook- 70 - 90...
- Page 20 Food Function Tempera- Time (min) Shelf posi- ture (°C) tion Fruit flans (made with Top / Bottom 35 - 55 yeast dough / sponge Heat mixture) Fruit flans made with True Fan Cook- 160 - 170 40 - 80...
- Page 21 ENGLISH 10.4 Bakes and gratins Food Function Temperature Time (min) Shelf position (°C) Pasta bake Top / Bottom 180 - 200 45 - 60 Heat Lasagne Top / Bottom 180 - 200 25 - 40 Heat Vegetables au Turbo Grilling 160 - 170 15 - 30 gratin...
- Page 22 Food Temperature (°C) Time (min) Shelf posi- tion Pastries made with egg 80 - 100 130 - 170 1 / 3 white, meringues Macaroons 100 - 120 40 - 80 1 / 3 Biscuits made with 160 - 170...
- Page 23 ENGLISH – roast lean meat in the roasting tin – baste large roasts and poultry with the lid or use roasting bag. with their juices several times – roast meat and fish in pieces during roasting. weighting minimum 1 kg. 10.8 Roasting tables Beef Food...
- Page 24 Poultry Food Func- Quantity Power Tempera- Time (min) Shelf po- tion (kg) (Watts) ture (°C) sition Poultry Turbo 0.2 - 0.25 200 - 220 20 - 35 portions Grilling each Chicken Turbo 0.4 - 0.5 190 - 210 25 - 40...
- Page 25 ENGLISH Grilling Food Temperature Time (min) Shelf position (°C) 1st side 2nd side Roast beef, me- 210 - 230 30 - 40 30 - 40 dium Filet of beef, 20 - 30 20 - 30 medium Back of pork 210 - 230 30 - 40 30 - 40 Back of veal...
- Page 26 Food Temperature (°C) Time (min) Shelf position Wedges / Cro- 210 - 230 20 - 35 quettes Hash Browns 210 - 230 20 - 30 Lasagne / Cannelloni, 170 - 190 35 - 45 fresh Lasagne / Cannelloni, 160 - 180...
- Page 27 ENGLISH Food Quantity Defrosting Further de- Comments (kg) time (min) frosting time (min) Chicken 100 - 140 20 - 30 Put the chicken on an upturned saucer in a big plate. Turn halfway through. Meat 100 - 140 20 - 30 Turn halfway through.
- Page 28 Vegetables Food Temperature (°C) Cooking time until Continue to cook at simmering (min) 100 °C (min) 160 - 170 50 - 60 5 - 10 Carrots Cucumbers 160 - 170 50 - 60 Mixed pickles 160 - 170 50 - 60...
- Page 29 ENGLISH Food Power Quantity Time (min) Standing Comments (Watts) (kg) time (min) Goulash 10 - 15 10 - 15 Turn halfway through, re- move defros- ted parts. Defrosting poultry Food Power Quantity Time (min) Standing Comments (Watts) (kg) time (min) Chicken 25 - 30 10 - 20...
- Page 30 Defrosting sausage Food Power Quantity Time (min) Standing Comments (Watts) (kg) time (min) Sliced saus- 2 - 4 20 - 40 Turn halfway through. Defrosting dairy products Food Power Quantity Time (min) Standing Comments (Watts) (kg) time (min) Quark 0.25...
- Page 31 ENGLISH Food Power Quantity Time (min) Standing Comments (Watts) time (min) Bread 1 kg 15 - 20 10 - 15 Turn halfway through. Sliced bread 0.5 kg 8 - 12 10 - 15 Turn halfway through. Bread rolls 4 rolls 5 - 8 5 - 10 Turn halfway...
- Page 32 Food Power Quantity Time (min) Standing Comments (Watts) time (min) Convenience 0.4 - 0.5 kg 14 - 20 Remove any food aluminium lids, turn half- way through. Frozen ready 0.4 - 0.5 kg 4 - 6 Remove any meals...
- Page 33 ENGLISH Food Power Quantity Time (min) Standing Comments (Watts) time (min) Vegetables, 0.5 kg 14 - 18 Add approx. short cooking 50 ml water, cook cov- time, frozen ered, stir halfway through. Vegetables, 0.5 kg 14 - 20 Add approx. long cooking 50 ml water, cook cov-...
-
Page 34: Care And Cleaning
Food Power Quantity Time (min) Standing Comments (Watts) time (min) Meatloaf 0.9 kg 25 - 27 Turn contain- er around by 1/4, halfway through the cooking time. 1) Cook all vegetables with a cover on the container. Combi-function table Use the functions Turbogrilling and For selected models only. -
Page 35: Troubleshooting
ENGLISH 11.2 Removing the shelf WARNING! supports Danger of electrocution! Disconnect the fuse before Before maintenance, make sure that the you replace the lamp. appliance is cool. There is a risk of burns. The lamp and the lamp glass To clean the appliance, remove the shelf cover can be hot. - Page 36 Problem Possible cause Remedy The oven does not heat up. The automatic switch-off is Refer to "Automatic switch- activated. off". The oven does not heat up. The Child Lock is on. Refer to "Using the Child Lock". The oven does not heat up.
- Page 37 ENGLISH 13. ENVIRONMENTAL CONCERNS marked with the symbol with the Recycle the materials with the symbol household waste. Return the product to Put the packaging in applicable your local recycling facility or contact containers to recycle it. Help protect the your municipal office.
- Page 38 www.aeg.com...
- Page 39 ENGLISH...
- Page 40 www.aeg.com/shop...
Need help?
Do you have a question about the KMS561000M and is the answer not in the manual?
Questions and answers