
Related Manuals for Panasonic PT-A900E


Summary of Contents for Panasonic PT-A900E
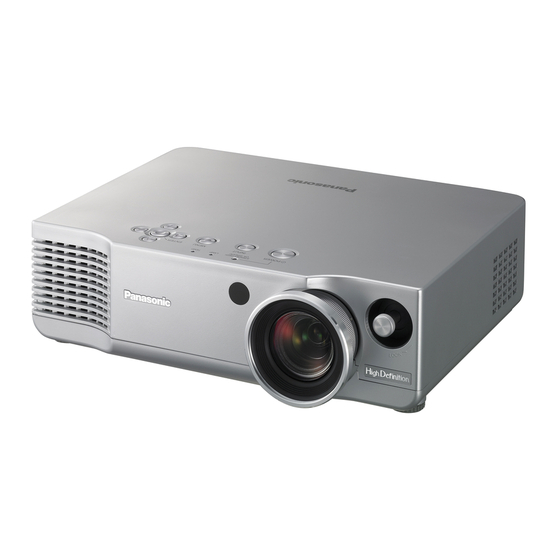
- Page 1 LCD Projector Operating Instructions PT-AE900E Model No. Before operating this product, please read the instructions carefully and save this manual for future use. TQBJ 0183...
-
Page 2: Important Safety Notice
We hope it will help you to get the most out of your new interface cables when connecting to computer or peripheral device. product, and that you will be pleased with your Panasonic LCD projector. If you use serial port to connect PC for external control of projector, you The serial number of your product may be found on its bottom. -
Page 3: Table Of Contents
IMPORTANT: THE MOULDED PLUG (U.K. only) Contents FOR YOUR SAFETY, PLEASE READ THE FOLLOWING TEXT Preparation BRIGHT, COLOUR, TINT, CAREFULLY. SHARPNESS, COLOUR TEMP., IMPORTANT SAFETY NOTICE ...2 DYNAMIC IRIS, Noise This appliance is supplied with a moulded three pin mains plug for your Precautions with regard to Reduction(NR), CINEMA REALITY, safety and convenience. -
Page 4: Precautions With Regard To Safety
Precautions with regard to safety Do not do anything that might damage the mains lead or the mains plug. B Do not damage the mains lead, make any modifications to it, place it near WARNING any hot objects, bend it excessively, twist it, pull it, place heavy objects on If you notice smoke, strange smells or noise coming from the projector, top of it or wrap it into a bundle. - Page 5 Do not look into the lens while the projector is being used. When disconnecting the mains lead, hold the plug, not the lead. B Strong light is emitted from the projector’s lens. If you look directly into this B If the mains lead itself is pulled, the lead will become damaged, and fire, light, it can hurt and damage your eyes.
-
Page 6: Accessories
Accessories Before use Check that all of the accessories shown below have been included with your Cautions regarding setting-up projector. Avoid setting up in places which are subject to vibration or shocks. Remote control unit Mains lead for Mains lead for U.K. The internal parts can be damaged, which may cause malfunctions or (EUR7914Z20 x1) Continental... -
Page 7: Location And Function Of Each Part
Location and function of each part Notes on use Projector <Top, right and front> In order to get the best picture quality ˛ & Draw curtains or blinds over any windows and turn off any lights near the screen to prevent outside light or light from indoor lamps from shining onto the screen. - Page 8 Projector Connector panel <Back and bottom> ˛ & & # Connector panel (page 15) # SERIAL connector (pages 22, 23, 24 and 66) This connector is used to connect a personal computer to the projector in $ Air inlet port order to control the projector externally.
- Page 9 & Arrow (F F , G G , I I and H H ) buttons (page 42) Projector control panel These buttons are used to select and adjust items in the on-screen menus. & ' ENTER button (page 42) This button is used to accept and to activate items selected in the on-screen menus. ( MENU button (page 40) This button is used to display the menu screen.
-
Page 10: Setting-Up
Setting-up Projector position Projection methods In way of installing projector, any one of the following four projection methods are used. Select whichever projection method matches the setting-up Projection distance Screen SH: Image height method. (The projection method can be set from the “OPTION” menu. Refer to page 52 for details.) SW:Image width BFront-desk projection... -
Page 11: Setting Up Range Using The Lens Shift
Setting up range using the lens shift function BProjector setting up range in relation to the screen This projector can be placed in various places by controlling the shift lever at the front side of the projector to move the lens in order to adjust the position of the projected image. -
Page 12: Connections
Connections Notes on connections Connecting to equipment compatible with HDMI B Read the instruction manual for each peripheral device carefully before connecting it. B Turn off the power supply for all peripheral devices before making any connections. Computer for B If the cables necessary for connection are not included with the peripheral control use device or available as an option, you may need to prepare a proper cable for the device concerned. -
Page 13: Connecting To Computer
Preparation for the remote control unit Connecting to computer # Open the cover. Computer for control use $ Insert the batteries so that the polarities are correct, and then close the cover. Serial adapter (ET-ADSER : sold separately) DIN 8-pin (male) AA batteries (two) NOTE:... -
Page 14: Turning On The Power
Turning on the power Press the input select button to select the input signal. & Input select Before turning on the power button 1. Ensure that all peripheral Control VIDEO S-VIDEO devices are connected properly. panel Changing 2. Connect the accessory mains lead. signals 3. -
Page 15: Turning Off The Power
Turning off the power ˛ ˛ ˛ NOTE: B During projection of an image, the cooling fan will operate, emitting a small noise as it operates. This noise may change depending on the Power indicator ambient temperature. Turning the lamp on or off will cause this noise to increase a little. -
Page 16: Setting The Aspect Ratio
Setting the aspect ratio (ASPECT) Input signal Projected image ASPECT 14:9 Expansion preserves This projector allows you to change the aspect ratio to match the type of original ratio input signal. Press the ASPECT button. BPressing the ASPECT button will change the aspect ratio according to the successive settings shown below. -
Page 17: Selecting The Picture Mode
B When “WSS” is set to “ON”(page 49), the projector switches the aspect Selecting the picture mode (PIC. MODE) ratio automatically if the input signal has a detector signal. You can select the appropriate picture mode for the type of projected image. B “WIDE”... -
Page 18: Retrieving The Saved Picture Settings
Retrieving the saved picture Displaying the “PICTURE” menu settings (MEM. LOAD) (MAIN) If you have saved the adjusted picture settings using the “MEMORY SAVE” menu, you can retrieve the saved picture settings. Press the MAIN button. Press the MEM. LOAD button. BThe individual adjustment screen will be displayed as shown above. -
Page 19: Using The Cinema Colour Management Function
Using the Cinema Colour CURSOR You can select a colour in the projected image, and adjust the colour settings. Management function(C.C.M) Press the ENTER button to display the cursor ( B ). # Select the colour you want to adjust with the cursor. You can adjust, save, and retrieve the settings for the selected colours of the B Press the F, G, I and H buttons to move the cursor, and then press projected image based on the selected picture mode to suit your preference. - Page 20 PROFILE SAVE B The colours white, gray and black cannot be adjusted. You can save the adjusted colour B If the same colours are adjusted separately, these colours may not be settings. adjusted to suit your preference. Press the ENTER button to display the B You can adjust a maximum of 8 colours (“POINT1-8”) for each user “PROFILE SAVE”...
-
Page 21: On-Screen Menus
On-screen menus Menu screens The various settings and adjustments for this projector can be carried out by selecting the operations from on-screen menus. The general arrangement of these menus is shown below. Menu screen POSITION menu (page 48) When an S-VIDEO/VIDEO/SCART When a YP signal is being input signal is being input... -
Page 22: Factory Default
Menu operation guide # Press the MENU button. & Press the F F or G G button to select an Unavailable on- item, and then press the I I or H H screen menu items button to adjust the value or change the setting. -
Page 23: Adjusting The Picture
Adjusting the picture # Press the MENU button to display the menu screen. TINT Noise Reduction (NR) $ Select the “PICTURE” menu from the main menu, and then press the (NTSC/NTSC 4.43/YP /PC/HDMI ENTER button. only) % Press the F or G button to select an item. This adjusts the flesh tones in the &... -
Page 24: Tv-System, Advanced Menu, Memory Save, Memory Load
TV-SYSTEM ADVANCED MENU MEMORY SAVE MEMORY LOAD (S-VIDEO/VIDEO only) Picture settings can be adjusted in Press the ENTER button to display Press the ENTER button to display more detail. the “MEMORY SAVE” menu. the “MEMORY LOAD” menu. Press the ENTER button to display (If any setting is not saved in the the “ADVANCED MENU”... -
Page 25: Adjusting The Position
Adjusting the position # Press the MENU button to display the menu screen. OVER SCAN NOTE: $ Select the “POSITION” menu from the main menu, and then press the [525p (480p), 625p (576p), B If signals with a dot clock ENTER button. -
Page 26: Changing The Display Language
Option settings AUTO SETUP # Press the MENU button to display the menu screen. keystone correction required is $ Select the “OPTION” menu from the main menu, and then press the (PC only) as minimal as possible. ENTER button. “H-POSITION”, “V-POSITION”, B The picture size will also change % Press the F or G button to select an item. - Page 27 (above 1 400 m) only. POWER” setting and the number of times the power is turned on and off). The “Panasonic” logo will not be displayed when the power is turned 52-E NGLISH NGLISH...
-
Page 28: When The Temp Indicator And The Lamp Indicator Are Illuminated
When the TEMP indicator and the LAMP indicator are illuminated There are two indicators on the control panel of the projector which give LAMP indicator information about the operating condition of the projector. These indicators illuminate or flash to warn you about problems that have occurred inside the Indicator Illuminated (red) Flashing (red) -
Page 29: Cleaning And Replacing The Air Filter
Cleaning and replacing the air filter Replacing the lamp unit If the air filter becomes clogged with dust, the internal temperature of the Warning Lamp unit replacement projector will rise, the TEMP indicator will illuminate and the projector’s period When replacing the lamp, allow it power will turn off (the TEMP indicator will flash after the power is turned off). - Page 30 ' Install the lamp unit cover, and , Press and hold the ENTER On-screen display LAMP indicator then use a Phillips screwdriver button for approximately 3 to securely tighten the lamp seconds. unit cover fixing screws. ( Insert the mains plug into the Displayed for 30 mains socket and then press seconds.
-
Page 31: Before Calling For Service
Before calling for service Before calling for service, check the following points. Problem Possible cause Page Problem Possible cause Page B The mains lead may not be connected. Picture from B The cable may be too long. – Power does not –... -
Page 32: Specifications
Specifications COMPONENT IN: Power supply: 100 V - 240 V ~, 50 Hz/60 Hz Y, P Single-line, RCA pin jack x 3 Power consumption: 180 W [During standby (when fan is 1.0 V [p-p] (Including sync), 75 Ω stopped): Approx. 0.08 W] 0.7 V [p-p], 75 Ω... -
Page 33: Appendix
Appendix List of compatible signals General arrangement of the “COLOUR MANAGEMENT” menu Scanning Display Dot clock Select “COLOUR MANAGEMENT” frequency Picture Press the C.C.M button. Mode resolution frequency Format from the “ADVANCED MENU”. quality* (dots)* (MHz) (kHz) (Hz) “COLOUR MANAGEMENT” MENU or RETURN button NTSC/NTSC4.43/ 720 x 480i... - Page 34 Using the SERIAL connector Control commands The serial connector which is on the connector panel of the projector conforms to the RS-232C interface specification, so that the projector can be controlled by a personal computer which is connected to this connector. Command Control contents Remarks In standby mode, all commands other than...
-
Page 35: Dimensions
Projection dimensions calculation methods Dimensions such as projection distances can be calculated from the screen (Continued from previous page.) diagonal length. (Units for calculations: m) Command Control contents Remarks 16:9 Parameter NAT=NATURAL NOR=NORMAL Picture mode DYN=DYNAMIC CN1=CINEMA1 selection CN2=CINEMA2 CN3=CINEMA3 VID=VIDEO (Refer to page 33 for details.) LW/LT... -
Page 36: Trademark Acknowledgements
If you wish to discard this product, please contact your local authorities or dealer and ask for the correct method of disposal. Matsushita Electric Industrial Co., Ltd. Web Site: http://www.panasonic.co.jp/global/ Printed in Japan These Operating Instructions are printed on recycled paper.
Need help?
Do you have a question about the PT-A900E and is the answer not in the manual?
Questions and answers