Table of Contents
Advertisement
Advertisement
Table of Contents

Related Manuals for Grizzly G1182


Summary of Contents for Grizzly G1182
-
Page 1: Instruction Manual
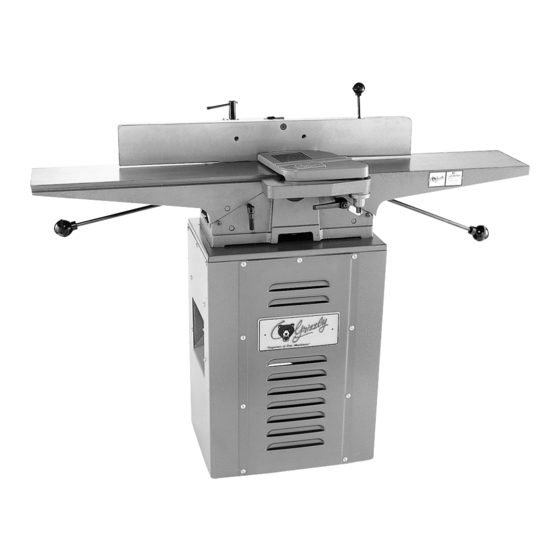
6'' HEAVY-DUTY JOINTER MODEL G1182 INSTRUCTION MANUAL COPYRIGHT © 1992 BY GRIZZLY INDUSTRIAL, INC. REG. #TX 3 176 562 WARNING: NO PORTION OF THIS MANUAL MAY BE REPRODUCED IN ANY SHAPE OR FORM WITHOUT THE WRITTEN APPROVAL OF GRIZZLY INDUSTRIAL, INC. -
Page 2: Table Of Contents
C. EDGE JOINTING ...21 D. BEVELING ...21 E. SURFACE PLANING...22 F. RABBETING ...22 MAINTENANCE ...23 A. GENERAL ...23 B. TABLES ...23 C. LUBRICATION ...23 D. V-BELT...23 XII. CLOSURE...24 TROUBLESHOOTING GUIDE ...25 WARRANTY AND RETURNS ...26 Table Of Contents PAGE G1182 6" Heavy-Duty Jointer... -
Page 3: Introduction
I. INTRODUCTION We are proud to offer the Model G1182 6" Heavy- Duty Jointer. The Model G1182 is part of a grow- ing Grizzly family of fine woodworking machinery. When used according to the guidelines set forth in this manual, you can expect years of trouble- free, enjoyable operation and proof of Grizzly’s... -
Page 4: Circuit Requirements
A. 110V OPERATION Your Model G1182 Jointer is supplied with a dual- voltage 110V/220V motor, pre-wired for 110V operation. Under normal use, the motor draws approximately 13 amps @ 110V. We recommend a 15 amp circuit breaker or slow-blow fuse for 110V. -
Page 5: Safety
10. SECURE WORK. Use clamps or a vise to hold work when practical. It’s safer than using your hand and frees both hands to operate tool. G1182 6" Heavy-Duty Jointer 11. USE PROPER EXTENSION CORD. Make KEYS VISITORS 12. WEAR PROPER APPAREL Do not wear 13. -
Page 6: Jointer Safety
12. NEVER BACK THE WORK toward the infeed table. 13. HABITS – GOOD AND BAD – are hard to break. Develop good habits in your shop and safety will become second-nature to you. G1182 6" Heavy-Duty Jointer ⁄ " thick. -
Page 7: Unpacking
IV. UNPACKING The Model G1182 6'' Jointer is shipped from the manufacturer in a carefully packed carton. If you discover the machine is damaged after you’ve signed for delivery, please call Customer Service immediately for advice. When you are completely satisfied with the con- dition of your shipment, you should inventory its parts. -
Page 8: Clean Up
VI. CLEAN UP The beds and other unpainted parts of the Model G1182 are coated with a waxy oil that protects them from corrosion during shipment. Remove the protective coating with mineral spirits and paper towels. Do not use gasoline or other petroleum based solvents because of their extremely low flash points. -
Page 9: Assembly
VIII. ASSEMBLY A. BEGINNING ASSEMBLY Most of your G1182 6'' Jointer has been assem- bled at the factory, but some parts must be assembled or installed after delivery. We have organized the assembly process into steps. Please follow along in the order presented here. - Page 10 Be sure to position the motor pulley to the rear (open end) of the stand as shown in Figure 6. Leave the motor mount bolts finger-tight for now. Figure 6. Attaching the motor. G1182 6" Heavy-Duty Jointer...
-
Page 11: Jointer To Stand
Under no circumstances should the grounding pin from any three- pronged plug be removed. Serious injury may occur. G1182 6" Heavy-Duty Jointer C. JOINTER TO STAND This step will require at least two people. To mount the jointer to the stand: 1. -
Page 12: Fence
The flange on the special nut should protrude upward when installed correctly. Figure 9. Fence support mechanism. Setscrews Cutterhead Pulley DO NOT slide the fence across the outfeed table. Scratching will result. Motor Pulley Setscrews G1182 6" Heavy-Duty Jointer... -
Page 13: Cutterhead Guard
⁄ DO NOT attempt any step of assembly, adjustments, or maintenance while your Model G1182 is running. Ensure that the switch is off, power is disconnected and moving parts have stopped before making adjustments. Failure to comply may result in serious personal injury. -
Page 14: Knife Setting Gauge
2. Attach the E-clips to the notches to lock adjustment arms onto the steel rod. The adjustment arms are symmetrical, so the placement is not a concern. See Figure 12. -14- VIII. ASSEMBLY (Continued) Figure 12. Knife setting gauge. G1182 6" Heavy-Duty Jointer... -
Page 15: Adjustments
Serious personal injury may occur. Figure 13. Location of check nuts. G1182 6" Heavy-Duty Jointer B. KNIVES These knives are extremely sharp. Never grab the cutterhead directly to rotate it. -
Page 16: Outfeed Table
Figure 16. Location of the table stop bolt and jam nut. ALWAYS wear ANSI-approved safety glass- es when assembling, adjusting, maintain- ing, or operating this machine. Wear approved hearing protection, too, when operating the Model G1182. G1182 6" Heavy-Duty Jointer... -
Page 17: Infeed Table
– then up against the stop. Check the accuracy of the stop setting with a straight- edge over the cutterhead and fine tune if nec- essary. G1182 6" Heavy-Duty Jointer D. INFEED TABLE To adjust the infeed table: 1. Loosen the jam nut and unscrew the table stop bolt out 3 or 4 turns. -
Page 18: Fence Stop
Figure 20. Location of the fence’s positive stop bolt. DO NOT attempt any adjustments while your Model G1182 is running. Ensure that the switch is off, power is disconnected and moving parts have stopped before making adjustments. Serious personal injury may occur. -
Page 19: Fence Stop
Stop Tab Figure 21. Location of Stop Bolt and Stop Tab. G1182 6" Heavy-Duty Jointer Figure 22. Jointer fence in 45° stop position. Stop Bolt If there is a gap between the bevel’s blade and the face of the fence, turn the stop bolt until the gap is gone. -
Page 20: Operations
DO NOT attempt any adjustments while your Model G1182 is running. Ensure that the switch is off, power is disconnected and moving parts have stopped before making adjustments. Serious personal injury may occur. -
Page 21: Edge Jointing
Wear approved hearing protection, too, when operating the jointer. G1182 6" Heavy-Duty Jointer D. BEVELING Beveling an edge is essentially the same opera- tion as edge jointing, except that the fence is tilt- ed to a specified angle. -
Page 22: Surface Planing
Using the passes to achieve a common Figure 27. Replace the guard when finished with rab- beting operations. Figure 27. Correct operator position for rabbet- ing. G1182 6" Heavy-Duty Jointer ⁄ " rule, it will take six ⁄ " rabbet. See... -
Page 23: Maintenance
XI. MAINTENANCE A. GENERAL Regular periodic maintenance on your Model G1182 Jointer will ensure its optimum perfor- mance. Make a habit of inspecting your jointer each time you use it. Check for the following con- ditions and repair or replace when necessary. -
Page 24: Closure
Washington location using the address in the Introduction. The specifications, drawings, and photographs illustrated in this manual represent the Model G1182 as supplied when the manual was prepared. However, due to Grizzly’s policy of continuous improvement, changes may be made at any time with no obligation on the part of Grizzly. -
Page 25: Troubleshooting Guide
The stock is probably being fed too fast or knives are incorrectly set, one knife is doing all the work. Remedies: Slow down your feed rate or check the knives to ensure that they are all within 0.001". Reset them if they are not. Knives may also need sharpening. G1182 6" Heavy-Duty Jointer TROUBLESHOOTING ⁄ " rule. Try ⁄... -
Page 26: Warranty And Returns
This is Grizzly’s sole written warranty and any and all warranties that may be implied by law, including any merchantability or fitness, for any particular purpose, are hereby limited to the duration of this written warranty.
Need help?
Do you have a question about the G1182 and is the answer not in the manual?
Questions and answers