Haier HMV1652 Installation Instructions Manual
Hide thumbs
Also See for HMV1652:
- Installation instructions manual (32 pages) ,
- Use and care manual (25 pages) ,
- User manual (25 pages)

Related Manuals for Haier HMV1652


Summary of Contents for Haier HMV1652
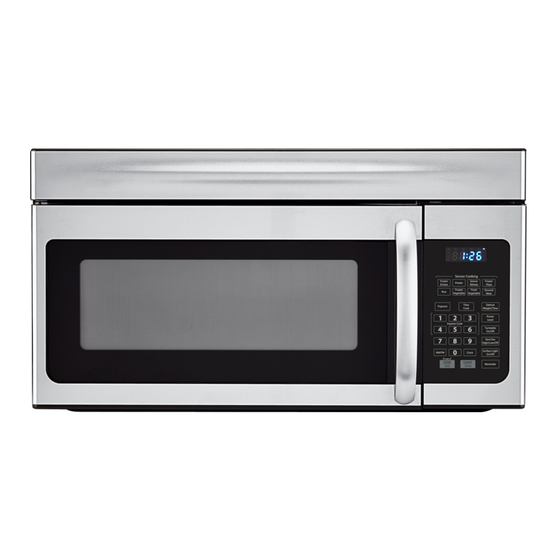
- Page 1 Installation Instructions Instructions d’installation Instrucciones De Instalación HMV1652 Microwave Oven Four Micro-Onde Horno Microondas Part # 0570000005...
-
Page 3: Table Of Contents
Step 6 - Install Microwave Oven..................12 Step 6 - Install or Replace Charcoal Filter ..............27 Step 7 - Complete Installation ..................28 RECORD KEEPING Thank you for purchasing this Haier product. This user manual will help you ___________________________________ get the best performance from your Model number new microwave. -
Page 4: Microwave Safety
MICROWAVE SAFETY Your safety and the safety of others are very important. We have provided many important safety messages in this manual and on your appliance. Always read and obey all safety messages. This is the safety alert symbol. This symbol alerts you to potential hazards that can kill or hurt you and others. - Page 5 IMPORTANT SAFETY INSTRUCTIONS WARNING: To reduce the risk of fire, electrical shock, injury to persons, or damage when using the microwave oven, follow basic precautions, including the following: • • Read all instructions before using Do not, under any the microwave oven. circumstances, cut, deform or remove any of the •...
-
Page 6: Installation Requirements
INSTALLATION REQUIREMENTS TOOLS AND PARTS PARTS PROVIDED Wood Screws Toggle Bolts (and wing nuts) Self-Aligning Machine Screws (1⁄4“ x 2“) (3⁄16“ x 3“) (1⁄4“-28 x 31⁄4“) TOP CABINET TEMPLATE REAR WALL TEMPLATE Nylon Grommet Top Cabinet Template Rear Wall Template (for metal cabinets) Installation Instructions Separately Packed... -
Page 7: Location Requirements
LOCATION REQUIREMENTS Bottom edge of cabinet needs to be 30" (76.2 cm) or more from the 16½" (41.9 cm) cooking surface 30" 30" (76.2 cm) (76.2 cm) min. Backsplash 66" (167.6 cm) or more from the floor to the top of the microwave NOTES: •... -
Page 8: Electrical Requirements
ELECTRICAL REQUIREMENTS WARNING Electrical Shock Hazard Plug into a grounded 3 prong outlet. Do not remove the ground prong from the power cord plug. Do not use an adapter. Do not use an extension cord. Failure to do so can result in death, re or electrical shock. Observe all governing codes and ordinances. -
Page 9: Installation Instructions
INSTALLATION INSTRUCTIONS STEP 1 – UNPACKING WARNING Excessive Weight Hazard Use two or more people to move and install microwave oven. Failure to do so can result in back or other injury. 1. Using two or more people move the microwave to near the location where it is to be installed. -
Page 10: Step 2 - Locate Wall Studs
6. Remove the screws from the mounting plate. Reinstall the screws into the holes from where they were removed. STEP 2 - LOCATE WALL STUDS IMPORTANT: The microwave must be connected to at least one wall stud. 1. Find the studs, using one of the following methods: Stud finder –... - Page 11 BENEATH FRAMED, RECESSED CABINET 1. Draw a vertical line on the wall at the center of the 30” (76.2 cm) wide space. 2. Tape the Mounting Plate/Rear Wall Template onto the wall matching the centerline and touching the bottom cabinet frame. NOTE : READ IT IS VERY...
-
Page 12: Step 4 - Align Wall-Mounting Plate
CABINETS WITH DECORATIVE TRIM IMPORTANT: The microwave must be level. If a decorative cabinet trim is interfering with the installation and leveling of the microwave oven, remove the decorative trim. 1. Use a level to make sure the cabinet bottom is level. If the cabinets have a front overhang only, with no back or side frame, install the mounting plate down the same distance as the front overhang depth. -
Page 13: Step 5 - Determine Installation Method
NOTE: Holes A and B are inside area E. If both A and B are not in a stud, locate a stud somewhere in area E and draw a third circle that aligns with the stud. It is important to use at least one wood screw mounted firmly in a stud to support the weight of the microwave. -
Page 14: Step 6 - Install Microwave Oven
STEP 6 - INSTALL MICROWAVE OVEN Install the microwave oven following the instructions specific to your method. METHOD A - OUTSIDE TOP EXHAUST (VERTICAL DUCT) IMPORTANT: • Make sure the screws for the blower motor and blower plate are securely tightened when they are reinstalled. - Page 15 Use Top Cabinet template to prepare top cabinet. 1. Read the instructions on the template, and then tape the template underneath the overhead cabinet. 2. Drill the holes following the instructions on the template. • Drill holes for the top support screws. •...
- Page 16 7. Secure blower unit to microwave with the screw removed in Step 1. Make sure the screw is tight. AFTER: Fan Blade Openings Facing Top Back of Microwave 8. Replace blower plate with the screw removed in Step 1. Make sure the screw is tight.
- Page 17 Mount the Microwave Oven WARNING Excessive Weight Hazard Use two or more people to move and install microwave oven. Failure to do so can result in back or other injury. IMPORTANT: Do not grip or use door handle during installation. NOTE: If the cabinet front hangs below the cabinet bottom shelf, it is recommended that you use filler blocks to avoid damage to the case from overtightening the screws.
- Page 18 Cabinet Front Cabinet Bottom Shelf Filler Block Equivalent to Depth of Cabinet Recess Self-Aligning Screw Microwave Oven Top 5. Attach the microwave oven to the top cabinet. 6. Insert 2 self-aligning screws through outer top cabinet holes. Turn two full turns on each screw.
- Page 19 Connect ductwork. 1. Extend the house duct down to connect to the exhaust adaptor. 2. Seal exhaust duct joints using furnace duct tape for high temperature applications. House Duct METHOD B - OUTSIDE BACK EXHAUST (HORIZONTAL DUCT) IMPORTANT: • Make sure the screws for the blower motor and blower plate are securely tightened when they are reinstalled.
- Page 20 Remove the blower plate. 1. Remove the screw that holds the blower plate to the microwave. 2. Lift off the blower plate. Set the screw aside. Blower Plate Back of Microwave Attach the Mounting Plate to the Wall NOTE: At least one wood screw must be used to attach the plate to a wall stud. 1.
- Page 21 CAUTION: Be careful to avoid pinching fingers between the back of the mounting plate and the wall. 4. Tighten all bolts. Pull the plate away from the wall to help tighten the bolts. Use Top Cabinet template to prepare top cabinet. 1.
- Page 22 4. Rotate blower unit counterclockwise 180°. Before Rotation After Rotation Back of Microwave 5. Gently remove the wires from the grooves. Reroute the wires through grooves on other side of the blower unit. Before Rerouting After Rerouting Wires Routed Through Left Side Wires Routed Through Right Side 6.
- Page 23 End A End B AFTER: Fan Blade Openings Facing Back 9. Secure the blower unit to the microwave with the original screw. 10. Replace the blower plate in the same position as before with the screw. Make sure the screw is tight. Blower Plate Back of Microwave Blower Motor Screw...
- Page 24 1. Thread the power cord through the hole in the bottom of the overhead cabinet. Keep the power cord tight while mounting the oven. NOTE: If the overhead cabinet is metal, use the nylon grommet around the power cord hole to avoid cutting the power cord. 2.
- Page 25 7. Tighten center screw completely. 8. Tighten the outer two screws to the top of the microwave oven. (While tightening screws, hold the microwave oven in place against the wall and the top cabinet). Install grease filters. For instructions, see the User Manual packed with the microwave. METHOD C - RECIRCULATING (NON-VENTED, DUCTLESS) IMPORTANT: •...
- Page 26 3. Place the mounting plate against the wall and insert the toggle wings into the holes in the wall to mount the plate. NOTE: Before tightening toggle bolts and wood screw, make sure the tabs on the mounting plate touch the bottom of the cabinet when pushed flush against the wall and that the plate is properly centered under the cabinet.
- Page 27 Blower Plate Mount the Microwave Oven WARNING Excessive Weight Hazard Use two or more people to move and install microwave oven. Failure to do so can result in back or other injury. IMPORTANT: • Do not grip or use door handle during installation. •...
- Page 28 4. Insert a self-aligning screw through top center cabinet hole. Temporarily secure the oven by turning the screw at least two full turns after the threads have engaged. (It will be completely tightened later.) Be sure to keep power cord tight. Be careful not to pinch the cord, especially when mounting flush to bottom of cabinet.
-
Page 29: Step 6 - Install Or Replace Charcoal Filter
STEP 6 - INSTALL OR REPLACE CHARCOAL FILTER NOTE: The charcoal filter is factory installed. Follow these steps to replace a filter or to install a filter after converting a vented model to a recirculating operation. 1. Remove screws on top of grille using a Phillips screwdriver. 2. -
Page 30: Step 7 - Complete Installation
STEP 7 - COMPLETE INSTALLATION WARNING Electrical Shock Hazard Plug into a grounded 3 prong outlet. Do not remove the ground prong from the power cord plug. Do not use an adapter. Do not use an extension cord. Failure to do so can result in death, re or electrical shock. 1. - Page 32 IMPORTANT Do Not Return This Product To The Store If you have a problem with this product, please contact the “Haier Customer Satisfaction Center” at 1-877-337-3639. DATED PROOF OF PURCHASE, MODEL #, AND SERIAL # REQUIRED FOR WARRANTY SERVICE Made in China...
Need help?
Do you have a question about the HMV1652 and is the answer not in the manual?
Questions and answers