Table of Contents
Advertisement
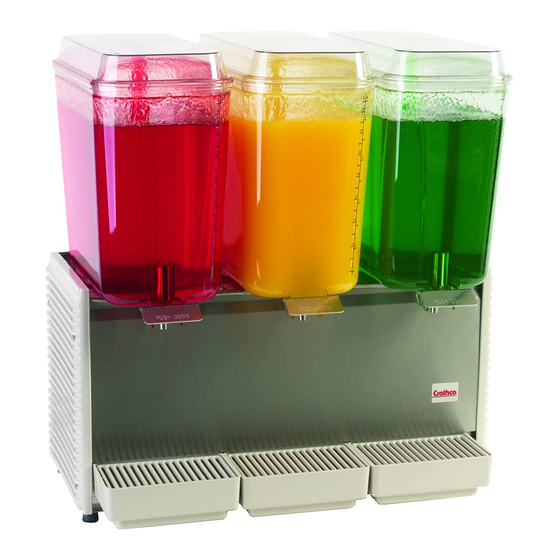
Mini, Standard, Heated, Whipper and Super Bowl Models
Table of Contents
Unpacking ................................................. 2
Installation ................................................. 2
Assembly .................................................. 3-4
Disassembly .............................................. 5
Routine Maintenance .............................. 6
Helpful Hints ............................................. 6
Preventative Maintenance ....................... 7
Security Kit Installation ............................ 8-9
Base Assembly Components .............
Installing Pump & Fan Motors ............
Overload and Relay .............................
Magnetic Lock ......................................
Evaporator Assembly ..........................
Refrigeration Test ................................
Trouble Shooting Guide ........................... 13
Exploded Views ......................................... 14-19
Wiring Diagrams ........................................ 20-24
Refrigeration
Schematic ............................................
Cap Tube Specs ..................................
Refrigerant Charges ...........................
Prior authorization must be obtained from
Grindmaster Corporation for all warranty claims.
Grindmaster Corporation, 1996
PRINTED IN USA
Beverage Dispensers
Service Manual
10
10
10
11
12
12
12
25
25
25
Grindmaster Corporation™
4003 Collins Lane
Louisville, KY 40245 USA
(502) 425-4776
(800) 695-4500
(800) 568-5715 (Technical Service Only)
FAX (502) 425-4776
www.grindmaster.com
Patents Pending
0404 Form #CC-375-05
Part #3275
Advertisement
Table of Contents

Related Manuals for Grindmaster D-15


Summary of Contents for Grindmaster D-15
-
Page 1: Table Of Contents
Wiring Diagrams ... 20-24 Refrigeration Schematic ... Cap Tube Specs ... Refrigerant Charges ... Prior authorization must be obtained from Grindmaster Corporation for all warranty claims. Grindmaster Corporation, 1996 PRINTED IN USA Service Manual Grindmaster Corporation™ 4003 Collins Lane Louisville, KY 40245 USA... -
Page 3: Unpacking
SET-UP UNPACKING Your dispenser is packed in 2 cartons: base pack and bowl pack. Unpack base by opening bottom flaps. See Figure A. IMPORTANT NOTES: 1. Do not leave base upside down as this can damage refrigeration system. 2. Check that all 4 rubber feet are attached to legs after removing from base pad. -
Page 4: Assembly
PLACE BEARING SLEEVE ON GUIDE PIN Note flat sides on outside of guide pin and on inside of bearing sleeve. Line flat sides up until bearing sleeve slides down over guide pin and rests on the cooling plate. PLACE IMPELLER OVER BEARING SLEEVE. - Page 5 PRESS SPRING UP INTO PLACE AGAINST THE BOTTOM OF THE BOWL. INSERT HANDLE INTO “V” NOTCHES AND PLACE VALVE INTO HOLE. “W” IS WHIPPER VALVE VALVE HOLE SPRING TURN VALVE 90° TO LOCK. Cross slot (located on top of valve) should run left to right across the bowl when locked.
-
Page 6: Disassembly
DRAIN ALL BEVERAGE FROM BOWLS A. Remove bowl lid(s) and drip tray(s) B. Drain through valve then C. Tip unit forward, gently press spray tube back a short distance to lift the edge of the pump cover to allow remaining beverage in well to be drained through valve. -
Page 7: Routine Maintenance
ROUTINE MAINTENANCE: For all Models Cleaning Your Dispenser To optimize performance or when using dairy products, clean unit daily. Regular cleaning of bowl components will result in maximum pumping efficiency, proper seating and sealing, and prevention of leaks at the valve O-Ring and bowl gasket by removing dried-on beverage solids and pulp from mov- ing sealed parts. -
Page 8: Preventative Maintenance
4) Every 6 months or more often if needed: unplug unit, remove panels, clean condenser and interior. (Remove dust and lint from fins with a soft brush and vacuum.) 5) For further information, visit www.grindmaster.com or call (800) 695-4500. Part #s for Preventative Maintenance... -
Page 9: Security Kit Installation
SECURITY KIT INSTALLATION - STANDARD UNITS The valve security kit locks dispense valve to prevent use when store is closed. The bowl security kit locks the lid on the bowl to prevent unauthorized access. Standard Security Kit Includes ITEM KIT (contents listed below) PAD LOCK COVER LOCK STRAP VALVE LOCKING BOX... -
Page 10: Security Kit Installation
SECURITY KIT INSTALLATION - MINI MODELS The valve security kit locks dispense valve to prevent use when store is closed. The bowl security kit locks the lid on the bowl to prevent unauthorized access. Mini Security Kit Includes ITEM KIT (contents listed below) SECURITY BRACKET SECURITY UPRIGHT LOCKDOWN CHANNEL... -
Page 11: Service
SERVICE BASE ASSEMBLY COMPONENTS (Refrigerated Unit) Compressor Refrigeration Tubing INSTALLING PUMP AND FAN MOTORS: For All Models Tools Required: Phillips screwdriver 1. Disconnect from power. 2. Remove cabinet panels. 3. Disconnect wires leading from motor to terminal board and/or switch. 4. -
Page 12: Replacement Of Temperature Control
REPLACEMENT OF TEMPERATURE CONTROL (PART # 1059) Tools Required: Phillips Screwdriver; Grease or Petroleum Jelly; Putty or similar substance 1. Unplug unit. 2. Remove front panel and side panel, located on the switch side, to access the temperature control mounting screws, located on the front right corner of the frame. -
Page 13: Magnetic Lock
MAGNETIC LOCK Magnetic Lock Problems If a unit is not spraying, check the following: a) The impeller must spin freely when the bearing sleeve is held between the thumb and the forefinger, b) The impeller should turn when assembled and the motor switch is turned “ON”. -
Page 14: Trouble Shooting Guide
Technical Service at (800) 425-4776 Monday-Friday, 8:00 AM-6:00 PM Eastern Standard Time. Please have the model and serial number ready so that accurate information can be given. Prior authorization must be obtained from Grindmaster Corporation’s Technical Service Department for all warranty claims. Page 13... -
Page 15: Exploded Views
Exploded View Standard and Whipper Models (D15, D25, D35, & WD) Crathco® Beverage Dispensers Page 14... - Page 16 Parts List Standard and Whipper Models Page 15 Crathco® Beverage Dispensers...
- Page 17 Standard Whipper Components Crathco® Beverage Dispensers Page 16...
- Page 18 Exploded View Mini Models (E27/9 or E47/9) Page 17 Crathco® Beverage Dispensers...
- Page 19 Parts List Mini Models (E27/9 or E47/9) Crathco® Beverage Dispensers Page 18...
-
Page 20: Exploded Views
Exploded View and Parts List HD15 - Heated Models Page 19 Crathco® Beverage Dispensers... - Page 21 Super Bowl (D112) Bowl Assembly Parts 2243 Part # 1010 1012 O-ring for Dispense Valve 1150 1155 1162 1165 Super Bowl Pump Cover (use with spray tube) 1175 Super Bowl Spray Tube Agitator (use in place of pump cover and spray tube for iced 1257 tea, orange juice, and viscous products) 2023...
-
Page 22: Wiring Diagrams
Wiring Diagrams Standard Models 115V & 220V Single Bowl D15/D155/D156 Double Bowl D25/D255/D256 Triple Bowl D35/D355/D356 Page 21 Crathco® Beverage Dispensers... - Page 23 Models E27, E275, and E276 or E29, E295, and E296 Models E47, E475, and E476 or E49, E495, and E496 Crathco® Beverage Dispensers Wiring Diagrams for Mini Models (115V & 220V) Page 22...
- Page 24 Wiring Diagrams Whipper Models Single Bowl WD15 Double Bowl 2WD25 1WD25-4 Triple Bowl 3WD35 2WD35-4 1WD35-4 Page 23 Crathco® Beverage Dispensers...
-
Page 25: Wiring Diagrams
Wiring Diagram for Heated Models (HD15 & WHD15) 115V/60Hz and 230V/50Hz Crathco® Beverage Dispensers Page 24... -
Page 26: Schematic
CAP TUBE SPECIFICATIONS Model Length GCS .073 .031 76” .087 .036 60” .088 .036 52” .093 .042 66” D112 .097 .042 97” WD35 .093 .042 66” Page 25 Refrigeration Schematic Part # 2308 D155/6 1324 D255/6 2968 D35/D355 197 3361 1199 E275/6 3361... - Page 28 Grindmaster® Coffee Grinders and Brewers • Espressimo® Espresso Machines • Crathco® Hot Beverage Dispensers Crathco® Cold and Frozen Beverage Dispensers • American MetalWare® Coffee and Tea Systems Tel (502) 425-4776 • Fax (502) 425-4664 • 1-800-695-4500 P.O. Box 35020 • Louisville, KY 40232 • USA...
Need help?
Do you have a question about the D-15 and is the answer not in the manual?
Questions and answers