
Subscribe to Our Youtube Channel
Related Manuals for ALLEN & HEATH AP9815


Summary of Contents for ALLEN & HEATH AP9815
- Page 1 Qu Series Reference Guide For Firmware Version V1.9 Before starting please check www.allen-heath.com for the latest Qu mixer firmware and documentation. Publication AP9372...
- Page 2 Limited One Year Manufacturer’s Warranty Allen & Heath warrants the Allen &Heath -branded hardware product and accessories contained in the original packaging ("Allen & Heath Product”) against defects in materials and workmanship when used in accordance with Allen & Heath's user manuals, technical specifications and other Allen & Heath product published guidelines for a period of ONE (1) YEAR from the date of original purchase by the end-user purchaser ("Warranty Period").
- Page 3 IMPORTANT - Read before starting: Safety instructions Before starting, read the Important Safety Instructions printed on the sheet supplied with the equipment. For your own safety and that of the operator, technical crew and performers, follow all instructions and heed all warnings printed on the sheet and on the equipment panels. System operating firmware The function of the Qu mixer is determined by the firmware (operating software) that runs it.
-
Page 4: Packed Contents
1. Packed contents Qu Mixer Qu-16/24/32 Guide AP10025 or Qu-Pac Guide AP9815 or Qu-SB Guide AP10287 Safety Sheet AP9240/CL-1 • • Read this before starting Mains lead Check this is correct for your territory Options and Accessories available Remote Audio Racks Provides remote audio over dSNAKE Cat5 cable digital snake. -
Page 5: Table Of Contents
2. Contents Packed contents ..........................4 Contents ............................5 Introduction............................7 Overview and Features ......................7 Qu Chrome Edition ......................... 7 System Architecture and Processing ..................8 Differences between the Qu models ..................10 Connection Overview ........................13 Local Input Connections ....................... 13 Local Output Connections .................... - Page 6 10.8 The FX ........................... 55 10.9 Working with FX – Adding vocal reverb: ................57 10.10 Scene Memories ........................58 Touch Screen Setup Functions ..................... 61 11.1 Audio Setup - PAFL ....................... 61 11.2 Audio Setup - Talkback ......................62 11.3 Audio Setup –Signal Generator ....................
-
Page 7: Introduction
3. Introduction 3.1 Overview and Features Building on the heritage of the GLD and flagship iLive digital consoles, the Qu presents exceptional performance together with an intuitive analogue style user interface with a motorised fader per channel, knobs and touch screen, total recall of all settings, full input, output and FX processing, USB streaming and hard drive multitrack recording, digital snake capability and remote wireless control using an iPad. -
Page 8: System Architecture And Processing
3.3 System Architecture and Processing The following diagrams show the Qu-16, Qu-24, Qu-32, Qu-SB and Qu-Pac I/O (inputs and outputs), audio architecture and processing available. The difference between the models and the routing capability of each processing section is illustrated. Refer also to the more detailed System Block Diagrams at the rear of this guide. - Page 9 SIGNAL FLOW Cat5 Digital Snake to AudioRack and ME Personal Monitor System CH17-32, Group and MTX Outputs Remote access to any Input/Output including: dSNAKE Mic/Line Inputs Line Inputs Line Outputs AES Out Qu-Drive 1 ------ 16 2Trk Alt Out Playback Record Mix 1-----------10 Stereo, 18 trk...
-
Page 10: Differences Between The Qu Models
3.4 Differences between the Qu models All four models operate in the same way and have a similar touch screen menu structure. The larger models add Groups and Matrix. Other differences are shown here: Qu-16 Qu-24 4 SoftKeys Shelf for iPad 2 Group masters 2 Matrix masters 10 SoftKeys... - Page 11 Qu-Pac Qu-Pac is the mix engine of the Qu-32 in a compact rack mountable format. It has the same local connections as the Qu-16 and can be expanded to use the additional Qu-32 channels and outputs by adding dSNAKE AudioRacks. It does not have faders, however all channels and functions can be controlled directly from the front panel using its touch screen.
- Page 12 Qu-16 16 Mic/Line Qu-24 24 Mic/Line in 24 out, 22 in USB audio streaming 32 out, 30 in USB audio streaming 4 Group out Matrix out Qu-32 32 Mic/Line in 32 out, 32 in USB audio streaming 8 Group out Matrix out Qu-SB Qu-Pac...
-
Page 13: Connection Overview
4. Connection Overview The following connections are available on the rear panel of the Qu mixer. The Qu-16 is shown here. 2-Trk and Alt out AES digital out (not Qu-SB) (not Qu-SB) Lamp (not Qu-SB) LR main out Analogue Mix outputs Mic and Line inputs Talkback Mic in (not... -
Page 14: Local Output Connections
4.2 Local Output Connections Group, Mix, Matrix outputs – Balanced XLR line level outputs for the mono and stereo mixes, for example to feed monitor amplifiers, external processing devices, delay fill speaker systems and recording devices. These use low impedance, high quality differential driver circuits for connection to +4 or 0dBu equipment. -
Page 15: Powering Up The Mixer
4.4 Powering up the mixer The Qu mixer has an internal universal voltage power supply unit. This means you can use your mixer in most parts of the world without the need to modify the unit as long the local mains supply is within the range: Mains Voltage = 100 to 240 V.AC... -
Page 16: Connecting Dsnake Remote Audio
5. Connecting dSNAKE Remote Audio The Qu mixer provides local sockets on its rear panel for all audio inputs and outputs. It can also work with remote audio by connecting over a single cable ‘digital snake’ to an Allen & Heath AudioRack, or to the Allen &... - Page 17 Available AudioRacks: AB168 16 Mic/Line in, 8 Line out - Floor, shelf or rack mount The AB168 AudioRack can be used as a stage box on the floor or a surface, or mounted in a 19” rack using the optional rack ears. EXPANDER –...
-
Page 18: Qu Systems
5.2 Qu Systems The Qu mixer has sockets for all its inputs and outputs on its rear panel and can therefore be used without any additional rack. However, if you wish to use a digital snake to connect remote stage audio to the mixer using a single Cat5 cable then there are several rack options available. - Page 19 Qu-32 Qu-32+AR84 – 8 remote inputs. Qu-32+AR2412 – Access to 24 – All inputs and outputs Provides 4 outputs mic inputs near the stage. are available locally. Qu-32 Qu-32 Qu-32 dSNAKE dSNAKE Qu-Pac Qu-SB – CH1-24 Out1-12 Same engine as Qu-32 but have CH1-8 Out1-4 16 inputs available locally.
-
Page 20: The Me Personal Mixing System
5.3 The ME Personal Mixing System The Allen & Heath ME Personal Mixing System can be used with the Qu mixer. This provides customisable personal monitor control for individual musicians and performers on stage. ME-1 personal mixer – A compact personal mixer able to work with up to 40 channels. -
Page 21: Qu-16, 24, 32 Operational Overview
6. Qu-16, 24, 32 Operational Overview This section provides an overview of the Qu fader mixer layout and operation to help you get started quickly. The Qu-16 mixer is shown here. Similar applies to the Qu-24 and Qu-32. Touch Screen Screen select TouchChannel SuperStrip... - Page 22 Mute key – Press to turn off the channel audio signal. This affects the send to all mixes including LR, groups, effects and stage monitors. The key lights red when muted. It flashes when muted by a Mute or DCA Group master. Sel key (select) –...
-
Page 23: The Master Strip
6.2 The Master Strip Qu provides a dedicated fader strip for the Mix Masters. It presents the fader and controls for the mix currently selected using the keys alongside. The sends to the selected mix are presented on the channel faders. They move to show the current settings. This provides a very quick way to access each mix without the need to switch to the Masters layer. -
Page 24: Working With The Sends On Faders
6.3 Working with the sends on faders: Select a Mix - Press a key. The master strip presents the mix fader and controls. The channel faders move to present Qu-16 the sends to that mix. Adjust Send levels – For Mix and FX sends. Move the channel faders. -
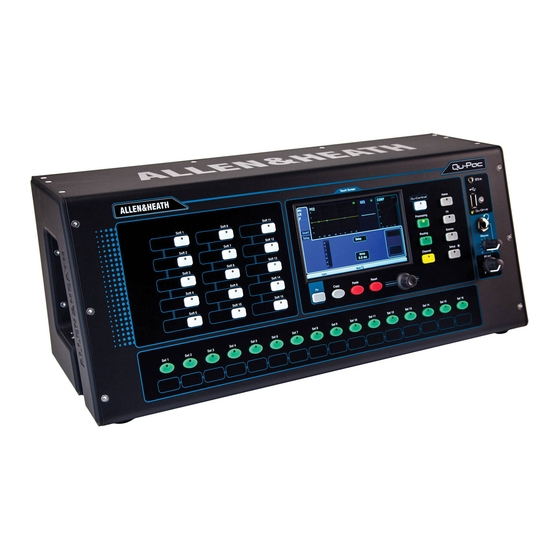
Page 25: Qu-Pac Operational Overview
7. Qu-Pac Operational Overview This section provides an overview of the Qu-Pac faderless mixer layout and operation to help you get started quickly. SoftKeys Touch Screen Live mixing screens System screens ST3 Input Qu-Drive USB Phones Alt Out Channel screen Channel select Virtual fader strip Mix select... - Page 26 System screens - These screens provide access to the mixer setup, Qu-Drive recording and memories: Home – Pages of housekeeping functions including safe Shut Down, Lock Surface, change and set up User Profile, view Meters and RTA, and work with Qu-Drive stereo and multitrack recording and playback.
-
Page 27: Note On Qu-Sb
8. Note on Qu-SB Please refer to the Qu-SB Getting Started Guide AP10287 for an operational overview of the mixer. The guide can be downloaded from the Allen & Heath website. The following chapters reference the Qu-16, Qu-24, Qu-32 and Qu-Pac Touchscreens. -
Page 28: Channel Processing
9.2 Channel Processing The SuperStrip provides familiar, analogue feel, one function per knob control of channel and mix master processing such as equalisers and dynamics. The Touch Screen displays the parameter values and provides additional related controls while in the Processing screen. - Page 29 Preamp An analogue preamplifier (‘head amp’) matches each connected microphone or line signal to the operating level of the console before it gets converted to digital to be processed and mixed with the other channels. Source lets you choose one of four sources as the input to the channel.
- Page 30 The panel USB Select key in the SuperStrip switches between the current Preamp source (Local or dSNAKE) and the current USB source (Qu-Drive or USB B). This key is not available on Qu-Pac. Phantom Power Turn on 48V if the connected device requires phantom power, for example a condenser microphone or active DI box.
- Page 31 Ducker Touch Ducker Setup to open the settings page: Single – Single channel ducking. The trigger and settings apply to just this channel. Gang – Multiple channel ducking. The same trigger and settings apply to all channels set to Gang mode. ...
- Page 32 Gate The Noise Gate can be switched in to dynamically turn off the audio when it drops below a certain level. For example, to reduce resonant decay of a kick drum or floor tom, or hiss of a noisy keyboard. Use the In key or screen button to switch the Gate in or out.
- Page 33 Compressor The Compressor is a powerful tool for controlling the dynamics of the sound, for example to smooth out a bass guitar or to narrow the dynamic range of a vocal to make it more intelligible in a busy mix. At its extreme setting the compressor can be used as a limiter to prevent the signal exceeding a preset maximum level.
- Page 34 Insert switches an internal FX in or out if one has been Group (not available on Qu-16) patched into the mix. The button is disabled when the insert is not patched. The FX is inserted at the start of the processing before the EQ. Use the FX / Back panel screen to choose and assign...
-
Page 35: Processing Libraries
9.5 Processing Libraries Processing block settings can be stored as Libraries: Gate Comp Channel (Preamp, Gate, PEQ, Comp, Delay) You can store up to 128 library items including all types. Press the key on the related Processing screen to open the... -
Page 36: List Of Factory Libraries
9.6 List of Factory Libraries :Bell Flat - 4 bell @ 0.5 octave Channel :Mic Vocal or instrument mic :Shelf Flat - Shelving LF and HF :Line Line level source Banjo Banjo pickup or mic :DI 48V With 48V on for DI box Bass:A Acoustic (upright) bass Bass:A... -
Page 37: Channel Routing
9.7 Channel Routing The Touch Screen presents tabs to access a CH or ST channel routing assignments and send levels when its fader strip key is selected and the Touch Screen Routing screen is active. The SuperStrip Pan control provides quick access to the related mix pan setting for the channel. The key is used to access the Mute and DCA Group masters while in any Routing screen. - Page 38 Channel Direct Output settings Adjust the channel Direct Output Trim from off to +10dB gain. The default setting is 0dB. Choose the channel source for the Direct Outputs using the drop-down menu. Choose whether the outputs are affected by the faders and/or mutes. These are global settings affecting all channels.
- Page 39 Channel Grp Sends screen The Qu-24 includes two stereo Group mixes, and the Qu-32, Qu-SB and Qu-Pac have four. Groups are not available on the Qu-16. Firmware V1.8 introduced Group Mix Mode. You can choose each Group to be either an audio group or a stereo mix.
-
Page 40: Mix Routing
9.9 Mix Routing The Touch Screen presents tabs to access the Mix master routing assignments and send levels when its fader strip key is selected and the Touch Screen Routing screen is active. The key is used to access the Mute and DCA Group masters while in any Routing screen. Assign all channels on or off to a mix, or Select a mix master key while the... -
Page 41: Audio Groups
9.11 Audio Groups The Qu-24 provides two stereo audio groups in addition to the 10 mixes. Qu-32, Qu-SB and Qu-Pac provide 4 stereo groups. Groups are not available on the Qu-16. Firmware V1.8 introduced Group Mix Mode. Groups can be configured as conventional stereo audio sub-groups or as additional stereo mixes. -
Page 42: Working With The Groups (Qu-24, Qu-32, Qu-Sb, Qu-Pac)
9.12 Working with the Groups (Qu-24, Qu-32, Qu-SB, Qu-Pac) Choose whether you want the Group to operate as an audio group or a stereo mix. Go to the Grp master Routing screen. Changing mode resets the associated parameters. Audio Group (default) CH (mono) and ST (stereo) input channels and FX returns can be routed to groups. -
Page 43: Mute And Dca Groups
9.13 Mute and DCA Groups The Qu mixer provides 4 Mute Groups and 4 DCA Groups. These let you control the levels of groups of channels or mixes. Mute Group – Provides a single master Mute key to mute or unmute all channels assigned to the group. -
Page 44: Using Mute Groups
To assign Mute Groups - Select the Mute Group Assign tab, then touch the tab for the Mute Group you wish to assign. To assign DCA Groups - Select the DCA Group Assign tab, then touch the tab for the DCA Group you wish to assign. -
Page 45: Using Dca Groups
9.15 Using DCA Groups There are 6 ways to access the DCA Groups: 1. All Qu mixers provide DCA master controls in the Routing screen Mute/DCA view Masters tab. Press key to open this view. Touch a Mute button to mute or unmute a DCA group. Touch a DCA Level box and use the screen rotary to adjust its level. -
Page 46: Touch Screen Mixing Functions
10.Touch Screen Mixing Functions All Qu mixers with the exception of Qu-SB feature an 800x480 pixel, colour touch screen for quick and intuitive setup and control of the mix. The Qu-16, Qu-24 and Qu-Pac have 5” screens. The Qu-32 has a larger 7”... - Page 47 Status Bar – This lower screen toolbar shows useful system information and is always visible. key function - for example to show that the key is available to select a Library or Options page. Scene information – Shows the number and name of the current (Curr:) and next (Next:) scenes.
-
Page 48: Copy, Paste, Reset Keys
10.1 Copy, Paste, Reset keys You can copy, paste and reset blocks of processing, mix parameters or scenes and their filters. Copy – While holding down the Copy key, press or touch the item you wish to copy. Next, while holding down the Paste key, press or touch the destination you wish to copy to. -
Page 49: The Sel Screens - Processing And Routing
10.2 screens – Processing and Routing Processing Screen – When selected this screen presents the processing including Preamp, Gate, EQ, Compressor for the channel or master currently selected using its strip key. Touch the top part of the screen to select the processing block you wish to view or adjust, for example Preamp or PEQ. -
Page 50: Home Screen - User
10.4 Home Screen – User Three User Profiles are available to protect selected functions and restrict user access, for example for volunteer operators in houses of worship, or guest engineers visiting venues. The Admin user has access to all functions and can set permissions and allocate passwords if required for the other users. You can log in as one of 3 Users with different permissions: ... -
Page 51: Home Screen - Meters
10.5 Home Screen – Meters This screen provides a convenient view of all channel, mix and FX signal activity. For optimum performance the loudest signals should read into the yellow. If any red Peak meter flashes then reduce the level of that signal to avoid possible distortion. -
Page 52: Home Screen - Qu-Drive (Usb Audio)
10.7 Home Screen – Qu-Drive (USB audio) This opens screens associated with the USB stereo and multitrack recording: Qu-Drive audio recording and multitrack playback require the USB storage device to support high sustained transfer rates. Not all USB devices will ... - Page 53 Stereo Playback – You can play back audio files from a USB storage device plugged into Qu-Drive: Format = 44.1 or 48kHz, 16 or 24-bit, WAV file Use the USB device with the Qu mixer only. Do not use it for other applications.
- Page 54 Multitrack Record – You can record to a USB storage device plugged into Qu-Drive: 18 Tracks = Individually patchable sources Record format = 48kHz, 24-bit, WAV file Data rate = 144 KB/sec per track (max 4GB total) ...
-
Page 55: The Fx
10.8 The FX Qu features 4 internal stereo FX (effects) processors. Each can be loaded from a library of different effects types and presets. These are the same as found in the flagship Allen & Heath iLive digital mix system and are based on emulations of popular industry standard effects. - Page 56 Symphonic Chorus - A faithful emulation of the 80’s classic chorus effect. Simple to use and frequently requested. The unit has just two controls, Frequency and Depth controlling the rate and delay range of the stereo modulator. The unit produces a rich, lively and wide chorus sound with a suggestion of very mild phasing / flanging.
-
Page 57: Working With Fx - Adding Vocal Reverb
10.9 Working with FX – Adding vocal reverb: Press the FX key to open the screen. Touch to select FX1. Press the key to open the Library page. Touch ‘Factory’. Recall a Reverb into the FX1 slot if one is not already loaded. Open the Back Panel view and check that FX1 is set for Mix>Return with FX1 as its input. -
Page 58: Scene Memories
10.10 Scene Memories Qu provides 100 Scene memories. These store and recall a snapshot of all live mixing parameters. Scenes have many applications. They can be used to store settings for bands during sound check for recall before they take to the stage during the show. Scenes can also be used for cue recall during theatre shows, or to provide a known starting point for different events or users in a multi-purpose venue. - Page 59 Scene contents A Scene stores the following: A Scene is a ‘snapshot’ of the Qu mixer settings. It Preamp settings stores the current layout and patch, and parameters Channel processing and linking associated with live mixing. It does not store user ...
- Page 60 The Filter screen Filter parameters: A Recall Filter protects one or more parameter types for all channels. Inputs/FX (All CH, ST, FX Ret, Groups) A scene stores all live mixing parameters. A Recall Input patch (Local, dSNAKE, USB) Filter can be set to protect (block) chosen ...
-
Page 61: Touch Screen Setup Functions
11. Touch Screen Setup Functions Press the Setup key next to the Touch Screen to open the Setup screens. Touch the top tabs to access the different categories of setup function. Touch the tabs below to open up the related options available. Dimmer –... -
Page 62: Audio Setup - Talkback
11.2 Audio Setup - Talkback Set up and assign Talkback to talk to the musicians via their monitors, or make announcements via the house (PA) mix: HPF – Dial in the High Pass Filter to remove low frequency pops and resonance while talking. Factory default is 120Hz. -
Page 63: Audio Setup - Automatic Mic Mixer (Amm)
11.4 Audio Setup - Automatic Mic Mixer (AMM) An Automatic Mic Mixer provides automatic level control of multiple microphones for spoken word applications, for example conferences and discussion panels involving several participants each with their own mic around a table. This improves intelligibility and can reduce the risk of feedback by dynamically reducing the levels of mics which are not being spoken into. - Page 64 AMM In/Out – You can switch the Gain activity meter block – These level meters give you a real time AMM in or out to hear its effect on overview of the AMM gain distribution for all 16 channels. They light the mix.
-
Page 65: Working With The Amm
11.5 Working with the AMM Set up and position the microphones - It is best to use the same type of microphone and position them so that the speaking participants are not too close or too far from each mic. To avoid false triggering and phasing set the distance from each voice to mic to be closer than the distance between the mics. -
Page 66: Control Setup - Custom Layer
11.6 Control Setup – Custom Layer The Qu-16, Qu-24 and Qu-32 mixers provide a custom fader layer. The Qu-Pac does not have faders and provides a custom Select key layer (see below). The Custom Layer can have any combination of channel, FX, master and MIDI strips assigned to its faders. -
Page 67: Control Setup - Softkeys
11.7 Control Setup - SoftKeys Qu-16 provides 4 SoftKeys. The Qu-24 and Qu-32 Qu-24 shown provide 10. Qu-Pac provides 15. These are called ‘Soft’ because they can be assigned to different functions by the user. Function – Touch the box to open and choose from the list of available functions. -
Page 68: Control Setup - Network
11.8 Control Setup - Network Use this screen set the TCP/IP address for the Network port and the name used to identify the Qu mixer on the network. It is important that the network address is compatible with the addresses of equipment connected to the port, for example a laptop providing MIDI control of mixer parameters, or a wireless router providing remote control using the Qu-Pad iPad app. -
Page 69: Control Setup - Preferences
11.10 Control Setup - Preferences This screen presents user preferences for the control surface. Set these according to how you prefer to work. These settings are stored with Show files. They are not stored in Scenes. PEQ Graph Fill – When turned On, the processing screen PEQ graph displays a colour fill. -
Page 70: Usb Data - Scene Transfer
11.11 USB Data – Scene Transfer Individual Scenes can be transferred between Qu mixers via a USB device (key or drive) plugged into the Qu-Drive port. This provides a quick way to transfer settings without overwriting the current scenes and preferences. -
Page 71: Usb Data - Show Transfer
11.13 USB Data – Show transfer Qu mixer settings can be stored to a USB device (key or drive) plugged into the Qu-Drive port. Data can be archived to computer and transferred between Qu mixers. A ‘Show’ stores all the Qu mixer settings and memories. -
Page 72: I/O Patch Setup - Surface
11.14 I/O Patch Setup – Surface Use this screen to patch signals to the rear panel Alt Out and AES outputs. Touch a box to open up the list of available options. Changes are applied instantly. You can also touch outside the list to exit. -
Page 73: I/O Patch Setup - Dsnake Out
11.16 I/O Patch Setup – dSNAKE Out This screen presents the patching for the dSNAKE remote audio outputs. These outputs can be mapped from any combination of Qu mixer output sources. The Qu mixer detects which AudioRack type is connected. A Qu system can have up to two AudioRacks connected. -
Page 74: I/O Patch Setup - Monitor
11.17 I/O Patch Setup - Monitor This screen presents the patching of the dSNAKE remote monitor audio outputs. This allows the Qu mixer to work with the Allen & Heath ME Personal Monitor mixing system. A ME-1 mixer or ME-U distribution hub can be plugged into any of these sockets: ... -
Page 75: I/O Patch Setup - Usb Audio
11.18 I/O Patch Setup – USB Audio This screen presents the patching of the USB audio outputs. This includes the Qu-Drive Stereo, Qu-Drive Multitrack and the USB B audio streaming. The Qu-16 provides 24 patchable USB outputs. The Qu-24, Qu-32, Qu-SB and Qu-Pac provide 32 USB outputs. -
Page 76: Utility - Calibration
11.19 Utility - Calibration Use the routines here to calibrate the touch accuracy of the Touch Screen and positional accuracy of the Motor Faders. Follow the on-screen instructions. 11.20 Utility – Qu-Drive This screen lets you check and format a USB device (key or hard drive) for use with Qu-Drive. -
Page 77: Utility - Firmware Update
11.21 Utility – Firmware Update The Qu mixer operating firmware can be easily updated using a USB device (key or drive). Make sure the USB device has been previously checked and formatted to work with the Qu mixer. If you need to format the device then use the Format facility in Setup / Utility / Qu-Drive screen. -
Page 78: Usb Audio Interface And Daw Control
12. USB Audio Interface and DAW Control The Qu mixer can stream audio and send MIDI messages to and from an Apple Mac or Windows ® ® computer via the rear panel USB B port. This lets you work with a DAW (Digital Audio Workstation) running on your computer. -
Page 79: Daw Control
Mac - Change this in the OS X preferences. Go to Utilities / Audio MIDI Setup / Audio Most DAWs allow flexible patching and routing of Devices, select the Qu mixer and click on Configure Speakers. Then assign stereo tracks to/from any interface I/O. -
Page 80: Qu-Pac Qu-Control Screen
13.Qu-Pac Qu-Control Screen Qu-Control is a custom assignable screen which lets you present just the few controls needed for basic operation. For example, to control background music source and level within a music bar. It can be associated with the Qu ‘Basic User’ with permissions set by the ‘Admin’ user so that only this screen is available for non-technical bar staff, for example to adjust the background music. -
Page 81: Ios Apps For Wireless Control
14. iOS Apps for Wireless Control Two Qu apps are available from the Apple Store: Qu-Pad - Engineer’s live mixing control Qu-You - Musician’s personal monitor control Qu-Control – Customisable app for install You can connect up to two iPads running Qu-Pad and up to 8 iPhones, iPads, iPod Touch or Android devices running Qu-You or Qu-Control. - Page 82 Setting up the Qu wireless network The app sends and receives control data over a wireless (Wi-Fi) network. This requires a wireless router (wireless access point) connected to the Qu mixer Network port. Control device Qu mixer Wireless router Qu Network port Cat5 cable Choosing a wireless router - For best performance we recommend you use a dual band (2.4 and 5GHz) wireless router (wireless access point) with auto channel selection.
-
Page 83: Resetting The Mixer
15.Resetting the Mixer There are two ways to reset the Qu settings: 15.1 Reset Mix Settings – A starting point for mixing This button in the Scenes screen resets the mixer to a known starting point for mixing. It provides a quick way to reset the processing, mixes and patching before a show or after another user has finished with it. -
Page 84: System Hard Reset
15.2 System Hard Reset A power up reset is available if you need to fully reset the Qu mixer settings and memories. This could be done to clear the system out before sending the mixer to a client, or if you suspect a system problem. To reset mix parameters before starting a show or sound check, use a Scene or the Reset Mix Settings function described earlier in this guide. -
Page 85: Specifications
16.Specifications 16.1 Installing Qu-16, Qu-24, Qu-32 The following provides information for mixer installation. The Qu mixer can be operated on a flat surface or fitted into a flightcase. The Qu-16 can be mounted in a 19” equipment rack or plinth. Ventilation - Make sure that air flow around the ventilation slots at the rear and underside of the mixer... -
Page 86: Installing Qu-Pac
16.2 Installing Qu-Pac Free Standing - For operating while on a desk, shelf or other flat surface. Make sure the 4 rubber feet are fitted. Allow space at the sides and rear for ventilation. The mixer can be transported in a purpose designed padded bag or flight case. -
Page 87: Installing Qu-Sb
16.3 Installing Qu-SB Free Standing - For operating while on a desk, shelf or other flat surface. Make sure the 4 rubber feet are fitted. Allow space at the sides and rear for ventilation. The mixer can be transported in a purpose designed padded bag or flight case. -
Page 88: Qu-16 System Block Diagram
16.4 Qu-16 System Block Diagram Qu Mixer Reference Guide AP9372 iss.9... -
Page 89: Qu-24 And Qu-32 System Block Diagram
16.5 Qu-24 and Qu-32 System Block Diagram Qu Mixer Reference Guide AP9372 iss.9... -
Page 90: Qu-Pac System Block Diagram
16.6 Qu-Pac System Block Diagram Qu Mixer Reference Guide AP9372 iss.9... -
Page 91: Qu-Sb System Block Diagram
16.7 Qu-SB System Block Diagram Qu Mixer Reference Guide AP9372 iss.9... -
Page 92: System Specifications
16.8 System Specifications Mic/Line Inputs Inputs Control Balanced, XLR and 1/4" TRS jack, fully recallable Faders Qu-16, 24, 32 100mm motorised Input Sensitivity (XLR / TRS) -60 to +5dBu / -50 to +15dBu Touch Screen Qu-16, 24, Pac 5" TFT, 800x480 resolution Analogue Gain -5 to +60dB, 1dB steps Touch Screen Qu-32...
Need help?
Do you have a question about the AP9815 and is the answer not in the manual?
Questions and answers