
Related Manuals for ALLEN & HEATH QU


Summary of Contents for ALLEN & HEATH QU
- Page 1 Getting Started Guide For Firmware Version V1.9 Before starting please check www.allen-heath.com for the latest Qu mixer firmware and documentation. Publication AP10025...
- Page 2 Any changes or modifications to the equipment not approved by Allen & Heath could void the compliance of the product and therefore the user’s authority to operate it. Qu Series products comply with the European Electromagnetic Compatibility directive 2004/108/EC and the European Low Voltage directive 2006/95/EC.
- Page 3 System operating firmware The function of the Qu mixer is determined by the firmware (operating software) that runs it. Firmware is updated regularly as new features are added and improvements made.
-
Page 4: Packed Contents
Part: LEDlampX Part: AB1608 Qu-16 polyester carry bag Part AP9931 19” Rack Ear Kit for Qu-16 To mount the Qu-16 in a standard 19” rack or flightcase. These fit over the plastic trims. Part: QU-16-RK19 Dust covers Cat5 cables AP9262 Qu-16... -
Page 5: Table Of Contents
10.2 System Hard Reset – Clear everything ................. 23 About this guide This is the Getting Started Guide for the Allen & Heath Qu-16, Qu-24 and Qu-32 digital mixers. For more information about Qu mixer setup and mixing functions please refer to the Qu Mixer Reference Guide available for download from the Allen &... -
Page 6: Introduction To The Qu Series
Qu-16 – Compact, rack mountable mixer with 16 mic and 3 stereo line input channels. Qu-24 – Larger model with 24 mic and 3 stereo inputs. Adds stereo Groups, Matrix and more SoftKeys. Qu-32 – Largest model with 32 mic and 3 stereo inputs. Adds 2 more stereo Groups. -
Page 7: Differences Between The Qu Models
3.1 Differences between the Qu models All Qu mixers operate in the same way and have a similar touch screen menu structure. The larger models add Groups and Matrix. Other differences are shown here: Qu-16 Qu-24 4 SoftKeys Shelf for iPad... - Page 8 The extra features of the bigger models will be ignored when their file is loaded on a Qu-16. The extra features of the bigger models will be reset to factory default when a Qu-16 file is loaded.
-
Page 9: Installation
4. Installation The Qu mixer can be operated on a flat surface or fitted into a flightcase. The Qu-16 can be mounted in a 19” equipment rack or plinth. The unique shape of the Qu aids heat management without the need for a fan. -
Page 10: Rear Panel
5. Rear Panel This shows the Qu-16 rear panel. The Qu-24 and Qu-32 are similar but include Group and Matrix outputs. AES digital out Alt out Lamp 2Trk out LR main out Analogue Mix outputs Mic and Line inputs Talkback... -
Page 11: Front Panel
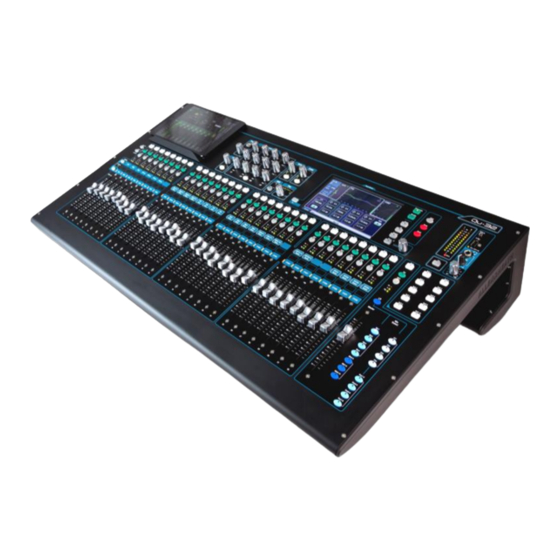
6. Front Panel This shows the Qu-16 front panel. The Qu-24 and Qu-32 are similar but include more fader strips, Group mix select keys, more SoftKeys and an iPad tray. Touch Screen Screen select TouchChannel SuperStrip Qu-Drive USB port Fader Flip Engineer’s monitor... -
Page 12: Audio Signal Processing
7. Audio Signal Processing The following diagrams illustrate the Qu signal flow and processing. The Qu-24 and Qu-32 include Group and Matrix mixes. All models include a built-in automatic mic mixer (AMM) for the first 16 channels. A more detailed diagram and further information is available within the Qu Mixer Reference Guide which can be downloaded from the Allen &... -
Page 13: Wireless Control
8. Wireless Control The Allen & Heath Qu-Pad, Qu-Control and Qu-You apps are available free from the Apple Store for iOS devices including iPad, iPhone and iPod Touch. Qu-You is also available for Android devices. Set up the Qu wireless network - For best performance use a dual band (2.4 and 5GHz) wireless... -
Page 14: Qu-Start
9. Qu-Start This section provides a quick guide to get you started setting up and mixing with Qu. For more information please refer to other sections in this guide and to the Qu Mixer Reference Guide available for download from www.allen-heath.com/key-series/qu-series. -
Page 15: Prepare The Mixer For Your Session
Set up the FX – Go to the screen to set up the 4 built-in FX units. The reset default sets up one reverb and a delay (Qu- 16), or two reverbs, a delay and an ADT effect (other Qu models). - Page 16 USB B streaming port. These share the same patch. USB streaming uses all 32 outputs (24 on Qu- 16). Qu-Drive recording is fed from the first 18 outputs. Qu- Drive stereo recording is fed from outputs 17-18.
-
Page 17: Set A Starting Point For Processing And Mix Parameters
CH2 PEQ only to CH3, 4 and 5: Copy+CH2 PEQ top of screen, then Paste+CH3, then CH4, then CH5 keys Qu-Pad app – You can also name channels, set channel linking and recall the Libraries using the Qu-Pad app. Qu Mixer Getting Started Guide AP10025 iss2... -
Page 18: Save The Settings
You can store up to 100 scenes within the Qu mixer. You can copy and clear existing scenes. To copy a scene hold down Copy key and touch a scene in the list. -
Page 19: Mixing With Qu-16, Qu-24 And Qu-32
9.6 Mixing with Qu-16, Qu-24 and Qu-32 Press a green key to work with channel processing Press the Processing key and touch the top part of and pan using the SuperStrip controls. Press Fader Flip the screen to access preamp and processing to work with the mix GEQ using the faders. -
Page 20: Security And User Access
Custom Layer only. Passwords can be set for each of these three users. These are required at login and surface lock. The Qu-Pad app follows the same User Permissions. Admin can set a separate password for Qu-You and Qu-Control users. -
Page 21: Usb Recording And Playback
USB’ document in the Qu Knowledgebase on the Allen & Heath web site. Use the USB storage device with the Qu mixer only. Do not use it for other applications. Format the USB device on the Qu mixer before recording... -
Page 22: A Few More Functions
Refer to the Qu Mixer Reference Guide for more about how the AMM works and can be used. Ringing out the monitors – The Qu-Pad app gives you the... -
Page 23: Resetting The Mixer
10.Resetting the Mixer There are two ways to reset the Qu settings to give you a known starting point: 10.1 Reset Mix Settings – A starting point for mixing This button in the Scenes screen instantly resets the mixer to a known starting point for mixing. It provides a quick way to reset the processing, mixes and patching before a show or after another user has finished with it. - Page 24 Qu Mixer Getting Started Guide AP10025 iss2...
Need help?
Do you have a question about the QU and is the answer not in the manual?
Questions and answers