Advertisement

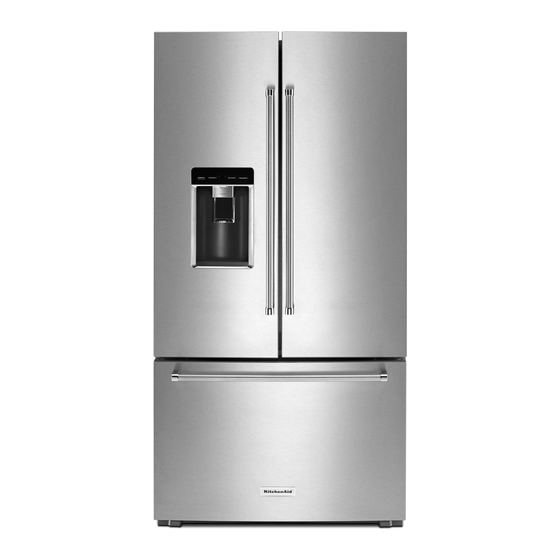
French Door Refrigerator
Réfrigérateur à porte à double battant
User Guide
Guide de l'utilisateur
THANK YOU for purchasing this high-quality product. Register your new refrigerator at www.kitchenaid.com.
In Canada, register your refrigerator at www.kitchenaid.ca.
For future reference, please make a note of your product model and serial numbers.
These can be located on the inside wall of the refrigerator compartment.
Nous vous REMERCIONS d'avoir acheté ce produit de haute qualité. Enregistrer votre nouveau réfrigérateur
sur le site internet www.kitchenaid.ca.
Pour référence ultérieure, consigner par écrit les numéros de modèle et de série de votre produit.
Ceux-ci sont situés sur la paroi interne du compartiment de réfrigération.
Model Number/Numéro de modèle____________________________ Serial Number/Numéro de série ___________________________
Para obtener acceso a "Instrucciones para el usuario del refrigerador" en español, o para obtener información adicional acerca de
su producto, visite: www.kitchenaid.com.
Necesitará su número de modelo y de serie, ubicado en el interior del compartimiento del refrigerador.
W10815169D

Advertisement

Table of Contents
loading

Summary of Contents for KitchenAid KRFC704FSS01

  • Page 1 Réfrigérateur à porte à double battant User Guide Guide de l’utilisateur THANK YOU for purchasing this high-quality product. Register your new refrigerator at www.kitchenaid.com. In Canada, register your refrigerator at www.kitchenaid.ca. For future reference, please make a note of your product model and serial numbers.
  • Page 2: Table Of Contents

    TABLE OF CONTENTS/TABLE DES MATIÈRES REFRIGERATOR SAFETY ..............3 SÉCURITÉ DU RÉFRIGÉRATEUR..........39 PARTS AND FEATURES ..............4 PIÈCES ET CARACTÉRISTIQUES ..........40 What’s New Behind the Doors? ...........5 Quoi de neuf en coulisse? ............41 GETTING STARTED ...............6 MISE EN PLACE ................42 INSTALLATION INSTRUCTIONS ...........8 INSTRUCTIONS D’INSTALLATION ..........44 Unpack the Refrigerator ...............8 Déballage du réfrigérateur............44...
  • Page 3: Refrigerator Safety

    REFRIGERATOR SAFETY Your safety and the safety of others are very important. We have provided many important safety messages in this manual and on your appliance. Always read and obey all safety messages. This is the safety alert symbol. This symbol alerts you to potential hazards that can kill or hurt you and others. All safety messages will follow the safety alert symbol and either the word “DANGER”...
  • Page 4: Parts And Features

    Proper Disposal of Your Old Refrigerator WARNING Suffocation Hazard Remove doors from your old refrigerator. Failure to do so can result in death or brain damage. IMPORTANT: Child entrapment and suffocation are not problems of the past. Junked or abandoned refrigerators are still dangerous—even if they will sit for “just a few days.”...
  • Page 5: What's New Behind The Doors

    What’s New Behind the Doors? Your KitchenAid French door bottom-mount refrigerator comes equipped ® with various innovative storage and energy efficient features. Energy and Normal Operating Sounds Removable Door Bins Your new French door bottom-mount refrigerator has been Door bins that can be easily removed from the metal finish base...
  • Page 6: Getting Started

    Fingerprint-Resistant Steel and Black Stainless Steel Power Outage Indicator (on some models) If the power should go out while you are away from home, this indicator will let you know that the refrigerator has been without A specialized coating for stainless steel that resists smudges, power.
  • Page 7 DOOR ALIGNMENT Tools Required Shelf Height Adjustment Shelf height can be adjusted by changing the adjustable shelf Depending on the width of the door opening, the following tools mounts between their vertical and horizontal positions. may be required to remove, replace, and align the refrigerator Carefully lift the shelf off the shelf mounts and turn the flipper doors.
  • Page 8: Installation Instructions

    INSTALLATION INSTRUCTIONS Unpack the Refrigerator Location Requirements WARNING WARNING Excessive Weight Hazard Use two or more people to move and install refrigerator. Failure to do so can result in back or other injury. Explosion Hazard Refrigerator Delivery Keep flammable materials and vapors, such as gasoline, away from refrigerator.
  • Page 9: Remove And Replace Refrigerator Doors

    Remove and Replace Refrigerator Doors NOTE: Measure the width of your door opening to see whether or not you need to remove the refrigerator doors to move the refrigerator into your home. If door removal is necessary, see the following instructions. IMPORTANT: If the refrigerator was previously installed and you are moving it out of the home, before you begin, turn the refrigerator control off.
  • Page 10 WARNING Excessive Weight Hazard Use two or more people to move and install refrigerator. Failure to do so can result in back or other injury. Bottom Door Hinge For your convenience, the refrigerator doors have bottom hinges A. Hinge base parallel to the bottom edge of the door with door closers.
  • Page 11 3. Disconnect the wiring plug located on top of the door hinge. A. Top hinge cover screw C. TORX T25 screws Grasp each side of the wiring plug. With your left thumb, ■ B. Top hinge cover D. Top hinge press down to release the catch and pull the sections of the plug apart.
  • Page 12: Remove And Replace Freezer Drawer Fronts

    Replace Drawer Front Replace Right-Hand Refrigerator Door 1. Pull out the freezer drawer glides to their full extension. 1. Set the right-hand door onto the bottom hinge pin. 2. Holding the drawer front by its sides, align the top screws, located at the bottom inside of the drawer front, with the 2.
  • Page 13: Electrical Requirements

    Allow the storage tank on the reverse osmosis system to refill ■ Electrical Requirements after heavy use. The tank capacity could be too small to keep up with the requirements of the refrigerator. NOTE: Faucet-mounted reverse osmosis systems are WARNING not recommended.
  • Page 14 A. Sleeve C. Copper tubing (to refrigerator) B. Nut D. Household supply line (1/2" [12.7 mm] minimum) A. Copper tubing C. Compression nut B. “P” clamp D. Compression sleeve 3. Turn on water supply to refrigerator and check for leaks. 4.
  • Page 15: Handle Installation And Removal

    5. Using a clockwise motion, tighten the setscrew just until it Handle Installation and Removal begins to contact the shoulder screw. Do not fully tighten. 6. Repeat steps 4 and 5 to fasten the lower setscrew. Parts Included: refrigerator door handles (2), refrigerated drawer 7.
  • Page 16: Refrigerator Leveling And Door Closing

    3. Move the refrigerator to its final location. 4. Using the ⁄ " hex driver, lower the brake feet. Turn them Remove the Handles clockwise until the rollers are off the floor and both brake feet are snug against the floor. This keeps the refrigerator from 1.
  • Page 17: Filters And Accessories

    4. Remove the water filter cap from the water filter. FILTERS AND ACCESSORIES Water Filtration System Do not use with water that is microbiologically unsafe or of unknown quality without adequate disinfection before or after the system. Systems certified for cyst reduction may be used on disinfected waters that may contain filterable cysts.
  • Page 18: Install Air Filter

    The Water Filter Status Light Replacing the Air Filter The water filter status lights will help you know when to change The disposable air filter should be replaced every 6 months. your water filter. To order a replacement air filter, contact us. See “Accessories” section in the User Guide for information on ordering.
  • Page 19: Accessories

    Accessories The following accessories are available for your refrigerator. To order an accessory, contact us and ask for the part number. In the U.S.A., visit our website www.kitchenaid.com or call 1-800-422-1230. In Canada, visit our webpage www.kitchenaid.ca or call 1-800-807-6777.
  • Page 20: Using The Controls

    Using the Controls View Temperature Set Points The Temperature Control UI is located above the external dispenser and on the side of the left refrigerator door. 1. Touch [—]/[+] for Refrigerator or [—]/[+] for Freezer and toggle through temperature set points. NOTE: To view temperature in degrees Celsius, touch and hold the [°F/°C] button for 3 seconds and the temperature display will change.
  • Page 21: External Dispenser Controls

    Max Cool Sound On/Off The Sound button allows the customer to turn the sound on The Max Cool feature assists with periods of high refrigerator use, full grocery loads, or temporarily warm room temperatures. and off. To turn on the Max Cool feature, press the Max Cool button. To turn on the Sound feature, press the Sound button.
  • Page 22: Lighting The Refrigerator

    2. Release the dispenser paddle for 5 seconds. Repeat steps Additional Features 1 and 2 until water begins to flow. 3. Once water begins to flow, continue depressing and releasing Door Ajar Alarm the dispenser pad (5 seconds on, 5 seconds off) until a total The Door Ajar Alarm feature sounds an alarm when the of 3 gal (12 L) has been dispensed.
  • Page 23 To Dispense Water — Measured Fill: Save Favorite Fill Measured Fill allows you to dispense a specified amount of water with the touch of a few buttons. Household water pressure may affect the accuracy of the 1. Put a sturdy glass under waterspout. Touch MEASURED FILL Favorite Fill feature.
  • Page 24 3. Touch DISPENSE WATER (center button) or press paddle and WARNING the selected amount of water will be dispensed. NOTES: The Favorite Fill dispenser will automatically time out after ■ 1 minute of inactivity. You can refill several glasses with the same measurement by ■...
  • Page 25: Ice Maker And Storage Bin

    Touch and hold CUBED ICE for 3 seconds to unlock the ■ dispenser. The display screen indicates when the dispenser is locked. ■ Ice Maker and Storage Bin IMPORTANT: To avoid low ice production and poor quality ice, flush the water system before turning on the ice maker. See “Water Dispenser”...
  • Page 26 3. Apply pressure to the top of the shelf to ensure the shelf is Wine Rack and/or Under Shelf Storage Pan properly seated on the shelf mounts. Under one shelf, there are brackets installed to the supports (one bracket on each support). The wine rack or under-shelf storage rests in these brackets.
  • Page 27 To replace crisper(s) cover(s): 3. Replace the tray by placing it on the bottom tray guide and pushing it past the tray stop into position. 1. Remove the crisper pan, platter pocket, and crisper glass before removing the crisper. 2. Fit back of cover frame into supports on side walls of the refrigerator and lower the front of the cover frame into place.
  • Page 28: Freezer Drawers

    Audio Reference Freezer Drawers Tone Assignment Small Items Bin (on some models) POWER ON Cooling system is turned on every time This drawer divider is not removable and is for small, delicate the product is powered on. items. For storage flexibility, the drawer bin can move forward and back, allowing you to store larger items in one section of POWER OFF Cooling system is turned off.
  • Page 29: Refrigerator Care

    DO USE DO NOT USE REFRIGERATOR CARE ✔ Soft, clean cloth ✘ Abrasive cloths ✘ Paper towels or newsprint Cleaning ✘ Steel-wool pads ✔ Warm, soapy water with a ✘ Abrasive powders or liquids mild detergent WARNING ✘ Ammonia ✘ Citrus-based cleaners ✘...
  • Page 30: Lights

    NOTE: Put refrigerator in Showroom Mode while on Vacation. IMPORTANT: Refrigerator shelves with under-shelf, LED lighting See “Using the Controls” section. are not dishwasher safe. 1. Remove all food from the refrigerator. 1. Unplug refrigerator or disconnect power. 2. If your refrigerator has an automatic ice maker: 2.
  • Page 31: Troubleshooting

    TROUBLESHOOTING First try the solutions suggested here. If you need further assistance or more recommendations that may help you avoid a service call, refer to the warranty page in this manual, visit www.kitchenaid.custhelp.com or call 1-800-253-1301. In Canada, visit www.kitchenaid.ca.
  • Page 32 TROUBLESHOOTING First try the solutions suggested here or visit our website at www.kitchenaid.custhelp.com. If you experience Possible Causes Solution The motor seems to run The door(s) are opened too frequently Warm air entering the refrigerator causes it to run more. Open too much.
  • Page 33 TROUBLESHOOTING First try the solutions suggested here or visit our website at www.kitchenaid.custhelp.com. If you experience Possible Causes Solution Unusual Noise (cont.) Creaking/Cracking/ May be heard as ice is being ejected This is normal. Grinding from the ice maker mold.
  • Page 34 TROUBLESHOOTING First try the solutions suggested here or visit our website at www.kitchenaid.custhelp.com. If you experience Possible Causes Solution Ice and Water (cont.) The ice maker is not An ice cube is jammed in the ice Remove ice from ice maker with a plastic utensil.
  • Page 35 TROUBLESHOOTING First try the solutions suggested here or visit our website at www.kitchenaid.custhelp.com. If you experience Possible Causes Solution Ice and Water (cont.) The water and ice A reverse osmosis water filtration A reverse osmosis water filtration system can decrease water...
  • Page 36 TROUBLESHOOTING First try the solutions suggested here or visit our website at www.kitchenaid.custhelp.com. If you experience Possible Causes Solution Water from the dispenser Water from the dispenser is chilled to This is normal. is warm. 50°F (10°C). The refrigerator has just been Allow 24 hours after installation for the water supply to cool installed.
  • Page 37: Performance Data Sheet

    PERFORMANCE DATA SHEET PERFORMANCE DATA SHEET Water Filtration System Model P9WB2L/P9RFWB2L Capacity 200 Gallons (757 Liters) System tested and certified by NSF International against NSF/ANSI Standard 42, Standard 53, Standard 401, and CSA B483.1 for the reduction of contaminants specified on the Performance Data Sheet.
  • Page 38: Warranty

    DISCLAIMER OF REPRESENTATIONS OUTSIDE OF WARRANTY KitchenAid makes no representations about the quality, durability, or need for service or repair of this major appliance other than the representations contained in this warranty. If you want a longer or more comprehensive warranty than the limited warranty that comes with this major appliance, you should ask KitchenAid or your retailer about buying an extended warranty.

This manual is also suitable for:

Krfc704fss00

Table of Contents