Table of Contents
Advertisement
Available languages
Available languages
Advertisement
Table of Contents

Related Manuals for EQUATION ALUTEC Series


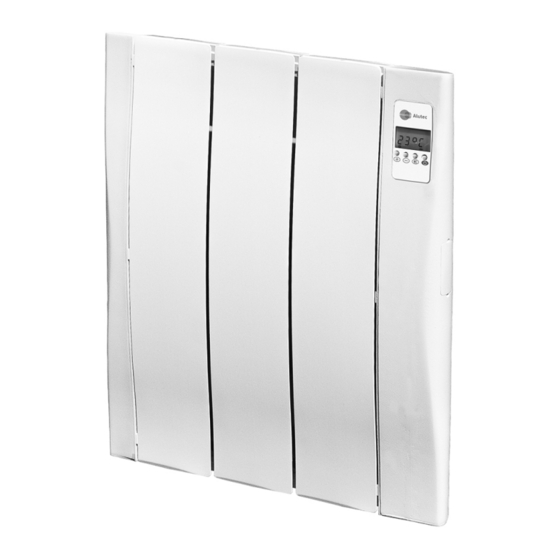
Summary of Contents for EQUATION ALUTEC Series
- Page 1 ALUTEC Nº MANUAL DE INSTALACIÓN Y USO ALUTEC-3 MANUEL D’INSTALLATION ET ENTRETIEN ALUTEC-5 ALUTEC-7 1100 INSTRUCTIONS AND INSTALATION MANUAL ALUTEC-9 1400 ALUTEC-11 1700 MANUAL DE INSTALAÇÃO E USO arcwmor@V3-02_2015...
-
Page 2: Table Of Contents
ESPAÑOL Muchas gracias por elegir los emisores térmicos digitales de bajo consumo ALUTEC, con un exclusivo programador electrónico de temperatura y horario. Antes de comenzar a usar los radiadores eléctricos digitales de bajo consumo ALUTEC le recomendamos que lea con atención este manual, para poder obtener su correcto funcionamiento con las máximas garantías. FRANÇAIS Merci beaucoup d’avoir choisi les radiateurs électriques digitaux de basse-consommation du modèle ALUTEC, avec un programmateur électrique de températura et d’horaire exclusif. -
Page 3: Advertencias Generales
ESPAÑOL 0. ADVERTENCIAS GENERALES Este emisor térmico es un aparato para fijarlo a la pared. Por favor, lea las instrucciones explicativas para su montaje. * Para desconectar el emisor de la red eléctrica saque la clavija de alimentación del enchufe. Nunca tire del cable. * No dejar el cable de conexión en contacto con el aparato mientras esté... -
Page 4: Operación Inicial (Primera Conexión)
ESPAÑOL 1.2 OPERACIÓN INICIAL (PRIMERA CONEXIÓN) Una vez que el aparato se encuentra jado a la pared y correctamente conectado a la red, pulse el interruptor ON/OFF situado en el lateral derecho. ENCENDIDO Al encender su emisor térmico el programador lee la memoria interna para cargar el último modo seleccionado por el usuario. -
Page 5: Modos Funcionamiento: Confort / Economía / Automático. Selección De Temperatura
ESPAÑOL 1.4. MODOS FUNCIONAMIENTO: CONFORT / ECONOMÍA / AUTOMÁTICO. Selección de temperatura Asegúrese que el termostato NO ESTÉ EN POSICIÓN “STAND-BY”. “Pro”. Pulsando alternaremos el modo función confort, economía o automático Para modi car la temperatura en el modo confort, pulse las teclas ó... -
Page 6: Programación
ESPAÑOL 1.7 PROGRAMACIÓN 1) Asegúrese de que el termostato esté en posición “Stand-By”. 2) Pulse la tecla durante 5 segundos para acceder al modo programación. 3) Seleccionar el modo de funcionamiento hora a hora pulsando el botón Segmento superior: CONFORT Segmento inferior: ECONOMÍA Ningún segmento: ANTIHIELO 4) Pulse la tecla... -
Page 7: Desviación Permanente De Temperatura (O Set)
ESPAÑOL 1.8 DESVIACIÓN PERMANENTE DE TEMPERATURA (OFFSET) Debido a las características del aparato, la medición de la temperatura se realiza en la parte inferior derecha, estando perfectamente ajustada en relación con la temperatura seleccionada por el usuario. No obstante existe la posibilidad de ajustar manualmente el valor de la temperatura. -
Page 8: Mantenimiento
ESPAÑOL ZONA DE RIESGO En el cuarto de baño, usted puede colocar su radiador en la zona 3. No puede ser tocado desde la bañera o ducha. 1. Seleccionar un lugar adecuado de la pared. La pared deberá ser rme y nivelada. Comprobar que exista un enchufe cerca de donde lo vaya a situar. -
Page 9: Advertissements Généraux
FRANÇAIS 0. ADVERTISSEMENTS GÉNÉRAUX * Cet émetteur thermique est un appareil pour être fixé au mur. Veuillez lire les instructions explicatives pour son montage. * Pour déconnecter l'émetteur du réseau électrique retirez la fiche d'alimentation de la prise de courant. Ne tirez jamais du câble. -
Page 10: Opération Initiale (Première Connexion)
FRANÇAIS 1.2 OPÉRATION INITIALE (PREMIÈRE CONNEXION) Une fois que l'appareil se trouve xé au mur et correctement connecté au réseau, appuyez sur l'interrupteur ON/OFF situé sur le latéral droit. VEÌLLE En allumant votre émetteur thermique, le programmateur lit la mémoire interne pour charger le dernier mode sélectionné... -
Page 11: Mode Confort / Économie / Automatique. Sélection De La Température
FRANÇAIS 1.4 MODE CONFORT / ÉCONOMIE / AUTOMATIQUE. SÉLECTION DE LA TEMPÉRATURE Assurez-vous que le thermostat N'EST PAS EN POSITION “STAND-BY“. En appuyant sur nous alternerons le mode fonction confort, économie ou automatique “Pro”. Pour modi er la température dans le mode confort, appuyez sur les touches . -
Page 12: Programmation
FRANÇAIS 1.7 PROGRAMMATION 1) Assurez-vous que le thermostat se trouve sur la position “Stand-By“. 2) Appuyez sur la touche pendant 5 secondes pour accéder au mode programmation. 3) Sélectionner le mode de fonctionnement heure après heure en appuyant sur le bouton Segment supérieur: CONFORT Segment inférieur: ÉCONOMIE Aucun segment: HORS-GEL... -
Page 13: Ecart Permanent De Température (O Set)
FRANÇAIS 1.8 ECART PERMANENT DE TEMPÉRATURE (OFFSET) Si le radiateur se trouve à un endroit particulièrement chaud ou froid et qu'il n'est pas possible de le changer de place en raison de l'installation des câbles, il est possible de régler la température mesurée/indiquée à l'écran de +/- 3 ºC. Cela s'avère utile si l'utilisateur souhaite que la lecture de température coïncide avec l'indication d'un thermomètre de précision situé... -
Page 14: Instructions D'installation (Exclusive Pour La France)
FRANÇAIS 2. INSTRUCTIONS D’INSTALLATION (exclusive pour la France) Le radiateur ne doit jamais être placé juste en dessous d'une prise de courant. Dans les salles de bains, le radiateur ne doit jamais être installé de telle sorte que les interrupteurs et autres dispositifs de contrôle puissent être touchés par une personne qui se trouve dans la baignoire ou dans la douche. - Page 15 ENGLISH 0. GENERAL WARNINGS * This heater is a unit for fixing to a wall. Please, carefully read the explanatory instructions for installation. * To disconnect the heater form the mains supply, remove the mains plug from the wall socket. NEVER by pulling on the cable.
- Page 16 ENGLISH 1.2 INITIAL OPERATION (FIRST SWITCH-ON) When the unit is secured to a wall and correctly connected to the mains supply, press the ON/OFF button located on the right side. SWITCH-ON When your heater is switched on, the programmer reads the internal memory in order to load the last mode selected by the user.
- Page 17 ENGLISH 1.4 OPERATING MODES: COMFORT / ECONOMY / AUTOMATIC. Temperature selection Check that the thermostat IS NOT IN THE STANDBY POSITION. Pressing will step through the comfort, economy and Pro automatic operating modes. To change the temperature in comfort mode, press the buttons.
- Page 18 ENGLISH 1.7 PROGRAMMING 1) Check that the thermostat is in the Standby position. 2) Press the button for ve seconds in order to change over to the Programming mode. 3) Select the hourly operating mode by pressing the button. Upper segment: COMFORT Lower segment: ECONOMY No segment: ANTI-FROST 4) Press the...
- Page 19 ENGLISH 1.8 TEMPERATURE OFFSET If the heater is installed is a specially warm or cold location and this position cannot be changed because of the wiring installation, the measured/onscreen indicated temperature can be adjusted by ±3ºC. It may be useful if the temperature reading coincides with a nearby precision thermometer and the adjustment can be made between -7ºC and +7ºC in 0.1ºC steps.
- Page 20 ENGLISH DANGER Only you can to install the radiator in ZONE 3. DO NOT USE THIS HEATER IN THE IMMEDIATE OF A BATH, A SHOWER OR A SWIMMING POOL (zone 0, 1 and zone 2). 1. A suitable location on the wall must be selected. This wall shall be strong and level. Check that there is a mains socket available nearby.
- Page 21 ENGLISH 0. GENERAL WARNINGS * This heater is a unit for fixing to a wall. Please, carefully read the explanatory instructions for installation. * To disconnect the heater form the mains supply, remove the mains plug from the wall socket. NEVER by pulling on the cable.
- Page 22 PORTUGUÊS 1.2 OPERAÇÃO INICIAL (PRIMEIRA LIGAÇÃO) Com o aparelho xado na parede e ligado corretamente à rede, clique no interruptor ON/OFF situado no lado direito. LIGAÇÃO Quando liga o emissor térmico, o programador lê a memória interna para carregar o último modo selecionado pelo utilizador.
- Page 23 PORTUGUÊS 1.4 MODOS FUNCIONAMENTO: CONFORTO / ECONOMIA / AUTOMÁTICO. Seleção da temperatura Certi que-se de que o termóstato NÃO ESTÁ NA POSIÇÃO DE STAND-BY. Carregando em , pode alternar entre os modos de funcionamento Conforto, Economia ou Automático Pro. Para modi car a temperatura no modo Conforto, carregue nas teclas .
- Page 24 PORTUGUÊS 1.7 PROGRAMAÇAO 1) Certi que-se de que o termóstato está na posição Stand-By. 2) Carregue na tecla durante 5 segundos para aceder ao modo Programação. 3) Selecione o modo de funcionamento hora a hora carregando na tecla Segmento superior: CONFORTO Segmento inferior: ECONOMIA Nenhum segmento: ANTIGELO 4) Carregue na tecla...
- Page 25 PORTUGUÊS 1.8 DESVIO PERMANENTE DA TEMPERATURA (OFFSET) Se o emissor estiver colocado num ponto especialmente quente ou frio e não for possível mudá-lo de lugar por causa da instalação elétrica, é possível regular a temperatura medida/indicada no ecrã em +/- 3 ºC. Esta função pode ser útil se o utilizador quiser que a leitura da temperatura coincida com a indicação de um termómetro de precisão próximo.
- Page 26 PORTUGUÊS ZONA DE RIESGO No quarto de banho, V. pode colocar o seu radiador na zona 3. Nao pode ser tocado a partir da banheira ou do duche. 1. Selecione um local adequado da parede. A parede deve ser sólida e nivelada. Certi que-se de que existe uma tomada elétrica próximo do local de instalação.
- Page 28 ALUTEC Leroy Merlin, S.A. Avenida de la Vega, 2 28108 Alcobendas (Madrid) España Bricodis, S.A. Av. dos Cavaleiros, 70 Portela 2790-045 Carnaxide Portugal Nº ALUTEC-3 230 V ALUTEC-5 50 Hz ALUTEC-7 1100 CLASE I / CLASS I ALUTEC-9 1400 IP20 ALUTEC-11 Fabricado en España Fabriqué...
Need help?
Do you have a question about the ALUTEC Series and is the answer not in the manual?
Questions and answers