
Related Manuals for PEAKnx wantec Monolith C IP


Summary of Contents for PEAKnx wantec Monolith C IP
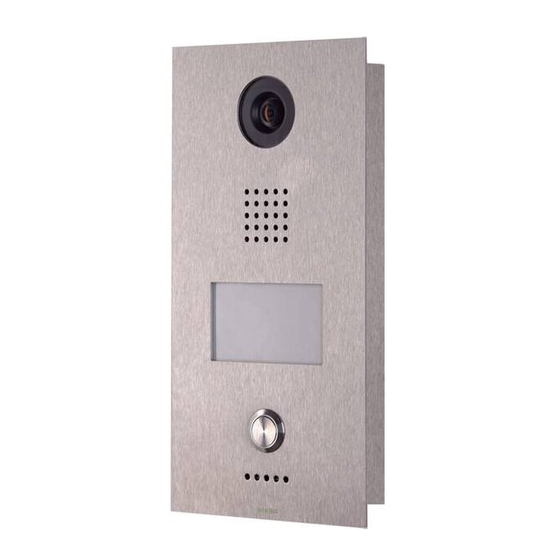
- Page 1 Monolith C IP Kurzanleitung | Getting started | Notice abrégée V 2.0.1 DE | EN | FR...
-
Page 2: Impressum
Erstellt zur Nutzung mit folgenden Produkten Kompatible Türstation Controlpro, Controlmini, Controlmicro, YOUVI wantec Monolith C IP In diesem Dokument erwähnte Produktnamen können Marken oder eingetragene Marken der jeweiligen Eigentümer sein. Diese sind nicht ausdrücklich durch „™“ und „®“ gekennzeichnet. © PEAKnx GmbH Otto-Röhm-Straße 69... -
Page 3: Table Of Contents
1.1 Einrichten des PEAKnx Panels in der Fritzbox ....... . . -
Page 4: Einleitung
Einleitung Einleitung In der folgenden Anleitung wird erläutert, wie Sie eine wantec Monolith C IP Türstation mit Ihrem PEAKnx Touch-Panel einrichten. Die Kommunikation zwischen dem Touch-Panel und der Türstation erfolgt über SIP. Stellen Sie daher bitte sicher, dass sich beide Geräte im selben Netzwerk befinden und YOUVI über einen Internetzugang verfügt. -
Page 5: Einrichten Der Wantec Türsprechanlage
2 Einrichten der wantec Türsprechanlage 2 Einrichten der wantec Türsprechanlage Schließen Sie das wantec-Gerät an einen PoE-fähigen Switch Ihres Netzwerkes an. Um die Monolith C IP einrichten zu können, müssen Sie seine IP-Adresse in Ihren Broweser eingeben. Diese ist ebenfalls in der Anleitung der Türstation angegeben z.B.: 192.168.1.250. −... - Page 6 2 Einrichten der wantec Türsprechanlage Tragen Sie unter „Benutzername“ und „Passwort“, Authentifizierungsnamen und das Pass- wort ein, welche Sie für die wantec Türstation in der Fritzbox vergeben haben. − Ihre Anmeldedaten und Registrar finden Sie auch unter fritz.box > Telefoniegeräte, wenn Sie die angelegte Türsprechanalage bearbeiten und zum Reiter „Anmeldedaten“...
-
Page 7: Einrichtung Der Voip-Kommunikation
Haus in der Taskleiste. − Sie erreichen die Konfigurationsseite auch über den Browser, sofern Sie sich mit dem Ge- rät im selben Netzwerk befinden wie das PEAKnx Touch-Panel. Dazu geben Sie folgende URL in Ihren Browser ein: −... - Page 8 3 Einrichtung der VoIP-Kommunikation zum Beispiel: http://192.168.188.250:80/video.jpg Format des Streams: Wählen Sie „JPEG“. Bildwiederholintervall in ms: Geben Sie „500“ ms ein, um 2 Bilder je Sekunde zu erhalten. Entsperrmethode: Wählen Sie aus, mit welchem Mechanismus Ihre Türöffnerfunktion an- gebunden ist, z.B. DTMF. −...
- Page 9 3 Einrichtung der VoIP-Kommunikation Wenn Sie das Türstationsmodul dem Dashboard hinzugefügt haben, erscheint ein Widget mit einer Information bezüglich der Registrierung beim SIP-Server. Ist diese erfolgreich, ist das Türstationsmodul bereit zur Nutzung. Um die Korrektheit dieser Einstellungen zu testen, betätigen Sie die Klingel an Ihrer Tür- station.
-
Page 10: Möglichkeit 2: Einrichten Des Youvi Kameramoduls
Wechseln Sie auf dem Panel zu YOUVI Dashboard > Kamera ODER öffnen Sie die Konfigu- rationsseite auf Ihrem PC in Ihrem Browser, wobei sicherzustellen ist, dass sich das System, auf dem der Browser läuft, im selben Netzwerk befindet, wie das PEAKnx Touch-Panel. Dazu geben Sie folgende URL in Ihren Browser ein: −... - Page 11 Laden Sie sich die gewünschte VoIP Software herunter und installieren Sie diese. Öffnen Sie die (SIP)-Einstellungen. Tragen Sie für die Domain oder SIP-Server die IP-Adresse Ihrer Fritzbox ein und für SIP Username und Password, den Benutzernamen und Passwort, welche Sie für das PEAKnx Panel in der Fritzbox/SIP-Server vergeben haben. −...
-
Page 12: Technischer Support
4 Technischer Support 4 Technischer Support Sollten Probleme mit Ihrem PEAKnx Panel auftreten, kontaktieren Sie bitte unser PEAKnx Support Team: − Mail: support@peaknx.com − Support Ticket erstellen: https://support.peaknx.com/?lang=de − Tel.: +49-6151-279 1825... - Page 13 EN - wantec Monolith C IP wantec Monolith C IP Getting started...
-
Page 14: Legal Notes
Created for use with the following products Compatible door station Controlpro, Controlmini, Controlmicro, YOUVI wantec Monolith C IP The product names mentioned in this document may be brands or registered trademarks of their respective owners. These are not explicitly labeled with “™” or “®”. - Page 15 1.1 Setting up the PEAKnx Panel in the Fritzbox....... . .
-
Page 16: Introduction
Introduction Introduction The following instructions explain how to set up an wantec Monolith C IP door station with your PEAKnx touch panel. The communication between the touch panel and the door station is rea- lized via SIP. Therefore, please make sure that both devices are part of the same network and that YOUVI has Internet access. -
Page 17: Setting Up The Wantec Door Intercom
2 Setting up the wantec door intercom 2 Setting up the wantec door intercom Connect the wantec device to a PoE-enabled switch on your network. To be able to set up the Monolith C IP, you must enter its IP address into your browser. It is also specified in the instructions of the door station, e.g.: 192.168.1.250. -
Page 18: Setting Up The Voip Communication
Open the YOUVI Configuration Dashboard page via the desktop shortcut or the green house in the taskbar. − You can also reach the configuration page on your browser, as long as you are in the same network as the PEAKnx touch panel. To do this, enter the following URL in your browser:... - Page 19 Username: Enter the name that you have assigned in your Fritzbox (your SIP server) for the touch panel with YOUVI, e.g. “Controlmini”. You can also find your credentials under fritz. box > Telephony Devices if you edit the created PEAKnx Panel (IP Phone) and go to the tab “Login data.”...
- Page 20 3 Setting up the VoIP communication Save your entries. Adding the door station in the visualization Open the visualization. In order to ensure that the visualization is automatically activated when the system is reboo- ted, open the YOUVI Visu settings under Auto start and activate this feature. Now switch on the Edit Mode and switch to the Dashboard.
-
Page 21: Option 2: Setting Up The Youvi Camera Module
To add the camera module open YOUVI Dashboard on the panel and select Install Camera Device. If you do not have a full license yet, you can purchase it in the PEAKnx Shop. Switch to YOUVI Dashboard > Camera Device OR open the configuration page on your PC in your browser, making sure that the system running the browser is on the same network as the PEAKnx touch panel. - Page 22 3 Setting up the VoIP communication − http://x.x.x.x:31228 or http://x.x.x.x:31226, where x.x.x.x must be replaced by the local IP address of your PEAKnx touch panel. This is displayed in the lower part of the YOUVI Dashboard App. − From the menu on the left, select “Cameras”.
-
Page 23: Technical Support
− Your login data can also be found under fritz.box > Telephony devices, if you edit the created PEAKnx Panel (IP telephone) and switch to the „Login data“ tab. The IP address of the fritzbox is the same as „Registrar“. - Page 24 FR - wantec Monolith C IP wantec Monolith C IP Notice abrégée...
-
Page 25: Mentions Légales
Conçu pour être utilisé avec les produits suivants Station de porte compatible Controlpro, Controlmini, Controlmicro, YOUVI wantec Monolith C IP Les noms de produits mentionnés dans ce document peuvent être des marques commerciales ou des marques déposées de leurs propriétaires respectifs. Elles ne sont pas expressément marquées par «... - Page 26 1.1 Configuration du panneau PEAKnx dans la Fritzbox ....... . 27...
-
Page 27: Introduction
Sélectionnez « LAN/WLAN (IP telephone) », attribuez un nom significatif, par exemple « Con- trolmini » et allez sur « Next ». − Entrez le nom d’utilisateur et le mot de passe pour le panneau PEAKnx et notez-les. Assu- rez-vous d’attribuer un mot de passe sécurisé. Confirmez le numéro de téléphone attribué et sélectionnez « Next ». -
Page 28: Configuration De L'interphone De Porte Wantec
2 Configuration de l’interphone de porte wantec 2 Configuration de l’interphone de porte wantec Connectez l’appareil wantec à une source d’alimentation PoE sur votre réseau. Pour pouvoir configurer l’IP Monolithe C, vous devez entrer son adresse IP dans votre navigateur. Ceci est également indiqué dans le mode d’emploi de la station de porte, par ex. -
Page 29: Configuration De La Communication Voip
3 Configuration de la communication VoIP Sous « Account » et « Password », saisissez le nom d’authentification et le mot de passe que vous avez attribués à la station de porte wantec dans la Fritzbox. − Vous trouverez également vos données de connexion et votre bureau d’enregistrement sous fritz.box >... - Page 30 − Vous pouvez également accéder à la page de configuration via le navigateur, à condition que vous soyez avec l’appareil sur le même réseau que l’écran tactile PEAKnx. Pour ce faire, entrez l’adresse suivante URL dans votre navigateur : −...
- Page 31 3 Configuration de la communication VoIP Méthode de déverrouillage : Sélectionnez le mécanisme auquel votre ouvre-porte est connecté, par exemple DTMF. − Code DTMF : Saisissez le code d’ouverture DTMF, que vous avez défini dans l’onglet Basic settings > Relay sur le site de la configuration wantec. −...
- Page 32 3 Configuration de la communication VoIP Lorsque vous avez ajouté le module Station de porte au dashboard, le widget apparaît avec des informations sur l’enregistrement sur le serveur SIP. En cas de succès, le module de station de porte est prêt à l’emploi. Pour tester ces paramètres, appuyez sur la sonnette de votre platine de rue.
-
Page 33: Possibilité 2 : Configuration Du Module De Caméra Youvi
Sélectionnez sur le panel YOUVI Dashboard > Camera OU ouvrez la page de configura- tion sur votre PC dans de votre navigateur, en vous assurant que le système qui exécute le navigateur est sur le même réseau que le panneau tactile PEAKnx. Pour ce faire, entrez l’URL suivante dans votre navigateur : −... - Page 34 − Vous trouverez également vos données d’enregistrement dans fritz.box > Téléphonie > Périphérique tél., si vous éditez le panneau PEAKnx (téléphone IP) créé. L’adresse IP de la fritzbox est la même que celle du « Registrar ». Le statut du logiciel Voip devrait maintenant indiquer que le téléphone s’est enregistré avec succès auprès de votre Fritzbox.
-
Page 35: Assistance Technique
Pour vérifier l’exactitude de ces réglages, appuyez sur la sonnette de votre station de porte. Après quelques secondes, une notification d’un appel entrant devrait apparaître sur votre panneau tactile PEAKnx. 4 Assistance technique Si vous rencontrez des problèmes avec votre panneau PEAKnx veuillez contacter notre équipe d’assistance de PEAKnx : − E-mail : support@peaknx.com −... - Page 36 www.peaknx.com...
Need help?
Do you have a question about the wantec Monolith C IP and is the answer not in the manual?
Questions and answers