
Related Manuals for Lincoln Electric POWERTEC i380


Summary of Contents for Lincoln Electric POWERTEC i380
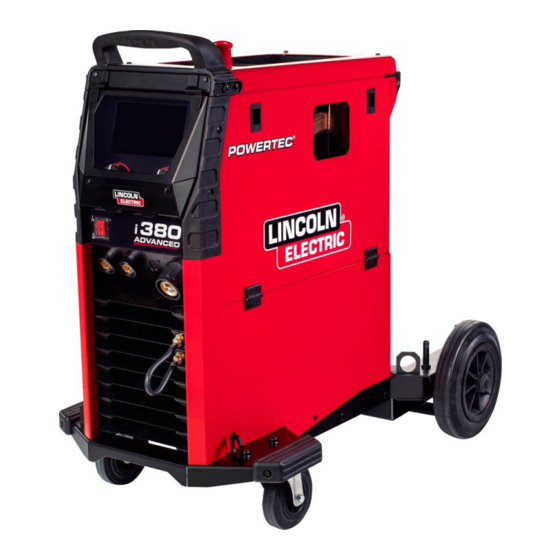
- Page 1 IM3102 04/2019 REV01 POWERTEC i380C ADVANCED OPERATOR’S MANUAL ENGLISH Lincoln Electric Bester Sp. z o.o. ul. Jana III Sobieskiego 19A, 58-263 Bielawa, Poland www.lincolnelectric.eu...
-
Page 2: Table Of Contents
12/05 THANKS! For having choosen the QUALITY of the Lincoln Electric products. Please Examine Package and Equipment for Damage. Claims for material damaged in shipment must be notified immediately to the dealer. For future reference record in the table below your equipment identification information. Model Name, Code &... -
Page 3: Technical Specifications
Technical Specifications NAME INDEX POWERTEC i380C ADVANCED K14180-1 INPUT Input Voltage U EMC Class Frequency PTi380C ADVANCED 400V ± 15%, 3-phase 50/60Hz Input Power (40°C) Input Amperes I 1max PTi380C ADVANCED 17,1 kVA @ 40% Duty Cycle 0,92 Idle Power Efficiency PTi380C ADVANCED RATED OUTPUT... -
Page 4: Electromagnetic Compatibility (Emc)
Provided that the public low voltage system impedance at the point of common coupling is lower than: 56,4 mΩ for the Powertec i380. This equipment is compliant with IEC 61000-3-11 and IEC-3-12 and can be connected to public lowvoltage systems. It is the responsibility of the installer or user of the equipment to ensure, by consultation with the distribution network operator if necessary, that the system impedance complies with the impedance restrictions. -
Page 5: Safety
Failure to follow the instructions in this manual could cause serious personal injury, loss of life, or damage to this equipment. Read and understand the following explanations of the warning symbols. Lincoln Electric is not responsible for damages caused by improper installation, improper care or abnormal operation. -
Page 6: Introduction
CYLINDER MAY EXPLODE IF DAMAGED: Use only compressed gas cylinders containing the correct shielding gas for the process used and properly operating regulators designed for the gas and pressure used. Always keep cylinders in an upright position securely chained to a fixed support. Do not move or transport gas cylinders with the protection cap removed. - Page 7 1. User Interface Cover. Input Supply Connection Cover shielding user interface. U7 User Interace is described in separate chapter. WARNING Only a qualified electrician can connect the welding 2. Power Switch ON/OFF (I/O): Controls the input machine to the supply network. Installation had to be power to the machine.
- Page 8 12. Gas hose. Internal Controls 13. Work Lead. 14. Cover bracket: To intall cooler cable holder bracket. 15. Quick Connect Coupling: Coolant inlet (supplies cool coolant to the torch/gun). 16. Quick Connect Coupling: Coolant outlet (takes warm coolant from torch/gun). 17.
- Page 9 Guide’s Marking Interface Table 1. Symbols description SMAW Process Select Welding Process Select Welding Program (MMA) GMAW Process Recall from the User FCAW Process (MIG/MAG) Memory Save to the User User Setup Advanced Setup Memory Configuration Arc Force Hot Start Pinch Preflow Time Postflow Time...
- Page 10 35. Left Knob: Sets the value in the top Left corner of the User Interface Advaced (U7) display. Cancel selection. Return to the previous menu. 36. Right Knob: Sets the value in the top Right corner of the display. Confirmation of changes. 37.
- Page 11 Table 4. SMAW Welding Parameters Bar Status bar Symbol Description Welding Process Choice Support Arc Force Figure 7. Hot Start A). Information about active welding mode B). 2/4 step C). USB Interface Configuration Menu (Setup) Welding Parameters Bar User Setup The Welding Parameters Bar enables: ...
- Page 12 Press the Right Knob [36] to confirm the selection. The Support Menu enables to get knowledge of the following points: Accessories: Rolls for aluminum wire Rolls for fluxed cored wire Rolls for steel/stainless steel wire ...
- Page 13 Table 5. User Setup Menu Symbol Description Preflow Postflow Burnback Time Spot Welding Figure 13. Run-In WFS WARNING To remove the icon - press the Right Knob [36] once Start Procedure again. To exit the User Setup Menu – press the Left Button [35].
- Page 14 – The Start Procedure controls the WFS and Volts (or Trim) for a specified time at the beginning of the weld. During the start time, the machine will ramp up or down from the Start Procedure to the preset Welding Procedure. ...
- Page 15 Table 7. Save and restore selection Symbol Description Current Welding Settings Advanced Parameters Configuration (P menu) All welding programs stored in user memory One of the welding programs stored in user memory Figure 19. Confirm the selection – Press and hold for 3 second Right Knob [36].
- Page 16 To confirm and save the data on a USB Memory Stick, highlight the Check Mark icon and then press the Right Knob [36]. To exit the USB Menu – press the Left Button [37] or disconnect the USB Memory Stick from the USB receptacle.
- Page 17 Settings and Configuration Menu Press the Right Button [36] to confirm the file selection. To access the Settings and Configuration Menu: The display shows the Load Data Menu from a USB Press the Button [37] or Right Knob [36] to get Memory Stick to User Interface.
- Page 18 The limits can be set for: Welding Current Wire Feed Speed Welding Voltage Wave Controls To set the range: Enter to the Settings and Configuration Menu. Use The Right Knob [36] to higlight the “Limits” icon. Figure 37.
- Page 19 The Brightness Level - it allows to adjust the display brightness from 0 to 10. Figure 42. Turn Right Knob [36] to select: numbers 0-9, Press Right Knob [36] to confirm first character of the Figure 40. password. ...
- Page 20 Figure 48. Figure 45. Note: The jobs which are disabled can not be using in Note: To unlock function user have to do the same “Save memory” function – shown in Figure 49. (job 2 is steps as steps to lock function. not available).
- Page 21 Set the Language – user can choose interface language (English, Polish, Finnish, French, German, Spanish, Italian, Dutch, Romanian). To set the language: Access to the Settings and Configuration Menu. Use the Right Knob [36] to highlight the Set the Language icon.
- Page 22 Figure 57. Figure 59. Confirm the select – press the Right Button [36]. The Press the Right Knob [36]. factory settings are restored. Use the Right Knob [36] to highlight the in/min (English/Imperial). Diagnostic Information Available information: ...
- Page 23 Table 11. The Configuration Parameters The Menu Exit Enables exit from menu Wire Feed Speed (WFS) Enables change WFS units: units "Metric" (factory default) = m/min; "English" = in/min. Recall Memory with This option allows a memory to be recalled by quickly pulling and releasing the Trigger gun trigger: ...
- Page 24 P.17 Remote Control Type This option selects the type of analog remote control being used. Digital remote control devices (those with a digital display) are configured automatically. "Push-Pull Gun" = Use this setting while MIG welding with a push-pull gun that uses a potentiometer for wire feed speed control (this setting is backward compatible with "P.17 Gun Selection"...
- Page 25 P.80 Sense From Studs Use this option for diagnostic purposes only. When power is cycled, this option is automatically reset to False. "False" (default) = Voltage sensing is automatically determined by the selected weld mode and other machine settings. ...
- Page 26 Cooler menu WARNING Cooler Menu is available when cooler is connected. Figure 62. Table 14. Service Menu Symbol Description Service weld logs Figure 61. Weld History Table 12. Cooler Menu Symbol Description Settings SnapShot Filling Service weld logs – allows recording welding parameters which were using during the welding.
- Page 27 Depending on the welding process and the type of the Powertec i380C Advanced. the gun, install the nozzle (GMAW process) or This file can be sent to Lincoln Electric protection cap (FCAW process). Support to troubleshoot any possible issues ...
- Page 28 Welding SMAW Process Adjustments of Brake Torque of Sleeve POWERTEC i380 ADVANCED does not include the electrode holder with lead necessary for SMAW welding, To avoid spontaneous unrolling of the welding wire the but the one can be purchased separately.
- Page 29 Changing Driving Rolls WARNING Turn the input power off before installation or changing drive rolls. POWERTEC i380C ADVANCED, is equipped with drive roll V1.0/V1.2 for steel wire. For others wire sizes, is available the proper drive rolls kit (see "Accessories" chapter) and follow instructions: Figure 68.
- Page 30 Lincoln Electric is not in a position to warrant or guarantee such advice, and assumes no liability, with Maintenance respect to such information or advice.
-
Page 31: Weee
12/05 Part List reading instructions Do not use this part list for a machine if its code number is not listed. Contact the Lincoln Electric Service Department for any code number not listed. Use the illustration of assembly page and the table below to determine where the part is located for your particular code machine. -
Page 32: Accessories
Accessories K10095-1-15M REMOTE CONTROL K2909-1 6-PIN/12-PIN ADAPTER K14172-1 12PIN REMOTE CONTROL KIT K14175-1 GAS FLOW METER KIT K14176-1 GAS HEATER KIT K14182-1 COOLARC 26 COOLER K10158-1 ADAPTER FOR SPOOL TYPE B300 K363P ADAPTER FOR SPOOL TYPE READI-REEL® K14091-1 REMOTE MIG LF45PWC300-7M (CS/PP) MIG/MAG TORCHES W10429-36-3M LGS2 360 G-3.0M MIG GUN AIR COOLED...
Need help?
Do you have a question about the POWERTEC i380 and is the answer not in the manual?
Questions and answers