Table of Contents
Advertisement
Quick Links
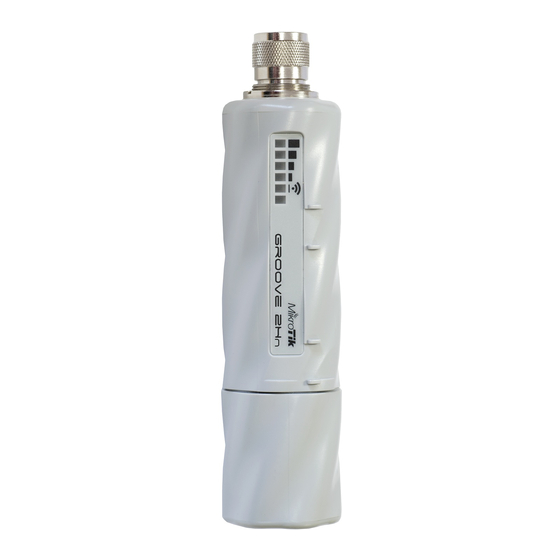
RouterBOARD Groove 2Hn
Quick Setup Guide and Warranty Information
The RouterBOARD Groove 2Hn comes preinstalled in an outdoor enclosure, with a built-in 2GHz
802.11b/g wireless, an N-Male antenna connector, and one 10/100 Ethernet connector which sup-
ports MDI-X auto detection. The device is packaged with a 24V power adapter, a PoE injector and
two mounting loops. Note: Another model, the Groove A-2Hn is an AP version of this device, and
includes a Level4 RouterOS license for wireless access point mode support.
First use
1. Connect the antenna to the N-Male connector.
2. Twist to open the Groove case, connect an Ethernet cable to the Ethernet port
3. Use the provided rubber insulator to put on the Ethernet cable, and push it into the case
opening, so that the opening is tightly closed
4. The Groove accepts 8-30V Passive PoE from a PoE injector
5. The default IP address from Ether1 is 192.168.88.1 for configuration
Username is admin and there is no password
Powering
The board accepts powering from the Ethernet port (Passive PoE):
Ethernet port accepts passive Power over Ethernet 8-30V DC. Package contains a 24V
adapter and a PoE injector.
Maximum power consumption of the device is 4W.
Booting process
This device doesn't come fitted with a Serial Port connector, so initial connection has to be done via the Ethernet cable, using
the MikroTik Winbox utility. Winbox should be used to connect to the default IP address of 192.168.88.1 with the username
admin and no password.
In case IP connection is not available, Winbox can also be used to connect to the MAC address of the device. More infor-
mation here: http://wiki.mikrotik.com/wiki/First_time_startup
In case you wish to boot the device from network, for example to use MikroTik Netinstall, hold the RESET button of the de-
vice when starting it until the LED light turns off, and Groove will start to look for Netinstall servers.
Mounting
If you wish to tighten the Groove to a pole, you can do it with the provided mounting loops. The Groove comes bundled with
two mounting loops - guide the loops around the Groove though the provided edge markings, and around the pole where it
will be mounted. You should avoid connecting a loose Ethernet cable to the Ethernet port, secure the cable to a wall or the
pole, so that the cable weight is not pulling the port. It is recommended to secure the Ethernet cable less than 2m from the
Groove device. This is to ensure that the cable doesn't damage the port by it's weight, or doesn't fall out.
Expansion Slots and Ports
Built in 2GHz 802.11b/g wireless, 1x1 MIMO, station mode
One 10/100 Ethernet port, supporting automatic cross/straight cable correction (Auto MDI/X), so you can use either
straight or cross-over cable for connecting to other network devices. The Ethernet port accepts 8-30V DC powering
from a passive PoE injector.
See www.routerboard.com for more information. Contact support@mikrotik.com for support questions.
15-Nov-2011
Advertisement
Table of Contents

Subscribe to Our Youtube Channel
Related Manuals for MikroTik RouterBOARD Groove 2Hn


Summary of Contents for MikroTik RouterBOARD Groove 2Hn
- Page 1 In case you wish to boot the device from network, for example to use MikroTik Netinstall, hold the RESET button of the de- vice when starting it until the LED light turns off, and Groove will start to look for Netinstall servers.
- Page 2 RMA process. 1. If you have purchased your product from a MikroTik Reseller, please contact the Reseller company regarding all war- ranty and repair issues, the following instructions apply ONLY if you purchased your equipment directly from MikroTik in Latvia.
- Page 3 15 dBi Omni Directional (pole) WL0-2450-15 13 dBi Omni Directional (hor. Polarization) HP, 0DH 24-13 Antennas of same type and lower gain than those listed above may be used in compliance with certification. See www.routerboard.com for more information. Contact support@mikrotik.com for support questions. 15-Nov-2011...
Need help?
Do you have a question about the RouterBOARD Groove 2Hn and is the answer not in the manual?
Questions and answers