Table of Contents
Advertisement
Quick Links
EUROPEAN USERS
400V 50Hz SUPPLY DETAILS ARE IN-
CLUDED WITH ELECTRICAL CONTROL
BOX. DISREGARD SUPPLY WIRING
DETAILS IN THIS MANUAL
INSTALLATION AND OPERATION MANUAL
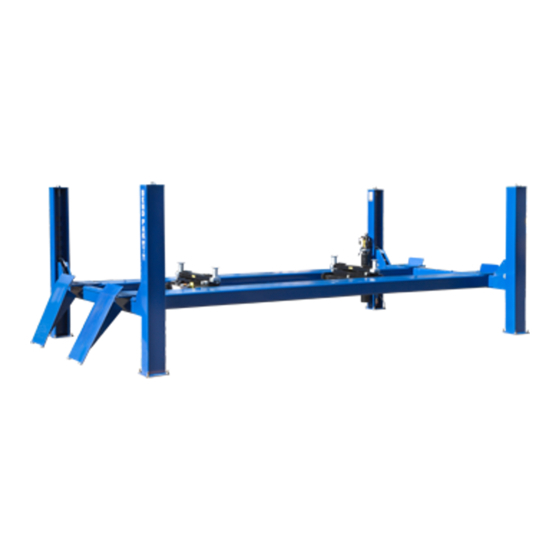
SUPER-DUTY
FOUR-POST LIFTS
Models:
HDS-18 / HDS-18X
HDS-27 / HDS-27X
HDS-35 / HDS-35X
HDS-40 / HDS-40X
ORIGINAL INSTRUCTIONS IN
ENGLISH LANGUAGE
RECEIVING
The shipment should be thoroughly inspected as soon as it
is received. The signed Bill of Lading is acknowledgement
by the shipping carrier as receipt of this product as listed
in your invoice as being in a good condition of shipment. If
any of these goods listed on this Bill of Lading are missing
or damaged, do not accept goods until the shipping carrier
makes a notation on the freight bill of the missing or dam-
aged goods. Do this for your own protection.
IMPORTANT SAFETY INSTRUCTIONS
PLEASE READ THE ENTIRE CONTENTS OF THIS MANUAL PRIOR TO INSTALLATION
AND OPERATION. BY PROCEEDING WITH LIFT INSTALLATION AND OPERATION YOU
AGREE THAT YOU FULLY UNDERSTAND AND COMPREHEND THE FULL CONTENTS
OF THIS MANUAL. FORWARD THIS MANUAL TO ALL OPERATORS. FAILURE TO
OPERATE THIS EQUIPMENT AS DIRECTED MAY CAUSE INJURY OR DEATH.
VER B
VER B
VER B
VER B
SAVE THESE INSTRUCTIONS
Keep this operation manual near the
machine at all times. Make sure that
ALL USERS read this manual.
BE SAFE
Your new lift was designed and built with safety in mind.
However, your overall safety can be increased with proper
training and thoughtful operation on the part of the operator.
DO NOT operate or repair this equipment without reading
this manual and the important safety instructions shown
inside. Keep this operation manual near the lift at all times.
Make sure that ALL USERS read and understand this
manual.
Manual REV G 05-14-15
pn# 5900160
1645 Lemonwood Dr.
Santa Paula, CA. 93060, USA
Toll Free 1-800-253-2363
Tel: 1-805-933-9970
Fax: 1-805-933-9160
www.bendpak.com
Advertisement
Table of Contents

Related Manuals for BendPak HDS-18


Summary of Contents for BendPak HDS-18
- Page 1 Manual REV G 05-14-15 BOX. DISREGARD SUPPLY WIRING DETAILS IN THIS MANUAL pn# 5900160 INSTALLATION AND OPERATION MANUAL SUPER-DUTY FOUR-POST LIFTS Models: HDS-18 / HDS-18X VER B HDS-27 / HDS-27X VER B HDS-35 / HDS-35X VER B HDS-40 / HDS-40X VER B...
- Page 2 Our comprehensive product warranty means more than a commitment to you; it’s also a commitment to the value of your new BendPak lift. For full warranty details and to register your new lift contact your nearest BendPak dealer or visit http:/ / www.bendpak.com/ support/ warranty/...
-
Page 3: Definitions Of Hazard Levels
OWNER’S RESPONSIBILITY IMPORTANT NOTICE To maintain the lift and user safety, the responsibility of Do not attempt to install this lift if you have never been the owner is to read and follow these instructions: trained on basic automotive lift installation procedures. Never attempt to lift components without proper lifting Follow all installation and operation instructions. -
Page 4: Table Of Contents
TABLE OF CONTENTS Contents Page No. Warranty ..................2 Definitions of Hazard Levels . -
Page 5: Protective Equipment
I understand that Bendpak lifts are designed to be Eye protection is essential during installa- installed in indoor locations only. Failure to follow instal- tion and operation activities. Safety glasses... - Page 6 INTRODUCTION 1. Carefully remove the crating and packing 2. Check the voltage, phase, and proper amperage materials. CAUTION! Be careful when cutting steel requirements for the motor shown on the motor plate. banding material as items may become loose and fall Electrical work should be performed only by a certified causing personal harm or injury.
-
Page 7: Tools Required
IMPORTANT NOTE: BendPak lifts are supplied with installation instructions and concrete fasteners meeting the criteria as prescribed by the American National Standard “ Automotive Lifts - Safety Requirements for Construction, Testing, and Validation” ANSI/ ALI ALCTV-2011. Lift buyers are responsible for any special regional structural and/ or seismic anchoring requirements specified by any other agencies and/ or codes such as the Uniform Building Code (UBC) and/ or International Building Code (IBC). -
Page 8: Assembly View / Description Of Parts
When removing the lift from shipping angles pay close attention as the posts can slide and can cause injury. Prior to removing the bolts make sure the posts are held securely by a fork lift or some other heavy lifting device. Assembly View HDS-18/ 27/ 35/ 40 Large Window (4 Pulleys) Approach... -
Page 9: Floor Plan / Specifications
FLOOR PLAN *IMPORTANT NOTE* Check Diagonal Measurements To Ensure Square Layout Diagonal Measurements Must Be Equal. MODEL HDS-18 HDS-18X HDS-27 HDS-27X Lifting Capacity* 18,000 lbs. / 8165 Kg. 18,000 lbs./ 8165 Kg. 27,000 lbs. / 12,247 Kg. 27,000 lbs. / 12,247 Kg. - Page 10 FLOOR PLAN *IMPORTANT NOTE* Check Diagonal Measurements To Ensure Square Layout Diagonal Measurements Must Be Equal. MODEL HDS-35 HDS-35X HDS-40 HDS-40X Lifting Capacity* 35,000 lbs. / 15,876 Kg. 35,000 lbs. / 15,876 Kg. 40,000 lbs. / 18,144 Kg. 40,000 lbs. / 18,144 Kg. *Max Capacity / Front Axle 17,500 lbs.
- Page 11 CLEARANCES HDS SUPER DUTY 54in 24in 1372mm 610mm MINIMUM TO MINIMUM TO NEAREST BAY NEAREST WALL OR OBSTRUCTION APPROACH B. Place target on floor at column positions (NOT 1. Lift Location: Use architects plan and Engineers on column base plates) and record readings. automatic level (transit) when available to locate lift.
-
Page 12: Power Unit Location
POWER UNIT LOCATION IMPORTANT NOTE ! The power unit can be located at either “ X” location shown below. It is important to locate the POWERSIDE runway (with cylinder) on the SAME SIDE as the power unit location. Utility rails on the side of each runway MUST be installed facing the center. - Page 13 A maximum shim thickness of Fig. 3.4 2” is possible by ordering optional Shim Plates. Contact your authorized BendPak Distributor for ordering information. Fig. 3.5 3. Using a forklift or crane, raise the Cross Tubes (making sure the Plastic Slide Blocks are still in position) and drop down into the top of the Columns.
-
Page 14: Step 4 / Raising The Cross Tubes
5. The Columns and Cross Tubes will now be in position 2. Manually raise the Cross Tubes until the Primary and spaced properly for the runways. Safety Locks engage and rest on the lock position second down from the top of the Ladder or approximately 66” 6. - Page 15 STEP 5 4. Position the POWERSIDE RUNWAY on top of the Cross Tubes with the UTILITY RAIL towards the center. The fitting (Powerside Runway Installation) holes located at the side of the Powerside Runway should be 1. Locate the POWERSIDE RUNWAY, easily identified by adjacent the POWER UNIT COLUMN.
- Page 16 WARNING! WHEN THE CABLE ADJUSTING NUTS BOTTOM OUT ON THE THREADED END OF THE CABLE CONNECTOR AND THERE IS STILL SLACK IN THE CABLES, THE CABLES HAVE STRETCHED BEYOND THE SAFE USEFUL LENGTH AND NEED TO BE REPLACED WITH FACTORY APPROVED CABLE ASSEMBLIES. DO NOT PLACE WASHERS, SPACERS OR OTHER DEVICES TO “...
- Page 17 4. With the CABLES properly routed, hold the Sheaves in position and install the SHEAVE PIN. (See Fig. 7.5) Stack Cables and Sheaves DANGER ! in proper order and make DO NOT PROCEED unless visual confirmation is made of ALL Safety Locks. ALL locks MUST be engaged before ready for the Sheave Pin.
- Page 18 7. Each cable must be installed through the CABLE RETAINER 9. After routing the Cables double-check to make sure all are first to keep Cables stowed in their proper position on the Cable properly positioned and REMAIN WITHIN THE GROOVES Block.
- Page 19 STEP 9 (Routing Hydraulic Hoses) NOTE: DANGER ! POWER AND RETURN PORT LOCATIONS MAY ALL WIRING MUST BE PERFORMED VARY. CONFIRM POWER AND RETURN PORT BY A LICENSED ELECTRICIAN. LOCATIONS IN POWER UNIT DOCUMENTATION OR CONTACT TECHNICAL SUPPORT. 1. Install the 90-degree Hydraulic Fitting to the POWER PORT and the 90°...
- Page 20 6. Install the end of Flex Hose with the Straight Fitting on the Hydraulic Hose into the hole in the Powerside Runway adjacent to the Power Unit. Install the end of the Flex Hose with the 90° Fitting on the Hydraulic Hose in the Flex Hose Bracket Assy.
- Page 21 STEP 10 ( Routing Air Lines) 1. Mount the Push Button Air Valve Assembly on to the power unit mounting bracket. The Push Button Air Valve should be positioned away from the Power Side Ramp on the “out” side of the lift for operator safety. (See Fig 10.1) Fig.
- Page 22 SAFETY AIR LINE ROUTING NOTE: CUT THE PROVIDED 1/4” AIR LINE TUBING WITH A SHARP BLADE TO LENGTHS AS REQUIRED. TUBING MUST BE CUT SQUARE WITH ALL PLASTIC BURRS REMOVED. AIR TUBING ASSEMBLY: SEE PAGE 20 FOR ASSEMBLY OF AIR LINE TUBING INTO FITTING. CAUTION: REMOVING THE AIR TUBING FROM THE COMPRESSION FITTINGS WILL CAUSE DAMAGE TO THE TUBING ITSELF.
- Page 23 DANGER! DO NOT PERFORM ANY MAINTENANCE OR INSTALLATION OF ANY COMPONENTS WITH OUT FIRST ENSURING THAT ELECTRICAL POWER HAS BEEN DISCONNECTED AT THE SOURCE OR PANEL AND CANNOT BE RE-ENERGIZED UNTIL ALL MAINTENANCE AND/OR INSTALLATION PROCEDURES ARE COMPLETED. IMPORTANT POWER-UNIT INSTALLATION NOTES n DO NOT run power unit with no oil.
- Page 25 STEP 12 STEP 11 (Installing The Slack Safety Springs) (Power Unit Hook Up) 1. Have a CERTIFIED ELECTRICIAN run the power supply to motor. Refer to the data plate found on the motor for proper power supply and wire size. The following steps involve the SLACK CABLE SAFETY DEVICE and MAIN SAFETY.
- Page 26 7. Raise lift until the lift stops and lower until the Safeties IMPORTANT NOTE: engage the Top Locking Position. Adjust each ladder so BendPak lifts are supplied with installation instruc- that each Safety Lock rests on the corresponding Top Lock tions and concrete fasteners meeting the criteria as Position.
-
Page 27: Step 16 / Leveling / Synchronizing
3. After drilling, REMOVE DUST thoroughly from each hole STEP 15 using compressed air and/ or bristle brush. Make certain that (Final Assembly) the Columns remain aligned with the chalk line. 1. Install the approach ramps on the entry side of the lift. (See Fig. - Page 28 5. Beginning with “ A” position, sight the level to the 12. Raise the lift to full height. Listen and watch as target and mark the number or the graduation on the inch the locking latches click in place. SYNCHRONIZE BY scale of the target that aligns to the cross hairs of the ADJUSTING THE CABLES so that all four latches click Level, (See Fig.
- Page 29 OPTIONAL EQUIPMENT INSTALLATION Rolling Jack maximum weight capacity for use with HDS-18 or HDS-18X is 9,000 lb (4,082 kg) per unit HDS-27 or HDS-27X is 13,500 lb (6,124 kg) per unit HDS-35 or HDS-35X is 17,500 lb (7,938 kg) per unit 5174010 HD/ HDS-18;...
-
Page 30: Optional Equipment Installation
OPTIONAL EQUIPMENT INSTALLATION... -
Page 31: Step 19 / Operation Instructions
STEP 20 or if it has broken or damaged parts. Use only qualified lift (Lift Operation Safety) service personnel and genuine BendPak parts to make repairs. • THOROUGHLY train all employees in use and care of lift, using manufacturer’s instructions and “Lifting It Right”... -
Page 32: Step 20 / Lift Operation Safety
LIFT OPERATION SAFETY (CONT’D) • ALWAYS keep area around lift free of tools, debris, grease and oil. • NEVER overload lift. Capacity of lift is shown on DANGER! nameplate affixed to the lift. VISUALLY CONFIRM THAT ALL PRIMARY SAFETY • DO NOT stand in front of the vehicle while it is being LOCKS ARE ENGAGED BEFORE ENTERING WORK positioned in lift bay. -
Page 33: Maintenance
2. Check safety locks to ensure they are in good operat- ing condition. 3. Check cables and sheaves for wear. Replace worn parts as required with genuine BendPak parts. 4. Inspect adapters for damage or excessive wear. Re- place as required with genuine BendPak parts. - Page 34 WIRE ROPE INSPECTION AND MAINTENANCE Lifting cables should be replaced every three - five years or when visible signs of damage are apparent. DO NOT USE LIFT WITH DEFECTIVE / WORN CABLES. Lifting cables should be maintained in a well-lubricated condition at all times. Wire rope is only fully protected when each wire strand is lubricated both internal and external.
- Page 37 Safe Lift Operation Automotive and truck lifts are critical to the operation and profitability of your business. The safe use of this and other lifts in your shop is critical in preventing employee injuries and damage to customer’s vehicles. By operating lifts safely you can insure that your shop is profitable, productive and safe.
- Page 38 Pay attention when walking under a vehicle that is up on the hydraulic lift DO NOT Leave the controls while the lift is still in motion. DO NOT stand directly in front of the vehicle or in the bay when vehicle is being loaded or driven into position. DO NOT Go near vehicle or attempt to work on the vehicle when being raised or lowered.
- Page 39 LIFT WILL NOT RAISE POSSIBLE CAUSE 1. Air in oil, (1,2,8,13) 2. Cylinder binding, (9) 3. Cylinder leaks internally, (9) 4. Motor run backward under pressure, (11) 5. Lowering valve leaks, (3,4,6,10,11) 6. Motor runs backwards, (7,14,11) 7. Pump damaged, (10,11) 8.
- Page 40 MOTOR WILL NOT RUN POSSIBLE CAUSE 1. Fuse blown, (5,2,1,3,4) 2. Limit switch burned out, (1,2,3,4) 3. Microswitch burned out, (1,2,3,4) 4. Motor burned out, (1,2,3,4,6) 5. Voltage to motor incorrect, (2,1,8) REMEDY INSTRUCTION 1. Check for correct voltage Compare supply voltage with voltage on motor name tag. Check that the wire is sized correctly.
- Page 41 WILL NOT RAISE LOADED LIFT POSSIBLE CAUSE 1. Air in oil, (1,2,3,4) 2. Cylinder binding, (5) 3. Cylinder leaks internally, (5) 4. Lift overloaded, (6,5) 5. Lowering valve leaks, (7,8,1,5,9) 6. Motor runs backwards, (10,12,9) 7. Pump damaged, (5,9) 8. Pump won’t prime, (1,2,3,4,5,11,9) 9.
- Page 42 LIFT WILL NOT STAY UP POSSIBLE CAUSE 1. Air in oil, (1,2,3) 2. Check valve leaks, (6) 3. Cylinders leak internally, (7) 4. Lowering valve leaks, (4,5,1,7,6) 5. Leaking fittings, (8) REMEDY INSTRUCTION 1. Check oil level ........The oil level should be up to the bleed screw in the reservoir with the lift all the way down.
- Page 43 Grease Port / Lubrication Locations Lubricate Once A Week Torque Recommendations VALUES ARE STATED IN FOOT POUNDS (ft-lb) SAE 0-1-2 SAE Grade 5 SAE Grade 8 SOCKET HEAD CAP SCREW CLASS 4.8 CLASS 8.8 CLASS 10.9 CLASS 12.9 Bolt Size Bolt Size (SAE) (Metric)
-
Page 45: Maintenance Records
MAINTENANCE RECORDS ____________________________________________________________________ ____________________________________________________________________ ____________________________________________________________________ ____________________________________________________________________ ____________________________________________________________________ ____________________________________________________________________ ____________________________________________________________________ ____________________________________________________________________ ____________________________________________________________________ ____________________________________________________________________ ____________________________________________________________________ ____________________________________________________________________ ____________________________________________________________________ ____________________________________________________________________ ____________________________________________________________________ ____________________________________________________________________ ____________________________________________________________________ ____________________________________________________________________ ____________________________________________________________________ ____________________________________________________________________... - Page 60 For Parts Or Service Contact: BendPak Inc. / Ranger Products 1645 Lemonwood Dr. Santa Paula, CA. 93060 Tel: 1-805-933-9970 Toll Free: 1-800-253-2363 Fax: 1-805-933-9160 www.bendpak.com pn# 5900160...
Need help?
Do you have a question about the HDS-18 and is the answer not in the manual?
Questions and answers