
Related Manuals for DAVIS Weather Envoy Vantage Pro2


Summary of Contents for DAVIS Weather Envoy Vantage Pro2
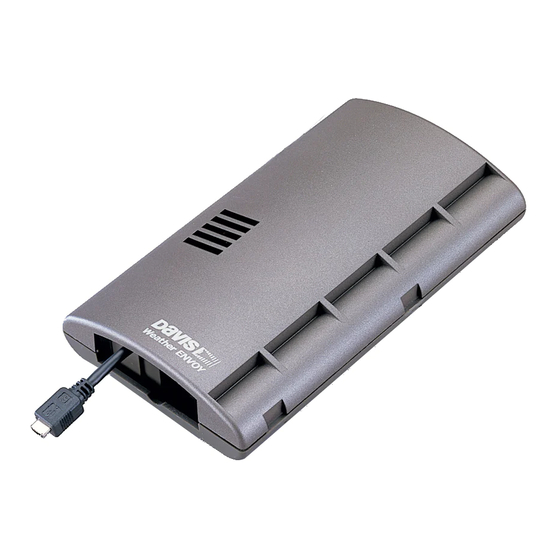
- Page 1 USER MANUAL Weather Envoy ™ ™ ™ For Vantage Pro2 , Vantage Pro2 Plus , and Vantage Vue Product number 6316 Davis Instruments, 3465 Diablo Avenue, Hayward, CA 94545-2778 U.S.A. • 510-732-9229 • www.davisinstruments.com...
- Page 2 Connect the equipment into an outlet on a circuit different from that to which the receiver is connected. • Consult the dealer or an experienced radio/TV technician for help. Changes or modification not expressly approved in writing by Davis Instruments may void the warranty and void the user's authority to operate this equipment. FCC ID: IR2DWW6312 IC: 378810-6312 This product (model 6316EU &...
-
Page 3: Welcome To The Weather Envoy
• Two #6 x 1'' screws for wall mounting • AC-power adapter Required for Operation You will also need the following Davis weather products to use your Envoy: WeatherLink Data Logger • A WeatherLink Data Logger (6510USB or 6510SER) and WeatherLink Computer Software for PC or Mac. -
Page 4: Hardware Installation
Hardware Installation Hardware Installation The Weather Envoy can be installed and connected to a computer via USB, or serial data logger. Local Connection Windows Computer Requirements WeatherLink is compatible with computers using a USB or serial port connection running the following platforms: Windows XP or later. Your Weather Envoy and WeatherLink also require the following for a local Windows computer connection. - Page 5 Install the Data Logger CAUTION: Plugging or unplugging the data logger while power is applied to the Envoy can lock up or damage the logger. The WeatherLink data logger must be installed before you install the batteries or plug in the AC power adapter. 1.
- Page 6 Install the Data Logger 3. Carefully insert the data logger into the connector slot, making sure to push the data logger firmly into place Note: Make sure the logger is plugged in firmly and completely. Data Logger Serial Data Logger Data Logger Data Logger Cable Channel...
-
Page 7: Install The Batteries
If you do not hear two beeps, check your battery orientation and reinstall the batteries. If you hear no beeps again, please contact Davis Instruments Technical Support. See “Contacting Davis Technical Support” on page 19. - Page 8 Optional: Adding an External Temperature Probe (Wireless Envoy Only) 1. Locate the power adapter jack on the end of the Envoy case. It’s next to the data logger output cable. RJ Jack Insert Power RJ Connector Adaper from Cabled ISS or Plug and rotate Optional External to fit...
- Page 9 Optional: Adding an External Temperature Probe (Wireless Envoy Only) Simply plug the RJ connector of the temperature probe into the RJ jack on the Envoy. External Jack Temperature Sensor Connector Note: Note: It may take several minutes for the temperature reading to stabilize. If the Envoy is mounted outside in a weather-proof shelter, you should thread the probe cable up through one of the holes in the base of the shelter.
- Page 10 Mount Your Weather Envoy Mount Your Weather Envoy You can place your Envoy on your desktop, install it on a wall near your computer, or install it with the optional Universal Shelter (#6618). Here are some guidelines for placing your Weather Envoy. Envoy Location You should place the Envoy in a location where it is easily accessible and can be easily connected to a computer.
- Page 11 Mount Your Weather Envoy The screws should be 3.25 (82.5 mm) apart and lined up vertically. 3. Drill the marked locations with a 3/32 7/64 (2.2 to 2.7 mm) drill bit. 4. Drive the two #6 x 1 (3.5 mm x 25 mm) Drill 3/32"...
-
Page 12: Local Computer Installation
DB9 adapter to the port, then connect the 8’ cable to the adapter. 2. Plug the short cable coming from the data logger into the 8' cable. The connection between the Envoy and the computer can be extended up to 40’ (12m) using a Davis Standard 4-conductor extension cable (#7876- 040). - Page 13 Local Computer Installation Note: Do not attempt to use more than 40' of extension cable, or the data logger may have difficulty communicating with the computer. Warning: Do not use phone cable. Our cable looks like a phone cable but it is wired differently 9-Pin Connector (DB-9)
-
Page 14: Running The Software
Pro+, but this is not necessary to download software. Click Get Started under the Basic column. 4. The WeatherLink Bulletin Dashboard will appear for Davis Instruments weather data. On the right side of the screen, your name will appear. Click the Account icon under your name. - Page 15 Set Up Uploads to WeatherLink.com To set transceiver options: 1. Select Set Transceiver from the Setup menu. The Set Transceiver dialog box displays. 2. Select a Station Type for each of the possible 8 transmitter IDs (“channels”) the Envoy may be receiving. See the WeatherLink Online Help System for more information on configuring the stations, the retransmit feature, and configuring the Envoy for using repeaters.
- Page 16 Find it by searching for WeatherLink in the iOS App Store or Google Play Store. Your username and password are the same as those for your WeatherLink.com account. You can also install the Davis Mobilize app for more agricultural-focused reports and analysis.
-
Page 17: Troubleshooting Guide
® about WeatherLink and the Weather Envoy. Please consult this guide and the WeatherLink software Help before contacting Davis. Please see Contacting Davis Technical Support on page 19 for more information. Communications Problems If you are having trouble establishing communication between WeatherLink and the Weather Envoy, start by checking the Envoy’s own... - Page 18 Communications Problems • If the port settings or the loopback process identifies a serial port other than the one selected, try again using that port. 1. If necessary, disconnect the cable from the blue serial adapter. 2. Insert the loopback connector into the adapter. 3.
- Page 19 Communications Problems Note: Contact your PC vendor or technical support for more information on device difficulties. • Hardware device conflict: Check the Device Manager tab in the Win- dows System Properties dialog box to ensure that Windows recognizes the selected COM port. Consult your computer’s documentation to see how to access the System Properties dialog box.
-
Page 20: Program Problems
Program Problems Program Problems The barometer graph on the Bulletin does not “fill in” completely. When you first load the bulletin, the barometer graph will only fill in completely when you have data in your database for the last six hours. Make sure of the following: •... -
Page 21: Contacting Davis Technical Support
Station Configuration in the Setup Menu and make sure the sensor has been selected. Contacting Davis Technical Support For questions about your Weather Envoy, please contact Davis Technical Support. We’ll be glad to help. Please do not return items to the factory for repair before calling to get a Return Materials Authorization number. -
Page 22: Appendix A: Weather Data
Appendix A: Weather Data Refer to this appendix to learn more about the weather variables measured and/or calculated by the Weather Envoy, by the Vantage Pro2 Sensor Suite and by the optional Vantage Pro2 sensors. Each section includes a brief discussion of the weather condition and a listing of the various ways in which the unit displays or stores that condition. - Page 23 apparent temperature will be lower than the air temperature, since perspiration evaporates rapidly to cool the body. However, when humidity is high (i.e., the air is saturated with water vapor) the apparent temperature “feels” higher than the actual air temperature, because perspiration evaporates more slowly.
-
Page 24: Barometric Pressure
air’s actual water vapor content, unlike relative humidity, which takes the air’s temperature into account. High dew point indicates high water vapor content; low dew point indicates low water vapor content. In addition a high dew point indicates a better chance of rain, severe thunderstorms, and tornadoes. -
Page 25: Solar Radiation
conditions while falling pressure indicates deteriorating weather conditions Solar Radiation Note: Requires that the Weather Envoy listens to station with optional solar radiation sen- sor attached (#6450, included on Vantage Pro2 Plus weather stations). What we call “current solar radiation” is technically known as Global Solar Radiation, a measure of the intensity of the sun’s radiation reaching a horizontal surface. - Page 26 A-1: EPA S A-2: E ABLE HOTOTYPES ABLE NVIRONMENT ANADA Skin Phototype Skin color Tanning & Sunburn history 1 - Never tans, Pale or milky white; Develops red sunburn; painful always burns alabaster swelling, skin peels Usually burns, pinkish or red coloring 2 - Sometimes Very light brown;...
- Page 27 UV Dose that Causes Sunburn All Burn Some Burn 120 mJ/cm UV Dose (MEDs) UV Dose and Sunburn - Use this plot to estimate the MED dose leading to sunburn. A person with Type II (Environment Canada) skin type might choose 0.75 MED as the maximum for the day;...
-
Page 28: Evapotranspiration (Et)
Evapotranspiration (ET) Note: Requires optional solar radiation sensor (#6450, included on Vantage Pro2 or Van- tage Pro2 Plus weather stations). Evapotranspiration (ET) is a measurement of the amount of water vapor returned to the air in a given area. It combines the amount of water vapor returned through evaporation (from wet vegetation surfaces and the stoma of leaves) with the amount of water vapor returned through transpiration (exhaling of moisture through plant skin) to arrive at a total. -
Page 29: Appendix B: Specifications
Appendix B: Specifications General Operating Temperature..+0° to +140°F (-18° to +60°C) Storage Temperature ..-22° to +158°F (-30° to +70°C) Current Draw, Wireless ..0.90 mA average, 20 mA peak, (plus 0.125 mA for each optional wireless transmitter in use) at 4 to 6 VDC Current Draw, Cabled . - Page 30 Range Inside ....0° to +140°F (-18° to +60°C) External Temp Probe ..-40° to +150°F (-40 ° to +65°C) Sensor Accuracy .
- Page 32 WeatherLink Tool bar Icons Open Bulletin Plot Yearly Alarm Online View Station Window Window Rainfall Indication (Hang Up) Help Strip Chart Database This Month’s Print Exit Download Window Window NOAA Summary Window Program Hot Keys Strip Chart Window ESC..Halt Redraw Main Program Window Ctrl-M .
Need help?
Do you have a question about the Weather Envoy Vantage Pro2 and is the answer not in the manual?
Questions and answers